

Generic, flat doors are the quickest way to make a home feel like a rental. This guide distills the interior door makeover down to 6 tactical steps that ensure a professional, cohesive result. Ready to improve your home’s finish? Here are the steps to a designer-led look.
1. Choose a Refined Paint Color

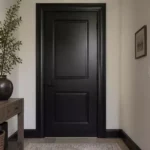
Treating your door as a deliberate color block instantly elevates the entire room’s architecture.
As an Amazon Associate I earn from qualifying purchases. Affiliate links may earn me a commission at no extra cost to you.
Stop defaulting to standard “trim white.” The most impactful designer move you can make is treating the door as a deliberate, architectural color block rather than an afterthought that blends into the wall.
When you choose a color, adopt a palette-aware strategy. Look at the undertones in your room – is your space naturally warm, with cream or beige textiles, or does it lean cool with crisp grays and blues? Matching your door color to these existing undertones creates a cohesive, high-end flow. A warm greige or soft taupe can make a cozy den feel intentional, while a moody charcoal or deep navy provides the necessary contrast to ground a neutral, airy hallway.
The Depth Advantage
If you are working with standard, hollow-core builder doors, color depth is your best friend. A flat, light color often highlights the “hollow” feel and lack of detail. By applying a rich, saturated tone, you draw the eye to the color itself rather than the construction of the door, effectively masking the lack of architectural weight.
You have two primary roads to take: the monochromatic approach or the high-contrast route. Painting the door and the surrounding trim the exact same color creates the illusion of added height, making your ceilings appear taller and your transitions more seamless. Conversely, using a deep, contrasting tone against white walls creates a sophisticated focal point that defines the space.
Pro-Tip: The Vertical Test
Never judge a color by a swatch lying flat on a table. Paint a large sample onto a piece of poster board and tape it to the door at eye level. Observe how the light hits that vertical surface throughout the day – a color that looks perfect in morning light might turn muddy or overly dark once the sun shifts.
⭐ Refined Paint Colors for Interior Doors
✨ Editor’s Pick
Premium Interior Flat White Paint Primer
Interior Flat Paint Primer Sparkling Sage
Cascadia Zero Interior Satin Paint Primer
⚖️ Quick Decision Guide: Picking Your Palette
- Choose a contrast: Go with deep charcoal or navy if you want the door to act as a bold, modern anchor in a light-filled neutral hallway.
- Choose a monochromatic: Match the door to your trim and walls if you need to visually stretch the space and make low ceilings feel significantly taller.
- Pair it with: Coordinate your chosen door color with the metal finish of your hardware – warm brass pops against moody greens, while matte black balances soft greiges.
Pick the Right Sheen

Selecting the perfect sheen balances your need for a durable finish with a sophisticated aesthetic.
The difference between a DIY project that looks like it was rushed and one that feels like a deliberate designer choice often comes down to a single technical decision: sheen. Many homeowners default to high-gloss paints, thinking they are the only option for durability, but this choice frequently backfires by highlighting every single bump, scratch, and brush mark on your door.
Instead, look at the industry standards for interior finishes. Semi-gloss (41–69 gloss units) is undeniably tough and easy to wipe down, making it a classic choice for high-traffic areas. However, it acts like a spotlight for imperfections. If your doors have any age or texture, satin (26–40 gloss units) is often the better path. It provides a modern, velvety finish that is far more forgiving while still offering enough resistance to handle daily wear and tear.
If you are painting a low-traffic bedroom door where you want a cozy, high-end feel, lean toward satin. For a high-traffic mudroom or hallway door that takes a beating from bags and kids, semi-gloss is the practical workhorse that keeps looking clean despite the heavy use.
When budgeting, keep in mind that quality paint generally ranges from $12 to $70 per gallon depending on the brand and sheen. Do not let the price per gallon dictate the finish, though – the real cost of choosing the wrong sheen is the labor required to sand it all down and start over when the light hits it the wrong way.
⭐ Choosing the Right Sheen for Doors
Designer Curated Semi Gloss Interior Paint
✨ Editor’s Pick
Fast Drying Semi Gloss Wood Finish
Exterior Water Based Satin Wood Topcoat
The doors you interact with daily shape the feel of your home, yet the anxiety of choosing the wrong finish often stalls the entire project. You can avoid common pitfalls by focusing your energy on the few intentional changes that actually define a high-end aesthetic.
Your home gains its finished quality from consistent, deliberate choices rather than an exhaustive list of perfect upgrades.
Fill Dents and Sand Smooth

A flawless, professional paint finish begins with meticulous surface preparation rather than the paint itself.
Prep is 80% of the result; if you paint over a nick, a deep scratch, or a rough patch, you aren’t hiding it – you’re just highlighting it. A designer-led look relies on a surface that reflects light uniformly, and even the highest-quality enamel will look amateurish if it’s sitting on a surface riddled with imperfections.
Before you even think about opening a paint can, you need to address the physical state of your door. Use wood filler for solid wood doors, but reach for a lightweight spackle or dedicated paintable filler if you are working with MDF or composite materials, as these react differently to moisture and expansion.
The Touch Test: If you can feel a tactile difference between the filler and the door surface with your fingertips, the paint will absolutely show it. Always sand until the transition is imperceptible to the touch, not just invisible to the eye.
To achieve a professional-grade substrate, follow a strict grit progression. Start with 80-grit paper to aggressively level any deep gouges, move to 150-grit to smooth out the initial repair, and finish with 220-grit to refine the surface for the primer.
Prep Checklist
- ✅ 80 Grit: Leveling out deep dings and previous damage.
- ✅ 150 Grit: Smoothing the filler and removing deeper scratches.
- ✅ 220 Grit: Final refinement for a perfectly smooth profile.
- ✅ Tack Cloth: Mandatory final pass to lift all dust particles before priming.
Do not skip the tack cloth step. Fine sanding dust is the enemy of a smooth finish, and leaving it behind will create a gritty, sandpaper-like texture in your final coat that no amount of expensive paint can fix.
⭐ Essential Tools for Smooth Door Surfaces
All Purpose White Wood Putty Filler
Paintable Crack Resistant Wood Putty Filler
✨ Editor’s Pick
Comprehensive Wood Furniture Repair Kit
The Right Sequence for a Flawless Finish
Skipping the proper order of operations often leads to peeling paint or visible repairs; follow these steps to lock in a professional, durable result.
- Clean and Degrease: Remove all oils with a mild detergent before you start any sanding.
- Fill and Sand: Perform your grit progression and patch repairs before applying any primer coat.
- Tack and Prime: Always use a tack cloth to remove dust before the primer seals the surface.
4. Prime for Even Coverage

A solid foundation ensures your final color coat looks professional and stays true to the swatch.
Skipping primer is the fastest way to a patchy, amateur-looking finish that reveals the door’s original material underneath. Think of primer as the essential foundation that bridges the gap between your door’s surface and the final topcoat, ensuring the paint adheres properly and shows its true color.
Pro Tip: Tinted Primer
Professional painters often have their primer tinted to match the final topcoat color. This trick significantly improves coverage and depth, especially when you are switching from a dark door to a lighter shade.
The type of door you are working with dictates exactly which primer you need to reach that high-end look. Using the wrong product can lead to peeling or an uneven, dull finish that refuses to level out.
- ✔
MDF Doors: Always use a specialized MDF primer. Standard primers can cause the wood fibers to swell or “raise,” resulting in a fuzzy, rough texture that is difficult to sand down once dry. - ✔
Slick or Pre-finished Doors: If you are painting over a factory-applied PVC coating or a high-gloss finish, you must use a high-quality bonding primer. Without this, your topcoat will likely scrape off with a fingernail months later. - ✔
General Wood Doors: A standard high-quality water-based or oil-based primer is usually sufficient, provided the surface has been properly sanded and cleaned.
Keep in mind that coverage rates vary by product, but you can generally expect a gallon of specialized MDF primer to cover approximately 430 square feet. Even if you think a “paint-and-primer-in-one” will save you time, applying a dedicated primer coat is the only way to guarantee a truly uniform, professional-grade result on interior woodwork.
⭐ Priming Doors for Even Coverage
✨ Editor’s Pick
Acrylic Waterborne Bonding Primer Sealer
Water Base Interior Primer and Sealer
Smart Water Based Interior Exterior Primer
🔢 The Right Sequence: Prime First
Getting the order right prevents common finish failures like peeling or uneven color, saving you from having to strip and redo the entire door later.
- Clean and de-grease the door surface thoroughly before any sanding begins.
- Apply the correct base-layer primer, allowing for full manufacturer-recommended drying time.
- Sand the dried primer lightly to ensure a glass-smooth surface for your topcoat.
5. Paint in Thin Level Coats

Mastering the wet edge technique ensures a professional, glass-smooth finish without visible roller texture.
The biggest mistake most homeowners make is trying to achieve full coverage in a single go. If you load your roller or brush with too much paint, you are guaranteed to end up with drips, sags, and unsightly lap marks that scream “amateur project.” Instead, the secret to a designer-led look is applying two thin coats rather than one heavy one.
To get that smooth, factory-quality finish, use a 4-inch velour mini-roller for the flat panels and larger surface areas. The short nap of a velour roller minimizes texture, leaving a finish that looks sprayed rather than brushed.
Pro Tip: The “Wet Edge” Technique
Always maintain a “wet edge” by overlapping your strokes while the previous section is still damp. If you let the edge of your paint dry before moving to the next section, you will create visible lap marks that are nearly impossible to sand out. Use a high-quality angled brush to “tip off” your roller marks – this means lightly dragging the tips of the bristles across the wet paint in one long, continuous motion to level out any orange-peel texture.
Once you have finished your first coat, patience is your best friend. Follow the manufacturer’s recommendation for recoat times, which typically range from 2 to 4 hours for water-based enamels, or up to 24 hours if you are using oil-based products.
Warning: The Cure Time Trap
Even if the door feels dry to the touch, it is not fully cured. Closing the door too soon – especially against the weatherstripping – will cause the paint to bond to the frame, leading to the finish peeling off at the latch when you eventually open it. Keep the door propped open until it is fully cured according to the paint can instructions to protect your hard work.
By keeping your layers thin and respecting the drying times, you ensure the paint has enough time to level out properly. This creates a durable, professional-grade surface that stands up to daily use and looks intentionally finished.
⭐ Painting Tools for Thin Level Coats
High Density Foam Paint Roller Set
✨ Editor’s Pick
Complete Paint Roller Kit With Pole
All In One Water Based Refinishing Paint
🔢 The Right Sequence for a Flawless Finish
Painting a door is a game of patience; follow this specific order to prevent texture buildup and ensure your hardware fits perfectly when you’re finished.
- Recess first: Paint the inner panels and moldings using your brush to reach tight corners.
- Surface second: Use your velour mini-roller on the flat center panels and the outer stiles.
- Edge last: Finish by painting the door edges and frame, ensuring no excess paint drips onto the hinges.
Install Substantial Hardware

Weight creates quality; choosing substantial hardware transforms a standard door into a designer feature.
Hardware is the jewelry of your door, and in the world of home design, physical weight equals perceived quality. When you swap out thin, lightweight knobs for substantial levers or heavy backplates, you change how the entire room feels the moment someone reaches for the handle.
Before you purchase, you must verify your technical specifications to avoid installation headaches. Standard interior doors are typically 1-3/8 inches thick, and the bore hole – the hole through the face of the door – is almost universally 2-1/8 inches. However, the backset, which is the distance from the edge of the door to the center of that bore hole, can vary between 2-3/8 inches and 2-3/4 inches. Always check your current setup before ordering to ensure your new hardware fits without needing messy adjustments.
Pro-Tip: When replacing older, loose hinges, don’t just swap the handle. Replace the hinges with new ones in the same finish as your hardware. It creates a cohesive, intentional look that makes the entire door assembly feel custom-built.
One of the most common mistakes is failing to ensure the mortise – the cutout for the latch plate and hinges – is perfectly flush. If the hardware isn’t set deep enough, the door will bind, feel stiff when opening, or fail to latch securely. Take the extra time to chisel your mortise cleanly so the plate sits perfectly level with the door’s surface.
For a truly designer finish, prioritize visual weight. Large levers and substantial backplates ground the door, making it feel like a permanent, high-end architectural element rather than a flimsy builder-grade afterthought. When you invest in solid metals with a consistent finish, you aren’t just adding a handle – you’re adding the final, tactile detail that elevates the entire room.
⭐ Substantial Hardware for Finished Doors
Plustool 6 Pack Matte Black Door Handles Interior
Modern Privacy Keyless Interior Door Handles
✨ Editor’s Pick
Contemporary Matte Black Door Lock Set
🔢 The Right Sequence
Installing hardware is the final step, but the order of operations ensures your new finish stays flawless and your latch aligns perfectly.
- Prep and paint the door completely, allowing for a full cure before touching the surface.
- Install the new latch and strike plate to test for smooth, binding-free operation.
- Attach the heavy levers and backplates only after confirming the mechanism engages without resistance.
With all six refinements on the table, you have a clear roadmap for moving away from builder-grade standards. Focusing on the one or two adjustments that best suit your current interior flow will yield a more substantial impact than attempting every step at once.
Cohesive hardware and professional finishes are what actually define a custom-look space, and prioritizing these details ensures your home feels consistently elevated. If you are looking to create a more intentional layout, you might also consider how to make every door feel like a deliberate design choice. Start with a single room this weekend; you will find that the shift in quality is immediate.
Related posts:
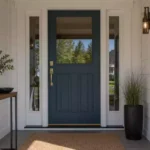 12 Front Door Ideas That Make Narrow Porches Feel Finished
 12 Cozy Interior Door Ideas for Small Homes
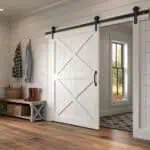 10 Farmhouse Interior Door Ideas for Mudrooms
 14 Creative Interior Door Ideas to Improve Privacy
 10 Interior Door Decor Tricks Nobody Talks About
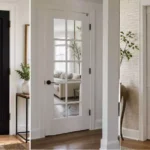 15 Interior Door Styles That Update Hallways Without Remodeling
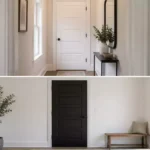 Black or White Interior Doors for a House With Light Walls?
 How to Paint Interior Doors Black Without Making the Trim Feel Disconnected