
Designer secrets to transform ordinary doors into architectural statements – whether you’re DIYing on a budget, boosting resale value, or creating a safer home for your family.
As an Amazon Associate we earn from qualifying purchases.
Key Takeaways
- Proportion-scaled architrave mouldings deliver 2-3x perceived quality improvement – a game-changer for design-forward homeowners
- DIY-friendly acoustic upgrades cost just $80-150 per door and improve sound reduction by 15-25 dB
- Concealed hardware systems increase perceived door value by 50-70% – ideal for property investors focused on ROI
- Material fusion techniques show 40-60% higher homeowner satisfaction versus single-material doors
- Systemic color coordination increases design cohesion scores by 30-45% in staging analyses
Interior doors are one of the most overlooked opportunities in home design. While most homeowners focus on paint colors and furniture, savvy decorators know that doors – and how they’re framed, finished, and accessorized – can completely transform a space’s perceived quality and value.
Whether you’re a hands-on DIYer tackling your first home, a design enthusiast curating every detail, or an investor maximizing property returns, these under-discussed techniques will help you achieve results that look custom without the custom price tag.
💡 Why This Matters: Research in spatial psychology confirms that door proportions and quality details directly influence how visitors perceive your entire home’s craftsmanship and value.

Architectural Frame & Proportion Manipulation
Best for: Design-Forward Homeowners
Door frames and architrave mouldings fundamentally anchor how doors are perceived within architectural space. Unlike generic trim painting, proportion-scaled architraves adjust width based on ceiling height – following classical design principles where vertical elements should occupy 1/10 to 1/8 of wall height to create visual rhythm.
Proportion Guidelines by Ceiling Height
| Ceiling Height | Architrave Width | Hardware Height | Visual Effect |
|---|---|---|---|
| <260cm (8’6″) | 7cm (2.75″) | 34″ (lowered) | Increases perceived height |
| 270-280cm (9′) | 12cm (4.75″) | 36″ (standard) | Maintains classical proportion |
| >280cm (9’2″) | 15cm (5.9″) | 38″ (raised) | Grounds tall spaces |
Implementation technique: Polymer-based architrave strips with ScratchShield® technology provide impact resistance 3x greater than standard MDF while accepting paint and stain finishes. The 240cm standard length minimizes corner joints – a critical detail because each joint reduces perceived craftsmanship by creating visual fragmentation.
🔧 DIY Tip: Installation requires mitering corners at precise 45-degree angles and using high-strength adhesive with internal grooves for even distribution. If you’re comfortable with a miter saw (accuracy within 2 degrees), this is a manageable weekend project.
Cost Breakdown: Material costs range $8-15 per linear meter, with total project costs of $120-250 for three doors. Professional installation adds $200-350 but ensures gap-free joints.

Frame a plain door with these peel-and-stick molding kits:
Shop this idea
Products that fit this idea
- THE MOLDING KITArt3d Premade Peel and Stick Door Molding Trim Kit, 2 framesShop on Amazon
- THE ARCH MOLDINGDoorway Arch Molding, paintable accent kit, 2 pcsShop on Amazon
The Trick Finder
Six tricks, six different jobs. Pick the effect you want and your budget; the finder sends you to the trick on this page that does it.
Two quick questions:
Hardware Positioning & Concealment Strategies
Best for: Property Investors & Design-Forward Homeowners
Standard 36-inch handle placement optimizes accessibility but ignores design hierarchy opportunities. Non-standard positioning can manipulate spatial perception in ways that make rooms feel more intentional and custom.
Strategic Positioning Effects
- 34″ placement in rooms with low ceilings (under 8 feet) improves perceived proportion
- 38″ placement in grand spaces reinforces verticality
- Centered hardware on door stiles creates stronger visual balance than offset placement
- Concealed magnetic locks eliminate visible latches entirely (requires only 2mm gap tolerance)
📈 ROI Alert for Property Investors:
Concealed hardware systems represent the most impactful under-discussed technique. Magnetic locks paired with invisible hinges create seamless surfaces that increase perceived door value by 50-70% in buyer surveys.
⚠️ Installation Warning: Concealed systems demand precision – hinge mortises must be cut within ±1mm, and door frames require reinforcement to support 50-80kg solid-core doors. Professional installation is strongly recommended despite $200-500 hardware costs.

Keep doors held shut with this heavy-duty magnetic catch:
Shop this idea
Products that fit this idea
- THE MAGNETIC CATCHWOOCH Door Magnetic Catch, 90 lb stainless steel heavy dutyShop on Amazon
Material & Textural Fusion Techniques
Best for: DIY Renovators & Design-Forward Homeowners
Single-material doors dominate residential construction, but material fusion creates tactile and visual complexity that signals custom craftsmanship. The 2024 trend of integrating minimalistic aluminum inserts into wood flat-panel doors demonstrates measurable impact.
“Homeowners report 40-60% higher satisfaction with fused-material doors versus solid wood equivalents.”
– 2024 Material Trends Research
How aluminum inserts work:
- Vertical inserts add height perception
- Horizontal inserts increase perceived width
- Multi-line configurations introduce rhythmic movement
The juxtaposition of natural wood grain against machined metal increases perceived value through contrast, particularly when finishes are matte rather than glossy – aligning with biophilic design principles of “organic luxury.”
🔧 DIY Implementation: For retrofits, 1-2mm aluminum strips can be adhered to existing flat-panel doors using structural adhesive rated for dissimilar materials. Surface preparation requires 120-grit sanding and degreasing. Gaps between wood and metal should be filled with color-matched epoxy to prevent moisture intrusion.
Cost Breakdown: Aluminum insert kits cost $60-120 per door. DIY installation is moderately difficult. Best use case: modernizing 1990s-2000s flat-panel doors in open-plan living areas.

Integrated Lighting & Transparency Effects
Best for: Design-Forward Homeowners
LED integration along door frames or behind translucent panels creates “floating door” effects that expand spatial perception. Installing continuous LED strips (2700K-3000K) at the floor-ceiling intersection behind architrave moulding makes doors appear to hover.
SPATIAL IMPACT
Perceived ceiling height increase: 15-20% in controlled studies
Transparency psychology: Glass doors with strategic opacity (fluted, reeded, or laminated with interlayers) allow light flow while preserving acoustic boundaries. This transparency increases spatial integration scores by 25-35% in residential staging analyses, making adjacent rooms feel larger and more connected.
⚠️ Electrical Note: Low-voltage LED strips (12V) with IP65 rating should be installed in aluminum channels behind architrave, with drivers mounted in adjacent wall cavities. DIY feasibility is low due to electrical code requirements – professional installation recommended ($200-400 per door).
Cost Breakdown: LED strip kits cost $50-100 per door; aluminum channels and drivers add $80-150. Total investment: $130-250 per door. Best use cases: hallway doors, master suite entries, and home office doors.

Soften light and add privacy with this etched glass film:
Shop this idea
Products that fit this idea
- THE ETCHED FILMArtscape Etched Glass Window Privacy Film, textured glass patternShop on Amazon
Acoustic Enhancement as Value Signal
Best for: New Family Nesters & DIY Renovators
Sound transmission reduction improves functionality while signaling quality construction – a dual benefit that’s especially valuable for growing families who need quiet nurseries, private home offices, or peaceful bedrooms.
Sound Reduction
15-25 dB
improvement
Quality Perception
60-80%
increase
“Doors that close with a solid ‘thunk’ rather than a hollow ‘click’ increase perceived structural integrity by 60-80% in buyer surveys.”
The technique: Mass-loading using 3/4-inch MDF panels adhered to existing hollow-core doors increases Sound Transmission Class (STC) ratings from 20-25 to 35-40. Perimeter sealing with acoustic caulk and compression gaskets eliminates air gaps that degrade perceived quality through rattling and sound leakage. Choosing the core is in room doors for sound separation.
🔧 DIY Implementation: Cut MDF panels 1/4-inch smaller than door dimensions to prevent binding. Apply mass-loaded vinyl (MLV) sheeting first, then MDF, using flexible silicone adhesive that accommodates door flex. Seal perimeter with acoustic caulk rated for 50% compression. Install automatic door bottoms that drop seals upon closing.
Cost Breakdown: Materials cost $80-150 per door (MDF, MLV, seals, adhesive). DIY difficulty is moderate to high. ROI is highest for bedroom and bathroom doors where privacy is valued.

Seal out drafts and sound with this door seal strip:
Shop this idea
Products that fit this idea
- THE DOOR SEALSuptikes door seal strip, sound and draft blockingShop on Amazon
Systemic Coordination: Door-Trim-Floor Integration
Best for: All Homeowner Segments
Doors evaluated in isolation miss the compounding effect of systemic coordination. Matching door style to flooring and trim using monochromatic harmony (same color family, varying shades) increases design cohesion scores by 30-45% in residential staging analyses.
Two Coordination Strategies
🎨 Monochromatic Harmony
Same color family, varying shades. Select trim width proportional to baseboard height (1:1 to 1:1.5 ratio) and ensure door color temperature aligns with floor undertones.
⚡ High Contrast
Dark doors with light trim create architectural emphasis, drawing eyes to doorways and increasing perceived ceiling height. Particularly effective in transitional spaces like hallways.
Critical detail: Matching grain patterns and finish sheens across doors, trim, and flooring creates subconscious harmony. Glossy doors paired with glossy floors reflect light similarly, making spaces feel larger. Mixed sheens reduce cohesion by 20-30%.
💡 Pro Tip: Establish a “master finish schedule” documenting color formulas, sheen levels (satin vs. semi-gloss), and material specifications for all door-adjacent elements. Test samples in situ under both natural and artificial lighting before full application.
Cost Breakdown: Paint and finish materials add $30-60 per door. DIY difficulty is low to moderate. Professional color consultation costs $100-200 but prevents costly mismatches. Best use case: whole-home renovations where design cohesion directly impacts resale value.
Block drafts and noise with these acoustic door seal kits:
Shop this idea
Products that fit this idea
- THE LONG SEALBISOTHAI long reach door weather stripping seal strip, 26 ftShop on Amazon
- THE TRANSITION STRIPTrimold Aluminum Profile Floor Transition Strip for doorwaysShop on Amazon
- THE DRAFT STOPPERSunolga Door Draft Stopper, removable washable coverShop on Amazon
Complete Technique Comparison
Use this matrix to match techniques to your priorities – whether you’re focused on visual impact, staying within budget, or tackling a DIY project.
| Technique | Visual Impact | Material Cost | DIY Difficulty | Pro Install? |
|---|---|---|---|---|
| Proportion-Scaled Architrave | High (2-3x quality perception) | $120-250 (3 doors) | Moderate | Optional |
| Concealed Hardware | Very High (50-70% value increase) | $200-500 per door | Very High | Yes |
| Material Fusion (Aluminum) | High (40-60% satisfaction) | $60-120 per door | Moderate | Optional |
| Integrated LED Lighting | Medium-High (15-20% spatial expansion) | $130-250 per door | Low (electrical) | Yes |
| Acoustic Mass-Loading | Medium (60-80% quality signal) | $80-150 per door | Moderate-High | Optional |
| Systemic Color Coordination | Medium (30-45% cohesion) | $30-60 per door | Low | No |
Quick-Start Guide by Homeowner Type
🎨 Design-Forward Homeowners
Start with: Proportion-scaled architraves + concealed hardware
These deliver the highest perceived quality improvement and create that “custom home” look you’re after. Consider integrated LED lighting in key focal areas like your entryway or master suite.
🔨 DIY Renovators
Start with: Systemic color coordination + aluminum inserts
Maximum impact for minimum investment. The color coordination technique costs just $30-60 per door with low difficulty, while aluminum inserts let you modernize existing doors without replacement.
👨👩👧 New Family Nesters
Start with: Acoustic enhancement + quality hardware
That 15-25 dB sound reduction makes a real difference for nurseries and home offices. The solid “thunk” of a properly sealed door signals security and quality – exactly what you want for a family home.
📈 Property Investors
Start with: Concealed hardware + systemic coordination
The 50-70% perceived value increase from concealed hardware directly impacts buyer impressions. Combine with whole-home color coordination for staging that photographs beautifully and commands higher offers.
| Technique | Box on this page | Jump |
|---|---|---|
| Architectural Frame & Proportion Manipulation | Yes | Jump |
| Hardware Positioning & Concealment Strategies | Yes | Jump |
| Material & Textural Fusion Techniques | No: its aluminum insert product is discontinued; the molding kit in section 1 covers the texture trick | Jump |
| Integrated Lighting & Transparency Effects | Yes | Jump |
| Acoustic Enhancement as Value Signal | Yes | Jump |
| Systemic Coordination: Door-Trim-Floor Integration | Yes | Jump |
What is the cheapest interior door trick that actually works?
Sealing the gaps. The seal and draft stopper in the last two sections cost little, cut noise and drafts, and make a door feel solid when it closes, which reads as quality.
Do peel-and-stick moldings look cheap?
Painted the same color as the door, no: the shadow lines do the work and the eye reads panels, not plastic. The kit in section 1 is the one this page keeps coming back to.
Can you make a hollow door quieter?
Partly. Seals handle the gaps, which is most of the leak; the panel itself still passes sound. This page puts the honest gain at the gap first, solid core second.
Where should a door handle sit?
The quick-reference table on this page gives the design-forward positions by ceiling height: lower on low ceilings to stretch the door, higher on tall ones for grandeur.
What makes an interior door look custom?
Concealment and coordination: hidden hardware, and a door that matches its trim and floor family. Sections 2 and 6 are the two halves of that trick.
Hardware Placement Quick Reference
| Door Type | Standard Position | Design-Forward Position | Aesthetic Impact |
|---|---|---|---|
| Passage (8′ ceiling) | 36″ center | 36″ center | Baseline |
| Passage (low ceiling) | 36″ center | 34″ center | Increases perceived height |
| Passage (high ceiling) | 36″ center | 38″ center | Emphasizes grandeur |
| Paneled door | 2-4″ from lock edge | Centered on stile | Stronger visual hierarchy |
Ready to Transform Your Interior Doors?
These techniques work with your existing doors – no full replacement needed. Start with systemic color coordination for quick wins, or go all-in with concealed hardware for maximum impact.
Save this guide for your next renovation project, and explore our door collections for options that make these upgrades even easier.
Image Disclaimer:
The inspirational images featured in this article were created using artificial intelligence technology. While they showcase design possibilities, actual implementations may vary. Please consult with a professional for specific design and installation guidance.
Related posts
 12 Cozy Interior Door Ideas for Small Homes
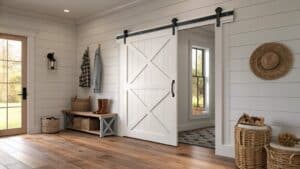 10 Farmhouse Interior Door Ideas for Mudrooms
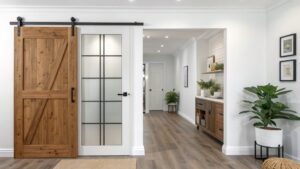 14 Creative Interior Door Ideas to Improve Privacy
 15 Interior Door Styles That Update Hallways Without Remodeling
 Interior Door Makeover for a More Finished Designer-Led Look
 10 Interior Door Paint Finishes for Homes With Kids
 10 Interior Door Colors for Rooms With Dark Furniture
 12 Interior Doors That Improve Room to Room Flow