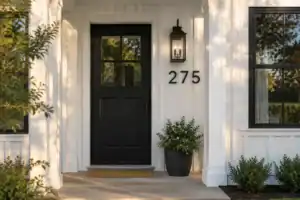
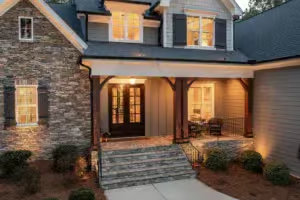
Painting interior doors black means deciding how the door, casing, and frame should relate – not repainting the room – so the opening feels intentional, not disconnected. These 7 practical steps narrow the choices that matter: trim relationship, black tone, sheen, preparation, application, and rehang, for a confident result. Start with the trim plan.
Choose How the Trim Should Relate to the Black

Choose a trim relationship that makes the entire doorway feel deliberate and architecturally connected.
As an Amazon Associate I earn from qualifying purchases. Affiliate links may earn me a commission at no extra cost to you.
Decide this before tape, sanding, or paint: should the black stop at the door, continue across the casing, or coordinate with it without becoming identical? Changing the relationship later can mean repainting the entire doorway, so treat this as a three-option visual decision rather than a choice between right and wrong.
Ornate casing usually benefits from contrast. Substantial molding needs some separation for its profile to remain readable, while simpler casing can support a stronger matching treatment. Wood, MDF, and already-painted casing affect preparation and upkeep, but they do not decide the color strategy for you.
Look beyond this single doorway. Several doors visible from one hallway or room should generally follow the same door-to-trim rule; mixing contrast, coordination, and matching accidentally makes the sightline feel unsettled.
Before you decide
- Photograph the full opening, including the door face, casing, frame, and nearby millwork.
- Inspect whether the molding is delicate, substantial, crisp, or already worn.
- Note every nearby doorway visible from the same room or hallway.
- View the proposed relationship in both bright and dim conditions before committing.
Choose contrast when preserving architectural lightness matters most, coordinate when you want connection without a fully monochrome opening, and match when a graphic, continuous frame suits the room. Once that rule is fixed, choose a black and sheen that can look consistent across both surfaces.
⭐ Top Paint Choices for Cohesion
✨ Editor’s Pick
Black Protective Door Metal Paint
Black Wood Touch Up Paint Pen
Portable Paint Color Matching Reader
🔢 Order That Saves Rework:
Lock the visual rule before choosing paint boundaries, so a finished door does not force an unexpected casing redo.
- Start with the most visible opening and judge how its casing profile reads around black.
- Decide whether the doorway should feel lighter, connected, or graphically enclosed.
- Write that rule down before marking edges, then carry it across every visible opening.
Pick the Right Black and Sheen for Both

A tested black and compatible sheen keep the entire doorway intentional in every kind of light.
Start with the actual room, not the name of a black on a fan deck. Two paints both called black can look noticeably different beside your casing once morning light, afternoon light, and artificial light hit the surface.
A neutral or true black is a sensible place to begin, but there is no universal winner for every interior. Some blacks pull warm with brown or red, while others read cool through blue, gray, or green; a color that looked neutral in the store can appear purple, green, brown, or muddy at home.
Test before committing: Paint a 12×12-inch sample on the actual door or on a sample board, then view it in morning light, afternoon light, and artificial light. Check it straight on and from several angles, since skimming light can make sheen changes and uneven patches much more obvious.
Use the sample to judge the door-and-trim relationship together. Apply the same color and coating plan to both surfaces, because an existing finish underneath – or the angle of a casing face compared with a flat door panel – can make the same black appear inconsistent.
Sheen is a separate decision from undertone. Black reflects light strongly, so the sheen affects whether the finish reads deep and quiet, smooth and cleanable, or marked by every roller track and uneven patch. Here is how to avoid brush and roller marks on any door.
- Satin: A practical starting point for doors and trim, with enough reflection for a clean finish and easier wipe-downs.
- Semi-gloss: Another practical starting range when you want more reflection and a surface suited to frequent contact and gentle cleaning.
- Matte or flat: A deliberate appearance choice, but less practical for a frequently touched interior door because it can be harder to wipe clean.
Choose an interior trim/enamel-style coating or another durable door-and-trim product category rather than defaulting to wall paint. Doors and casing receive fingerprints, scuffs, and cleaning, so confirm that the finish is intended for interior doors or trim and that the door and casing can use the same product family or compatible products.
A satin finish can reveal roller tracks when light skims across a panel, while an overly flat finish may make routine wiping less forgiving. Look at the sample from the side before deciding; straight-on color alone will not show the whole risk.
Once the undertone, sheen, and compatible coating category are settled, the design decisions are done. The next step is checking the condition of the door and trim so the selected finish has a clean, sound surface to grip.
⭐ Interior Sheens Worth Considering
✨ Editor’s Pick
Interior Satin Paint For Doors
Interior Flat Paint For Trim
💡 The Detail That Pulls It Together:
Judge your sample as a doorway, not an isolated color chip. Place the door and casing samples side by side at the opening’s normal viewing distance, then look for whether the sheen feels continuous across their different planes. This simple comparison catches a “matching” black that still appears patchy or visually disconnected.
The doorway decisions worth locking in are the ones that determine how the finished opening reads: whether the trim contrasts, coordinates, or matches, and whether the chosen black and sheen hold up in changing light. A written surface map and one 12×12-inch sample can remove most uncertainty before paint touches the opening; these interior door styles may help clarify the direction.
Once those calls are settled, the remaining work is careful execution – not seven separate chances to make an expensive mistake.
Prep and Sand the Door and Trim

A clean, evenly scuffed surface gives black paint the smooth architectural finish you want.
Black will not hide a dirty, glossy, dented, or dusty surface. It can make dents, ridges, drips, and frame-line flaws easier to see, so preparation decides whether the doorway looks smooth or advertises every shortcut.
Work in this order: clean, repair, lightly scuff-sand, remove dust, and protect surrounding surfaces. Start with a damp sponge on the door, casing, and frame; use the rough side for heavier buildup if the surface can tolerate it, then let the material dry before sanding.
Fill nail holes, dents, and cracks with lightweight spackling compound. Once the compound dries, sand the repair smooth and feather its edges so the patch does not sit as a raised or sunken shape beneath the black coating.
Scuff-sanding is meant to dull the existing finish and give the next coating a better bonding surface, not to strip every painted area down to bare wood. Use finer grits for light scuffing and patch smoothing; reserve coarser abrasion for rough or damaged spots.
- 120-grit can smooth dried spackle and help level brush marks or drips after primer.
- 240–320 grit is appropriate for lightly sanding primed material when the surface needs a smoother feel.
- Use extra care on thin veneer; sanding through it creates a repair problem that black paint will not conceal.
MDF and other moisture-sensitive materials should not be over-wetted during cleaning. After sanding, remove every trace of dust with a vacuum, damp sponge, or tack cloth, since leftover particles can add texture and interfere with bonding.
Protect the floor with drop cloths or floor protectors, then dust nearby walls and ceilings so painter’s tape can adhere. Tape should protect adjoining walls and ceilings without covering trim that is part of the black or coordinated paint plan.
Safety pause: Older painted surfaces may contain lead. Wear respiratory protection, eye protection, gloves, and protective clothing, and do not aggressively disturb questionable paint without appropriate precautions.
Before moving on, run your hand and eyes over the prepared door and trim under side light. Every glossy patch, stain, bare area, and repaired edge now helps determine whether primer is needed.
⭐ Prep Tools That Smooth Surfaces
Dark Walnut Wood Repair Filler Kit
Five Inch Electric Wood Sander
✨ Editor’s Pick
Compact Door Painting And Sanding Kit
💡 Why Scuffing Beats Stripping
A uniformly dull surface helps the next coating bond consistently across the door, casing, and frame without erasing the material’s character. That matters when one doorway combines painted wood, MDF, or veneer: gentle preparation keeps the profiles intact while reducing the uneven sheen that can make connected surfaces look mismatched.
Practical takeaway: Aim for consistent surface dullness, not bare material everywhere.
Prime Where Needed

Match the primer to the surface, and the black finish will look smoother and stay better bonded.
Not every sound, already-painted door needs primer – but a bare, glossy, stained, oil-painted, or laminate surface should not be treated like ordinary latex-painted wood. Primer is a surface-condition decision, not an automatic extra coat.
- Sound latex paint over latex paint: Primer may be unnecessary when the surface is clean, dull, intact, and free of repairs or stains.
- Bare wood or raw new material: Prime to seal the surface and support even appearance and adhesion.
- Stains, knots, water marks, nicotine, or tannin risk: Choose a stain-blocking primer to reduce bleed-through.
- Glossy or slick finish: Clean and scuff-sand first, then use an adhesion-appropriate primer if the coating instructions call for it.
- Old oil-based paint receiving water-based finish paint: Use a bonding primer labeled for that coating change.
- Laminate: Primer is especially important because ordinary paint has difficulty gripping the slick surface.
- MDF or veneer: Select a compatible primer and keep moisture controlled during preparation.
- Intact factory primer: It may be ready for finish paint when the primer is sound and compatible.
An isopropyl-alcohol test can help identify the existing coating. Rub the surface with alcohol; paint transferring to the cloth suggests latex, while no transfer may indicate oil-based paint, though the result is only an indication rather than laboratory certainty.
Choose primer for compatibility, not color. The substrate and existing coating determine whether you need acrylic latex, alkyd, bonding, or stain-blocking performance; a dark primer alone cannot solve poor adhesion or bleed-through.
Brush primer into panels, profiles, and trim details, then use a foam roller or small roller on flatter areas. A single light coat may be appropriate when the product directs it, while excessive primer can create drips and buildup around panel edges.
Let the primer dry and recoat according to its label rather than relying on a universal timetable. Once the surface has the right grip and any stains are sealed, thin finish coats can build the black without burying the door’s details.
Printable Surface-Condition and Primer Checklist
- Surface is identified as latex-painted, oil-painted, bare, stained, laminate, MDF, veneer, or factory-primed.
- Glossy areas have been cleaned and lightly scuff-sanded.
- Bare or raw areas are sealed with a compatible primer.
- Knots, water marks, nicotine, and tannin risks have stain-blocking coverage.
- The alcohol-rub result has been treated as an indication, not absolute proof.
- Primer is labeled for the substrate and existing coating.
- Dry and recoat instructions are written down from the product label.
⭐ Primer Options for Better Adhesion
✨ Editor’s Pick
Bonding Primer For Glossy Trim
White Spray Primer For Doors
Four Gallon Primer Sealer Pack
💡 Primer Should Disappear Into the Finish:
Before applying black paint, view the primed door and trim from a low angle and across the panel edges. If you can see ridges, drips, dust, or uneven texture, let the primer dry fully, smooth only the problem areas, and remove every trace of sanding dust. The best primer coat looks even – not thick or decorative.
Paint the Door in Thin Coats

Thin, controlled coats create a smooth black finish that keeps every panel detail crisp.
Black looks polished on a door only when the panels, rails, stiles, edges, and flat fields share consistent coverage and sheen. The safest approach is a controlled sequence: move through each section once, level it once, and stop before the paint begins to set.
- Start with the recessed areas. Use a small angled brush for panel grooves, inside corners, and detailed profiles.
- Immediately level those areas with a foam roller where the surface allows it, or use a 4-inch high-density foam sleeve on flatter sections.
- Paint the rails and stiles next, working from one area into the next so the edge stays wet instead of drying into a visible line.
- Leave the outer edges until last, watching the corners and hinge-side areas closely for drips or pooled paint.
Thin coats reduce sagging, drips, texture, and buildup along panel edges. Black does not need to be flooded onto the surface for opacity; heavy application usually creates more sanding and touch-up later.
Paint once, level once, leave it alone. Light pressure with the foam roller helps prevent edge lines, while repeated brushing after the paint starts to tack creates ridges and visible surface texture.
Plan on at least two finish coats, and expect that three may be needed when changing a light-colored door to black. Coverage depends on the existing surface and the coating, so judge the next coat by thin patches and uneven sheen rather than forcing extra paint into one pass.
Once a section begins to set, stop returning to it after roughly 2–3 minutes if the paint is becoming tacky. Follow the coating label and the actual room conditions, since heat, humidity, and product formula affect how long the surface remains workable.
Let each coat dry fully before recoating, then inspect from a low or side angle where skimming light exposes defects that a straight-on view can hide. Check for drips, dust nibs, brush marks, roller tracks, thin patches, and uneven sheen.
A dried drip can be knocked down with 320-grit sandpaper, followed by a tack-cloth wipe and a light touch-up. Keep the door open for several hours after painting, and wait until the finish is fully cured before aggressive cleaning or applying stick-on bumpers.
⭐ Rollers for Smooth Door Coats
✨ Editor’s Pick
Microfiber Roller Covers For Smooth Finishes
Four Inch Foam Roller Set
✨ Small Details That Matter:
Small finishing choices help the black read as one smooth surface instead of a collection of separately painted door parts.
- Panel edges: Keep paint from collecting in inside corners, where buildup can soften crisp door detailing.
- Touch-up blending: Feather minor corrections into the surrounding area so isolated dabs do not create a visible sheen patch.
Paint or Blend the Trim to Match Your Plan

Carry the black door into a deliberate frame with clean edges and consistent visual weight.
The doorway either comes together here or starts to look unfinished: the door is black, but the casing has a messy edge, an accidental strip, or a noticeably different sheen. Paint the trim according to the relationship chosen earlier, then treat the frame as one continuous opening rather than a separate afterthought.
Before opening the trim paint, map every visible surface. Mark the finish planned for the door face, door edges, frame, casing faces, returns, and any nearby millwork that can be seen from the room or hallway.
- Matching trim: Use the same or compatible product family and the selected sheen across the door, casing, and frame. The goal is a unified opening, not simply adding more black to whichever surfaces are easiest to reach.
- Contrasting trim: Stop the dark color exactly at the casing line. The light or contrasting casing should have a straight boundary and an uninterrupted profile, with no thin black sliver left on a return or frame section.
- Coordinating trim: Keep the frame visually connected without requiring identical color or intensity. Repeat that same relationship across visible openings so the difference reads deliberate rather than accidental.
Mask adjoining walls and surfaces, and protect hinges or trimwork that should remain unpainted. A small angled brush handles narrow casing areas with more control than a loaded full-size brush, while a small foam or 4-inch roller can cover flatter sections without forcing paint into corners.
For glass or glazed panels, masking liquid or tape sheets can protect a broader area than narrow tape strips. Follow the masking product’s instructions, especially for drying before paint is applied.
The professional standard is intentional paint breaks. Contrasting casing needs a crisp stop, matching casing needs consistent sheen, and coordinating casing needs a repeatable rule.
Remove painter’s tape while the paint is still wet. If the coating has set, carefully score the edge with a utility knife before removal so the tape does not tear the paint line.
Sound, already-painted trim can generally receive compatible interior paint after cleaning and scuffing. Bare wood, stained trim, glossy surfaces, or casing with a different binder may need the primer decision from Step 4 instead of another finish coat.
Inspect the entire opening from several angles and under both bright and dim light. Black trim makes lap lines, dust, brush marks, and sheen differences easier to spot, so correct thin patches or rough edges before the coating dries and cures undisturbed.
After curing, use a damp cloth for routine cleaning unless the coating manufacturer states otherwise. Repeated scrubbing can burnish or dull the finish, especially where hands frequently contact the casing or frame.
⭐ Trim Details That Finish Strong
Multi Color Wood Touch Up Kit
Angled Trim Brush Set For Detail
✨ Editor’s Pick
Paintable Waterproof Sealant For Doors
💡 Why the Edge Treatment Matters:
A door is often seen partly open, from the hallway or at an angle, so the edge and frame returns can influence the opening more than the front face. Treating those sightlines consistently keeps the black from appearing like a flat rectangle dropped into lighter casing and helps the doorway read as intentional in motion.
Visual test: Check the doorway partly open as well as closed; unfinished edges become easier to spot.
Rehang and Do Final Touch-Ups

A carefully aligned door keeps the black finish smooth, quiet, and connected to its surrounding trim.
A door can feel dry and still be vulnerable to dents, sticking, scraping, and fingerprint marks. Rehanging belongs to the paint job because the hinge line and jamb clearance are exactly where a rushed installation can damage the edges you worked hardest to smooth.
Wait until the coating is fully dry to the touch and, ideally, close to full cure before putting the door back into regular use. Water-based or latex finishes may need about 24 hours before rehanging, while oil-based finishes may need about 48 hours; heavier, regular handling can require another 3–7 days of cure time, depending on the product label and room conditions.
Do not confuse dry-to-touch with cured. Keep the door open as needed, avoid slamming it, and wait on aggressive cleaning or stick-on bumpers until the coating has hardened according to its label.
Protect the finished edges before bringing the door to the hinges. A cloth, paint-safe tape, or cardboard barrier can keep a screwdriver or hinge hardware from scuffing the black surface, while a block of wood or cardboard supports the door without dragging it across the floor or jamb.
- Seat and start the top hinge first so the door is supported.
- Align the lower hinge and start its screws loosely.
- Check the top, bottom, and latch-side gaps before tightening anything fully.
- Tighten the screws only after the door sits flush and swings smoothly.
Install loosely, test the swing, and tighten last. Screw pressure should not be used to force a painted door into alignment; if the hinge line is off, forcing it can scrape the jamb or chip the hinge-side edge.
If the door rubs, separate an alignment problem from paint buildup. Check hinge position, screw tightness, hinge movement, and clearance first, and adjust the hinges before considering any material removal from the edge.
Inspect the hardware for rust, corrosion, bent parts, stripped screw holes, and stiff movement. Clean old paint from the hardware and use a small amount of suitable lubricant if a hinge squeaks or resists movement, keeping the focus on minor maintenance rather than replacing sound parts.
Once the door is hanging, check the latch edge, hinge edge, bottom edge, jamb contact points, casing corners, and every tape line. Clean the surface first, identify the cause of each flaw, then use a small brush for restrained touch-ups instead of repeatedly adding paint to an area that is already sound.
Final Inspection and Rehang Checklist
- The coating has reached the label-directed dry and cure stage for its product type.
- Finished edges were protected during installation.
- The door was supported, with the top hinge seated first.
- Screws were started loosely before final tightening.
- Top, bottom, and latch-side gaps were checked.
- Hinges move smoothly, and no hardware is bent, corroded, or stripped.
- The door opens and closes without rubbing, scraping, sticking, or bridging paint.
- Latch edges, hinge edges, casing corners, and tape lines received only the touch-ups they needed.
- Final testing was done gently, without slamming or aggressive cleaning.
Open and close the door without slamming it, then inspect the edges again from the side. Small problems are easier to correct before repeated use turns a soft scrape or fingerprint dent into a visible mark.
⭐ Hardware for Rehanging Painted Doors
✨ Editor’s Pick
Matte Black Interior Door Hinges
Matte Black Privacy Door Knob
Extra Long Door Hinge Screws
💡 Why the Final Test Matters:
A gentle open-close test confirms that the finished door is functioning as one clean visual unit with its frame, rather than hiding a contact point that will gradually mark the black edge. Catching that interaction now protects the crisp trim boundary and prevents unnecessary repainting.
Best final check: Watch the hinge side, latch edge, and jamb contact points during one slow, quiet swing.
With the full process in front of you, How to Paint Interior Doors Black Without Making the Trim Feel Disconnected becomes a matter of sequence rather than guesswork. Decide whether the trim will contrast, coordinate, or match; test the black and sheen in changing light; then prepare, prime where the surface calls for it, and build the finish in controlled coats. The few choices that shape the result are more important than completing every possible refinement.
A sound, already-painted door is a reasonable DIY project if you can work carefully, mask cleanly, and allow time for drying and cure. Detailed millwork, difficult existing coatings, or a low tolerance for visible edge defects may justify bringing in a professional. Start with the trim relationship and sheen that matter most in your home, use the checklist to verify the surface and rehang, and let those decisions establish the finished doorway. Once the first opening is right, repeating the same rule elsewhere becomes a clear design choice – not another round of uncertainty.
Related posts
 How to Make a Front Door More Secure Without Making It Look Industrial
 Walk In Shower No Door Ideas That Feel Open Without Feeling Exposed
 15 Shower Door Ideas From Clean and Simple to Statement-Making
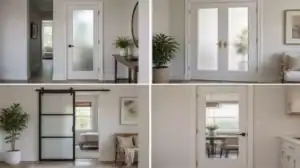 12 Frosted Glass Interior Doors That Add Light Without Losing Privacy
 How to Make Several Room Doors Along One Hallway Feel More Cohesive
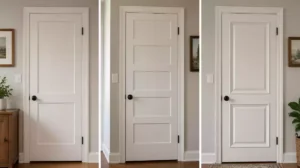 Hollow Core Bedroom Doors Built Up to Feel More Like Solid Wood
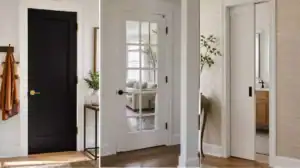 15 Interior Door Styles That Update Hallways Without Remodeling
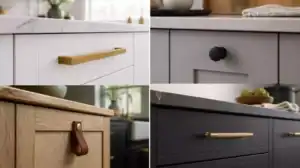 12 Door Handle Upgrades That Make Cabinets Feel Custom