

A plain flat interior door can look far more considered without replacing the slab. The work is mostly about controlling the small details: a panel layout that fits the door, trim that sits tight to the face, filled joints that disappear under paint, a primer that actually bonds to the existing finish, and hardware that fits the holes already in the door.
This project is easiest with the door removed and laid flat on sturdy supports. That gives you better control over molding, sanding, primer, and paint, and it keeps drips from collecting around the new trim. Before taking anything apart, mark each door and its opening so hinges, latch positions, and swing direction do not become a guessing exercise later.
Key Takeaways
- Use adhesive across the molding on hollow-core doors; brads can hold the pieces in position, but the thin door face may not provide substantial backing across the field.
- Use wood filler for nail holes and imperfect miters, then use a thin bead of paintable trim caulk where molding meets the door face.
- Choose primer for the surface you actually have: raw MDF, bare wood, repaired areas, or a glossy factory coating do not all behave the same way.
- Measure the existing latch backset, hinge size, hinge corner shape, and door thickness before ordering replacement hardware.
Basic project kit
- Tape measure, pencil, combination square, and straightedge
- Miter saw or miter box suited to the molding profile
- Paint-grade panel molding or narrow flat trim
- Compatible wood adhesive and brad nailer or finish-nail setup
- Wood filler, paintable molding-and-trim caulk, putty knife, and caulk tool
- Sanding blocks or sponges in the grits needed for filler and final scuffing
- Primer chosen for the door surface and trim material
- Door-and-trim or cabinet-grade interior paint, angled brush, and mini roller
- Replacement lever or knob set and hinges, if they are part of the plan
Assess What You Are Working With

Start with the door itself, not the molding sample. A flat slab may be hollow-core, solid-core, or solid wood, and that changes how aggressively you can sand and how much you should expect fasteners to hold. Hollow-core doors typically have a thin face over a light internal structure, so aggressive sanding can cut through the face and brads driven through the middle of the slab may have little material to bite into. This Old House’s hollow-core door projects use glue across the molding and brads to hold the pieces in position rather than treating the nails as the main bond.
Check the slab for swelling, delamination, deep gouges, loose veneer, a badly warped edge, or hinge damage before spending time on cosmetic work. Minor dents and old hardware marks can be filled. A slab that rubs hard against the jamb, has a loose hinge area, or will not sit flat in the opening needs that mechanical problem dealt with before decorative trim goes on.
Look at the existing coating under strong side light. A dull painted surface that is sound is a simpler prep job than a slick factory finish or old glossy enamel. Grease around knobs, handprints along the latch edge, furniture polish, and cleaning-product residue all interfere with adhesion. Sherwin-Williams’ interior-door guidance starts with degreasing, rinsing, sanding, and removing dust before paint.
Older-home sanding alert
If the home was built before 1978 and the existing coating may contain lead, do not treat sanding as ordinary prep. EPA guidance warns that sanding, cutting, and other work that disturbs painted surfaces can create hazardous lead dust. EPA recommends lead-safe work practices for DIY projects and recommends hiring a lead-safe certified contractor for pre-1978 work.
Before removing the hardware, record four things: the knob or lever function, the distance from the door edge to the center of the bore, the hinge dimensions and corner shape, and the door thickness. Take close photos of the latch plate, strike, hinge mortises, and screw positions. Those photos are much more useful at reassembly time than a pile of unlabeled screws.
Do this before buying trim
- Measure the actual door width and height.
- Mark the knob or lever rose on the face so molding cannot crowd it.
- Mark the hinge locations on the opposite edge.
- Check how much clearance the slab has at the head, jambs, and floor.
- Decide whether the molding will be applied to one face or both before cutting a full set.
Add Trim or Molding to Flat Doors

The panel layout decides whether the finished door reads as intentional or like trim was added after the fact. Lay the slab flat, mark a centerline if the design needs one, and draw the full molding layout before cutting material. Keep the spacing from the outer door edges consistent, leave visual breathing room around the knob or lever rose, and check that any horizontal rail near the lockset does not run into the bore or latch hardware.
Narrow panel molding gives a raised-frame effect with less added thickness. Flat paint-grade strips create a simpler rectilinear panel. Wood, MDF, and other paint-grade profiles can all work, but the product needs a flat enough back to make reliable contact with the door face. On a hollow-core slab, heavy profiles and deep fasteners add risk without solving the real attachment problem.
Cut one frame first and dry-fit it on the pencil lines. Do not batch-cut an entire house of doors from a single measurement unless every slab has been checked. Even small differences show up at mitered corners. This Old House’s panel-molding method calls for laying out the pieces first, dry-fitting the frame, applying wood glue to the back, pressing each piece into place, and tacking the molding while maintaining full contact with the door.
Pro tip: do not rely on brads alone
On a hollow-core face, spread compatible adhesive so the molding makes full contact, then use brads to keep it from creeping while the adhesive sets. This avoids depending entirely on fasteners that may pass through the thin face skin where there is little backing. Keep the nail heads just below the molding surface so they can be filled without digging a crater around each one.
Work around each frame in a fixed order so the corners stay aligned. Set one piece, verify the pencil line, add the adjacent piece, and check the miter before moving on. If a joint opens when the next piece is pressed in, fix the cut rather than forcing a large gap closed with filler. Filler can disguise a hairline miss; it cannot make a badly sized frame look crisp after paint.
If the trim profile has a directional shape, mark the back of each cut piece before moving it to the door. A surprising amount of rework comes from flipping a profiled molding and discovering that two matching miters now have different faces.
Fill and Sand for a Smooth Surface

The filler stage is where an applied molding starts reading as part of the door. Set every proud brad below the surface. Fill nail holes, dents, and small miter gaps with a paintable wood filler that suits the trim material. Slightly overfill holes that tend to shrink, let the filler dry according to its label, then sand it flush rather than chasing the hole with repeated wet coats.
Keep filler and caulk in separate jobs. Wood filler belongs in nail holes and places that need to become hard and sandable. A thin bead of paintable molding-and-trim caulk belongs along fine seams where the molding meets the door face. DAP’s trim guidance follows that order: fill and sand brad holes, then seal molding joints and gaps with a paintable trim sealant before the finish coat.
For filler ridges and rough molding edges, This Old House uses 120-grit paper in its panel-molding project. For the broader painted door surface, Sherwin-Williams gives 220 grit as a light scuff example in its door-prep guidance. Those are different tasks: use the coarser cut where filler needs leveling, then shift finer for the final scuff. Do not keep sanding a hollow-core face once the sheen has been dulled and the surface feels even.
Mistake to avoid: thick caulk lines
A heavy bead rounds over the profile and makes the applied trim look soft after paint. Run the smallest bead that closes the seam, tool it before it skins, and wipe stray material off the flat door face. If a gap is large enough to need a mound of caulk, correct the molding fit instead.
After sanding, remove dust from the molding profiles, panel corners, door edges, and latch bore. Dust packed into a miter becomes a visible ridge as soon as primer dries over it. Use a vacuum and a clean wipe suited to the coating system rather than dragging a dusty rag across the surface.
Prime the Doors Properly

Primer has two jobs here: give the topcoat a dependable bond and make unlike materials read as one painted surface. A door face may already be coated, the new trim may be raw wood or MDF, and the repairs may be porous filler. Coating the assembled face with a compatible primer reduces the chance that those different surfaces flash through the final paint.
Bonding primer matters most when the existing door has a slick coating that ordinary wall primer may not grip well. Zinsser BONDZ is one example of a primer specifically made for hard-to-stick and glossy surfaces, and KILZ lists properly prepared glossy surfaces and MDF among the substrates for several of its interior primers. The useful lesson is the substrate match, not the logo on the can: read the technical label for adhesion, surface prep, compatible topcoats, and recoat time before starting.
Brush primer into the molding profiles, inside corners, and around the latch edge first. Then roll the broad flats in thin passes. Sherwin-Williams uses the same detail-first approach in its door instructions: an angled brush for detailed areas and a roller for the remaining flat surface.
Once the primer is dry, inspect the door under side light. Primer exposes defects paint will not hide: a proud nail patch, a fuzzy MDF edge, a missed caulk seam, or a miter with a visible step. If the primer manufacturer allows sanding, knock down those defects lightly, remove dust again, and reprime any spot where you cut back to raw material.
Pro tip: inspect before color
Move a work light across the door at a low angle. Shadows reveal filler ridges and open seams far better than overhead room lighting. Fix them now; a satin or semi-gloss topcoat will make surface defects easier to see.
Paint in a Designer Color and Finish

The new molding gives the door its architecture; paint makes the separate pieces read as one object. For doors that get touched every day, use an interior coating sold for doors, trim, cabinets, or similarly handled woodwork rather than leftover flat wall paint. Benjamin Moore’s trim guidance points to satin or semi-gloss for doors and trim because those sheens highlight detail and provide a washable surface. Sherwin-Williams also sells door-and-trim coatings in satin.
Satin is forgiving on a door that has minor waves or patches because the sheen is quieter. Semi-gloss throws more light across the new molding and is less forgiving of surface flaws. If the slab is an inexpensive hollow-core door with a slightly uneven face, a controlled satin sheen often keeps attention on the panel geometry rather than every ripple in the skin.
Color works best when it is chosen against the fixed materials around the door: flooring, wall color, casing, and hardware finish. Warm off-whites keep the treatment quiet. Muddy greiges, soft olive tones, muted blue-green, charcoal, and deep brown can make applied molding read more strongly without changing the door construction. Test the actual paint on a movable sample or primed scrap molding and view it next to the door at morning, afternoon, and evening light before committing every slab in the hall.
Paint the profiled molding and inside corners with an angled brush, feathering the paint out onto the flats. Follow immediately with a mini roller over the broad areas so brush texture does not dry as a halo around each frame. Sherwin-Williams’ interior-door method calls for thin, even roller layers and a second coat after the first has dried for the product being used. Recoat timing varies, so use the label on your chosen coating rather than borrowing a clock from another paint.
Do not close a newly painted door too early
Dry-to-touch and ready-for-service are different points in a coating’s dry and cure cycle. Keep painted faces and stops from pressing together until the product instructions allow normal use. Sherwin-Williams and Benjamin Moore both warn that closing doors before the coating has dried sufficiently can cause paint blocking, where two painted surfaces stick and pull at each other.
Keep paint build thin inside hinge mortises, on latch faces, and around the bore. Thick layers in those tight areas can change how the hinge sits or how the latch plate fits. If you want the door edge painted, do it deliberately and keep the coating out of screw holes and moving hardware.
Swap the Hardware and Hinges

Hardware is the fastest place to make a newly paneled door look coherent, but fit comes before finish. Match the function first: passage hardware for rooms that do not need a lock, privacy hardware for bedrooms and bathrooms, and dummy hardware only where there is no working latch. Then confirm the existing bore, backset, door thickness, and latch faceplate shape.
Many current residential locksets use adjustable latches. Kwikset, for example, lists 2-3/8-inch to 2-3/4-inch adjustable backsets on several current interior lever sets, while Schlage lists the same two common backset positions on its residential installation instructions and products. That does not make every lock universal. Measure your door before ordering so a different latch geometry does not turn a simple hardware change into drilling and patching.
Hinges need the same discipline. Measure the existing leaf height and width, count the screw holes, and note whether the corners are square or radiused. A current Schlage interior hinge, for example, is sold as 3-1/2 by 3-1/2 inches with a 5/8-inch radius corner. If your mortise is square or a different size, that hinge will not simply disappear into the existing recess.
Hardware checks before checkout
- Passage, privacy, or dummy function matches the room.
- Latch backset matches the existing bore location.
- Hardware accepts the measured door thickness.
- Latch faceplate matches the existing edge prep or can be fitted without leaving an exposed gap.
- Hinge height, width, thickness, corner shape, and screw pattern are checked.
- Lever projection clears the new molding when the handle turns.
For a low-risk hinge change, keep the same hinge geometry and change only the finish. Changing from radius corners to square corners, or changing hinge size, means altering the mortise. On a hollow-core door, the hinge-side solid blocking is the part you want to preserve, so avoid turning a cosmetic change into unnecessary routing.
Rehang the door before doing final hardware tightening. Confirm that the hinge leaves sit flush, the slab clears the jamb, the latch enters the strike without lifting or pushing the door, and the lever returns freely. If the door worked before and binds after the hardware change, investigate the new hinge seating and paint buildup before trimming the slab.
Upgrade the Door Casing

Once the slab has applied panels and new hardware, undersized or damaged casing can become the part that makes the opening feel unfinished. Keep this work at the doorway rather than turning it into a room-wide trim project. The goal is a casing profile with enough visual weight to sit comfortably around the door without crowding nearby baseboard, switches, corners, or adjacent openings.
Before prying anything off, score the paint and caulk joint along the wall and jamb. Work the casing loose gradually so the drywall paper and jamb edge stay intact. Remove old nails rather than pulling the new casing over them, then check whether the jamb is flush with the wall plane. If the wall or frame is uneven, a dry fit will show where shimming or small corrections are needed.
Mark a consistent reveal on the jamb before cutting the new casing. Lowe’s current molding installation guide uses a 1/8-inch reveal on both sides of the jamb in its header measurement and calls for dry-fitting the pieces before fastening. It also recommends adhesive for added strength and fastening the casing into the frame or wall structure.
Cut the two side pieces and head casing to your chosen joint method, then dry-fit all three before nailing. With mitered casing, one slightly long leg can open both top corners, so trim in small increments. Keep the inside edge on the reveal marks rather than following a crooked drywall edge. Once the joints close and the reveal looks even, fasten the casing, set the nail heads, fill the holes, and use a thin paintable caulk line only where small wall or jamb gaps remain. Lowe’s guide follows the same sequence of fastening, filling holes, sealing gaps, and finishing the molding.
Final fit check
Stand several feet back and read the opening as one unit. The panel molding should have even spacing, the lever should have clear space around it, hinge leaves should sit flat, casing reveals should stay consistent, and no filled joint should catch the light as a ridge. If one defect keeps drawing your eye before the final coat on the casing, fix it before calling the door finished.
A builder-basic slab can stay in service and still gain the depth, shadow lines, color, and hardware detail associated with more expensive millwork. The work succeeds or fails in the quiet stages: accurate layout, full adhesive contact, restrained filler and caulk, surface-specific primer, thin paint coats, and hardware that matches the existing prep.
Related posts:
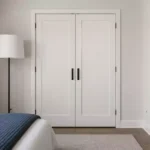 Bifold Door Makeover From Builder-Basic to Built-In Looking
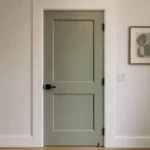 Interior Door Makeover for a More Finished Designer-Led Look
 15 Front Door Decor Arrangements Beyond the Basic Wreath
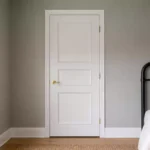 Closet Door Makeover for a Custom-Built Look on a Basic Door
 Flat Door Makeovers That Look Custom-Built Not Builder-Grade
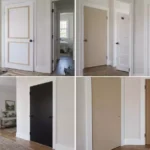 Flat Door Makeovers That Look Custom-Built Not Builder-Grade
 Transform Your Space With Stylish Barn Doors
 Black or White Interior Doors for a House With Light Walls?