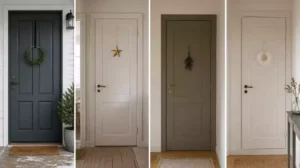
Updating flat slab doors is the quickest way to remove builder-grade monotony without the cost of full replacement. This guide focuses on 9 practical techniques that add architectural character to your home, ensuring you invest your time and budget only in results that actually last.
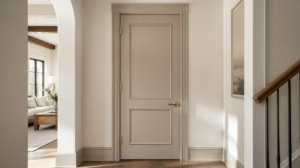
Hollow-Core to Shaker Panel

Give your flat doors architectural depth with simple MDF trim and a professional finish.
As an Amazon Associate I earn from qualifying purchases. Affiliate links may earn me a commission at no extra cost to you.
The biggest fear with hollow-core doors is the dreaded “sag” – that feeling that adding any weight will cause the door to warp or the veneer to buckle. You can absolutely achieve a Shaker panel aesthetic without surgery by using the “add-on” method rather than trying to route or carve into the door itself.
Never attempt to cut into the face of a hollow door, as you will lose structural integrity almost immediately. Instead, use 1/4″ MDF or thin wood strips to build the panel profile right on top of the existing surface.
Precision Planning
Before you make your first cut, download our Layout Calculation Worksheet to ensure your Shaker spacing is perfectly symmetrical. Proper planning prevents the “DIY look” and ensures your rails and stiles align with your home’s existing trim.
When attaching your MDF strips, the choice of adhesive is vital to prevent veneer bubbling. Use a high-quality wood glue like Titebond II or Gorilla Wood Glue, as some heavy-duty construction adhesives can be too aggressive for the thin skins of hollow-core doors.
Securing the strips requires patience and the right pressure. Follow these requirements for a stable, long-lasting bond:
- Use 1″ or 1.5″ finish nails to tack the strips in place while the glue sets.
- Clamping is non-negotiable; leave your clamps on for a full 24-hour curing period.
- Ensure your workspace is clean, as any trapped debris will show through once you apply your primer and paint.
The Secret to Seamless Joints
The difference between a custom build and a patch job is in the sanding. Sand your added MDF strips to 120–150 grit to perfectly blend the edges into the door face, making the trim look like an original part of the wood.
.
🔢 The Right Sequence to Prevent Rework
Following this order ensures your adhesive bonds properly to the door surface before you commit to permanent paint finishes.
- Surface Prep: Lightly scuff the door face with 150-grit sandpaper to improve glue adhesion.
- Bond and Clamp: Apply wood glue and nail your MDF strips, then clamp for 24 hours.
- Fill and Finish: Fill nail holes, sand flush, and prime the entire door before painting.
Flat Slab to Board and Batten

Adding architectural depth turns a flat door into a permanent, custom-built furniture statement.
Board and batten is more than just a wall trick; it’s the most effective way to shift a door from a flat, builder-grade plane into a piece of architectural furniture. By adding vertical and horizontal wood strips, you create intentional shadows and texture that make the door feel substantial.
Unlike the lighter MDF used for simple Shaker panels, this method typically employs 3/4″ thick tongue-and-groove pine or cedar. The increased weight is exactly what gives the door its “heft,” but it also introduces a specific structural risk.
Structural Warning: If your total added wood weight exceeds 5–8 lbs on a hollow-core door, you must upgrade your existing hinges.
Failure to reinforce the hinge side will lead to premature sagging and an uneven latch strike.
To avoid the dreaded “DIY boxy” look, precision in your layout is mandatory. A consistent 4″ top and bottom setback from the edge of the door is the visual key that keeps the proportions feeling intentional rather than amateur.
Before you commit to the final assembly, remember that once those battens are nailed down, you lose the ability to sand those inner corners. Pre-sanding your boards to a 220-grit finish is non-negotiable for a professional look.
Board and Batten Quick Checklist
- Material: Use 3/4″ thick T&G pine or cedar for structural integrity.
- Assembly: Secure with 3″ rosehead or clinched nails for a traditional look.
- Spacing: Keep a strict 4″ setback from the top and bottom of the door.
- Prep: Sand all wood components to 220-grit before attaching to the door.
If you are planning this project, download the Material Cut List & Spacing Guide to ensure your measurements are perfect before you head to the lumber yard. Getting the math right on the first cut saves you the headache of misaligned battens later.
.
⚠️ Where This Can Go Wrong:
- Hinge fatigue: Overloading hollow-core doors with heavy wood battens causes the door to sag, making the latch stick.
- Uneven nail depth: Using the wrong pressure on your finish nailer can blow through thin veneer, creating unsightly craters.
- Skipped pre-sanding: Failing to sand inner corners before assembly leads to rough, unfinished patches that are impossible to reach later.
Plain White to Deep Charcoal

Anchoring your space with a dramatic dark door creates an instant, high-end focal point.
Painting a flat slab door in a dark, moody hue is one of the most effective ways to shift a room’s entire energy. While a white door disappears into the background, a deep charcoal finish acts as an architectural anchor that grounds the surrounding space.
The Prep-Prep-Prep Rule: Dark paint is unforgiving when it comes to surface imperfections. Because light doesn’t bounce off dark colors the same way it does white, every tiny dent or speck of dust will be magnified.
Use TSP or Simple Green to thoroughly degrease the existing surface before you even think about picking up a brush. Any lingering oils from hands or cleaning products will cause your finish to fail and appear patchy.
Once you are ready to paint, the sheen you choose is just as important as the color itself. So is technique: here is how to paint interior doors smoothly. We recommend skipping semi-gloss finishes, as they tend to highlight every single ripple or previous DIY mistake on a flat slab.
Instead, opt for a satin or eggshell finish to provide a smoother, more professional appearance. These sheens offer just enough durability for high-traffic entryways while hiding those inevitable surface imperfections far better than high-gloss alternatives.
Pro Tip: Dark doors look most intentional when they anchor a neutral-toned hallway or room. By keeping your walls in soft whites, creams, or light grays, you allow the charcoal door to stand out as a piece of furniture rather than just a functional barrier.
.
💡 Why This Works
Deep charcoal acts as a high-contrast visual anchor, pulling the eye toward the entryway and away from less-refined architectural elements. By shifting the door from a neutral plane to a saturated focal point, you create the illusion of a custom-designed interior without needing to alter the door’s physical structure.
Visual Impact: Dark tones add sophisticated depth, making standard flat doors feel like intentional, high-end design statements.
ADDING APPLIED MOLDING TRIM

Create the sophisticated illusion of vintage architectural depth on your basic flat-slab doors.
This approach is fundamentally about creating the illusion of depth. By adding simple 1/4″ primed wood molding to a flat surface, you can mimic the rich, character-filled look of a classic paneled door without the expense of a full replacement.
You will need a power miter saw to handle these cuts. Hand-sawing simply won’t provide the crisp, tight edges required to make the molding look like it was original to the door.
The Caulk Secret: Every single seam where your molding meets the door must be caulked. Without this final detail, the molding will look like an obvious, floating patch rather than a built-in architectural detail.
Precision is your best friend when laying out your geometry. Use painter’s tape to hold your cut pieces in place before you commit to firing a single nail.
This allows you to step back and verify that the geometric center is perfect across the entire door. Once you are satisfied with the alignment, use an 18-gauge brad nailer to secure the wood safely in place.
Project Essentials:
- Material: 1/4″ primed wood molding.
- Tools: Power miter saw and 18-gauge brad nailer.
- Technique: Cut both ends of each piece at a 45-degree angle.
- Cost: Budget roughly $15–$30 per door for materials.
Always remember to cut slightly on the outside of your laser line. It is much easier to shave off a hair of excess material than it is to fix a gap created by cutting too short.
.
⚠️ Where This Can Go Wrong:
- Uneven Miters: Relying on hand-sawing creates visible gaps at the corners that paint cannot hide; always use a power miter saw.
- Surface Prep: Skipping a thorough wipe-down leaves dust under the molding, preventing the adhesive from creating a lasting, seamless bond.
- Structural Integrity: Using heavy trim on hollow-core doors risks adding too much weight; stick to thin, lightweight 1/4″ molding only.
Focusing on high-quality materials and precise installation ensures your door modifications provide lasting value rather than just a quick aesthetic fix. Investigating interior door decor techniques that prioritize structural integrity will help you avoid the common pitfalls that lead to early wear and tear.
When you prioritize durable finishes and solid joinery, you effectively safeguard your home’s architectural appeal against the inevitable signs of aging and daily use.
Painted Door to Natural Wood Veneer

Bring organic warmth to your space by replacing cold paint with rich, authentic wood grain.
Turning a basic painted slab into a natural wood feature is the ultimate way to swap builder-grade sterility for a high-end, artisan feel. This process relies on applying a real wood veneer directly over your existing door face.
The Bare Substrate Rule: You cannot apply veneer over existing paint. The door must be stripped or sanded down to the raw substrate to ensure the adhesive creates a permanent, bubble-free bond.
Because this project involves bonding delicate materials to a large surface, the quality of your adhesive is non-negotiable. You must use a 3000+ series contact cement applied in two distinct coats to ensure the veneer grips tightly across the entire door.
Once the veneer is applied and trimmed, the finish is what separates a amateur attempt from a professional transformation. We recommend applying 2–3 coats of Marine Spar Urethane to provide the durability needed for high-traffic entry or interior doors.
Always work in a well-ventilated space when using contact cements, as the fumes are significant. Take your time during the application; once the two adhesive surfaces touch, they form an instant bond that is difficult to reposition.
.
Designer Note: Achieving a Custom Grain Match
Veneer isn’t just about covering paint – it’s about mimicking the deliberate “book-matched” look of high-end furniture. When selecting your sheets, pay close attention to the direction of the grain. For a seamless, built-in appearance, align the grain vertically with the door’s frame. This attention to detail prevents the veneer from looking like a patch, elevating the slab into a bespoke architectural piece that anchors your room’s natural textures.
SOLID SLAB TO GLASS INSERT

Bring natural light into your entryway by cutting a precise window into your solid door.
Structural Red Flag: This upgrade is strictly for solid wood doors. Never attempt to cut into a hollow-core door, as you will destroy the structural integrity of the frame and leave nothing for the glass to mount to.
Adding a glass insert is the ultimate way to brighten a dark hallway, but it requires a high level of precision. Because you are modifying a structural element, you must ensure your door has a minimum thickness of 1 3/4 inches to safely house the glass kit.
You cannot use standard window glass for this project. You must source tempered or laminated glass that meets Class 2/Grade A safety codes to ensure it shatters safely if impacted.
When planning your cutout, adhere to these technical requirements to ensure a professional result:
- Internal Reinforcement: You must install internal cross-bracing around the entire perimeter of your cutout area. This replaces the wood you removed and prevents the door from bowing or sagging under the weight of the glass.
- Measure On-Site: Do not order your custom glass until the physical hole is cut into the door and measured to the absolute millimeter. Pre-ordering glass based on theoretical dimensions is a common mistake that leads to costly returns.
This project is a significant investment in both time and materials. If you are not comfortable squaring up an opening in a heavy solid slab, this is the one instance where hiring a professional is worth the expense to protect your door’s longevity.
⭐ Top Products for Solid Slab to Glass Insert
✨ Editor’s Pick
Heavy Duty Pet Resistant Window Screen Mesh
🧰 Ask Before You Hire:
- Structural guarantee: Will the contractor confirm the internal bracing will effectively support the door’s long-term weight?
- Glass specification: Can they provide written proof the glass meets Class 2/Grade A safety requirements?
- Site-specific template: Will they measure the cutout on-site rather than ordering glass from generic door dimensions?
Standard Knob to Long Modern Handle

Swap standard hardware for oversized pulls to give your flat doors a custom, architectural weight.
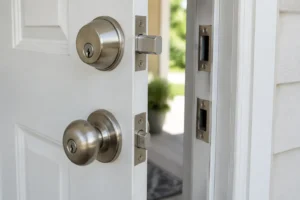
Swapping a standard-issue door knob for a long, 10–12″ handle is the easiest way to give a flat door the look of high-end millwork. Renters should check reversible door updates for renters first, because swapping hardware can count as an alteration. This “jewelry effect” changes the scale of the door, making a standard-grade slab feel much heavier and more intentional.
Precision is non-negotiable when mounting long hardware. A handle that is even slightly tilted will immediately signal a DIY project rather than a custom-built finish.
Before you start, you need to address the existing hole from your old knob. Use high-quality wood filler like Dham’s putty to patch the old borehole completely, ensuring it is flush with the surface before you sand and paint.
Once you are ready to drill for your new handle, follow these critical steps to ensure a professional result:
- Measure and mark your new mounting holes with extreme accuracy, keeping your alignment tolerance within 1/16″.
- Use a template if the hardware comes with one, as this is the safest way to prevent a “tilted” installation.
- Check your latch orientation before closing the door for the first time.
- Ensure the latch bevel faces the door jamb, which allows for a smooth, satisfying mechanical click every time the door shuts.
Installation Warning
Double-check your hole positioning relative to the standard 2 3/8″ backset. If your new handle baseplate is large, it may overlap the edge of the door if you don’t account for the spacing correctly.
.
✨ Small Details That Matter
Selecting the right scale and finish for your new hardware is the final step in elevating a flat slab into a custom architectural element.
- Backset clearance: Verify the standard 2 3/8″ backset works with your chosen handle to prevent awkward plate overlap.
- Visual weight: Opt for a matte finish to ground light-colored doors, adding a sophisticated, modern contrast to your entryway.
Flat Door to Reeded Glass Panel

Achieve the high-end boutique look of reeded glass using cost-effective adhesive film solutions.
You can capture that sophisticated, high-end boutique aesthetic without the massive expense of custom architectural glass. By using PVC reeded film, you transform a plain flat slab into a textured glass-look panel that filters light beautifully while maintaining privacy.
The Precision Prep Checklist
- Clean the surface thoroughly with a soapy water solution to remove all dust and oils.
- Use a plastic squeegee to apply the film from the center outward to eliminate trapped air bubbles.
- Leave a 1/16″ gap at every edge to allow water to release during the drying process.
- Always swap to a fresh blade after every single cut to ensure the edges remain crisp and free of jagged tears.
This project is surprisingly accessible, with the PVC film typically costing between $35 and $75 per door. The secret to a professional result lies entirely in your patience during the application and trimming phases.
Avoid This Common Mistake: Failing to leave that tiny 1/16″ margin at the edges will trap moisture underneath, which inevitably leads to the film peeling back at the corners within a few months. Take your time to trim accurately, and your finish will last far longer.
If you are working with a solid door, this technique can even be combined with a glass cutout for a truly custom piece of architectural furniture. For standard hollow-core slabs, keep the film applied directly to the surface to maintain the door’s structural integrity.
⭐ Top Products for Flat Door to Reeded Glass Panel
✨ Editor’s Pick
Professional Frosted Glass Privacy Paint Kit
🏡 Real-Home Application Tips:
- Room lighting: Reeded film diffuses harsh light, making it a perfect choice for doors leading into darker laundry rooms or hallways.
- Privacy balance: Use this on pantry doors to obscure cluttered shelves while still allowing enough light through to see inside.
- Maintenance routine: Wipe the film with a damp, soft cloth; avoid harsh chemical cleaners that can cloud the PVC texture over time.
BUILDER BEIGE TO TWO-TONE FINISH

Create a bespoke, high-end feel by coordinating your door edges with your room color palette.
Painting the edges of a door to match the room they face is a subtle custom detail that instantly elevates a space. Instead of a uniform builder-grade finish, this technique treats the door as a bridge between two distinct design environments.
The logic is simple: the side facing the exterior (or the hallway) should match your warm cream base, while the side facing the interior room receives your deep charcoal or navy treatment. You then paint the hinge edge to match the exterior side and the latch edge to match the interior side.
The Edge Rule: Paint the hinge-side edge the same color as the room the door opens toward. Paint the latch-side edge the same color as the room the door is in when closed.
Preparation remains the single most important factor for success when working with existing builder-grade paint. Use TSP or Simple Green to thoroughly remove all dust and oils from the surface before you even pick up a brush.
When it comes time to paint, clean lines are non-negotiable for a professional look. Use 3M Frogtape for your transition lines and press the edges firmly to prevent any paint bleed-through.
Precision Prep Checklist
- ✅ Deep Clean: Remove all surface oils with TSP or Simple Green.
- ✅ Frogtape: Always use high-quality painter’s tape and burnish the edges.
- ✅ Ventilation: Ensure you are working in a well-ventilated area.
- ✅ Test: Apply paint to a hidden spot to check for adhesion over the old finish.
This project is one of the most cost-effective ways to change the feel of a room, typically costing between $15 and $30 for quality supplies. By focusing on the edges, you transition from a standard slab to a piece of architectural intent.
.
💡 Why This Works
This two-tone approach transforms an otherwise invisible utility door into a deliberate architectural element that connects your rooms. By painting the edges to match the transition, you create a seamless visual flow that feels intentional rather than accidental, effectively erasing the “builder-grade” feeling from your home’s interior transitions.
Design Benefit: It provides a custom, bespoke feel that rewards you every time you open a door.
With all nine strategies now on the table, you have a clear roadmap for upgrading those flat, builder-grade slabs into intentional architectural features. Focus on the one or two applications that best suit your layout, as these specific adjustments provide the most significant shift in quality and visual weight.
Implementing a few deliberate changes – like custom interior designs or refined hardware – is what effectively separates a standard door from a bespoke piece. Choose the methods that align with your long-term goals and execute them with precision to ensure the result feels polished and permanent.
Related posts
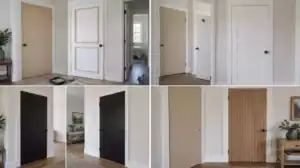 Flat Door Makeovers That Look Custom-Built Not Builder-Grade
 Bifold Door Makeover From Builder-Basic to Built-In Looking
 Closet Door Makeover for a Custom-Built Look on a Basic Door
 11 Hollow Core Door Makeovers With Molding and Paint
 Front Door Makeovers That Transformed the Entire Entrance
 12 Mirrored Wardrobe Door Makeovers for Dated Bedrooms
 10 Front Door Makeovers for Red Brick Houses
 Transform Interior Doors From Builder Basic to Designer Looking