Choosing a front door that balances security, durability, and aesthetics is one of the most significant investments for your home. This guide narrows the process down to 10 ideas worth your attention so you can decide with confidence and secure long-term value. Let’s start with the build.
Core Material and Build

Selecting the right material balances your home’s security, energy efficiency, and long-term resale value.
As an Amazon Associate I earn from qualifying purchases. Affiliate links may earn me a commission at no extra cost to you.
Your entry door is the primary barrier between your home and the outside world, making the material choice a foundational decision. Most homeowners choose between three main categories: Steel, Fiberglass, and Solid Wood.
Each material carries a different lifecycle and performance profile that directly impacts your maintenance burden. Understanding these differences ensures you aren’t paying for repairs in a few years time.
The ROI Advantage
If you are keeping resale value in mind, fiberglass leads the pack with approximately 71.9% ROI. In comparison, wood typically hovers between 60–65% due to the higher ongoing maintenance required to keep it from weathering.
Avoid These Mistakes
- Choosing steel doors with less than 24-gauge thickness, which compromises impact resistance.
- Installing wood doors in high-humidity zones without a rigorous sealing schedule.
- Neglecting to seal the bottom edge of a door during installation, which leads to rot regardless of the material.
.
🏡 Real-Home Application:
- Climate compatibility: Prioritize fiberglass for volatile weather zones to prevent seasonal binding and avoid the warping typical of wood.
- Daily performance: Expect a polyurethane-core fiberglass door to provide superior thermal retention, keeping your entryway free of drafts year-round.
- Visual authenticity: Choose a high-end wood-grain texture on fiberglass to achieve the warm, classic aesthetic without the constant maintenance burden.
Solid Wood vs. Engineered Core

Understanding core construction is the best way to prevent seasonal warping and binding.
Many homeowners assume that a solid wood door is the gold standard for exterior use, but that isn’t always the case. Direct exposure to the elements can cause solid blocks to expand and contract, leading to splits or binding that makes a door difficult to operate.
Instead, look for engineered cores designed specifically for exterior performance. These use cross-grain construction to neutralize the natural movement of the wood, providing significantly better stability in volatile weather zones.
You can verify the quality of your door by checking its weight and grain pattern. A quality solid or high-end engineered door should feel substantial, typically weighing between 60 and 80 lbs.
The Grain Inspection Test
Check the edge of the door for the grain pattern. A true solid block will have a continuous, natural grain pattern, whereas a veneer will often show repeating or stopped patterns where the thin layer has been applied.
If you live in a region with high humidity or extreme temperature swings, an engineered core is the smartest choice for your home. It provides the aesthetic warmth of wood without the seasonal headache of a door that refuses to close properly.
.
📋 Quick Reality Check: Before You Commit
- Weigh the build: Confirm the door weighs between 60 and 80 lbs, which signals the density required for true structural integrity.
- Assess your climate: If your home experiences extreme temperature swings, prioritize an engineered core to avoid the seasonal binding common with solid wood.
- Verify the grain: Inspect the door edge for a continuous, natural grain pattern to ensure you are getting a solid block rather than a veneer.
Lock and Security Rating

A high-grade locking system creates a serious perimeter that keeps your home truly secure.
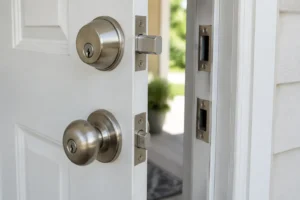
Your front door is only as strong as its weakest component, and that is usually the latch or deadbolt. If you install an expensive, solid door but pair it with entry-level hardware, you have effectively neutralized your own security.
The industry benchmark for residential protection is ANSI/BHMA Grade 1 compliance. This certification ensures the hardware has been tested to withstand rigorous physical force and repeated use that would cause lower-grade locks to fail.
Avoid the “Weak Link” Trap
Never settle for Grade 3 hardware on an exterior entry. It compromises the structural integrity of the entire door system and is often the first point of failure during a forced entry attempt.
Beyond the grade, pay close attention to the physical specs of your deadbolt. A 1-inch (25mm) deadbolt throw is the absolute minimum requirement to ensure the bolt extends far enough into the frame to provide genuine resistance.
Equally important is how that hardware connects to your home. You must secure the strike plate with 3-inch (76mm) structural anchor screws.
These screws are long enough to pass through the door frame and bite deeply into the actual wall studs. If your installer uses the short, standard-issue screws that only anchor into the soft wood door jamb, the lock will likely rip through the frame under pressure.
Security Compliance Checklist
- ☑ ANSI/BHMA Grade 1 deadbolt installed.
- ☑ 3-inch structural screws anchoring strike plate to studs.
- ☑ 1-inch minimum deadbolt throw.
- ☑ Strike plate reinforced for impact resistance.
.
⚠️ Common Mistakes to Avoid When Securing Your Entry
- Hardware Mismatch: Never install Grade 3 hardware on an exterior door, as it lacks the physical fortitude to resist basic forced-entry attempts.
- Short Anchors: Avoid using standard 0.75-inch screws for your strike plate; they only grip the jamb and will easily tear away under pressure.
- False Security: Don’t mistake a fancy decorative handle for a secure deadbolt; always verify the 1-inch throw requirement independently of the aesthetic trim.
Frame and Threshold Strength

A properly engineered threshold acts as the primary defense against water intrusion and air leaks.
Think of your door frame as the chassis of an entry system. If the frame is flimsy, even the most expensive, solid door will fail to provide the security or energy efficiency you are paying for.
For a reliable entry, you need a frame constructed with a minimum 16-gauge steel. This thickness provides the structural rigidity necessary to resist forced entry and prevents the frame from bowing over time.
The Threshold Geometry Rule: Always ensure your threshold is sloped at a 2-degree angle away from the house. This specific geometry is non-negotiable for shedding water away from your subfloor.
You also need to maintain the correct gap between the door and the threshold to balance energy efficiency with the reality of home settling. Aim for a maximum gap of 3/16 inch (4.7 mm).
Anything wider than this will invite drafts and moisture into your home. If the gap is too tight, you risk the door binding during seasonal temperature shifts.
Warning: Never allow an installer to skip the sill pan installation. A sill pan is the only reliable way to prevent subfloor rot caused by water migrating under the threshold over the life of your door.
Finally, confirm that your installer uses 3-inch hardened steel screws to anchor the frame into the structural wall studs. Relying on short, decorative screws into the door casing provides zero protection against a kick-in entry.
.
📋 Quick Reality Check: Frame and Threshold
- Gauge Verification: Confirm your frame is at least 16-gauge steel to ensure it won’t bow or fail under pressure.
- Drainage Angle: Use a level to verify the 2-degree threshold slope, which is critical for shedding water away effectively.
- Anchor Inspection: Check that your installer uses 3-inch hardened steel screws to anchor the frame directly into home studs.
Balancing the aesthetic impact of your entryway with the hard reality of security ratings can feel like a heavy lift. However, you do not need every single detail to be perfect to achieve a high-performing result that adds real value, as seen in these proven ROI strategies.
Focusing on structural integrity and the right hardware ensures your door provides lasting security without requiring you to obsess over every minor design choice.
Panel Style and Proportions

Achieving timeless curb appeal through balanced proportions and authentic architectural panel design.
The visual impact of your entryway relies heavily on the scale of its components. While aesthetic preferences vary, sticking to time-tested geometric ratios ensures your door feels intentional rather than like an afterthought.
Aim for a 1:2 or 2:3 vertical aspect ratio when selecting your door configuration. This traditional sizing aligns with the proportions of most historic and contemporary home facades, creating a sense of balance that feels naturally right to the eye.
Proportion Checklist:
- Stile and rail widths should measure between 4 and 6 inches for structural integrity.
- Ensure the vertical aspect ratio sits at 1:2 or 2:3 for visual harmony.
- Choose classic six-panel designs for an enduring, timeless aesthetic.
When selecting your door, pay close attention to how glass is incorporated into the panel design. Many budget-conscious options use grilles trapped between two panes of glass, which often look flat and artificial up close.
Opting for SDL (Simulated Divided-Lite) configurations provides a far more authentic, high-end look by placing physical bars on the exterior and interior glass surfaces. This creates the depth and shadow lines associated with traditional craftsmanship, significantly elevating the perceived value of your entryway.
Avoid the Grille Trap: While internal grilles make glass cleaning easier, they often compromise the authenticity of the door’s architectural style. If you want a door that looks substantial and custom-built, prioritize SDL designs over internal grille options.
.
💡 Designer Note: Why Proportions Matter
Beyond simple geometry, the width of stiles and rails dictates how a door carries its visual weight. On a busy facade, overly thin frames can look flimsy, while excessively wide rails crowd the panel space. Choosing a 4–6 inch width provides the necessary “heft” to make your entry look structurally grounded and intentional rather than purely decorative.
Glass and Sidelight Options

Enhance your entryway with glass that balances natural light, curb appeal, and uncompromising home security.
Glass inserts are often the most vulnerable point of an entry system, creating a potential shortcut for intruders. To maintain your home’s security perimeter, prioritize impact-rated materials that resist forced entry rather than standard decorative glass.
For homes located in high-wind zones or areas where security is a primary concern, look for inserts tested to ASTM E1886/E1996 standards. These units have passed the large-missile test, which fires a 9-pound board at 50 feet per second to simulate debris impact.
Security Insight: Sidelights are statistically the most common point of entry during a break-in because the glass can be shattered to reach the interior deadbolt. Always use laminated glass with an internal interlayer, which holds the shards together even if the surface is struck.
Expect to budget an additional $700–$1,200 per insert for true impact-rated glass configurations. While this represents a significant upfront cost, it is a necessary investment for any door situated less than 30 feet above grade.
Avoid This Mistake: Never rely on basic decorative glass for sidelights without confirming it includes a laminated security layer. A decorative grille-between-glass provides zero structural resistance to impact.
.
💰 What This Really Costs
- The impact premium: Plan to add $700–$1,200 per insert for hurricane-rated glass that meets strict ASTM safety requirements.
- Hidden installation labor: Don’t forget that reinforcing sidelights or fitting custom heavy-duty glass often requires specialized secondary labor fees.
- Long-term value: Investing in impact-rated inserts is money well spent if your home sits less than 30 feet above grade.
Finish and Weather Resistance

Protecting your investment starts with a high-quality finish that withstands the elements year-round.
The longevity of your front door depends heavily on how you shield it from the environment. While the material you choose provides the structural foundation, the finish and weather resistance determine how that door survives the sun, rain, and temperature swings.
The Primer Trap: Skipping a high-quality primer is the most frequent cause of premature paint failure on exterior doors. Even if your door comes pre-finished, ensure the base layer is compatible with your chosen topcoat to prevent adhesion issues.
If you have opted for a natural wood door, you must commit to a rigorous maintenance schedule to prevent checking and rot. Achieving a durable finish on wood typically requires 8–10 coats of spar varnish, which provides the necessary UV protection and flexibility to move with the wood as it expands and contracts.
For painted doors, your choice of sheen is just as important as the brand of paint used. You should avoid flat finishes entirely, as they trap dirt and moisture, leading to faster degradation.
- ✓ Finish Selection: Use semi-gloss or satin finishes to ensure water beads off the surface rather than soaking in.
- ✓ Lifespan Expectancy: A high-quality paint job should last 5–7 years, while polyurethane coatings typically require attention every 3–5 years.
.
✨ Finishing Touches
Beyond the main surface, the hardware finish and threshold seal are the details that ultimately prevent moisture from compromising your door’s core over time.
- Hardware coordination: Match your deadbolt and handle finish to the door’s undertones to prevent visual clutter and premature pitting.
- Threshold maintenance: Apply a silicone-based lubricant to the weather stripping annually to keep the seal flexible and airtight.
Standard vs. Custom Sizing

Getting the dimensions right now saves thousands in custom fabrication and installation headaches later.
When you start shopping, you will quickly notice that the entry door market splits into two distinct paths: stock and custom. Staying within standard sizing is the single most effective way to keep your project costs under control.
Standard door units typically measure 36 inches by 80 inches, though 32-inch and 34-inch widths are also common. Choosing these dimensions keeps your installation costs in the $1,160 to $1,452 range.
Custom doors are beautiful, but they often carry a price tag three to five times higher than standard units. You can easily find yourself spending between $3,500 and $8,500+ for bespoke sizing.
The most common mistake homeowners make is measuring the door slab itself rather than the rough opening. Your door unit requires a specific gap between the frame and the wall studs to allow for proper shimming and squaring.
Avoid the Measurement Trap: Never order a door based on the existing door skin dimensions. Always remove the interior casing to verify the actual rough opening size.
If you have an old house with non-traditional dimensions, consult with a contractor before committing to a custom build. Often, minor reframing to fit a standard door size is more cost-effective than ordering a bespoke unit.
.
⚖️ Quick Decision Guide: Standard vs. Custom
- Choose standard if: You want to keep installation costs under $1,500 and avoid multi-month lead times for manufacturing.
- Skip standard if: Your home has historic or non-traditional rough openings that would require expensive, structural wall reframing.
- Pair it with: High-quality flashing tape and a professional-grade sill pan to ensure your new unit stays airtight.
Installation Requirements

Proper installation is the final step in ensuring your door performs as a secure, weather-tight barrier.
You can purchase the most expensive, secure door on the market, but it will fail if it isn’t installed correctly. A poorly hung unit leaves your home vulnerable to drafts, moisture intrusion, and potential security breaches at the frame.
To ensure a professional fit, your rough opening needs to be precisely 2 inches wider and 2.5 inches taller than the door unit itself. This extra space allows for the necessary shimming and squaring required to keep the door operating smoothly for years.
The Dollar Bill Test
Once the door is hung, verify your seal compression by closing the door on a dollar bill. If you can pull the bill out without any resistance, your weatherstripping isn’t tight enough and you are likely losing heat.
Beyond the fit, the weather-proofing steps are non-negotiable for a long-lasting entry. You must ensure that your installer includes mandatory flashing tape and a proper sill pan installation to protect your home’s subfloor from rot.
Installation Red Flags
- Skipping the flashing tape around the perimeter of the door.
- Using spray foam as the primary structural anchor for the door frame.
- Failing to install a dedicated sill pan under the threshold.
- Ignoring the 2-degree slope requirement for water shedding on the threshold.
If you are hiring a professional, confirm these specific steps before they begin work. A standard installation typically costs between $500 and $1,500, and it is money well spent to keep the unit secure and structurally sound.
.
🧰 Questions for Your Installer
- Flashing approach: What specific flashing tape and sill pan method will you use to prevent subfloor rot?
- Structural anchoring: Can you confirm the frame will be anchored directly into the wall studs using 3-inch screws?
- Warranty coverage: Does your installation labor come with a guarantee against air infiltration and door binding issues?
10. Long-Term Maintenance

Protect your investment with simple habits that ensure decades of smooth, reliable performance.
The secret to a 50-year entry system is a 10-minute quarterly inspection, not an expensive overhaul. When you keep the components working in harmony, you prevent the small issues that lead to rot or hardware failure.
Establish a maintenance log for your home records to track when you last sealed or lubricated your entry. This simple documentation adds tangible value and transparency when it comes time to list your property for resale.
Hardware care is often overlooked, but it is the most common cause of “sticky” doors. Use graphite lubricant specifically for your lock cylinders to keep the tumblers moving freely.
For hinges, switch to a high-quality silicone-based spray. Avoid WD-40 at all costs, as it acts as a dust magnet and will eventually gum up your mechanical parts.
Keep a close eye on the weatherstripping for signs of compression or cracking. If you notice drafts or light peeking through the edges, replace the seals immediately to prevent moisture from entering the frame.
Watch for signs of seal failure early. If you see peeling paint or dark spots near the threshold, moisture has already started to compromise the material, and you should address the sealing issue before it leads to rot.
.
🔢 The Right Sequence for Door Care
Tackling maintenance in the proper order prevents you from dragging debris into clean seals or accidentally gumming up fresh hardware.
- Clean the frame: Remove all dust and loose debris before applying any lubrication or seals.
- Test the hardware: Apply graphite to locks and silicone to hinges to ensure smooth, zero-resistance operation.
- Seal the perimeter: Inspect and adjust weatherstripping last to ensure a perfect, airtight compression fit.
With all ten variables on the table, the path to a high-performance entry is much clearer. You do not need to address every single technical detail at once to see a meaningful shift in your home’s security and appeal. Focusing on the one or two structural calls that align with your climate and budget will define the success of this project far more than trying to perfect every minor component.
A solid core and a properly rated lock system provide the foundation for lasting value. Once those essentials are secured, you can explore timeless door styles that bring your vision to life. Make the decision that serves your home’s future, and the rest will follow.
Related posts
 Why Choose French Doors
 12 Wood Front Door Color Ideas for Timeless American Homes
 Charm and Elegance Unleashed: The Timeless Appeal of Timber French Doors
 How Much Can You Cut Off a Solid Wood Door? A Complete Guide
 Solid Core Timber Doors
 How Wide Do French Doors Open and How Do You Secure Them?
 Can French Doors Be Solid?
 15 Best Front Door & Curb Appeal Ideas That Buyers Notice First