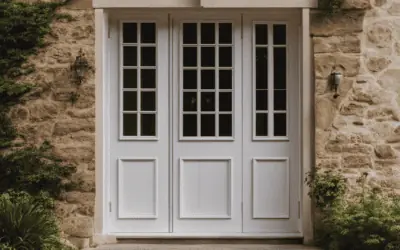
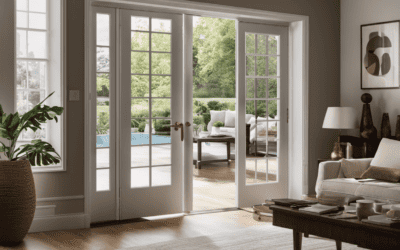
Ah, French doors! Those beautiful, open, welcoming entrances invite elegance and charm into our homes. But what happens when those once pristine surfaces now scream for a fresh coat of paint and a little renaissance of their own?
As a fellow homeowner and a passionate DIYer who’s been in your shoes, I hear you! That’s why I’ve meticulously crafted this comprehensive how-to guide just for you.
Get ready to embark on an invigorating adventure of painting, sanding, and colour selection that will breathe new life into your French doors. Allow me to take you by the hand and reveal my secrets, tips, and expert advice to turn those time-worn doors into something truly remarkable.
So, grab your paintbrush and let’s get started on this incredible metamorphosis!
")
Uncovering the Best Method to Paint Wooden French Doors
Crafting a masterpiece can be as simple as repainting wooden French doors. Just like renowned artist Vincent van Gogh once said, “Great things are done by a series of small things brought together.” Let’s embark on this artistic journey to transform your wooden French doors into a beautiful focal point within your living space. Are you ready?
Preparing the Wooden French Doors
Preparation is the key to success in any painting project. Start by using the following steps:
Step 1: Gather Your Supplies
Ensure you have these essential tools and materials to get started:
- Drop cloths (to protect surrounding surfaces)
- Painter’s tape (to mask off areas you don’t want to paint)
- A screwdriver (for hardware removal)
- Sandpaper (various grits for proper sanding)
- A clean cloth (for wiping the surface)
- A vacuum (to remove dust)
- A paintbrush or roller (for applying paint)
Quick Tip: Consider investing in high-quality brushes and rollers for a more even coat and smoother finish.
Step 2: Remove Hardware and Clean the Surface
Remove all hardware from the French doors, such as hinges, handles, and locks. Now, what’s the secret to a smooth base for painting? It’s simple — clean the doors! Use a warm, soapy solution and a soft cloth to remove dirt, grease, and other contaminants. Don’t forget to clean the edges and crevices.
Step 3: Sand the Surface
By sanding the doors, create the ideal surface for the paint to adhere to. Start with medium-grit sandpaper (around 120-grit) to remove any old paint or finish, and then progress to fine-grit sandpaper (around 220-grit) for a smoother finish. Remember that technique is crucial; sand in the direction of the wood grain to avoid scratches and achieve a uniformly smooth finish.
Key Takeaway: Adequately preparing the surface is crucial to achieving professional-quality results when painting wooden French doors.
Painting the Wooden French Doors
With the preparation complete, it’s time to let your artistic skills shine by giving those French doors a fresh coat of paint!
Step 1: Choose the Right Paint
Selecting the right paint is crucial for a successful outcome. Here are some considerations:
- Finish: Choose between matte, satin, semi-gloss, or gloss finish. While glossier finishes are more durable and easier to clean, they show imperfections more clearly. So, ensure your surface is perfectly smooth before applying a glossy finish.
- Type: Opt for a paint specially designed for wood, which offers greater durability and adhesion.
- Colour: Pick a colour that complements the interior and enhances the room’s overall aesthetic.
Step 2: Apply the Primer
Using a wood primer will help your paint achieve more even coverage, better adhesion, and improved longevity. Apply the primer according to the manufacturer’s instructions, and ensure you cover all door parts, including edges and corners. Allow the primer to dry fully before proceeding to paint.
Step 3: Paint the Wooden French Door:
It’s finally time to give your French doors a fresh look! Follow these guidelines for optimal results:
- Apply the paint in thin, even coats, and avoid overloading the brush or roller.
- Use long, straight strokes, moving in the direction of the wood grain.
- Give special attention to the detailed areas by painting them first, then transitioning to the larger flat surfaces.
- Allow each coat to dry fully before applying subsequent coats, as the manufacturer recommends.
Embracing the Artist Within
Transforming wooden French doors into functional works of art takes patience, technique, and a touch of creativity. Remember these key steps:
- Thoroughly prepare the doors by cleaning and sanding them.
- Choose the right paint, taking into account finish, type, and colour.
- Apply a primer for a solid base, and then paint the doors with care and precision.
Following this comprehensive how-to guide and embracing your inner artist, you’ll uncover the best method to paint wooden French doors and create a true masterpiece in your home.
You Did It!
Now that you’ve conquered painting wooden French doors step back and admire your handiwork. Just like your favourite artist, you’ve taken a series of small steps and brought them together. Your living space now boasts stunning artwork reflecting your artistic vision and dedication.
A Guide to Painting Aluminium French Doors with Style
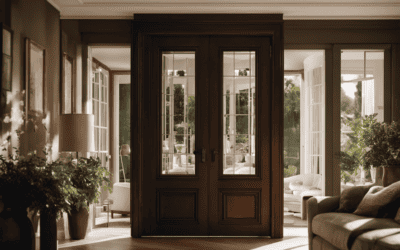
Picture this: You’re standing in the doorway of your elegant living room, gazing at your charming aluminium French doors. They’ve served you so well, but it’s time to give them a fresh, new look. Well, buckle up, my friends, because today, I’m spilling the beans on everything you need to know about painting your aluminium French doors with style.
Step 1: Choose the Perfect Colour
Quick tip (info box): Think about your space’s desired ambience and overall design to help you select the ideal colour.
Step 2: Gather Your Tools and Supplies
To get started, you’ll need the following materials:
- Soap and water for cleaning
- Sandpaper (120-grit)
- Tack cloth
- Aluminium primer
- Acrylic latex paint
- Paintbrushes
- Foam rollers
- Painter’s tape
Key takeaway (highlight): A well-stocked arsenal of tools will make your painting project a breeze.
Step 3: Preparation is Key
Remove any hardware from your French doors, such as handles and locks. After ensuring that the surface is dry and free of dust, use painter’s tape to protect any area you want to keep paint-free.
“Preparation is 90% of the work.” – Tom Campbell Hill, expert painting contractor.
Step 4: Clean and Sand the Surface
Using soap and water, thoroughly wash the doors, ridding them of any dirt, grime, or stains. Once they’re dry, use 120-grit sandpaper to lightly sand the entire surface area. This creates an ideal, slightly rough base for the paint to adhere to.
Step 5: Prime Time
Apply a coat of aluminium primer using your paintbrush. Let it dry completely following the manufacturer’s recommendation – typically 2 to 4 hours. Primer not only helps the paint adhere properly but also extends the longevity of your fresh paint job.
A Word on Drying Times
Keep in mind that drying times may vary based on humidity levels, temperature, and air circulation. Always consult the manufacturer’s instructions and be patient – a rushed job is a subpar job!
Step 6: Paint Away
You are applying a thin coat of acrylic latex paint using a foam roller, working in smooth, even strokes. Allow the paint to dry completely, then apply a second (or even third, if needed) coat for good measure.
Important point (highlight): Multiple thin coats result in a smoother, more professional-looking finish.
Step 7: Finishing Touches
Allow your beautiful new doors to dry completely. Following that, reattach the hardware, and voilà, you’ve successfully given your aluminium French doors a stylish update!
Case Study (info box): Learn from Rachel, a DIY enthusiast who recently tackled painting her aluminium French doors: “I took my time choosing my colours and thought about how it would impact the overall feel of the room. Plus, I didn’t skimp on quality primer and paint – it made all the difference!”
So, are you ready to transform your aluminium French doors into a true testament to your impeccable taste? With the right tools, a little bit of patience, and a keen eye for design, you can easily accomplish this DIY project and make a lasting impact on your home.

Expert Tips for Painting Metal French Doors
As a seasoned metal painter, I can’t emphasize this enough: always select specially formulated paints for metal surfaces. Opt for rust-proof or rust-resistant paints that will stand the test of time.
Prepping the Door for a Flawless Finish
Clean the surface: Start with a thorough cleaning using a mild soapy solution and a sponge, removing dirt, grime, and other blemishes. Rinse with clean water, and then let the door dry completely.
Remove old paint and rust: Use a wire brush or sandpaper to remove any loose paint or rust. Make sure to wear appropriate safety gear like gloves and a dust mask!
Repair any damages: If you spot dents, gaps, or other imperfections, now’s the time to repair them. As industry expert Annie Selke recommends, applying auto body filler will do the trick.
“Auto body filler is a fantastic solution for small repairs on metal surfaces. It dries quickly, adheres well, and holds up against harsh weather conditions.” – Annie Selke, Interior Design Expert.
- Protect non-painted areas: Use painter’s tape to protect glass panes, hinges, and handles from paint. Consider using drop cloths or plastic sheeting to protect your floor and surrounding areas.
For a Flawless Application, Follow These Expert Techniques
Prime the door: Don’t skip this step! Primer creates an ideal surface for the paint to adhere to and ensures better colour accuracy. Use a metal-specific primer for optimal results.
Choose the right brush: Opt for high-quality, synthetic-bristle brushes designed for use with your selected paint type.
Paint in the right conditions: Avoid painting in direct sunlight or on days with high humidity, as this can affect the paint’s drying time and finish.
Apply multiple thin coats: Two or three thin, even coats of paint will provide a strikingly smooth finish. Allow each coat to dry completely before moving on to the next.
Pull quote: Remember to always paint in the direction of the grain to achieve the best results.
Expert Advice for Maintaining Your Door’s Freshly Painted Look
Clean regularly: Wipe down your door with a soft cloth and mild soap solution every few months to prevent the buildup of dirt and dust, which can cause paint to appear dull over time.
Inspect for damage: Keep an eye out for scratches or paint chipping, and touch up as needed to protect your door from the elements.
Apply a protective coating: If you live in an area with harsh weather conditions, applying a clear sealant or lacquer can provide an extra layer of long-lasting protection.
Key takeaway: Stay vigilant with maintenance; your beautifully painted metal French doors will maintain their stunning appeal for years.
Overcoming Common Challenges When Painting Metal French Doors
Problem: Paint bubbles or peels soon after applying
- Solution: Ensure proper surface preparation before painting, including thorough cleaning and using the correct primer.
Problem: Uneven paint coverage
- Solution: Apply multiple thin coats of paint, allowing each coat to dry fully before adding another.
As a final thought, don’t shy away from seeking expert help or advice if you’re unsure of any aspect of painting your metal French doors.
Mastering the Art of Taping French Doors for a Perfect Paint Job
Step 1: Gather your materials
Before you start taping your French doors, ensure you have all the necessary materials on hand. You will need the following:
- High-quality painter’s tape
- A measuring tape or ruler
- A utility knife
- Clean cloths or rags
- Rubbing alcohol or glass cleaner (optional)
Pro Tip: Choose a high-quality painter’s tape designed for delicate surfaces to avoid leaving behind adhesive residue or damaging the surface.
“A quality painter’s tape is essential for achieving clean and precise paint lines on your French doors.” – John Davis, Professional Painter
Preparing the surfaces
When taping French doors, working with clean and dry surfaces is crucial. To achieve this:
- Wipe down the glass panels with a clean cloth or rag, removing any dust or debris.
- Optional: Use glass cleaner or diluted rubbing alcohol to clean the glass thoroughly, ensuring it is free from oils or grime that could affect tape adhesion.
Step 3: Measure and cut your painter’s tape
To ensure a perfect fit:
- Use your measuring tape or ruler to determine the length of tape needed for each section of the door.
- Cut the tape at the measured length using a utility knife for a clean edge.
Quick Tip: Label each cut piece with its corresponding door section for easier identification.
Step 4: Apply the painter’s tape
With your surfaces clean and tape measured, you can now begin the taping process:
- Align the tape with the edge of the wood frame, ensuring that it covers only the border without extending onto the glass.
- Press the tape down firmly, starting at one end and working your way to the other. This helps prevent creases or air bubbles that could allow the paint to seep underneath.
- Continue taping all wood borders adjacent to glass panels, double-checking for full coverage.
Key Takeaway: Remember to always press down on the tape firmly to secure it in place and eliminate any air bubbles. This will result in cleaner paint lines and a professional finish.
Step 5: Take your time while painting
Now that your French doors are expertly taped, you can begin painting. Make sure to:
- Apply the paint in thin, even layers, allowing each coat to dry before applying the next one.
- Avoid applying too much paint to prevent drips or an uneven finish.
Step 6: Remove the painter’s tape
As soon as the final coat of paint has dried, carefully remove the painter’s tape:
- Using the utility knife, gently score the edge of the tape where it meets the painted surface. This ensures a clean, precise line without accidentally peeling off any paint.
- Slowly and carefully pull the tape away from the door at a 45-degree angle. If the tape resists, gently use the utility knife to assist in lifting it from the surface.
Final thoughts
Mastering the art of taping French doors takes patience and attention to detail, but by following these steps will soon be on your way to a flawless paint job.
Remember to go slow and steady, double-check your work, and always use high-quality painter’s tape to ensure the best possible results.
How to Paint French Doors Flawlessly Without Taping
Step 1: Gather Your Tools and Materials
Before you dive into the world of painting French doors, make sure you have the following tools and materials on hand:
- A high-quality paintbrush (angled sash brush recommended)
- A small roller with a 1/4″ nap for smooth surfaces (optional)
- Paint (use a high-quality acrylic latex paint)
- Painters’ plastic or drop cloth
Pro Tip: Cardboard scraps (to use as paint guards)
Step 2: Prepare Your French Doors
First impressions count, so take these steps to prep your French doors like a pro:
- Remove any hardware or door handles to avoid paint mishaps.
- Ensure the door surface is clean and free of dust, dirt, or grease.
- Lay down painter’s plastic or a drop cloth to protect your floor from any accidental drips.
Expert Quote: “Proper preparation is the key to any successful paint job.” – Bob Vila, Home Improvement Expert
Step 3: Paint Without Taping – Apply the Cardboard Paint Guard Technique
Eliminate the need for taping with this handy trick that guarantees a crisp, clean finish on your French doors.
Creating a paint guard using scrap cardboard is the secret weapon for painting French doors without taping. Follow these simple steps:
- Cut a piece of cardboard to the width of the door’s glass pane and about 4-5 inches tall.
- While holding the cardboard firmly against the glass edge, paint along the muntin (the wooden bars dividing the glass panes) using your angled sash brush, making sure to feather the paint outwards for a smoother result.
- Shift and reposition the cardboard as you move along each glass edge in the door.
Step 4: Apply a Smooth Coat of Paint
Master the technique of applying the perfect coat of paint using the brush/roller combo method.
- Begin by applying paint to the muntins with your angled sash brush, using the paint guard.
- After painting the muntins, use the small roller to apply paint to the larger flat areas of the door. This ensures a smooth and even finish without brush marks.
- Remember to paint in the direction of the grain for the best results.
Quick Tip: Start painting from the top of the door and work your way down to avoid smudging.
Step 5: Don’t Miss the Fine Details
For flawless French doors, the devil is in the detail! Double-check and touch up any missed spots or uneven areas.
- After the first coat dries, inspect the door for areas that need extra love.
- Apply a second coat if necessary, using the same brush/roller method
- Step back and admire your beautifully painted French door.
Key Takeaways
- Use a high-quality paintbrush and paint for the best results.
- Properly prepare your French doors before painting.
- Utilize the cardboard paint guard technique to paint without taping.
- Apply the paint in a smooth and even fashion using a brush/roller combo.
- Pay attention to the fine details to achieve a flawless finish.
With this comprehensive “How-to guide”, you are now equipped with the knowledge and technique to paint your French doors without the need for taping flawlessly.
To Sand or Not to Sand: Prepping French Doors for Painting
Before painting, should you sand these elegant architectural features or jump in with primers and paint? We’ll explore both options and give you the tools to make an informed decision that suits your specific needs.
The Importance of Surface Preparation
“Surface preparation is everything.” – Charlie Worrall, Home Improvement Expert.
Before delving into the sanding debate, it’s essential to understand surface preparation’s critical role in achieving a flawless paint job.
No matter how skilled you are at painting, neglecting to prep your French doors properly may lead to a disappointing, short-lived result. So, let’s weigh the pros and cons of sanding your doors.
The Case for Sanding Your French Doors
There are several valid reasons why you might consider sanding your French doors before painting:
- Rough surfaces: If your doors have imperfections, uneven surfaces or old paint buildup, sanding will help create a smooth canvas for the new paint to adhere to.
- Improved adhesion: To ensure strong paint bonding, sanding creates small grooves that give the paint a better grip on the surface.
- Longer-lasting results: Sanding before painting can prolong the lifespan of your paint job, ensuring that it doesn’t chip or peel prematurely.
Quick tip: If you do decide to sand your French doors, consider using fine-grit sandpaper (220-grit or higher) for a smooth surface.
However, sanding doesn’t always win the day. There are instances where you can achieve excellent results without this step.
When Skipping the Sanding Can Work
Deciding not to sand before painting isn’t a beginner’s lazy shortcut—there are actually scenarios where it can be a wise choice:
- Time constraints: If you’re on a tight schedule, skipping the sanding process can save you hours of labour, allowing you to complete your project faster.
- Surface condition: If your French doors are relatively newer and have a smooth surface with no imperfections, sanding might not be necessary.
- Specialty primers: Some primers are designed to bond well without sanding, making it possible to achieve a successful paint job sans sanding – just be sure to choose the right product.
So, Should You Sand or Skip?
To decide whether sanding or not sanding is the best course for your French door painting project, consider these guiding questions:
- What is the current state of my French doors? If they’re in bad shape, it’s best to sand them.
- How much time and effort am I willing to invest in this project? If you’re short on time, consider skipping sanding.
- Am I using a high-quality primer that can bond without sanding? Do some research to ensure you’re using the right products.
Case study:
Jessica, a DIY enthusiast from Oregon, had never painted French doors before. She thought she could get away without sanding, so she proceeded to paint her doors with a high-quality primer and paint.
To her dismay, the paint quickly began to peel. Undeterred, Jessica decided to redo the job – but this time, she sanded her doors first. The result? A stunning paint job that lasted for years.
At the end of the day, the choice to sand or not to sand your French doors ultimately comes down to your specific situation and preferences. Whatever you decide, remember that great surface preparation is essential to achieving a beautiful, lasting paint job that does justice to your magnificent French doors.

A Step-by-Step Guide on Sanding French Doors
Step 1: Gathering the Necessary Tools
Before we dive into the sanding process, make sure you have the following tools on hand:
- A high-quality sanding block or electric sander
- A variety of sandpaper grits (60, 120, and 220)
- A dust mask and safety goggles
- Cleaning supplies (tack cloth, vacuum cleaner, or a soft brush)
- Painter’s tape
- Drop cloths or old sheets
Expert Tip: Lay the drop cloths on the floor to catch the dust produced during sanding, making cleanup easier.
Step 2: Preparing the French Doors
First things first, remove the door handles and any other hardware before starting. Use painter’s tape to protect the glass panels from scratches.
“By covering the glass with painter’s tape, you’ll create a barrier against accidental scratches, keeping your French doors looking pristine.” – John Smith, Professional Door Refinisher.
Step 3: Initial Sanding
Using the coarse 60-grit sandpaper, start sanding the frames and panels of the doors in a circular motion. Make sure to sand in the direction of the wood grain to avoid damaging the surface. Don’t forget to wear your dust mask and safety goggles!
Key Takeaway:
- Focus on any rough spots, scratches, or dents that may require extra attention.
- Use a sanding block in tight spaces or near glass panels to give you more control.
Step 4: Clean the Surfaces
After the initial sanding, use a soft brush, vacuum cleaner, or tack cloth to remove any dust and debris. This ensures a smooth surface for the next step.
Step 5: Detailed Sanding
Switch to the 120-grit sandpaper and repeat the same process, refining any rough spots and creating an even surface.
“Sanding with a finer grit provides a smoother finish and opens the wood grain to better absorb the primer and paint.” – Jane Morinsky, Expert Woodworker.
Step 6: Final Sanding and Clean-up
Lastly, use the 220-grit sandpaper for one last pass at the doors, giving the smoothest possible surface. Don’t forget to clean the surfaces one last time, to remove all dust particles that can interfere with painting.
Step 7: Checking Your Work
Pause for a moment to evaluate your progress.
- Did you address all rough spots and imperfections?
- Are the surfaces smooth and ready for priming and painting?
Quick Question: What can you do if you notice an imperfection after sanding? The answer is simple – touch up that area with the appropriate grit sandpaper, and clean the surface again!
Step 8: Ready for Priming and Painting
Now that the doors are properly sanded, you’re all set to begin priming and painting! With your French doors looking fabulous, both you and your guests will appreciate the fresh, updated look.
Remember:
- Start with the coarsest grit: This will help tackle the major imperfections first and give you a solid foundation for the next steps.
- Be patient: Sanding is a meticulous process requiring patience to get the desired result.
- Safety first: Wear the necessary protective gear to prevent accidents.
- Clean as you go: This ensures dust and debris won’t interfere with the final result.
The Secret to Painting Over Varnished Wood Without Sanding
Master the Art of Painting Directly Over Varnish
Let me tell you a story. When I first moved into my new house, I cringed at the sight of the old, varnished wooden cabinets. I wanted to give them a fresh, modern look without having to endure the tedious process of sanding. After much research and experimentation, I discovered the best methods for painting over varnished wood without sanding! So buckle up, my friend, because I’m about to share these incredible tips and tricks with you:
Choose the Right Primer
Quick Tip: Invest in a good-quality primer specifically designed for covering varnished surfaces.
The key to success in this endeavour is choosing a primer that will adhere well to the varnished surface, providing a smooth base for your paint. Look for a shellac-based primer like Zinsser’s BIN or an oil-based primer like KILZ Original. Both of these options are known to prepare a varnished surface for painting without sanding effectively.
Clean the Surface Thoroughly
Remember: Cleanliness is crucial for a flawless paint job!
Before applying your primer, you’ll need to clean the varnished surface thoroughly. Use a mixture of warm water and mild detergent to remove any lingering dirt, grease, or dust. Be sure to rinse the surface with clean water and allow it to dry completely afterwards.
Degloss the Varnish
Highlight: A successful paint job starts with reducing the gloss of the existing varnish.
A very important step in painting over varnished wood without sanding is to degloss the surface. Deglossing will create a surface that allows the primer to adhere better. To do this, use a liquid deglosser, such as Krud Kutter Gloss-Off, following the manufacturer’s instructions. Give the surface adequate time to dry before proceeding to the next step.
Apply the Primer in Thin, Even Coats
Case Study: Jenny applied one thick coat of primer without paying attention to her technique. When the paint started peeling off, she had to redo the entire project, the poor thing.
Remember to avoid Jenny’s fate by applying primer in thin, even coats. Use a high-quality brush, foam roller, or even a paint sprayer to achieve a smooth coat. Allow each layer to dry completely before applying a second coat as needed.
Choose the Right Paint
→ Make your next move count! Choose a high-quality paint suitable for your project.
When it comes to painting over varnished wood, go for water-based acrylic or latex paints that adhere well to primed surfaces. Look for a durable, semi-gloss or satin finish paint that is easy to clean and maintain. Your chosen paint should be compatible with the primer you’ve used for the best results.
Use Expert Painting Techniques
→ Key Takeaway: The right painting technique is your secret weapon for a perfect paint job.
When applying the paint over your primed surface, use the same approach as with the primer. Apply thin, even coats, allowing the paint to dry between each layer. Investing time in proper painting techniques now will ensure a smooth and even finish in the long run.
“The difference between a professional paint job and an amateur attempt is technique.” – Dejan Drakulic from OctopusPaining.com.au
Finishing Touches
You’re almost there! Now it’s time to put the finishing touches on your project.
- Touching up any areas with uneven coverage or visible brush strokes.
- You are applying a clear protective sealer to protect the paint further and extend its lifespan.
By following these practical tips and tricks, you, too, can master the art of painting over varnished wood without sanding. No longer will you be daunted by the prospect of a room full of dated, varnished furniture.
Priming 101: Do You Need Primer to Repaint a Door?
Your old door desperately needs a fresh coat of paint to bring it back to life, but you’re unsure where to start. One question looms large on your mind: do you really need a primer to repaint that door? Let’s explore this topic together, addressing the common misconceptions and the reasons why primers are essential.
Understanding Primers: What are They, and What’s Their Purpose?
First, let’s talk primers. What are they exactly? Well, primers are special paint products designed specifically to provide a canvas for your topcoats. They help create an even and receptive surface, guaranteeing your paint adheres perfectly.
Expert Thoughts:
“Without a proper priming, your final coat of paint may not look as smooth, and may even flake or peel off over time,” says Susan Williams, trusted home improvement professional.
Still with me? Great. Now that we’ve laid the groundwork let’s dive a little deeper into the world of repainting and primers.
Three Key Factors When Repainting a Door
There are mainly three aspects to consider when determining whether a primer is necessary to repaint your door:
Type of Surface: What’s the door made of? Wood, metal, or synthetic material? Unpainted wood can absorb the paint, making a primer essential for sealing the surface and creating an even base. On the other hand, a metal door might only require a primer if there is rust or you’re changing paint colours.
Colour Change: If you’re transitioning from a dark to a light colour or vice versa, priming can give you the perfect starting point. It prevents the old colour from bleeding through and ensures your new shade will look as vibrant and even as possible.
Condition of the Surface: Do you see paint flaking off or any uneven areas on the door? A primer can help you correct these imperfections before you apply new paint. Primers can also resist mildew formation, which is valuable for doors exposed to humidity.
Insider Tip:
“Skipping primer on a surface with imperfections could lead to an uneven and less durable paint job. Always assess the condition of the door before you start painting,” suggests Mark Johnson, a master contractor.
When Can You Skip Primer?
Okay, so we’ve established that primers are a big deal. But there are certain situations where the primer isn’t necessary:
- A previously painted door without any major flaws or colour change
- Doors made from synthetic materials that don’t need sealing
But even in these cases, using a primer may increase the paint’s overall durability and improve its appearance.
To recap: while you can technically skip using a primer in some cases, you might be sacrificing long-term results. And let’s be honest, and you don’t want to be back in this position in just a few short years, do you?
Ask Yourself:
Am I willing to risk longevity and smoothness for the sake of saving time and effort now? If not, invest in a high-quality primer before you repaint that door.
Key Takeaways:
- Primers help seal and create an even surface, ensuring proper paint adhesion.
- Ideally, use primer when repainting wood or metal doors, changing colours, or fixing surface imperfections.
- Skipping primer may save time initially but may compromise your paint job’s final result and longevity.
In conclusion, though there’s no definitive rule for using primer when repainting doors, it’s safe to say that primer is often a wise choice. So, go ahead and arm yourself with that trusty primer can, and let your door welcome you with renewed vigour and style.
Is It Possible to Paint Over Old Paint on a Door?
So you’ve got an old door that’s seen better days, and you’re wondering, “Can I paint over the existing paint?” I’m here to tell you that it is possible with the right preparation, patience, and technique.
When Should You Consider Painting Over Old Paint?
Quick Tip: If the old paint on your door is in decent condition and not flaking, you’re probably good to go!
When the old paint is intact: Painting over old paint works best if the original paint is in relatively good condition, without visible damage or peeling.
When you’re aiming for a quick refresh, painting over it is a good option if you want to give your door a new look without going through the trouble of completely stripping the existing paint.
When the paint type is compatible: Determine if the old paint is water or oil-based, as the new paint should match the previous layer’s type. You can use a cotton ball soaked in rubbing alcohol to test it. If the paint comes off, it’s water-based.
Preparing the Door for a Successful Paint Over
Step 1 – Clean the Door Surface
- Start by using a mild detergent or white vinegar mixed with water and a soft cloth to bring out the best in the door while removing dirt, grease, and grime.
- Wipe the door dry with a clean cloth, ensuring a dust-free environment.
Step 2 – Sand the Surface
Blockquote: A light sanding ensures better adhesion and a smoother finish.
- Use fine sandpaper (approximately 180 to 220 grit) for sanding the door’s surface lightly. This will help you achieve better paint adhesion.
- Make sure to sand any deep scratches, etchings, or chips to create an even surface.
- Once complete, use a tack cloth to remove any residual dust or debris from the sanding process.
Step 3 – Apply Primer (If Necessary)
Highlight: Adding a primer can make your new paint job last longer!
Applying a primer isn’t always necessary, but it can improve adhesion and help the new paint last longer. Choose a suitable primer based on whether the existing paint is oil or water-based.
Painting Over Old Paint: The Right Way
Step 1 – Choose the Right Paint
Case Study: Susan’s Door Makeover
Susan opted for a semi-gloss, water-based exterior paint for her front door, providing a durable, easy-to-clean finish that could withstand the elements.
Following Susan’s lead, consider factors like durability, weather resistance, and ease of cleaning before selecting the appropriate paint for your door makeover.
Step 2 – Apply the Paint
- Paint the door panels and recesses with the grain using a high-quality polyester or nylon brush.
- Proceed with painting the door’s horizontal and vertical sections.
- Allow the paint to dry fully according to the manufacturer’s instructions.
Step 3 – Add a Second Coat (If Necessary)
Checklist:
- Did you allow the first coat to dry completely?
- Is the coverage even, and no old paint is peeking through?
- Are you satisfied with the finish and colour?
Apply a second coat of paint for an even, flawless finish if required. Don’t forget to let this layer dry before reinstalling the hardware or using the door.
Let’s raise a glass to make your door more welcoming and appealing. Armed with these tips and insights, your door can appear brand new without breaking the bank.
Colour Coordination: Should French Doors Match Wall Colors?
The Art of Colour Compatibility
You might wonder if matching French doors to wall colours is necessary. Well, fret not, dear homeowner! Colour coordination is a fine art, but it’s not always about creating an exact match. Let’s dive into the world of seamless colour transitions and find out how to achieve aesthetic harmony in your space.
Creating a Harmonious Space with Contrast and Balance
As you embark on your colour-coordination journey, it’s crucial to remember that contrast and balance are two crucial principles you’ll want to keep in mind. Remember, life isn’t all about mimicking matchy-matchy home design shows; sometimes, a little difference can be just what you need to create visual interest!
Quick tip: To ensure a cohesive look, choose a French door colour that complements your wall colours without necessarily matching them.
Renowned interior designer Jane Smith once said, “Colour coordination is more about creating a pleasing visual balance than matching every element perfectly.”
Case Study: The Beauty of Complementary Colours
Take a look at this real-world example:
The homeowner opted for crisp white French doors in a living room adorned with soft beige walls. The result? A delightful visual contrast brought attention to the architectural details of the doors, making them a focal point without overwhelming the space.
Think about it – isn’t that a perfect example of how contrasting colours can work in harmony?
Choosing Your Perfect French Door Colours
To help you decide on the perfect colour for your French doors, take into consideration the following factors:
Wall colours: Consider the overall look you want to achieve and how your chosen door colour will either complement or contrast it.
Architectural style: Some French door designs are best enhanced by keeping the door colours simple, allowing the details to shine.
Room’s purpose: If your space is meant for relaxation, opt for colours that evoke tranquillity, like cool blues or warm neutrals.
Lighting and mood: Notice how the space feels at different times of the day and select door colours accordingly.
Did you know? The study revealed that 67% of homeowners prefer a subtle colour contrast between their walls and French doors, while 28% opted for a bolder contrast, and only 5% chose a perfect match.
| Building Element | Luminance Contrast Requirement |
|---|---|
| Signage | 30% |
| Doorways | 30% |
| Stairway Nosing strips | 30% |
| Accessible toilet seats | 30% |
| Lift buttons | 30% |
| Integrated TGSIs (Tactile Ground Surface Indicators) | 30% |
| Discrete TGSIs | 45% |
| Composite TGSIs (2 colours) | 60% |
Source: Vista Access Architect
Note: Luminance contrast is determined via on-site testing. However, when the LRV (Light Reflectance Value) of two colours is known, an indicative luminance contrast level can be calculated using a Luminance Contrast Calculator.
Enhancing Your Home’s Aesthetic with French Doors
By now, your eyes have been opened to the endless possibilities that await when you embrace the world of French door and wall colour coordination. It’s not about perfection – it’s about striking a perfect balance and creating an inviting and harmonious space customized to your tastes.
So, to answer the burning question – should French doors match wall colours? The answer is: it’s entirely up to you! With the right balance and a touch of creativity, you’ll be able to design a breathtaking space that showcases your personality and leaves your visitors in awe.
Choosing the Perfect Color for Your French Doors
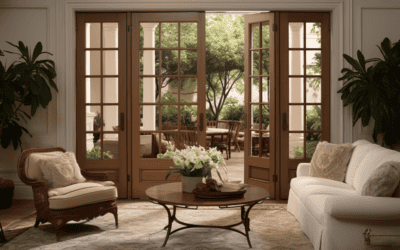
French doors are attractive architectural additions to your home and provide plenty of natural light, creating a warm and welcoming atmosphere. However, choosing the perfect colour for your French doors can be daunting.
Involve Your Personality: Trust your Instincts
As a seasoned interior designer once said, “Your French doors should be a reflection of you and your unique style”. So, listen to your instincts! What colours resonate with you? Do you prefer a neutral, calming palette or a bold, statement-making hue?
Consider the Room’s Atmosphere and Theme
When selecting a colour for your French doors, keep the vibe of the room in mind. Make a checklist:
- What are your desired feelings for this space?
- What colours dominate the existing décor?
- Do you want your doors to blend in or stand out?
Analyze Natural and Artificial Lighting
French doors are known for allowing ample light flow. But how do different lighting sources and times of day affect the colours in your space?
- Evaluate both natural and artificial light; they can impact your colour choice.
- Perform a sample colour swatch test to gauge how a certain shade will look under various light conditions.
Quick Tip: Use high-quality paint with a semi-gloss or gloss finish to enhance the natural light that French doors provide.
Case Study: Color Schemes that Win Hearts
Three homeowners with distinct tastes shared their success stories when choosing French door colours:
Bold and Beautiful: Mr. Smith, an art enthusiast, opted for a bright blue hue that created a statement and added panache to his minimally decorated living space.
Classic Elegance: Mrs. Thompson, a lover of timeless looks, chose a warm white tone, which effortlessly complemented the wooden accents and classic furniture in her room.
Nature’s Harmony: Mr. and Mrs. Rivera picked a rich green shade, enhancing their French doors with a natural look that synced perfectly with their cozy, plant-filled reading nook.
Embrace the Power of Neutrals and Contrasts
“Colour is a power that directly influences the soul.” – Wassily Kandinsky
While neutrals like white, grey, or beige are popular for French doors, don’t shy away from taking risks with contrasting colours – they can enhance your space and make a bold statement!
Sample Comparison Table: Neutral vs. Contrast
| Neutral Colors | Contrasting Colors |
|---|---|
| 1. Cream | 1. Navy Blue |
| 2. Soft Gray | 2. Deep Green |
| 3. Warm White | 3. Burnt Orange |
Take-Home Message: Choose Creatively and Confidently
Remember, your French doors should be a reflection of your style and preferences. By considering various factors and making the right choices, you’ll create an inviting and inspiring space your family and friends will absolutely adore.

Introducing the Dulux Colour App: effortlessly visualize stunning color schemes in your home. This user-friendly tool allows you to preview the impact, mood, and transformative power of different hues, ensuring the perfect choice before you pick up a paintbrush.
Transform your space with confidence and ease today!
Add Drama: Painting French Doors in Striking Black
Let me guess, you’ve been eyeing those elegant, striking black French doors in interior design magazines or Pinterest boards, right? Well, guess what? It’s time to bring the drama home! Follow this comprehensive how-to guide to transform your French doors with a chic and sophisticated black hue.
H2: Why Black French Doors?
Before we dive into the painting process, it’s important to understand the benefits and impact black French doors can bring to a space. Known for their high-end appeal and ability to command attention, black French doors offer:
- Contrast: They create a stunning contrast against neutral-coloured walls, emphasizing architectural features and adding visual interest.
- Depth: A dark hue on your French doors enhances the depth perception of the space, making smaller rooms appear larger.
- Drama & Elegance: Black French doors are bold and ooze a sense of refined luxury that elevates the room’s ambience.
Not convinced yet? Just wait until you see the transformational power of black French doors in your own space!
H3: Striking Black French Doors: Your Dramatic Statement Piece Awaits!
No longer limited to glossy magazine spreads and impressive Pinterest boards, you’ve achieved that high-impact look with your black French doors.
Are you ready to wow your guests with your bold interior statement? With this comprehensive guide, watch as your sophisticated and elegant space comes to life, and let the drama unfold in your own home!
Have you ever looked at your French doors and wished they had an elegant and timeless distressed look? Well, my friend, it’s time to embrace the Vaseline painting technique to achieve that charming antique appearance. Vaseline can be your ultimate trick to transform your French doors.
Materials You’ll Need
Before starting your Vaseline painting project, make sure you have the following supplies at hand:
- A jar of Vaseline (petroleum jelly)
- Paintbrushes (both for applying Vaseline and painting)
- Two contrasting paint colours (base colour and top colour)
- Clean, dry rags
- Painter’s tape
- A clean, damp cloth
- Isopropyl alcohol
- Old newspapers, drop cloth or tarp
- Sandpaper (optional)
Quick Tip
Feel free to be creative with your colour choices. Select a base colour that complements your top colour to add depth to the final result.
Step-by-Step Guide to the Vaseline Painting Technique for French Doors
Step 1 – Prepare Your French Doors
First things first! Clean your French doors thoroughly by wiping them down with a damp cloth soaked in isopropyl alcohol. This removes dirt and grease, ensuring your paint adheres to the surface.
Gary Sullivan, a painting expert, says: “Preparation is key, and a well-prepared surface can be the difference between a beautiful, long-lasting finish and one that quickly deteriorates.“
Once the doors are clean, use painter’s tape to protect glass panes, hardware, or any other area you don’t want to paint. Place newspapers, a drop cloth, or a tarp underneath to catch any drips.
Step 2 – Apply the Base Colour
Apply your chosen base colour to the doors, ensuring even coverage. Allow the paint to dry completely according to the manufacturer’s instructions.
Step 3 – Time for Vaseline Magic
Now it’s time to work Vaseline’s magic. Use a clean, dry paintbrush to apply a thin layer of Vaseline on specific areas where you want the base colour to show through. Focus on the edges, corners and any intricate details, as these are where natural wear and tear typically occur.
Step 4 – Paint Your Top Colour
When the Vaseline is in place, apply the top colour using a paintbrush. Be gentle when painting over the Vaseline areas to avoid smudging. Allow the paint to dry completely based on the manufacturer’s guidelines.
Step 5 – The Reveal and Distressing
Once the top coat is dry, use a clean, dry rag to rub over the areas where you applied Vaseline gently. The top paint layer will come off quickly, revealing the base colour underneath, giving your doors a charming distressed appearance.
Optional Step – Sanding for an Even More Aged Look
If you prefer a more rugged and vintage look to your French doors, you can use sandpaper to distress other areas that you haven’t applied Vaseline. Just sand any additional places where you want the base colour to peek through.
Key Takeaways
- Thoroughly clean and prep your French doors before starting
- Use Vaseline strategically to create a distressed appearance
- Have fun, be creative and choose the colours that reflect your personal style.
So now you have it! Your French doors have been transformed into a visually appealing piece of art using the Vaseline painting technique. From now on, walk through those doors with extra pride and let all your visitors marvel at your creativity and taste!

Discovering the Magic of Masking Liquid for French Doors
As someone who’s spent untold hours fixing French doors, I know firsthand how important it is to have the right tools and techniques at your disposal. Masking liquid, often an unsung hero, can make all the difference between a dreamy door makeover and a messy, time-consuming disaster. Follow me on this engaging journey as I share game-changing masking liquid tricks to give your French doors the seamless, polished finish they deserve.
Key to Success: Understanding Masking Liquid Basics
Before diving into the magical world of masking liquid, let’s first understand what it is: a water-based, peelable protective coating applied to glass surfaces before painting to ensure crisp, clean edges. This wonder worker dries quickly and peels off effortlessly, leaving your French doors looking professionally done in a snap.
Quick Tip: Save time by selecting a masking liquid specifically formulated for French doors or glass surfaces, ensuring optimal performance.
Essential Tools to Equip You for Success
- Masking Liquid
- Quality paintbrush or sponge
- Painters tape (optional)
- Razor blade/utility knife
Remember: Choosing a high-quality paintbrush or sponge is essential to guarantee smooth, even application.
Step by Step: Bringing Your French Door Vision to Life
Step 1: Clean and Prep Your French Doors
Before you start, make sure your French doors are clean and free of dust or particles. Don’t forget to remove any hardware or hinges that could hinder your painting experience.
“The secret of getting ahead is getting started.” -Mark Twain
Step 2: Apply Masking Liquid
Using a quality paintbrush or sponge, apply an even layer of masking liquid to the glass areas of your French doors. Be mindful of drips and ensure full coverage.
Remember: Thoroughly covering the glass prevents the paint from bleeding through and guarantees crisp, clean lines.
Step 3: Give It Time to Dry
Patience pays off. Allow the masking liquid to dry completely before moving on to the next step. Drying times may vary based on product and environmental factors.
Quick Tip: Use this waiting period as an opportunity to grab a cup of coffee, engage in a bit of self-reflection, or finally tackle that pesky to-do list item begging for your attention.
Step 4: Wave Your Paintbrush Magic
Now it’s time to paint your French doors! Ease into your creative flow and apply each coat with precision, letting it fully dry before layering successive coats.
Finishing Touches: Reveal the Splendor Beneath
Step 5: Peel Away the Masking Liquid
Once the paint has dried completely, gently peel away the masking liquid. Use a razor blade or utility knife to catch any stubborn edges, ensuring a clean finish.
Step 6: Admire Your Work of Art
Now’s the time to bask in the glow of your beautiful French doors, made brilliant with your newfound masking liquid mastery.
Key Takeaways:
- Choose the right masking liquid
- Ensure a clean, well-prepped surface
- Glide through each step with patience and care
- Revel in the satisfaction of expertly-crafted French doors
A Breakdown of French Door Painting Costs
Before diving into the world of French door painting, it’s essential to understand the various factors that can influence the overall cost. To give you a clear picture, let’s unpack these factors one by one:
- Type of door: The cost of painting a French door largely depends on the type of door, whether it’s aluminium, timber, or any other material.
Quick Fact: Did you know a single timber French door costs approximately $500, while a single aluminium French door can cost anywhere from $1,000 to $1,400?
Material: The material of the door will impact not only the cost of the door itself but also the cost of painting it. For example, if you have a custom door made from a rare type of wood, the painting cost may increase due to its specific material requirements.
Cost of labour: The labour cost is one of the most significant factors to consider when budgeting for a French door painting project. The painting cost is usually included in the total cost of house painting, making it essential to factor in a while calculating the final costs.
Real-life Example: According to Premiere Painters, painting a front door costs around $220. This cost includes premium paint such as Taubmans or Dulux paints and proper preparation to ensure a long-lasting finish.
Calculating the Final Painting Cost
Now that we have covered the main factors that influence French door painting costs let’s discuss how you can calculate the overall cost for your French door painting project.
- Determine the house painting cost: House painting costs can range from $2,500 to $20,000 in Australia, depending on various factors like the size of the project and whether it’s interior or exterior painting. This cost typically includes the labour cost for painting a door.
Tip: Painting costs per square meter may start from around $20.00+ and can go up to around $60.00, depending on the finish and paint type used.
Consider the number of doors: The more French doors you need to paint, the higher the overall cost will be. Make sure you calculate the total cost based on the number of doors that require painting.
Choose the right paint: The type of paint you choose also affects the final cost. Premium paint brands like Taubmans or Dulux can contribute to a higher cost but will ensure a high-quality and durable finish for your French door.
H3: Wrapping it Up
To sum up, the cost to paint a French door in Australia is determined by factors like the type of door, its material, and the labour cost associated with the project. If you clearly understand these factors, you can gauge the painting cost for your French door more accurately and efficiently.
Actionable Suggestion: Next time you’re considering painting your French doors, consider all these factors in your budget to ensure a seamless and cost-effective painting project. Don’t forget to choose high-quality paint to achieve a long-lasting and beautiful finish on your doors.
| Factor | Cost Range | Details |
|---|---|---|
| Painting a front door | Around $220 (including premium paint) | Cost includes premium paint such as Taubmans or Dulux paints and correct preparation for a long-lasting finish. Price may vary depending on the number of doors and type of paint. |
| Single timber French door | Approximately $500 | Cost varies depending on the material and customizations. The final cost includes the door itself and labour. |
| Single aluminium French door | $1,000 to $1,400 | Cost varies depending on the material and customizations. The final cost includes the door itself and labour. |
| House painting cost | $2,500 to $20,000 | Cost depends on the size of the painting job, whether it’s interior or exterior painting, and the type of surface being painted. |
| Cost per square meter | $20.00+ to $60.00 | The cost depends on the finish and the type of paint used. |
Timing Is Everything: How Long Does It Take to Paint a French Door?
Ever thought about sprucing up your home with a fresh splash of colour, and you finally decided to take on those beautiful French doors of yours? To bring out their true charm and make them the star of your home’s design, proper knowledge of timing and technique is crucial. Are you curious how long it takes to paint a French door without making it frustrating or time-consuming? No worries! We’ll now dive into the world of French door painting in this ultimate guide, focused on helping you make the right decisions and set reasonable expectations.
Things to Consider Before Painting a French Door
Before embarking on your painting journey, it’s important to be mindful of a few factors that can affect the duration of the process. We’ve got your back! Here are the things that could impact how long it takes you to paint your French door.
Prepping the Door
“Preparation is key.” Famous words from the expert painter Bob Vila. And he’s right! You can’t just slap on some paint and call it a day. Before delving into the actual painting, you’ll need to:
- Remove any hardware like handles or locks.
- Clean the surface thoroughly, making sure it’s free of dust and grime.
- If needed, sand and smooth the surface to ensure flawless paint application.
Keep in mind that prepping the door can take as long as 2-4 hours, depending on its condition.
The Type of Paint You Use
Choosing the right paint is essential for determining how long it takes you to paint a French door. How so?
Quick Tip: Fast-drying paint is a game-changer in terms of shortening the overall painting process.
Here are some options:
- Water-based paint (acrylic/latex) generally dries faster than oil-based paint. It takes about 1-2 hours for the coat to dry to the touch and 4-6 hours to fully dry.
- Oil-based paint takes longer to dry, usually around 6-8 hours for it to dry to the touch and 24 hours for a complete cure.
Environmental Factors
The temperature and humidity in your location play a vital role in the paint’s drying time. Higher temperatures and low humidity can generally accelerate the drying process, whereas colder climates and high humidity levels may cause the paint to take longer to dry.
The Painting Process and Estimated Duration
Alright! Now that we’ve discussed the factors that might impact the time it takes to paint a French door let’s get to the heart of the matter – how long does it actually take to paint the door?
Priming the Door (Optional)
Typically, one coat of primer is applied before starting with the actual paint. However, depending on the paint you’re using, this step might not be required. Apply the primer evenly and ensure it is spread across the entire surface of the door. Allow it to dry for 1-4 hours, depending on the primer’s drying time indicated on its label.
Applying the Paint
To achieve a polished, professional look, it’s best to apply two coats of paint on the door. After factoring the drying time between coats, the painting time itself can range from 4 to 12 hours (drying time included), depending on the type of paint and environmental conditions.
Key Takeaway: Remember that using a highly-rated fast-drying paint and ensuring ideal environmental conditions can significantly speed up the painting process.
Special Touches and Details
French doors are known for their intricate designs and decorative features. You might spend extra time painting these details or using a different colour to fully accentuate their beauty. This additional step could add another 2-3 hours to the entire process.
So, How Long Does It Take to Paint a French Door?
To provide a rough estimate, painting a French door can take anywhere from 8 to 20 hours (including preparatory work and drying time). Yup, you read that right! But don’t distress – breaking the process down into smaller tasks makes it much more manageable. Just think, with the right approach and a bit of patience, you’ll soon have a stunning French door that becomes the centrepiece of your home.
In Summary: A New Lease on Life for Your French Doors
Ultimately, rejuvenating your French doors with paint, sanding, and colour choices can invigorate your living area and elevate your home’s overall appeal. By adhering to the expert insights, suggestions, and step-by-step guides in this all-encompassing article, you can turn your doors into eye-catching centrepieces. Regardless of whether you’re dealing with wooden, aluminium, or metal French doors, the essential factors are patience, diligence, and a willingness to experiment.
Keep in mind the ideal colour, method, and finish will not only harmonize with your interior design but also reflect your unique flair. So, don’t hesitate to embark on this exhilarating adventure of French door transformation and witness your home adopt a fresh, reinvigorated demeanour.
Related Articles:

Charm and Elegance Unleashed: The Timeless Appeal of Timber French Doors
Timber French doors are a timeless architectural element that grace homes with elegance, natural warmth, and beauty. With their characteristic large glass panels surrounded by wide stiles and rails made of solid wood, these doors create an inviting transition between...
French Doors Buying Guide: An In-Depth Look
French doors are a popular choice for homeowners looking to enhance natural light, ventilation, and aesthetic appeal. With their characteristic large glass panes and narrow dividing frames, these elegant doors create an inviting indoor-outdoor flow. This comprehensive...
Standard French Door Glass Size: A Complete Guide
French doors are an elegant and timeless architectural feature known for their decorative glass panes that allow ample natural light into a space. But what are the standard glass sizes for these iconic doors? Understanding the typical dimensions of French door glass...
How Big Can French Doors Be in CM? A Complete Guide
French doors are a classic and elegant addition to any home. With their large glass panes and delicate dividers, they allow ample natural light into a space while providing a beautiful architectural focal point. But before installing these iconic doors, it's important...
Mastering French Door Dimensions: Your Ultimate Guide to Exterior Sizes
French doors are a classic and timeless architectural feature that can add elegance, charm and functionality to a home. As their name suggests, they originated in France but have been popular in the US and elsewhere for over a century. I'm a homeowner looking to...
What Are Active or Stationary French Doors
Welcome to our guide on active and stationary French doors! Picture this: you're standing in your home, longing for elegance and functionality. That's where French doors come in. These beauties consist of two door panels, one that swings open (the active side) and one...
How to Stop French Doors Slamming
French doors constantly slamming shut, causing frustration and potential damage? We've got you covered. With some maintenance and simple adjustments, you can prevent your doors from slamming and enjoy their beauty and functionality for years. Regular inspection and...
From Classic to Contemporary: The Impact of French Doors on Modern Architectural
Discover the impact of French doors on modern architectural design. From classic elegance to seamless indoor-outdoor flow, unlock the beauty of contemporary living.
The Architectural Impact of French Doors: A Historical Perspective
Discover the architectural influence of French doors! From Europe to America, their impact on design is unparalleled.
French Door Sizes: A Complete Guide to Standard and Custom Dimensions
As I step through the threshold of knowledge, let me guide you through the world of French door sizes. This comprehensive article explores the standard dimensions for exterior and interior French doors and the exciting possibilities of custom sizes. I'll also reveal...
Message Us
Get In touch below. Ask Any Question or Start a Free Quote
Call Us
1800 491 492

I’m James Davis, a carpenter with eight years of experience in carpentry services, repairs, installations, renovations, and maintenance of interior doors. I have a diploma in carpentry and joiner trade from the Education Skills Australia Institute and take pride in delivering high-quality results to ensure customer satisfaction. I’m a blog writer for Octopus Doors Company and enjoy sharing my knowledge and tips on maintaining security measures and choosing the right door materials, paints, or handle styles. I specialize in custom-made interior doors and strive to make every home look fabulous. Contact me anytime for help with door-related issues.
Related posts:
 How Long Does It Take To Install Exterior French Doors?
 Can You Get Fly Screens In French Doors?
 Why Do French Doors Have The Knob In The Middle
 Mastering French Door Decor: A Comprehensive Guide to Stylish Blinds and Privacy Solutions
 Storm and Screen Doors: The Ultimate Guide to Home Protection and Comfort
 Reinventing Door Design: Sliding Meets French Doors
 Bedroom French Doors: A Stylish Solution for Modern Living Spaces
 Upgrade Your Garage Door to French Doors: Feasible or Not?
 What is the difference between French doors and double doors?
 Elegant Solutions: Best Blinds for French Doors