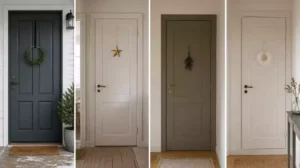
Upgrading builder-basic bifold doors is a practical way to achieve a custom look without the expense of full replacement. This guide focuses on 8 essential steps that ensure your doors operate smoothly and look like high-end cabinetry. Let’s start by removing the panels for your planned upgrades.
1. Take Down the Bifold Panels
Carefully removing your doors preserves the hardware and ensures a smooth, professional installation later.
As an Amazon Associate I earn from qualifying purchases. Affiliate links may earn me a commission at no extra cost to you.
Most DIYers make the mistake of yanking on these panels, which is the fastest way to strip the hardware or damage the door jamb. Because bifold doors rely on a delicate system of pivots and guides, you need to be methodical to keep the mechanisms intact for reinstallation.
The secret is the pivot-first removal method. You aren’t just pulling the door off; you are disengaging the tension that holds it in place.
The Two-Person Rule: Bifold panels are often hollow-core and prone to bowing if handled by one person. Always have a helper support the door weight once you release the top pivot to prevent snapping the pins or twisting the frame.
Before you touch a tool, grab a roll of painter’s tape and a marker; labeling each panel as “left” or “right” and noting which side faces the hallway is non-negotiable. If you mix up the panels or flip them, the original hardware holes will be misaligned, turning a simple upgrade into a frustrating geometry puzzle.
Follow these steps to safely clear the track:
- Clear the path: Fully open the doors so the panels are flat against the wall, giving you clear access to the top pivot hardware.
- Release the tension: Use a flathead screwdriver to gently depress the spring-loaded pivot pin located in the top track.
- Tilt and lift: Once the pin is compressed, pull the top of the panel toward you until it clears the track, then lift the entire door straight up to disengage the bottom bracket.
- Store securely: Lay the panels flat on a clean surface – like a set of sawhorses or a clear floor space – to avoid warping or damaging the edges while you work on the surface.
Avoid This Common Mistake: Never force the bottom pivot out of its bracket while the top is still secured. This puts immense pressure on the top hinge and track, often resulting in bent pins or a stripped track channel that will never slide smoothly again.
⭐ Top Hardware Kits for Bifold Doors
✨ Editor’s Pick
Bifold Closet Door Hardware Repair Kit
Replacement Top Track Guide for Bifold
Heavy Duty Hidden Pivot Door Hinge
⚠️ Watch Out for These Hidden Hazards:
- Hardware fatigue: Avoid using power drills to remove pivot screws, as they easily strip the soft metal heads.
- Track debris: Neglected bottom tracks often hide grit that causes uneven seating; vacuum them before reinstalling your doors.
- Weight stress: Never attempt a one-person removal; the leverage required can snap the hinge pins or warp the frame.
Sand and Clean the Surface

Proper surface prep creates the necessary grip for a durable, factory-look paint finish.
Most DIY bifold projects fail before the first coat of paint even touches the surface. Those cheap, builder-grade doors come from the factory with a high-gloss, synthetic sheen that acts like a non-stick coating. If you try to paint directly over that slick surface, your finish will peel or chip within months. You have to break that factory seal to give your primer and paint a fighting chance.
The goal isn’t to strip the door down to the raw material, but to create a “tooth” for the new finish to grab onto. Follow this two-stage sanding progression to get the surface ready:
- 180-grit sandpaper: Use this first to aggressively break the existing sheen. You want to see the gloss disappear into a dull, matte finish across the entire door.
- 220-grit sandpaper: Follow up with this finer grit to smooth out any deep scratches or imperfections left by the 180-grit pass. This ensures your final paint job doesn’t show texture marks from the sanding process.
Pro-Tip: Respect the Grain
Even on faux-wood or composite doors, always sand in the direction of the grain. Sanding across the grain creates cross-hatch scratches that will show through your paint as permanent, unsightly lines. If you aren’t sure which way the grain runs, look closely for the subtle lines or patterns in the factory finish and stick to that path.
Once you finish sanding, the surface will be covered in fine dust. This is the stage where most people make a critical mistake by just wiping the door with a dry rag. That leaves behind microscopic residue that prevents paint adhesion. You need a clean, oil-free surface to get that professional, built-in appearance.
Use denatured alcohol on a clean, lint-free cloth to wipe down every inch of the door. This chemical is ideal because it cuts through residual oils and evaporates almost instantly, leaving no dampness behind that could swell the door material. If you don’t have denatured alcohol, use a vacuum with a soft brush attachment followed by a tack cloth to ensure the panels are completely free of particles.
Mistake-Avoidance Check
Avoid using heavy-duty household cleaners or abrasive scouring pads. These can leave behind chemical residues or create deep gouges that are nearly impossible to fill later. Stick to the grit progression and denatured alcohol for a clean, reliable foundation.
⭐ Essential Tools for Door Maintenance
Professional Auto Trim Removal Tool Kit
✨ Editor’s Pick
Adjustable Door Hinge Gap Wrench Tool
Adjustable No Drill Wall Hanger Hooks
🔢 The Right Sequence
Following this specific order prevents you from trapping dust or oils under your finish, which is the leading cause of premature paint failure on bifold panels.
- Mechanical Prep: Remove hardware and panels to access all edges and corners.
- Surface Abrasion: Sand thoroughly with 180-grit, then 220-grit, moving strictly with the grain.
- Chemical Cleanup: Wipe down with denatured alcohol immediately before priming to ensure full adhesion.
3. Add Panel Molding or Trim

Create depth and custom character by adding low-profile molding to flat, builder-basic doors.
The secret to achieving that high-end, built-in look isn’t just about paint – it’s about adding dimension. By applying low-profile trim to your existing flat-surface bifolds, you create the shadow lines and visual weight typically found on expensive custom cabinetry.
However, this is where most DIYers run into trouble. If your trim is too thick or placed too close to the hinge line, the doors will bind, hit each other, or fail to fold flat entirely. Before you cut a single piece of wood, you must account for the mechanical realities of the door’s swing.
Never let your trim extend into the hinge gap or overlap the jamb path. Always maintain a buffer zone around the outer edges of the door panels, or you will lose the ability to open your closet without the doors snagging or popping out of the track.
To get the alignment perfect, follow the dry-fit rule: lay your trim pieces out on the door face while the doors are flat on your sawhorses. Use a pencil to mark your margins, ensuring the pattern is perfectly symmetrical across both panels. Once you are satisfied with the layout, use construction adhesive and small brad nails to secure the trim in place.
Avoid the temptation to use heavy wood pieces; stick to lightweight materials like thin panel molding or 1×3 strips. If you keep the trim confined to the marked safe zones on the door face, you will maintain the mechanical integrity of the bifold hardware while gaining that custom, built-in aesthetic.
⭐ Best Sanding Tools for Smooth Finishes
Comprehensive Paint Roller and Brush Kit
Precision Grade No Slip Sandpaper Sheets
✨ Editor’s Pick
High Performance Electric Wood Sander
⚠️ Where Trim Projects Go Wrong:
- Weight overload: Adding heavy, solid wood trim can overwhelm hinges, causing the panels to bow or sag over time.
- Symmetry failure: Neglecting to dry-fit the entire pattern across both panels often leads to mismatched, unprofessional-looking alignment.
- Hardware interference: Placing trim too close to pivot points or rollers prevents the door from folding, potentially stripping your track.
Maintaining smooth movement is often more about correct installation than expensive hardware upgrades. Focusing on the hardware mechanics early on prevents the frustration of doors that stick or jump off the track later.
Securing the alignment now ensures your doors operate reliably for years, making the entire project feel like a high-end, permanent installation rather than a temporary fix.
4. Fill the Gaps and Seams

Create a seamless, solid-wood appearance by eliminating visible seams between your trim and door.
The secret to making a budget-friendly bifold look like a high-end, custom-built piece is hiding the transition where your new trim meets the existing door face. If you leave those tiny gaps visible, the “add-on” nature of the project becomes obvious the moment someone walks into the room.
You need to bridge these joints so the entire door looks like one solid, manufactured panel. For most of this work, you will be choosing between two primary materials, and picking the right one is what saves you from having to redo the work in six months.
Material Selection: Spackling vs. Epoxy Filler
- Spackling Paste: Use this only for minor surface dings or shallow nail holes. It is easy to sand but lacks the structural integrity for larger gaps along trim seams.
- Epoxy-Based Wood Filler: This is your go-to for structural seams. It cures to a rock-hard finish, won’t shrink over time, and holds up to the constant vibration of folding doors.
Once you have applied your filler, the flush-sanding technique is what separates a amateur finish from a professional one. Do not be tempted to sand while the filler is still tacky; if you rush this, the filler will shrink as it dries, leaving you with an ugly divot that telegraphs exactly where the seam is.
Wait for the material to cure fully according to the manufacturer’s instructions. Once it is completely hard, use a sanding block with 220-grit paper to feather the filler down until it is perfectly level with the surrounding wood.
Avoid the “Shrinkage Trap”
Never skip the full curing time. If you sand too early, the filler will pull away from the edges, forcing you to fill and sand all over again. Patience here ensures the finish stays smooth and crack-free for years.
Run your fingertips across the seam after you think you are finished. If you can feel even a slight ridge or dip, keep sanding; your paint will highlight any imperfection, so the surface must be genuinely flush before you even think about picking up a primer brush.
⭐ Trim Kits for Custom Door Looks
✨ Editor’s Pick
Peel and Stick Wall Molding Kit
Self Adhesive Interior Door Frame Trim
Flexible Peel and Stick Wainscoting Panels
🔢 The Right Sequence for Seams
Getting the order right prevents the filler from cracking as the doors move and settle over time.
- Apply trim first: Secure all molding pieces with adhesive and nails before starting any filling.
- Fill while stable: Add your epoxy filler once the trim is fully set and immovable.
- Sand after cure: Wait until the material is completely hard to achieve a perfectly flush finish.
5. Prime the Panels

A smooth, properly primed base is the secret to achieving that high-end factory finish.
Skipping the primer is the fastest way to turn a weekend project into a peeling, uneven mess. Because builder-grade bifold doors are often made from slick MDF or cheap wood composites, paint simply won’t bond effectively without a high-quality primer to act as a bridge.
For the best results, lay your panels flat on sawhorses rather than trying to paint them while hanging. This prevents drips from running down the face of the door and allows you to maintain a consistent, level coat across the entire surface.
Pro-Tip: The Tool Selection Rule
Use a high-density foam roller for the large, flat faces of the door to mimic a professional spray-painted look. Keep an angled sash brush on hand strictly for the crevices where your trim meets the door face, as the roller won’t be able to reach those tight corners properly.
When you begin the application, always prime the trim details first. These corners are the most likely spots for paint to pool or leave brush marks, so tackling them while you are fresh ensures you can smooth out any excess before moving to the main panels.
The most important rule in this entire process is following the manufacturer’s label for recoat times. Every primer has a different chemical makeup, and ignoring these windows can ruin the durability of your final finish.
If you rush the recoat window, the new layers of paint may react with the primer base, causing it to lift or bubble. Patience during this stage is the difference between a door that looks like custom cabinetry and one that clearly shows its builder-basic roots.
⭐ Fillers and Putty for Flawless Seams
Wood Furniture Repair Filler Kit
✨ Editor’s Pick
Wood Filler Scratch Cover Repair Kit
Wood Filler Sticks for Furniture Repair
🔢 The Right Sequence
Following a strict priming order prevents pooled paint and ensures a professional, uniform adhesion across your entire door assembly.
- Detail Work: Use your sash brush to prime all crevices, trim edges, and corners first.
- Flat Surfaces: Roll the large panels immediately after to blend edges before the trim primer dries.
- Full Curing: Wait for the manufacturer’s specified recoat time before moving to your final paint finish.
Paint for a Built-In Look

Matching your doors to the wall color creates a sophisticated, custom-cabinet aesthetic.
Painting your bifold doors is the final step in erasing their “builder-basic” origins. The most effective strategy for achieving a high-end, custom look is to paint the doors the same color as the surrounding wall. This technique allows the doors to disappear into the architecture, turning a functional closet into a subtle, integrated feature of the room.
When you are ready to paint, keep the panels laid flat on sawhorses to prevent drips and ensure an even, factory-like coat. Start by painting the trim details with an angled sash brush, then use a high-density foam roller for the large, flat surfaces to avoid visible brush marks.
To achieve a truly professional finish, open the panels slightly while painting the center stiles and rails. This ensures you cover the hard-to-reach hinge areas and prevents paint buildup that could cause the doors to stick or crack once dry.
Always apply thin, even coats and work from the top down. If you are painting the center rails where the doors meet, take care to brush with the grain. This helps you blend your strokes and avoid those unsightly “lap marks” that often give away a DIY project. Ensure you fully respect the recoat times specified on your paint can; rushing this stage is the fastest way to ruin the finish you have worked so hard to prepare.
⭐ Primers and Rollers for Smooth Painting
Paint Roller Kit with Extension Pole
Small Foam Paint Roller Tray Set
✨ Editor’s Pick
Water Based Primer for Wood Surfaces
The Detail That Pulls It Together
To truly mimic high-end cabinetry, consider the “sheen transition” between your doors and the surrounding walls. Painting the door-frame trim and the adjacent wall in the same finish creates a seamless, monolithic look, while using a slightly higher sheen on the doors themselves adds just enough subtle contrast to highlight your new trim work without breaking the visual flow.
7. Swap the Knobs and Pulls

Elevate your doors instantly by replacing builder-grade hardware with modern, substantial pulls.
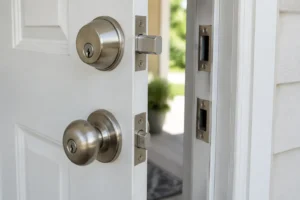
Think of your door hardware as the jewelry of the room. Those tiny, hollow-core knobs that came pre-installed on your bifold doors are often the first tell-tale sign of a builder-basic setup, but swapping them for modern, high-quality pulls is one of the fastest ways to change the entire look of your space.
Before you purchase new hardware, you need to verify compatibility with your door’s dimensions. Most bifold panels are between 7/8 inch and 1 3/8 inch thick, though some specialty doors can reach 2 1/4 inches. Ensure the screws included with your chosen pulls are long enough to pass through your door thickness, or be prepared to source alternative hardware bolts at your local shop.
Pro-Tip: The Alignment Template
Never eyeball your hardware placement. Create a simple paper or cardboard alignment template to mark your drill holes before you touch the door. This ensures every pull across all your bifold panels sits at the exact same height and horizontal distance, giving you that professional, built-in cabinetry appearance.
When selecting your new hardware, keep the weight capacity in mind. While most standard bifold panels can handle up to 30 pounds, adding heavy, solid-brass pulls to each panel can eventually affect how the doors swing if the hardware is too massive. Stick to lightweight or hollow-bodied modern pulls that provide a substantial aesthetic without adding unnecessary load to your track system.
If your new hardware has a different hole footprint than the original knobs, you will need to fill the old holes before you prime and paint. Use a high-quality wood filler, sand it until it is perfectly flush with the door surface, and ensure it is fully cured before drilling your new, precisely measured holes. Taking this extra time to prep the surface will make the new pulls look like they were part of a custom-designed piece from the start.
Avoid This Mistake
Do not skip the template step. Even a 1/8-inch discrepancy in pull placement is highly visible on bifold doors because they hang right next to each other. Symmetry is the bedrock of the built-in look.
⭐ Handles and Pulls for Modern Doors
✨ Editor’s Pick
Stainless Steel Recessed Door Pull Handle
Brass Four Leaf Clover Cabinet Knobs
Antique Brass Round Cabinet Door Knobs
✨ Finishing Touches: The Hardware Finish
Selecting a finish that complements your room’s existing metal tones ensures your DIY project feels intentional rather than like an afterthought.
- Coordinate with fixtures: Match pull finishes to nearby light fixtures, cabinet hardware, or curtain rods for a cohesive, high-end look.
- Test the contrast: Choose matte black for a modern, dramatic pop against light-painted doors, or satin brass for a warmer, classic aesthetic.
8. Reinstall and Align the Track

Precision in your final adjustments creates that smooth, high-end glide every time you open them.
This is the make-or-break moment of your project. If the mechanics aren’t dialed in, even the most beautiful custom trim won’t hide a door that drags, pops out of the track, or refuses to fold flat.
Before you even pick up a tool, verify that your header track is perfectly level and centered in the frame. If the track itself is skewed, no amount of pivot adjustment will fix the binding.
The Alignment Trap: Avoid the urge to make drastic turns on your hardware screws. Bifold geometry is incredibly sensitive; small, incremental adjustments are the only way to achieve a balanced, smooth swing.
Use this flowchart to identify exactly which part of your hardware needs attention based on the behavior you are seeing. Always clear the track of any debris or dust before attempting these adjustments, as even small obstructions can cause the rollers to jump.
Once you are satisfied with the movement, apply a light coat of silicone spray to the pivot points and the track channel. Never use heavy grease, as it will collect dust and eventually turn your smooth operation into a sticky, grinding mess.
Finalize the process by tightening all mounting screws firmly. If they are loose, the vibration from opening and closing the doors will quickly undo all your hard work.
⭐ Track Maintenance and Alignment Tools
Bifold Door Hardware Kits Repair Closet Sliding Folding Accordion Barn Door
✨ Editor’s Pick
Lithium Grease for Garage Door Tracks
Universal Sliding Closet Door Floor Guide
🔢 The Right Sequence
Following this order prevents the frustration of repetitive adjustments and protects your fresh paint job from unnecessary hardware scratches.
- Mount the head track first to ensure a perfectly level base for the pivots.
- Insert the top pivot into the track before anchoring the bottom guide bracket.
- Make fine-tune adjustments to the pivot pins only after the doors are fully hanging.
With these eight strategies to refine your bifold doors now in front of you, the path from builder-grade to custom-built becomes a matter of selection rather than a total overhaul. Focusing on the one or two tactics that address your specific door depth and style is exactly what yields a high-end, cohesive result.
The transformation of your space hinges on the precision of your trim and the alignment of your hardware. If you are looking to see how other flat door makeovers achieve this same polished look, start by grabbing your tape measure and verifying your clearance today. When you commit to a few deliberate adjustments, the final product will feel intentional and professionally finished, effectively elevating the entire room’s aesthetic.
Related posts
 Flat Door Makeovers That Look Custom-Built Not Builder-Grade
 Flat Door Makeovers That Look Custom-Built Not Builder-Grade
 15 Front Door Decor Arrangements Beyond the Basic Wreath
 Hollow Core Door Makeover DIY With Real Depth and Character
 12 Door Makeover Ideas for Plain Doors That Need a Refresh
 Front Door Makeover Ideas With Serious Before-and-After Impact
 Interior Door Makeover for a More Finished Designer-Led Look
 14 Pocket Door Ideas Built Around Tiny Bathrooms