Those plain, builder-basic doors occupy significant visual real estate in your home, but they are often overlooked as a blank canvas. This guide rounds up 12 door ideas worth saving to help you add character and find the right fit for your living space.
Fresh Coat of Paint

Transform that builder-basic flat door into a crisp, professional focal point in one weekend.
As an Amazon Associate I earn from qualifying purchases. Affiliate links may earn me a commission at no extra cost to you.
Most builder-basic doors are finished in a flat, chalky white that traps fingerprints and scuffs like a magnet. Replacing these doors is an expensive headache, but a fresh finish gives you the same impact for a fraction of the cost. Pricier looks are in latest door designs that feel expensive.
You can expect to spend between $70 and $200 on supplies depending on your existing door condition and color choice. This project is the ultimate low-risk entry point for DIYers because it relies on patience and prep rather than complex carpentry.
The Prep Essentials
- Light sanding: Use a fine-grit sanding block to degloss the original finish, which creates the “tooth” necessary for new paint to bond.
- High-quality enamel: Skip standard latex wall paint and opt for interior enamel; it cures to a hard, non-sticky finish that resists the frequent contact doors receive.
- Sheen selection: Choose a semi-gloss finish. It strikes the perfect balance between reflecting enough light to feel clean and hiding minor surface imperfections that a high-gloss would highlight.
Pro Tip: Paint-and-primer-in-one products are convenient, but they often lack the bite needed for high-traffic door surfaces. For the most durable results, apply a coat of separate, high-adhesion primer first.
⭐ Top Paint Options for Door Refresh
✨ Editor’s Pick
Acrylic Enamel Paint for Interior Doors
Solid Pine Exterior Prehung Entry Door
Modern Steel Exterior Entry Door
💰 What This Really Costs
- The real range: Expect to spend between $70 and $200 per door depending on your prep needs and paint quality.
- Hidden cost: Don’t overlook the price of quality masking tape, drop cloths, and high-quality synthetic-bristle brushes for edges.
- Worth it: This is a high-impact investment; it costs significantly less than replacing doors while completely refreshing room aesthetics.
Bold Color Statement

Shift a room from neutral to curated with a single saturated, high-impact hue.
There is a distinct moment when a space stops feeling like a “builder-basic” box and starts feeling like a designed home. Introducing a saturated, unexpected hue to a flat door is the fastest way to trigger that shift.
High-contrast colors like navy, forest green, or charcoal anchor a room when paired against clean white trim. Because these dark, pigmented shades are unforgiving, they will highlight every surface flaw; a flawless, smooth prep job is mandatory before you open that paint can. Our guide to painting doors without brush marks walks through it.
Pro Tip: Paint the door frame the same color as the door itself. This creates a “color block” effect that tricks the eye into perceiving the door as larger and the ceiling as slightly higher.
Before you commit to a gallon, always test swatches against your existing flooring and wall colors in different lighting throughout the day. Dark colors can shift dramatically from morning to evening, and you want to ensure your chosen shade doesn’t clash with the undertones of your surrounding finishes.
Dark colors require an extra coat of high-quality tinted primer to achieve true depth. If you skip this, or if your surface prep is sloppy, the finished result will look patchy rather than intentional.
⭐ Bold Color Statements for Your Doors
Classic Plastic Block Rosette Trim
✨ Editor’s Pick
Flexible Peel and Stick Door Trim
Waterproof Rubberized Paste for Casings
📋 Quick Reality Check Before You Paint:
- Surface Smoothness: Inspect for deep scratches or dings, as dark, bold colors will emphasize these imperfections rather than mask them.
- Hinge Clearance: Check that your current hinge gaps aren’t too tight, since extra coats of primer and paint can cause binding.
- Adhesion Integrity: Confirm your door doesn’t have an existing waxy finish, which requires a thorough deglossing to prevent the new color from peeling.
Added Trim Molding

Transform flat, builder-grade slabs into high-end architectural features with precise geometric trim layouts.
Those plain, flat doors often suffer from “flat door syndrome,” lacking the character found in vintage solid-wood designs. By applying thin trim strips directly to the door face, you can mimic the look of expensive shaker-style or traditional multi-panel doors for a fraction of the cost.
Precision is your biggest challenge here because even a 1/8-inch gap in your mitered corners will ruin the intended illusion. It is often easier to achieve those perfect corner angles using a dedicated miter saw rather than a manual hand-miter box.
Pro Tip: Use construction adhesive in addition to small finish nails to ensure the trim doesn’t pop or shift when the door is slammed. Once the adhesive is set, use a high-quality caulk to fill the seams where the trim meets the door face for a seamless, factory-finish look.
This project is perfect for those who enjoy detailed carpentry and want to add character to traditional or farmhouse interiors. If you prefer a quick, low-labor update, you may want to skip this one in favor of a simpler paint-only refresh.
⭐ Added Trim Molding for Door Elegance
Paintable Acrylic Latex Sealant for Trim
Composite Front Entry Door with Ironwork
✨ Editor’s Pick
Colorful Classroom Bulletin Board Trim
📋 Quick Reality Check:
- Check hinge clearance: Ensure your added molding is thin enough that the door still swings fully without catching the frame.
- Verify door weight: Even light trim adds bulk; confirm your existing hinges can support the slightly heavier door without sagging.
- Inspect board flatness: Before attaching trim, ensure your flat-panel door isn’t warped; molding will highlight, rather than hide, surface bowing.
Transforming a space doesn’t require overhauling every single surface to see high-end results. Focusing on the architectural details that define the room’s character often achieves more than a total renovation, especially when you explore custom-look door upgrades that demand less labor.
Committing to just one or two high-impact design choices will provide more structural presence than trying to implement every idea in this list.
Board and Batten Panels

Transform flat surfaces into architectural features by adding rhythm and depth to your hallway.
Adding vertical or grid-like battens to a door turns a row of uninspiring exits into a cohesive architectural statement. This treatment mimics the weight and character of classic millwork, grounding a space that feels too sterile.
Pro Tip: Before you commit to a pattern, measure your hinge clearance carefully. Adding even a quarter-inch of trim can cause the door to bind against the jamb if you don’t account for the swing path.
You can choose between a simple vertical layout or a more complex grid. Vertical lines are particularly effective at drawing the eye upward, making ceilings feel taller and hallways feel more spacious.
This style shines in homes that already lean toward cottage or farmhouse aesthetics. If your home has a strictly modern or minimalist floor plan, keep the battens thin to avoid overwhelming the door’s scale.
Avoid this mistake: Do not use oversized, chunky battens on narrow doors. Excessively wide trim will make the entry feel claustrophobic and can block the natural movement of the door handle.
When planning your layout, consider the following checklist to ensure a professional result:
- Check your hinge-side clearance to prevent rubbing.
- Use a level for every vertical piece to ensure the rhythm doesn’t look crooked.
- Select a trim thickness that doesn’t interfere with your existing door casing.
- Fill all nail holes and caulk the seams where the batten meets the door face for a seamless, factory-made look.
⭐ Board and Batten Panels for Texture
✨ Editor’s Pick
Arch Wainscoting Wall Panel Kit
Customizable Arch Doorway Molding Kit
Confetti Bulletin Board Border Trim
💡 The Detail That Pulls It Together
Board and batten works best when it feels integrated rather than an afterthought. Focus on the proportions of your “stiles” and “rails” – keeping the vertical battens spaced at consistent intervals prevents a chaotic look. In a hallway, matching the height of your existing wainscoting or window sills creates a natural, intentional flow that feels like it was part of the original floor plan.
Two-Tone Finish

Create custom architectural depth by using contrasting colors to define your door’s unique panels.
A two-tone finish uses color placement to trick the eye, making a standard flat-panel door look like a custom-milled piece. By painting the recessed center panel a lighter shade and the surrounding frame a darker, moodier hue, you add instant dimension to an otherwise boring surface.
This project is perfect for someone who wants a playful, curated look without the expense of adding actual trim. If you have a door that already features molded panels, you have an easy guide for your paint lines; if your door is perfectly flat, you can use high-quality painter’s tape to create your own geometric sections.
The Pro Tacky-Tape Trick
To achieve a razor-sharp transition, remove your painter’s tape while the final coat is still slightly tacky. If you wait until the paint is fully cured, the film can bridge the gap and peel away, resulting in a jagged, amateurish line.
The success of this look relies entirely on your masking strategy. Use a high-quality, medium-adhesion tape like FrogTape to prevent bleed-through, and always press the edges down firmly with a putty knife before you start painting.
If you choose to use dark colors, be aware that they show every imperfection. You will need to spend extra time sanding and priming to ensure a glass-smooth surface before you break out the color.
⭐ Two-Tone Finish Ideas for Doors
Quick Drying Entry Door Stain Kit
✨ Editor’s Pick
Natural Wood Stain and Pigment Kit
Wood Filler Sticks for Furniture Repair
💡 Why This Works
The two-tone technique uses the principles of depth and framing to break up large, flat surfaces. By creating a distinct visual boundary between the rails and the center panel, you manipulate how light hits the door, making a simple flat surface feel like a substantial, custom-milled architectural feature.
Visual framing: Defining panel boundaries creates a sophisticated, expensive appearance without actually changing the door’s physical structure.
Faux Wood Stain

Bring the warmth of natural timber to your hollow-core doors with precise graining techniques.
If your home feels sterile because of cheap, paint-grade hollow-core doors, faux wood staining mimics the organic depth of solid oak or walnut without the price tag of a total replacement. This method relies on specialty glazing and graining tools to build up layers of color, creating a convincing illusion of natural timber.
Pro Tip: Master the Motion
Practice your technique on a piece of scrap plywood before touching the door. You need to master the flick-and-drag motion of the graining tool to ensure the pattern looks organic rather than repetitive or stamped.
This project is significantly more skill-sensitive than a standard paint job. The finish requires patience, and you must apply a high-quality clear topcoat afterward to protect the delicate glaze from high-touch areas like knobs and edges.
Skip this project if you are looking for a quick one-afternoon update, as the drying time between glaze and topcoat is non-negotiable. This is the best choice for vintage-inspired or rustic interiors where you want the specific visual warmth that only wood can provide.
⭐ Faux Wood Stain for Modern Doors
Bifold Barn Door with Frosted Glass
Heavy Duty Pivot Hinge for Doors
✨ Editor’s Pick
Fiberglass Screen Door Mesh Replacement Kit
💸 Affordable Upgrade Path
- Gel stain alternative: Use a thick gel stain for a simpler, one-step application that hides cheap factory finishes effectively.
- Hardware swap: Upgrade to high-contrast matte black handles to distract the eye from minor graining inconsistencies.
- Focus areas: Prioritize graining on the door face; keep the edges a solid, complementary tone to save time.
Frosted Glass Insert

Bring soft, diffused light into your home without sacrificing your privacy or quiet.
Adding a frosted glass insert is the most effective way to brighten a windowless bathroom or a cramped home office. By replacing a solid center panel with translucent glass, you invite natural light to flow between rooms while keeping your space tucked away from view.
Heads up: If you are cutting into an existing door, confirm it is solid-core before you begin. Hollow-core doors have cardboard honeycomb centers that will crumble if you attempt to frame out a glass opening.
You have two main paths for this project, depending on your comfort level with power tools and your budget. Choosing the right method depends entirely on how much of a change you want to make to the door’s structure. If you rent, read about updating a rental door without losing your deposit before you cut or drill.
If you choose to use frosted adhesive film, make sure to clean the surface with isopropyl alcohol before applying. This removes oils that cause the edges to peel over time, especially in humid spaces like bathrooms.
For those opting for a real glass insert, keep in mind that the new weight of the glass may require you to tighten or even replace your existing hinges. A door that was once lightweight and hollow will swing differently once it holds a solid glass pane.
⭐ Frosted Glass Inserts for Privacy
✨ Editor’s Pick
Fiberglass Front Door with Frosted Glass
Entry Door Glass Insert Replacement Kit
Contemporary Fiberglass Exterior Door Slab
💡 Why This Works:
Frosted glass acts as a light-diffusing filter, softening the harsh, direct illumination common in small interior rooms. By replacing an opaque panel, you eliminate the visual “dead end” of a solid door without exposing your private activities, making the entire floor plan feel more expansive and connected.
Light diffusion benefit: It creates a glowing, soft-focus aesthetic that hides clutter while maintaining a bright, airy atmosphere. Hidden storage doors are in modern door designs that hide storage.
New Modern Hardware

Swap your dated knobs for clean-lined levers to instantly modernize your home’s entire interior.
Replacing old, brass-plated knobs is the easiest way to make a room feel current without picking up a paintbrush. A fresh set of matte black or brushed brass levers shifts the entire aesthetic of a flat-panel door from builder-grade to custom-designed.
Pro Tip: Before you buy, check your door’s bore size and backset to ensure the new hardware fits your existing holes perfectly. Most modern levers are designed for a standard 2-1/8 inch bore, but measuring first saves you from patching and re-drilling.
The smallest details often define the quality of the update. You should always replace the hinges to match the finish of your new handle, as mismatched hardware is the quickest way to signal an amateur DIY job.
This update is ideal for anyone looking for a high-impact change that takes less than an hour per door. If your existing doors have non-standard prep, skip this until you are ready to fill, sand, and repaint the door face, as new hardware rarely hides old, incompatible drill patterns.
⭐ New Modern Hardware for Doors
Acoustic Wood Slat Wall Panels
✨ Editor’s Pick
Artificial Boxwood Grass Wall Panels
Glass Barn Door with Hardware Kit
💡 Why This Works:
Updating hardware acts as the “jewelry” of your door. By replacing builder-grade brass with modern finishes like matte black or brushed brass, you ground the room in a specific design era. It’s a low-effort, high-reward swap that makes a standard flat door feel intentional and curated rather than just functional.
Design takeaway: Matching hinge finishes to your new levers creates a polished, professional look that unifies the entire door.
Beadboard Panels

Add instant cottage-inspired depth to hollow, builder-grade doors using simple vertical wood paneling.
Beadboard panels transform a flat, lifeless door by introducing rhythmic vertical texture that mimics traditional millwork. This is the ideal fix for homeowners wanting a coastal or farmhouse aesthetic without the expense of replacing existing doors.
Installing these sheets requires careful planning to ensure the door remains functional. You must account for the added thickness, as even a quarter-inch material can cause the door to rub against the stop or catch on the floor.
Pro Tip: Always use a high-quality liquid nails adhesive to secure the panels, but supplement with a few finishing nails around the perimeter. This ensures the board stays flush and doesn’t pull away when the door experiences temperature fluctuations.
To finish the look, you must install thin, narrow trim strips along the edges of the beadboard. This hides the raw edge of the panel and creates a clean, built-in appearance that looks like it was part of the original door design.
Consider this upgrade if you have a home with existing character that needs a boost. However, if your doors are already positioned in very tight frames with little clearance, you should skip this method to avoid binding issues.
⭐ Beadboard Panels for Classic Style
Peel and Stick Wall Molding Kit
Encouraging Bulletin Board Border Trim
✨ Editor’s Pick
Waterproof PVC Beadboard Wainscoting Kit
💡 Why This Works
Adding beadboard shifts the focus from the door’s flat surface to its texture, creating a sense of custom craftsmanship. The vertical lines draw the eye upward, which can make a room feel taller, while the light-and-shadow play hidden within the grooves adds an organic warmth that standard smooth doors simply lack.
Architectural Impact: This method turns a builder-grade entry into a intentional, character-rich focal point with minimal effort.
Chalkboard Panel

Turn a high-traffic door into a functional family communication hub or creative workspace.
A chalkboard panel turns an otherwise dead surface into a dynamic family organizer or a doodle space for kids. It works best on pantry doors or playroom entryways where the inevitable dusty residue won’t disrupt the cleanliness of a formal living area.
You can achieve this look using two primary methods, each with different commitments:
- Chalkboard Paint: Requires a multi-coat application and a light sanding between layers for a smooth, professional finish.
- Peel-and-Stick Contact Paper: A faster, non-permanent solution that is ideal for renters or those who want to test the utility before committing to paint.
Pro Tip: Before you write your first grocery list, prime the entire surface by rubbing a piece of chalk sideways over the door. Wipe it off with a dry cloth to “season” the finish and prevent permanent ghosting of your first message.
Be realistic about the maintenance required for this update. High-touch areas will naturally accumulate oils and chalk dust, so be prepared for occasional wipe-downs.
⭐ Chalkboard Panel Ideas for Doors
✨ Editor’s Pick
Ultra High Gloss Designer Lacquer Paint
White Semi Gloss Touch Up Pen
High Gloss Automotive Clear Coat Pen
⚖️ Quick Decision Guide
- Choose this if: You want a low-cost, high-utility surface for frequently organized to-do lists or kid-friendly creative expression.
- Skip this if: You prefer a strictly polished look, as the unavoidable chalk dust and ghosting can feel messy.
- Pair it with: A framed corkboard or magnetic strip nearby to keep pens and erasers contained and organized.
High-Gloss Lacquer

Achieve a mirror-like, high-end furniture finish that instantly lifts the sophistication of any room.
A high-gloss lacquer finish turns a standard interior door into a bold, reflective architectural piece. This look works best in modern or contemporary spaces where you want the door to catch and bounce light around the room.
Warning: This is the most unforgiving finish you can choose. It highlights every speck of dust, roller mark, and imperfection on the door surface.
Achieving that glass-like appearance requires a meticulous prep system rather than just a quick coat of paint. You must commit to multiple rounds of fine-grit sanding between every single coat to cut back the surface.
If you are tackling this as a DIY project, you need the right tools for a professional result. Follow these steps to minimize the common pitfalls:
- Use a high-density foam roller to lay the paint down, as traditional nap rollers will leave behind texture.
- Add a paint conditioner like Floetrol to your mixture, which helps the paint level out and reduces the appearance of brush marks or bubbles.
- Ensure your room is completely dust-free before starting, as even a tiny particle will stand out in a high-gloss reflection.
True lacquer is often a professional-only service due to the harsh fumes and specific application requirements. For most homeowners, a high-gloss, water-based enamel provides a safer, more accessible alternative that still delivers that signature shine.
⭐ High-Gloss Lacquer for Modern Doors
Gloss White Aluminum Door Kick Plate
✨ Editor’s Pick
Marine Grade High Gloss Wood Varnish
Liquid Deglosser for Surface Preparation
🔢 The Right Sequence for a Flawless Finish:
Achieving high-gloss perfection requires strict adherence to this sequence; rushing the prep or drying stages will guarantee visible surface imperfections.
- Degrease and sand: Strip all oils and sand the surface completely smooth before applying any primer.
- Prime and block: Apply a high-build primer, then sand it perfectly flat using fine-grit sandpaper.
- Apply color layers: Build up thin, multiple coats of enamel, sanding lightly between each layer until flawless.
Wallpaper Accent Panels

Transform your door into a custom piece of art with easy, high-impact wallpaper patterns.
Wallpapering the recessed panels of a door adds a layer of depth and personality that paint alone cannot achieve. This method is ideal for bedroom or powder room doors where you want to introduce a bold visual focal point without committing to a permanent change.
If you are a renter or tend to change your mind frequently, stick to peel-and-stick wallpaper for a low-commitment update. It can be removed in minutes when you are ready to sell or redecorate.
Pro Tip: Choose a pattern with a small scale to ensure the design doesn’t look disjointed on the limited surface area of a door panel. Large-scale prints often lose their impact when they are cut down to fit small rectangular spaces.
The success of this project relies heavily on the quality of your application. Use a seam roller to firmly press the edges of the paper into the corners of the recessed panels to prevent lifting over time.
Avoid applying wallpaper to high-traffic doors that are frequently grabbed near the panels, as the edges may catch and curl. Stick to bedrooms or closets where contact is minimal to keep your design looking fresh.
⭐ Wallpaper Accent Panels for Doors
Removable White Cloud Wall Decals
Colorful Mexican Tile Wall Decals
✨ Editor’s Pick
Realistic 3D Halloween Bat Wall Decals
💡 The Detail That Pulls It Together:
Success here is all about pattern scale. On a door’s narrow recessed panels, oversized motifs often look chaotic or get awkwardly cropped. Opt for intricate, small-scale prints that feel intentional rather than haphazard. This creates a cohesive “framed art” effect that complements your hardware and trim without overwhelming the room’s overall architecture.
You have now navigated twelve distinct ways to elevate a plain door, ranging from simple hardware swaps to permanent architectural additions. Selecting the one or two methods that align with your home’s existing character is far more effective than trying to incorporate every technique mentioned. It is the deliberate choice of a single finish or detail that transforms a space, not the volume of changes you apply.
Identify the entryway or room that feels the most lacking and apply your chosen refresh there first. By focusing on interior door styles that directly enhance your room flow, you gain the confidence that your updates will remain relevant for years. Once that primary door is settled, you will find the rest of your home naturally follows suit.
Related posts
 Front Door Makeover Ideas With Serious Before-and-After Impact
 Closet Door Makeover for a Custom-Built Look on a Basic Door
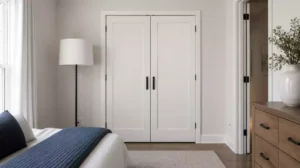 Bifold Door Makeover From Builder-Basic to Built-In Looking
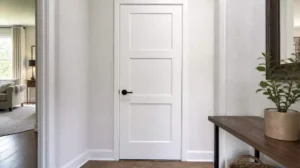 Hollow Core Door Makeover DIY With Real Depth and Character
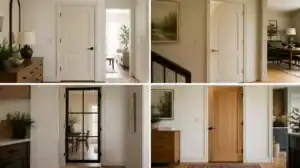 17 Interior Door Designs That Make a Plain Room Look Custom
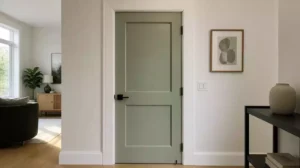 Interior Door Makeover for a More Finished Designer-Led Look
 15 Front Door Designs That Improve a Plain Exterior
 14 Latest Door Design for Home Ideas That Feel More Expensive