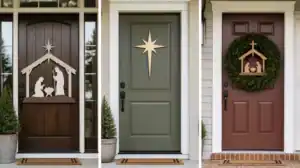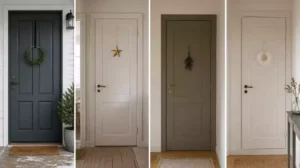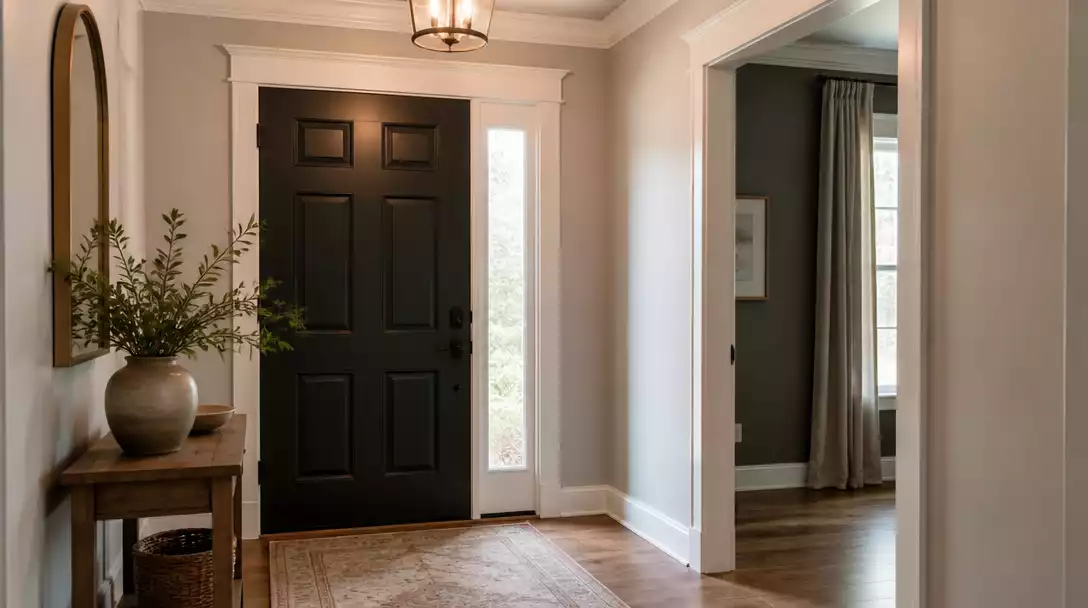
If your front door color feels like a design mistake, you rarely need a professional refinishing job to fix it. This guide narrows the process down to 8 essential factors that harmonize your entryway surroundings to get the look right. Let’s start with the wall undertones.
1. Wall undertone
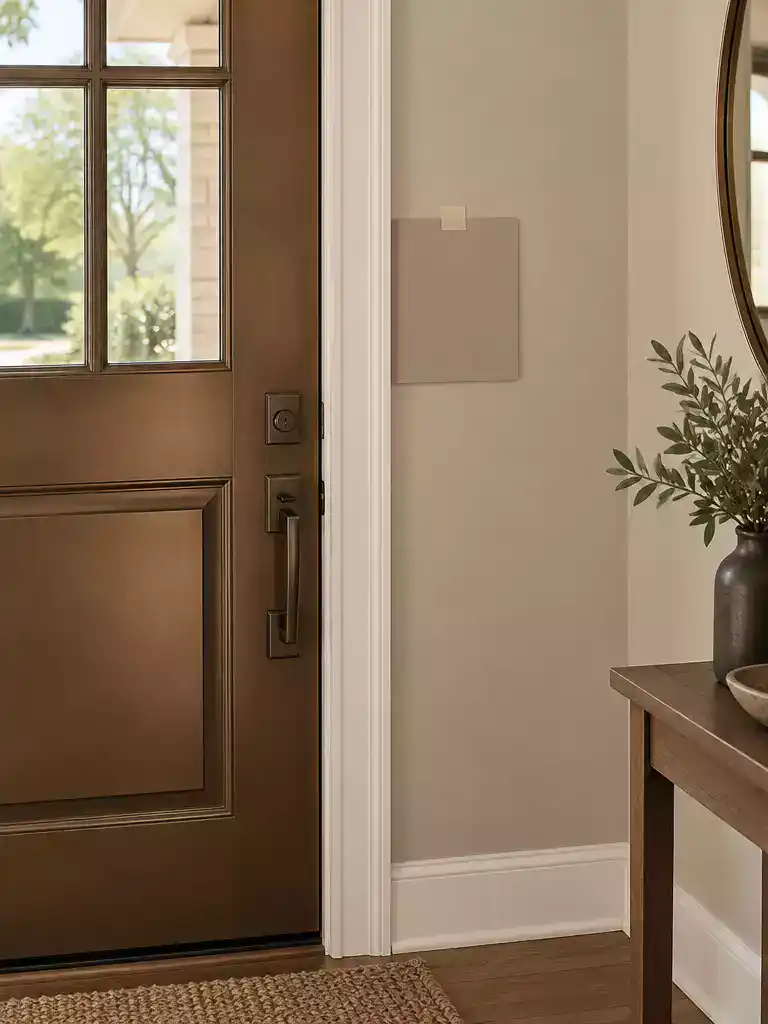
Aligning your wall undertones creates a cohesive, intentional look that makes your door colors pop.
As an Amazon Associate I earn from qualifying purchases. Affiliate links may earn me a commission at no extra cost to you.
The most common mistake homeowners make is choosing a wall color based on how it looks in a catalog, rather than how it interacts with the door bias. Before you buy a single gallon of paint, you need to identify whether your door leans warm or cool.
A warm door – think brown, red-brown, or bronze – will look muddy or dirty if it is surrounded by a cool gray wall. Conversely, a cool door, such as navy, charcoal, or slate, will clash instantly if paired with a yellow-based cream or beige.
The “Neutral Trap” Warning
Avoid the neutral trap.
Many “neutral” paints are not actually neutral. They often hide subtle blue, green, or pink biases that only reveal themselves once they are up on the wall next to your door. Never trust the swatch alone; these hidden undertones can completely shift when placed in the specific lighting of your entryway.
To get this right, you must test samples directly on the wall where the door and wall intersect. This is the only way to see how the two colors “talk” to each other throughout the day.
Follow these rules for alignment:
- Warm doors: Stick to warm-toned walls like cream, beige, taupe, or greige.
- Cool doors: Pair these with cool-toned walls like crisp neutrals, gray, or blue-gray.
If you aren’t sure about your door’s undertone, hold a piece of pure white printer paper next to it. If the door looks yellow or orange by comparison, it is warm. If the door looks blue or purple next to the white paper, it is cool.
⭐ Top Coir Door Mats to Buy
✨ Editor’s Pick
Heavy Duty Indoor Outdoor Welcome Mat
Buffalo Plaid Checkered Front Door Rug
Four Pack Artificial Coir Door Mats
⚠️ Common Mistakes to Avoid:
- Ignoring light shifts: Choosing a color without testing how it looks under morning east light versus late-afternoon west sun.
- Relying on digital swatches: Making final color decisions based on online photos rather than physical samples in your actual entryway.
- Forgetting floor undertones: Picking a wall color that clashes with the existing tile or wood flooring, creating an unanchored, disjointed look.
Door contrast
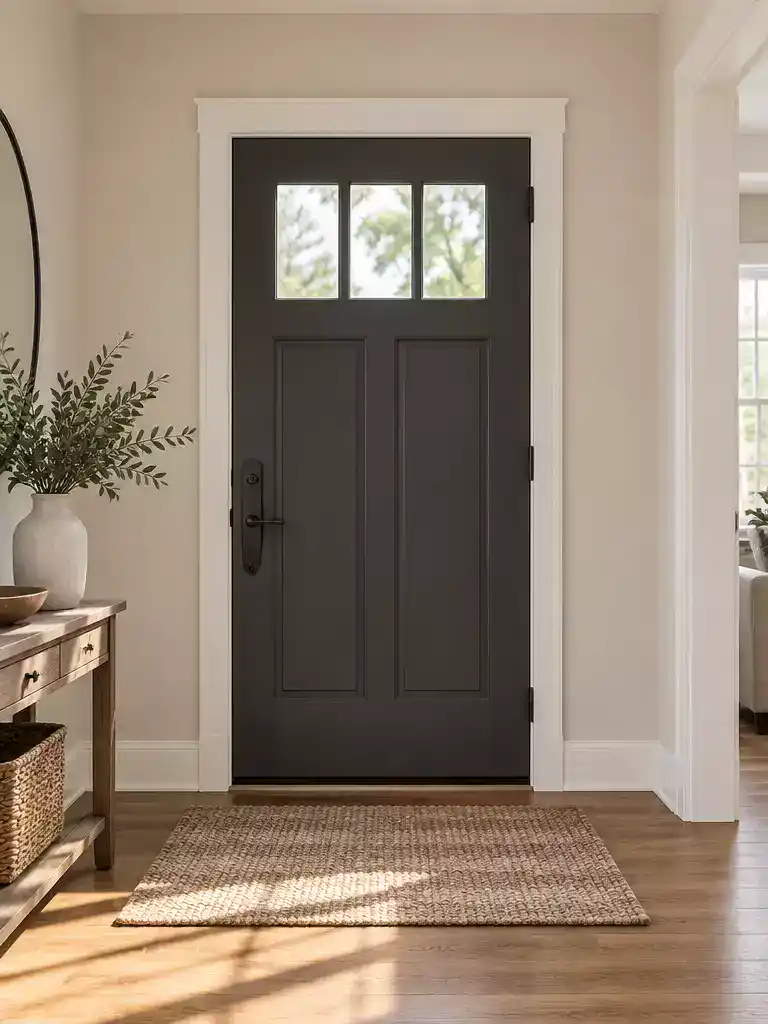
Mastering the play of light and shadow creates a sophisticated, intentional entryway focal point.
Most homeowners assume that making a front door “pop” requires a high-contrast, bold paint color on the door itself. In reality, the most effective way to manage your entryway’s impact is by adjusting the value – the relative lightness or darkness – of the surrounding walls.
If your goal is to make the door a true focal point, the wall color must be significantly lighter or darker than the door’s current finish. This creates a clear visual boundary that allows the door to stand out without needing a total color overhaul.
The Recede vs. Command Rule: If you feel your door is currently an eyesore, don’t try to highlight it. Instead, choose a wall color with a similar value to the door to make it recede into the architecture, minimizing its visual presence until you are ready for a full refinishing project.
Avoid the temptation to use high-saturation wall colors in an attempt to “fix” a door color that feels off. These vibrant walls often compete for attention, creating a chaotic entryway that feels smaller and more cluttered.
Instead, focus on the cost-efficiency of using premium wall paint to solve your design dilemma. While a full professional door refinishing project can cost between $2,000 and $4,000, high-quality interior wall paint typically ranges from $55 to $130 per gallon.
By shifting the wall value rather than the door color, you maintain the integrity of the existing finish while completely changing the mood of the space. This is a strategic move that keeps your project budget-friendly while delivering a professional, cohesive result.
⭐ Handlesets That Elevate Any Front Door
Six Lite Clear Glass Exterior Door
✨ Editor’s Pick
Double Exterior Entry Door With Frame
Matte Black Front Door Handle Set
💰 What This Really Costs
- The real range: Updating surrounding walls typically costs $300 to $1,000, a significant savings over the $2,000 to $4,000 required for professional door refinishing.
- Hidden cost: Don’t forget to budget for high-quality brushes and painter’s tape, which add $30 to $80 to your total project supplies.
- Worth it: Investing in premium wall paint at $55 to $130 per gallon is a high-impact way to refresh your entry without the labor-intensive door overhaul.
3. Trim separation
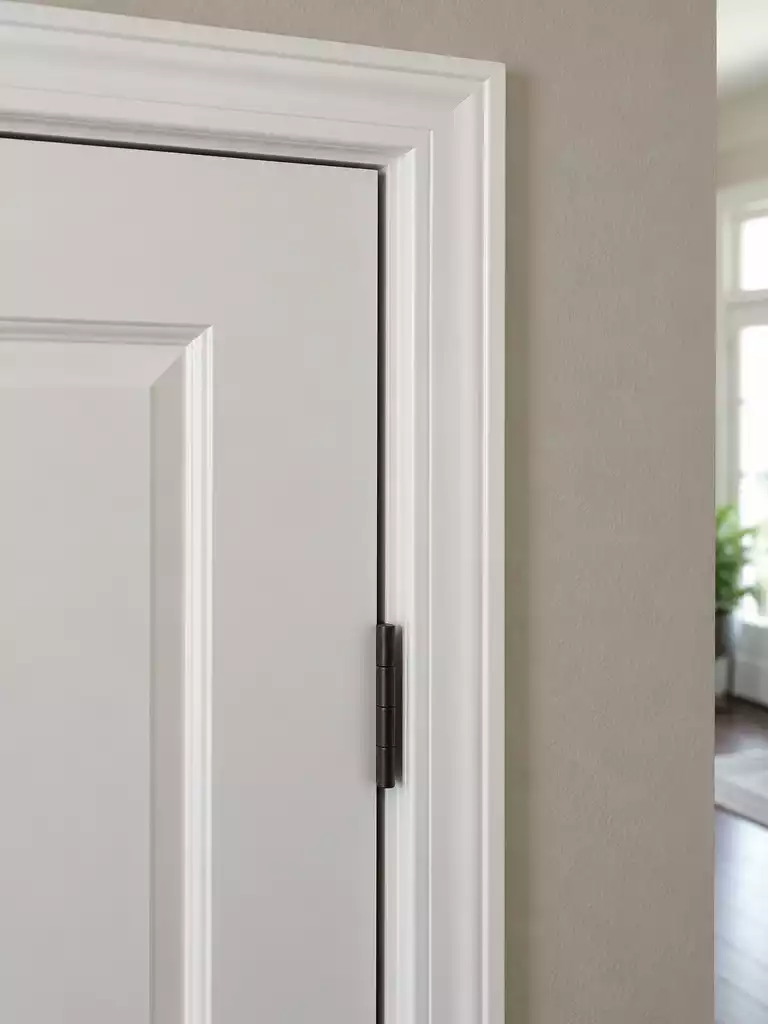
A crisp trim reveal creates a defined boundary that lets your door color stand alone.
Think of your door trim as a physical buffer zone. It acts as the mediator between your door’s finish and the wall color, preventing the two from bleeding into one another visually.
When the transition feels muddy, it is often because the door color and wall color are fighting for dominance without a clear boundary. Establishing a uniform reveal – that small, consistent gap between the door and its casing, typically 1/4 to 1/2 inch – is the most effective way to lend an architectural structure to the space.
The Architectural Impact of Trim Choice:
- Wider Trim: Choose this for a bolder, more traditional look that frames your door like a piece of art.
- Matched Trim and Wall: Paint your trim the exact color as the walls for a modern, minimalist aesthetic that makes the door pop by removing “visual noise.”
Updating your trim is one of the most cost-effective ways to change the mood of an entry. You are looking at roughly $30–$90 per gallon for high-quality trim paint, plus another $30–$80 for essential supplies like painter’s tape, brushes, and spackle.
Pro Tip: Before you commit to a color, use high-quality painter’s tape to create a clean line where the trim meets the wall. A sharp, crisp edge makes the entire entryway look professionally finished, regardless of the paint quality you choose.
If your current trim is dated or damaged, consider the visual weight it carries. A wider profile creates a stronger separation, which is especially helpful if your door color is dark and your walls are light. If you are aiming for a seamless, airy feel, matching the trim to the wall color is the best way to avoid the “choppy” look that often plagues smaller entryways.
⭐ Best Hardware for Secure Entryways
Stainless Steel Concealed Flush Door Bolts
Matte Black Sliding Pocket Door Lock
✨ Editor’s Pick
Heavy Duty Hidden Pivot Door Hinge
💡 Why This Works:
By treating your trim as a dedicated frame rather than just a wall edge, you create a visual “reset” point. This separation prevents the door’s finish from clashing with the wall color, effectively neutralizing any conflicting undertones and making the transition feel intentional, polished, and architecturally grounded.
Design Takeaway: A crisp, uniform reveal acts as a neutral border, allowing your door and wall colors to coexist harmoniously.
Because wall color is entirely reversible, the stakes are significantly lower than a permanent door refinishing project. You can achieve a cohesive look by refining the surrounding environment, which often offers a much higher resale value than expensive structural changes.
Focusing on the interplay between wall undertones and ambient light usually solves the problem without requiring a full renovation.
4. Adjacent hallway color
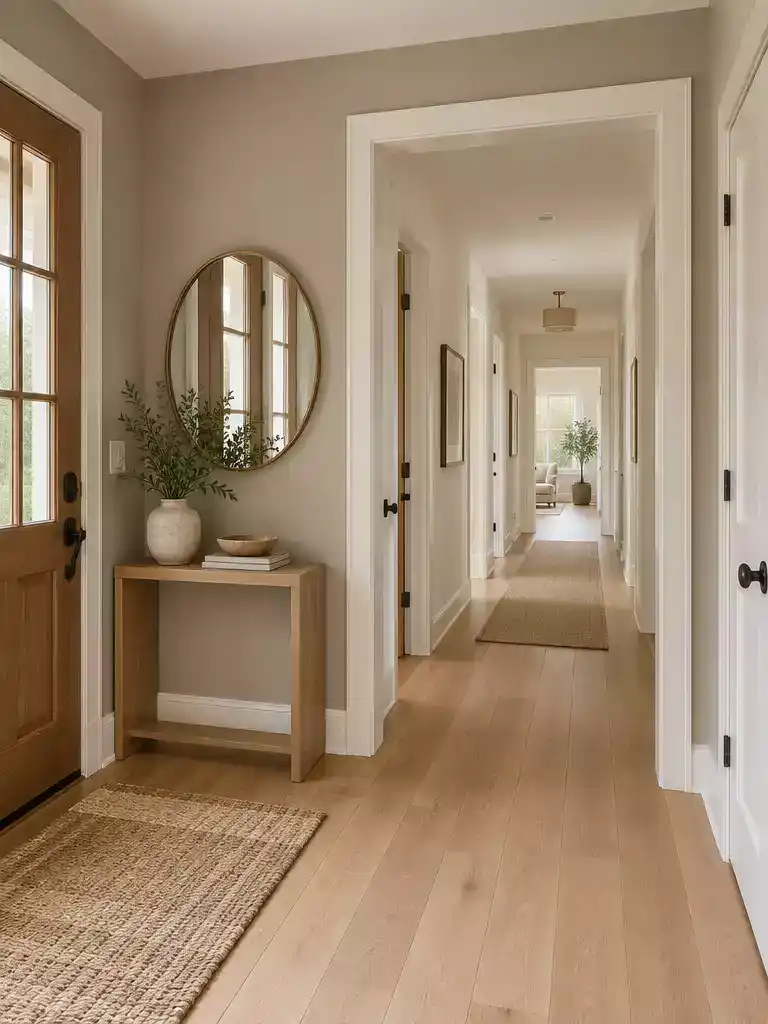
Create a sense of intentional flow by harmonizing your entryway with the adjoining hallway space.
Your entryway shouldn’t feel like an island disconnected from the rest of your home. When you stand at your front door, the transition into your hallway needs to feel purposeful rather than abrupt or “choppy.”
The most effective strategy is to treat your entryway and the adjacent hallway as a single, continuous color zone. You don’t need to paint everything the exact same color, but you should stick to a shared color family to avoid visual jarring.
The Step-Down Method: If your entryway feels too dark or enclosed, try using the same color family as your main hallway but shift one step lighter or darker. This subtle difference in paint value provides enough distinction to define the entryway as a unique space while maintaining a sense of architectural unity.
If you are planning to hire a professional to handle this, keep in mind that labor costs typically range from $1.50 to $4 per square foot. While this is an additional investment, it is often the missing link that finally makes a “problem” front door feel like it belongs in your home.
Before you commit to a specific paint, consider these three checks to prevent the space from feeling disconnected:
- Check the sightlines: Stand in your living room or kitchen and look toward the entryway. Does the color shift feel natural, or does it look like a sudden wall?
- Check the transition points: Are there doorways or architectural arches that naturally break up the space? Use these physical boundaries to “reset” the color if you choose to go with a more distinct shade.
- Check the lighting change: Natural light behaves differently in a hallway than it does in an entryway. Always test your paint samples in the hallway corridor at different times of the day to ensure the undertones don’t skew unexpectedly.
Painting a compact hallway usually costs between $190 and $600 for professional labor, depending on the complexity of the space. By aligning the hallway color with your entryway, you effectively “frame” your front door, drawing attention to it as a deliberate design choice rather than an isolated, mismatched feature.
⭐ Tried and Tested Door Hardware Tools
✨ Editor’s Pick
Adjustable Aluminum Door Hinge Router Jig
Precision Lock and Hinge Lubricant Spray
Antique Brass Interior Door Hinge Kit
🏡 How This Works in a Real Home:
- Visual continuity: Use the same trim color in both the entryway and hall to anchor the transition.
- Daily utility: Choose durable, washable paint in high-traffic hallways to keep the transition looking fresh longer.
- Lived-in finish: Carry the same wall sheen throughout both spaces to avoid distracting shifts in light reflection.
5. Flooring relationship
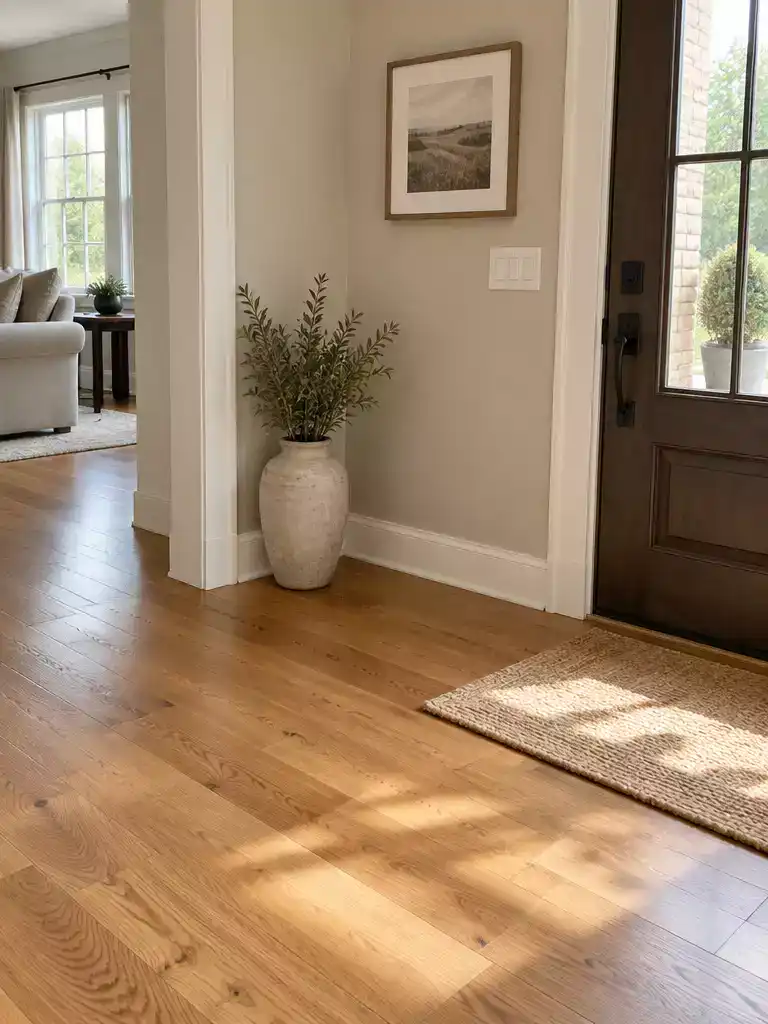
Your floor sets the tone for your entire entryway, anchoring the color palette beneath your feet.
Think of your flooring as the foundation of your color scheme. Because the floor occupies such a large visual footprint, it dictates the “temperature” of the room, and your walls need to play along if you want the space to feel cohesive.
If you have warm floors – think classic oak, walnut, or terracotta tile – you generally want to stick with warm wall undertones like creams, beiges, or warm greiges. Conversely, if your entry features slate, cool-toned gray tile, or whitewashed woods, your walls will look most natural when they mirror those cooler, crisper tones.
The Three-Color Rule
To keep your entry from feeling cluttered, aim for a simple triad: define your dominant wall color, your contrasting door color, and use the flooring or your hardware as the final accent. Sticking to this structure prevents the “choppy” look that happens when too many competing textures and tones fight for attention.
If you find yourself staring at your floors and walls, unable to tell if they are clashing or complementing, you aren’t alone. It is a common design challenge, and sometimes the best way to stop the guessing game is to bring in a pro.
Professional color consulting can be a strategic move if you are worried about the cost of repainting multiple times. It is often a far more efficient path than buying gallon after gallon of paint that doesn’t quite sit right with the flooring underneath.
⭐ Lighting That Brightens Your Entryway
Solar Powered Waterproof Driveway Deck Lights
✨ Editor’s Pick
Bronze Motion Sensor Outdoor Porch Lights
Color Changing Solar Pumpkin Pathway Lights
🧰 Ask Before You Hire:
- Undertone verification: Ask the consultant to specifically identify the floor’s hidden undertones before suggesting any wall colors.
- Sample consultation: Can the pro provide large-scale samples for the entryway’s specific lighting conditions before you commit?
- Long-term cohesion: How will these chosen colors transition into the adjacent hallway to avoid a choppy visual experience?
6. Natural light
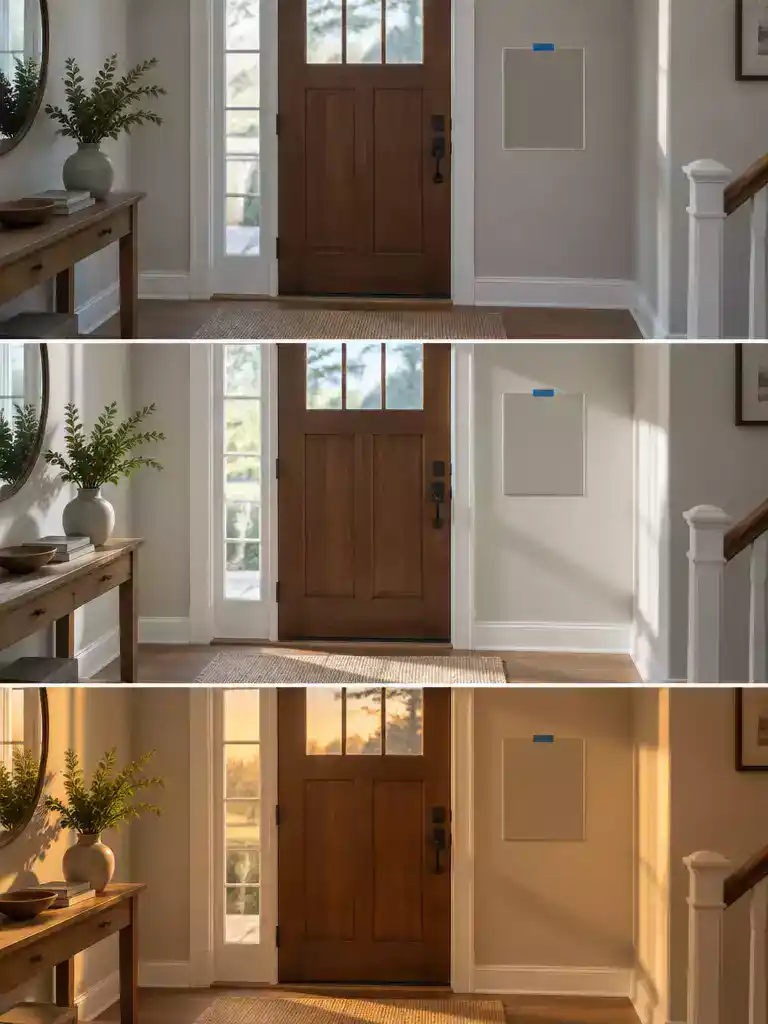
Harmonize your wall color with the sun’s direction to ensure your door never looks muddy.
Natural light is the most influential factor in how your paint color will actually look once it is on the walls. Before you commit to a gallon, you have to understand the directional bias of your entryway because the sun changes the color temperature of your space throughout the day.
The Directional Guide:
- North: Light is cool and often muted. Avoid cool-toned wall paints here, as they will pull the blue or gray out of your door, making the entire entryway feel cold, lifeless, or “dead.”
- South: This is the brightest, warmest light. Stay away from overly warm or yellow-based wall colors, which can turn your door into an orange or muddy-looking mess.
- East: Expect crisp, warm light in the morning that shifts to cool, blue tones by the afternoon.
- West: Your space will be relatively neutral in the morning but flooded with intense, golden, orange-toned light during the late afternoon.
The biggest mistake homeowners make is choosing a color based on how it looks in a store or on a tiny paper chip. You need to test your samples on at least two different walls – the one directly opposite the window and the side wall near the door frame – to see how the shadow and light intensity affect the undertone.
Avoid the “Dead” Door Effect: If your entry is North-facing, do not rely on standard “greige” or cool gray paints. These will almost always clash with a dark door finish, sucking the vibrancy out of the space and making the door feel like a heavy, disconnected block.
If you find that your wall color is fighting the light, you don’t necessarily need to repaint the door. Often, simply choosing a wall color with a slightly higher light reflective value (LRV) can help bounce the available natural light around, softening the transition between your door and the surrounding wall.
⭐ Shop Sidelight Curtains and Glass
Adhesive Sidelight Curtains for Front Doors
Clear Tempered Glass Entry Door Insert
✨ Editor’s Pick
Thermal Insulated Blackout Sidelight Curtain
💸 Affordable Upgrade Path:
- Strategic light-bouncing: Use high-reflectance white paint on the ceiling to brighten north-facing entries without expensive light installations.
- Mirror placement: Hang a mirror opposite your entryway window to amplify natural light and shift the room’s color temperature.
- Sample board savings: Test colors on inexpensive poster board rather than buying full gallons, keeping your total project spend under $1,000.
7. Artificial Lighting
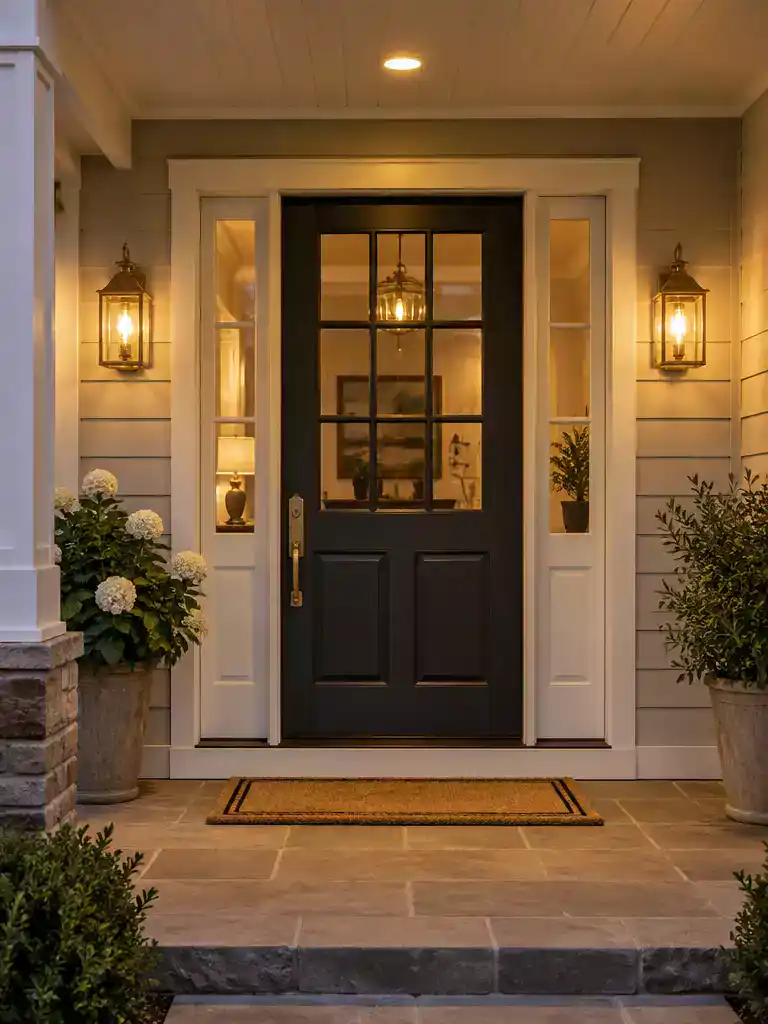
Optimizing your light temperature ensures your paint colors look as intended, day or night.
When your entryway feels “muddy” or the door color doesn’t seem to match the walls, the culprit is often poor artificial lighting rather than the paint itself. If you are using mismatched bulbs with varying color temperatures, you are essentially asking your eyes to interpret multiple conflicting color stories at once.
The color temperature of your bulbs is the most critical technical specification to reconcile. Aim for a range between 2700K and 3000K; this provides a warm, welcoming glow that complements most interior palettes without veering into harsh, clinical territory.
The CRI Factor
Beyond temperature, look for a Color Rendering Index (CRI) of 90 or higher. A low CRI bulb acts like a filter that strips away the true pigment of your wall color, making even high-quality paint look flat or “off.”
Consistency is your best tool for a cohesive space. Using the same lamp family across all fixtures in your entry – whether they are wall sconces, ceiling-mounted lanterns, or recessed cans – prevents the lighting from feeling disjointed.
If your current fixtures are dated or casting uneven shadows, a hardware upgrade can be a highly effective way to refine the space. While full fixture replacement can range from $175 to $950 depending on the scope of work, it is often a more permanent solution than repainting for fixing an entry that simply feels “dark” or uninviting.
⭐ Great Wall Lights for Your Home
✨ Editor’s Pick
Oil Rubbed Bronze Motion Sensor Sconce
Matte Black Exterior Wall Lantern Sconce
Modern Black Dusk to Dawn Porch Lamp
💰 Where the Budget Goes
- The real range: Expect to spend $175–$950 for fixture upgrades, depending on whether you replace individual lights or the entire system.
- Hidden cost: Budget for professional labor if your wiring is outdated, which adds $100–$650 to your total installation project estimate.
- Worth it: Upgrading fixtures is a high-impact move that provides better color rendering for your paint than just swapping bulbs.
8. Existing Door Finish
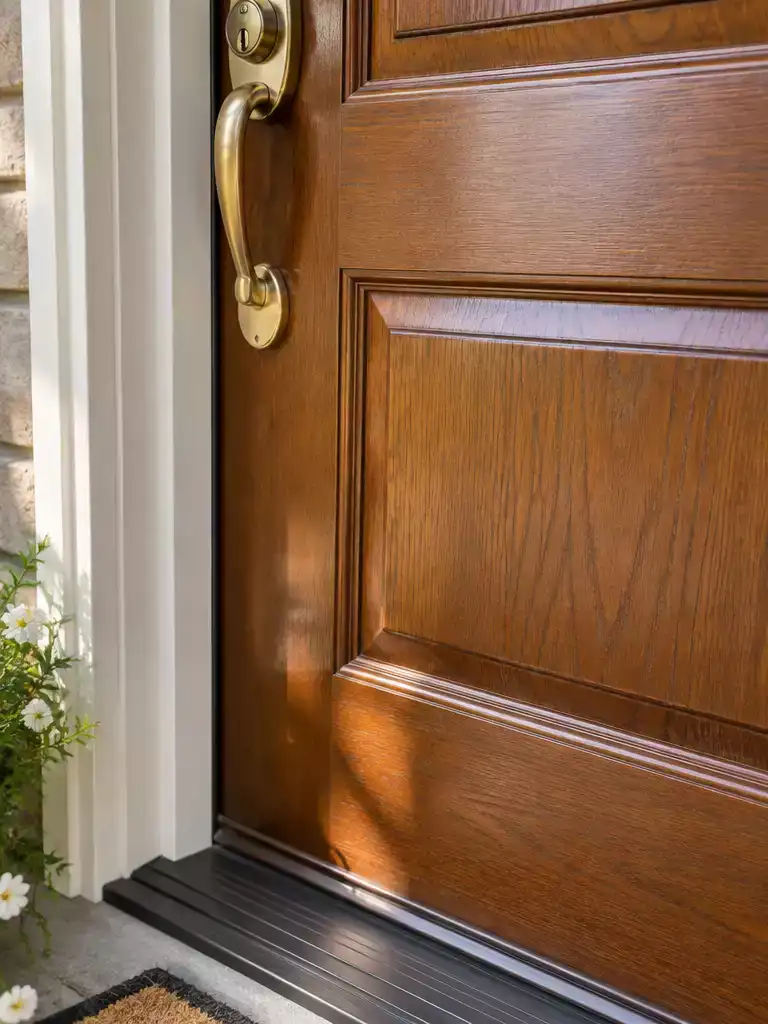
Assessing your door’s physical condition is the first step toward a successful, cost-effective entryway refresh.
Before you commit to changing your wall color, you need to be honest about the state of the door itself. Not every “design problem” can be solved with a paintbrush and a new wall color; if the surface integrity is compromised, no amount of color coordination will fix it.
Use this Salvage Checklist to determine if your door is a candidate for a surrounding wall update or if it requires a professional refinishing investment.
Salvage Checklist: Is Your Door Ready?
- Finish Integrity: Run a finger over the surface. Is the finish smooth and intact, or can you feel flaking, peeling, or significant cracking?
- Fading and Sun Damage: Is the color uneven or bleached by direct UV exposure? Minor fading can often be worked into a new scheme, but severe damage usually requires a fresh coat of stain or paint.
- Structural Soundness: Are there gouges, deep scratches, or areas where the wood has begun to rot or warp?
If you find that the finish is peeling, fading, or cracked, you are looking at a full refinishing project, which typically ranges from $2,000 to $4,000. In these cases, a wall-color update will only highlight the poor condition of the door, making the entryway look neglected rather than intentionally designed.
However, if the finish is simply “wrong” for your space – perhaps the undertone is clashing with your new flooring or the trim – but the surface is smooth and free of damage, you are in the perfect position to use the surrounding environment to harmonize the look. This strategy is a highly efficient way to avoid the high cost of a professional overhaul.
Keep your existing finish looking its best by cleaning only with mild soap and water. Avoid abrasive cleaners or harsh chemicals that can strip the finish and accelerate the need for a full refinish.
If you decide the door is a candidate for your wall-focused strategy, remember that your goal is to make the existing finish feel like a deliberate, cohesive part of the room. By adjusting the surrounding wall undertones and lighting, you can effectively “reset” the context of the door without ever touching the door itself.
⭐ Finishes That Refresh Your Door
Satin Vermont Green Door Trim Paint
✨ Editor’s Pick
Industrial Strength Paint and Varnish Stripper
All in One Matte Refinishing Paint
⚖️ Quick Decision Guide: Salvage or Refinish?
- Choose this strategy if: Your door finish is physically intact but simply clashes with your home’s current color palette.
- Skip this strategy if: The door surface shows peeling, deep gouges, or severe UV damage requiring professional repair work.
- Pair it with: A fresh set of hardware or a new entry mat to bridge the gap between wall and door.
With all eight strategies now at your disposal, you have the full picture of how environment influences your entryway’s impact. Focusing on the one or two areas that address your specific lighting or undertone challenges is the most efficient way to achieve a cohesive result. Targeting the right variables beats attempting a total overhaul of the space.
The goal is to harmonize your front door makeover by refining the surrounding frame, whether that means adjusting your trim separation or correcting artificial lighting sources. By making these calculated shifts, you ensure your entryway feels intentional rather than disjointed. A well-considered approach to these relationships often yields better resale value and daily satisfaction than a complete, costly replacement. Take the next step by testing a sample in your home’s unique light, and you will find that the space comes together with far less effort than you might expect.
Related posts
 Innovative Trim Alternatives: Using a Door Stop Instead of Quarter Round
 Bifold Closet Doors Rebuilt With Shaker Style Faces Instead of Flat Slabs
 12 Front Door Entryway Ideas
 10 Front Door Entryway Ideas for a Stunning First Impression
 21 Best Trending Front Door Paint Styles
 12 Best Black Front Door Paint Colors That Hide Everything
 A Complete Guide to Choosing Your Front Door Paint Color
 15 Trending Front Door Paint Colours We’re Loving This Year