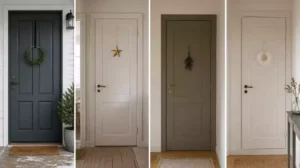
Replacing flat-slab doors with Shaker-style faces is a practical way to add architectural weight to a room without the cost of a full door replacement. This guide narrows down 7 specific panel layouts to help you choose the right proportions for your space and decide with confidence.
1. Single tall shaker panel

A minimalist design choice that creates a clean, architectural flow in smaller living spaces.
As an Amazon Associate I earn from qualifying purchases. Affiliate links may earn me a commission at no extra cost to you.
The single tall shaker panel is the ultimate choice for a minimalist aesthetic. By removing horizontal dividers, you eliminate visual noise, which makes this layout particularly effective for smaller rooms where you want the closet to blend into the wall rather than command attention.
To achieve that high-end, custom-built look, stick to smooth, paint-ready materials like MDF or quality wood-veneer. These substrates take paint exceptionally well and avoid the grain-texture issues found in cheaper softwoods.
The Proportional Rule
For standard doors, maintain stiles and rails between 2.25″ and 3″. If you are working with extra-tall wardrobe doors, bump those dimensions up to 2.5″–4″. This prevents the door frame from looking fragile or disproportionately thin against the height of the room.
Because this design relies on a single, clean rectangle, centering is non-negotiable. Any slight deviation in the panel spacing will be immediately obvious to the eye. Take the time to measure your stiles and rails twice before you commit to your layout, as the simplicity of this design offers no place for minor alignment errors to hide.
Common Pitfall: The “Weak Frame” Effect
Avoid the temptation to use standard trim stock that is too narrow. Using 1.5″ or 2″ rails on a tall single-panel door creates a spindly, cheap appearance that undermines the “built-in” look you’re aiming for. Stick to the 2.25″ minimum to ensure the door feels substantial and intentional.
⭐ Top Tall Shaker Panel Door Picks
✨ Editor’s Pick
Three Lite Panel Bifold Closet Door
Six Panel Shaker Style Bifold Door
Four Panel Hollow Core Bifold Door
⚖️ Quick Decision Guide: Is the Single Panel for You?
- Choose this if: You want a clean, modern, or minimalist look that helps a small room feel larger.
- Skip this if: Your room has heavy traditional crown molding or ornate trim, which might make the panel look out of place.
- Pair it with: Simple, low-profile cabinet hardware to maintain that sleek, uninterrupted architectural flow across the closet face.
2. Two panel shaker face

Achieve a timeless, high-end look with perfectly balanced proportions that mimic custom cabinetry.
The two-panel Shaker face is arguably the most versatile design for standard 6’8″ bifold doors. It leans into a classic, architectural aesthetic that feels right at home in spaces with existing traditional trim, effectively mimicking the appearance of expensive, custom-built cabinetry.
The Hierarchy Rule
To maintain the authentic Shaker visual hierarchy, your intermediate (center) rail must be wider than the outer stiles. Aim for a center rail width of exactly 6-11/16″. Avoid the temptation to shrink this middle section below 5″, as it will look like a design mistake rather than a deliberate choice.
When you are planning your layout, your outer stiles and rails should start at a baseline of 2.25″. If you want the doors to feel more substantial, you can comfortably bump these up to the 2.5″–3″ range. This extra width adds weight and presence to the door, which is particularly helpful if your room has high ceilings or heavy baseboards.
Common Pitfall: The 50/50 Split
Never place your horizontal center rail exactly in the middle of the door. An equal split creates a “builder-basic” look that feels flat and uninspired. Always offset the rail to create visual interest and a more professional, intentional profile.
Before you commit to your measurements, double-check your hinge points. A two-panel layout is only successful if the rails do not cross over the bifold hinges. If a rail sits directly on a hinge, the door will bind and fail to fold properly, turning your upgrade into a functional headache.
⭐ Best Two Panel Shaker Face Doors
✨ Editor’s Pick
Solid Pine Wood Dutch Door Slab
Premium Zinc Alloy Black Wall Hooks
⚖️ Quick Decision Guide: Two-Panel Shaker Face
- Choose this if: You want a timeless look that effortlessly blends with traditional baseboards and existing door trims.
- Skip this if: Your space is ultra-modern or minimalist; a single tall panel often suits those aesthetics better.
- Pair it with: Simple, matte black or oil-rubbed bronze hardware to emphasize the clean, deliberate lines of the frame.
The visual permanence of your layout choice often feels daunting, but you only need to hit a few structural markers to achieve a high-end, custom look. Most of the heavy lifting for architectural value comes down to consistent rail widths rather than complex designs, which is a common theme in modern storage upgrades.
Focusing on balanced rail proportions ensures the final result feels like a deliberate architectural feature rather than a temporary fix.
3. Three panel shaker face

Create a sense of vertical height with balanced, symmetrical panels that ground your space.
This layout is arguably the most effective way to introduce vertical elongation to a room. By stacking three distinct panels, you break up the monotony of a flat slab and visually draw the eye upward, which can make ceilings appear slightly taller than they actually are.
It is an ideal choice for standard 24″, 30″, or 36″ wide doors, provided you maintain strict symmetry. If your panels are not equal in width, the doors will look off-balance and haphazard, which is the exact opposite of the custom, built-in aesthetic you are aiming for.
Precision Planning
For a standard 6’8″ door, use these specific dimensions to maintain the correct Shaker hierarchy:
- Top rail: 4-1/2″
- Lock (center) rail: 7-3/8″
- Cross rails: 4-3/8″
When you are mapping out this design, remember that the goal is to create a substantial, architectural look. Avoid the temptation to shrink your rail widths to “save space” or make the panels look larger; these specific measurements are intended to preserve the character of the design.
Warning: The Hinge Conflict
Before you commit to this layout, map out your bifold hinge points. If a horizontal rail crosses directly over a hinge, the door will not fold correctly. Always adjust your panel heights slightly so rails sit above or below the hardware attachments.
This configuration works particularly well in homes with traditional trim, as the broad horizontal members mimic the construction of high-end custom cabinetry. By keeping the three panels equal, you ensure the door reads as a purposeful, integrated part of the wall rather than a simple closet cover.
⭐ Three Panel Shaker Face Door Options
Large Interior Pet Door For Cats
Interior Door Jamb Frame Repair Kit
✨ Editor’s Pick
Louvered Sliding Closet Door Two Panels
💡 Why This Works
The three-panel configuration effectively disrupts the “builder-basic” look by introducing horizontal lines that mirror architectural wainscoting. By stacking these fields, you create a rhythm that guides the eye upward, providing a sophisticated, custom-built appearance that feels intentional rather than like an afterthought or a simple closet cover.
Visual Benefit: Proper panel stacking visually expands restricted vertical space and grounds the door’s overall design.
4. Tall upper panel layout

Create a custom cabinetry look that draws the eye upward and grounds your room.
The tall upper panel layout is your go-to when you want to move away from standard, builder-grade bifolds toward a custom cabinetry aesthetic. By shifting the horizontal divider well below the center line, you create an elongated upper section that visually stretches the height of your room. It is the most effective way to hide the inevitable floor-level clutter while keeping the upper portion of the door feeling open and architectural.
The Golden Ratio Tip: To avoid the “builder-basic” look of a 50/50 split, always place your divider significantly lower than the center point. This intentional offset changes the door from a standard utility piece into a deliberate design feature.
Precision in your rail dimensions is what makes this layout look like a high-end built-in rather than a DIY project. You want the bottom rail to act as a substantial base, or “kick plate,” for the door.
- Bottom Rails: Aim for a width between 7-9/16″ and 7-15/16″. This extra height at the bottom provides a strong visual anchor.
- Top Rails: Keep these in the 3-15/16″ to 4-7/16″ range to maintain a lighter, more refined look at the top of the door.
Mistake to Avoid: Do not guess your rail widths during assembly. If your bottom rail is too thin, the door will look top-heavy and cheap. Always measure your total door height first and map out these specific rails on paper to ensure the proportions hold up before you cut your material.
This configuration works particularly well in bedrooms or hallways where you want to draw the eye upward without making the closet feel like a solid, overwhelming wall. By keeping the upper panel large, you maintain a sense of verticality that makes the entire space feel larger than it actually is.
⭐ Tall Upper Panel Layout Selections
✨ Editor’s Pick
Five Lite Frosted Glass Sliding Door
Single Panel Primed Bifold Interior Door
Bifold Door Hardware Replacement Repair Kit
🏡 How This Works in a Real Home:
- Baseboard Alignment: Ensure your bottom rail height matches or sits slightly above existing baseboard trim for a seamless, intentional transition.
- Daily Clearance: Check that your lower panel doesn’t interfere with floor-level obstructions like door stops or thick carpet pile during folding.
- Natural Proportions: Avoid making the upper panel look like a “window”; keep the scale substantial enough to feel like a high-end, solid door.
5. Equal square panel grid

Achieve a sophisticated, modern look with perfectly balanced, symmetrical panel geometry.
The equal square panel grid is a bold, contemporary choice for those who want their closet doors to function as a primary architectural element. Unlike traditional layouts that aim for vertical elongation, this approach embraces a modern grid aesthetic that feels intentional and highly structured.
This layout is particularly effective for transitional or modern spaces, but it is also the most demanding to execute correctly. Because the design relies entirely on the repetition of identical shapes, your eye will immediately catch even the slightest deviation in spacing or alignment.
Precision is the priority: If your stile and rail widths vary by even 1/8″, the grid will look crooked. We recommend using consistent 2″ to 5″ widths depending on the heft you want for the frame; thinner members feel lighter and more minimalist, while wider members provide a more substantial, high-end architectural feel.
This configuration works best on standard 79″ tall doors, which provide enough vertical space to accommodate multiple rows of squares without the panels feeling squashed. Before you commit to this look, map out your door width – whether it is 24″, 30″, or 36″ – to ensure the math for your grid segments remains consistent across the entire door face.
Avoid the Hinge Conflict
Because this design uses multiple horizontal rails, you must map your bifold hinge points before finalizing your panel layout. If a horizontal rail is positioned exactly where a hinge needs to be mounted, the door will not fold properly or the hardware will look messy and forced.
If you are aiming for this look, prioritize consistency above everything else. All outer stiles and internal rails must align perfectly to maintain the integrity of the grid. This is not the time for estimating measurements; map it out on paper first to ensure every square is identical.
⭐ Equal Square Panel Grid Doors
Frosted Glass Accordion Bifold Closet Door
✨ Editor’s Pick
Mirror Aluminum Alloy Bifold Closet Door
Matte Black Thick Backplate For Knobs
🏡 How This Works in a Real Home:
- Visual Continuity: Keep the grid consistent with your room’s existing square-patterned furniture or window mullions to anchor the closet design.
- Daily Maintenance: Use a high-quality, paint-ready MDF to ensure the multiple intersecting corners stay crisp and resist cracking over time.
- Natural Proportions: Avoid forcing the grid if your door height is non-standard; prioritize square segments over perfect uniformity if you must adjust.
6. Narrow vertical panel layout

Create a high-texture, architectural finish perfect for tight spaces and narrow closet openings.
If you are working with narrow closet openings, a single wide panel can quickly look out of proportion – almost as if the door is too big for the frame. A narrow vertical panel layout solves this by introducing a “slat-inspired” aesthetic that adds visual height and texture to the room. It feels much more intentional than a plain slab, turning a functional necessity into a deliberate design choice.
The Stile Rule: To keep this look from appearing like cheap lattice or disappearing into the wall, keep your vertical members, or stiles, in the 2-1/8″ to 2-1/4″ range.
Going thinner than 2″ creates a flimsy, “lattice” effect, while going wider than 2-3/4″ often swallows the panel space, making the door look heavy and clunky.
Because this style relies on repetition, precision is your best friend. You will have more edges to sand, prime, and paint than with any other layout on this list, so expect to spend extra time on the finish work.
Avoid the “Thin-Strip” Trap
Do not fall for the temptation to use stock 1″ or 1.5″ trim strips for this look. It will look like a DIY mistake rather than a custom Shaker upgrade. Stick to the 2-1/8″ to 2-1/4″ baseline to ensure the door retains a substantial, high-end feel.
This layout is particularly effective in transitional or modern homes where you want to add architectural interest without overwhelming the space with heavy, oversized panels. Just remember that because there are more components involved, maintaining consistency across all vertical members is non-negotiable. If one stile is off by even a fraction, the human eye will catch it instantly in a multi-panel, vertical design.
⭐ Narrow Vertical Panel Layout Ideas
Folding Closet Door Hardware Repair Kit
Composite Front Entry Door With Ironwork
✨ Editor’s Pick
Raised Textured Six Panel Bifold Door
💡 Why This Works:
By using narrow vertical panels, you effectively manipulate the viewer’s eye to travel upward, which visually stretches the height of the room. This layout breaks up wide, static doors into rhythmic, architectural segments, transforming a bulky closet into a sophisticated, built-in feature that feels custom-designed rather than mass-produced.
Design Benefit: This layout disguises the width of large closets, making them appear neatly organized and intentionally designed.
7. Matched four door shaker wall

Transform a wide closet opening into a seamless, high-end architectural feature for your room.
When you are dealing with a large closet opening that requires a double-bifold setup – four doors in total – the goal is to make the entire wall feel like a single, intentional piece of custom cabinetry. This configuration is the ultimate way to hide a wide opening without it looking like a series of disjointed, builder-grade panels.
The golden rule for a four-door wall is absolute consistency. All four doors must use identical rail and stile widths, regardless of any slight variations in your door frames.
The Consistency Mandate: Never adjust your rail or stile widths to “fit” a slightly off-center opening or to compensate for uneven wall gaps. Instead, adjust the width of your center panels to account for those discrepancies while keeping the exterior frame members uniform across all four doors.
For a substantial, high-end look that mimics expensive custom wardrobes, aim for rail and stile widths in the 2.5″ to 3″ range. This adds enough visual weight to the doors so they ground the room rather than feeling like flimsy partitions. If you have particularly tall doors, stick to the upper end of that range to prevent the frame from looking fragile or disproportionate to the height of the ceiling.
Checklist for Four-Door Success
- ✅ Verify Hinge Alignment: Ensure your rail placement does not cross the hinge points on the bifold mechanism.
- ✅ Uniformity Check: Use the exact same measurement for every stile and rail on all four doors.
- ✅ Panel Adjustment: If your opening isn’t perfectly square, hide the variance by subtly resizing the panels, not the frame members.
- ✅ Operating Clearance: Confirm that the free-swinging access panel can latch to the folding pair without the new shaker faces catching or binding.
By treating the four doors as a single, unified grid, you effectively disguise the functional break of the bifold system. This layout works exceptionally well in transitional or modern homes where clean, architectural lines are preferred over ornate trim. It turns a necessary storage space into a focal point that feels like it was designed by a carpenter rather than added by a tract-home builder.
⭐ Matched Four Door Shaker Walls
✨ Editor’s Pick
Clear Over The Door Hat Organizer
Unfinished Pine Wood Shaker Cabinet Door
Antique Brass Interior Door Hinge Pack
📈 The Long-Term Payoff
While upgrading bifold doors is primarily an aesthetic investment for your own enjoyment, creating a high-end “built-in” look is a standout feature for potential buyers. It signals that the home has been cared for with intentionality. Because Shaker styling is a timeless architectural choice, this upgrade holds its visual value far longer than trendy or ornate door designs.
Marketability factor: A seamless, custom-look closet wall elevates the entire room’s perceived quality and finish.
With all seven configurations on the table, you have the full scope of how to elevate your closet doors from basic slabs to high-impact architectural features. Selecting the one or two layouts that best suit your room’s proportions is the only move that actually matters. You do not need to apply these techniques to every door in the house to achieve a cohesive, custom-built look.
Getting the rail widths and panel math right is what distinguishes a professional finish from a standard closet door makeover. By sketching your chosen design on paper before cutting your materials, you eliminate the guesswork and ensure the final result looks intentional. Once you secure those key measurements, the rest of the installation follows naturally, leaving you with a clean, upgraded space that adds genuine value to your home.
Related posts
 Innovative Trim Alternatives: Using a Door Stop Instead of Quarter Round
 Bifold Door Makeover From Builder-Basic to Built-In Looking
 Can You Use Bifold Doors as French Doors? A DIY Guide
 Curtains for Closet Doors That Hide Clutter Without Looking Makeshift
 Are Bifold Doors Good for Bathrooms?
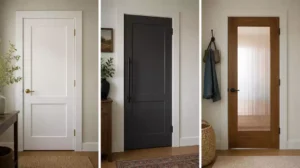 Flat Door Makeovers That Look Custom-Built Not Builder-Grade
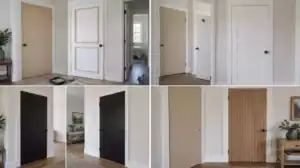 Flat Door Makeovers That Look Custom-Built Not Builder-Grade
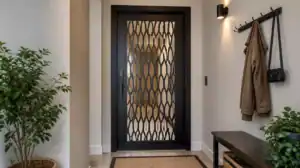 10 Safety Door Design Entrance for Flat Ideas That Look Stylish Not Heavy