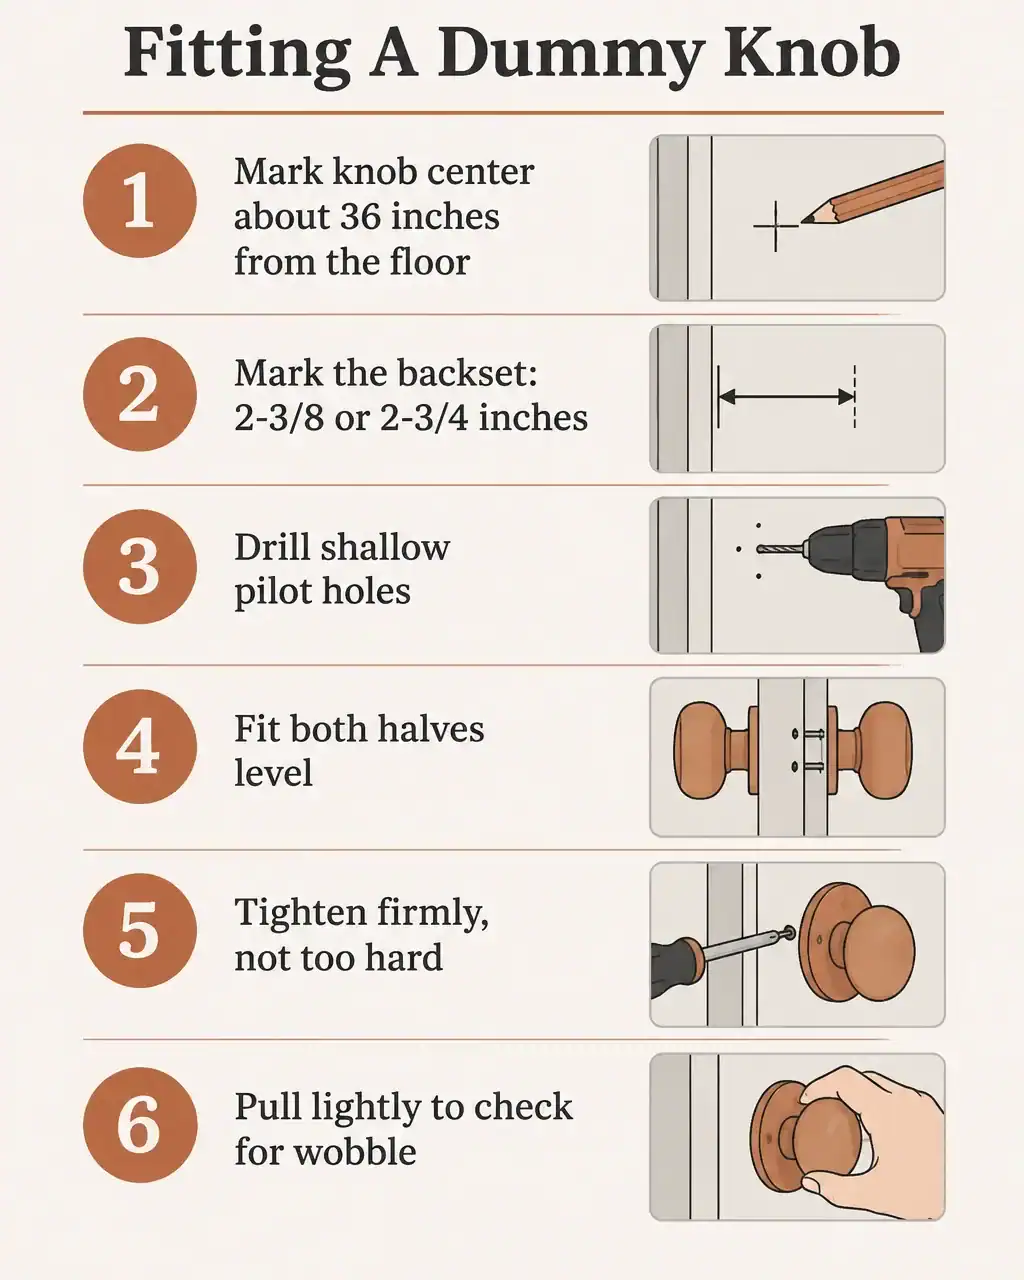
A dummy knob goes on the inactive leaf of a French door pair. It looks like the working handle but does not move a latch, and it takes six steps and a drill to fit.
Mark the height, mark the backset and keep the pilot holes shallow. The mistake people make is in the shopping, not the drilling.
What a dummy knob does
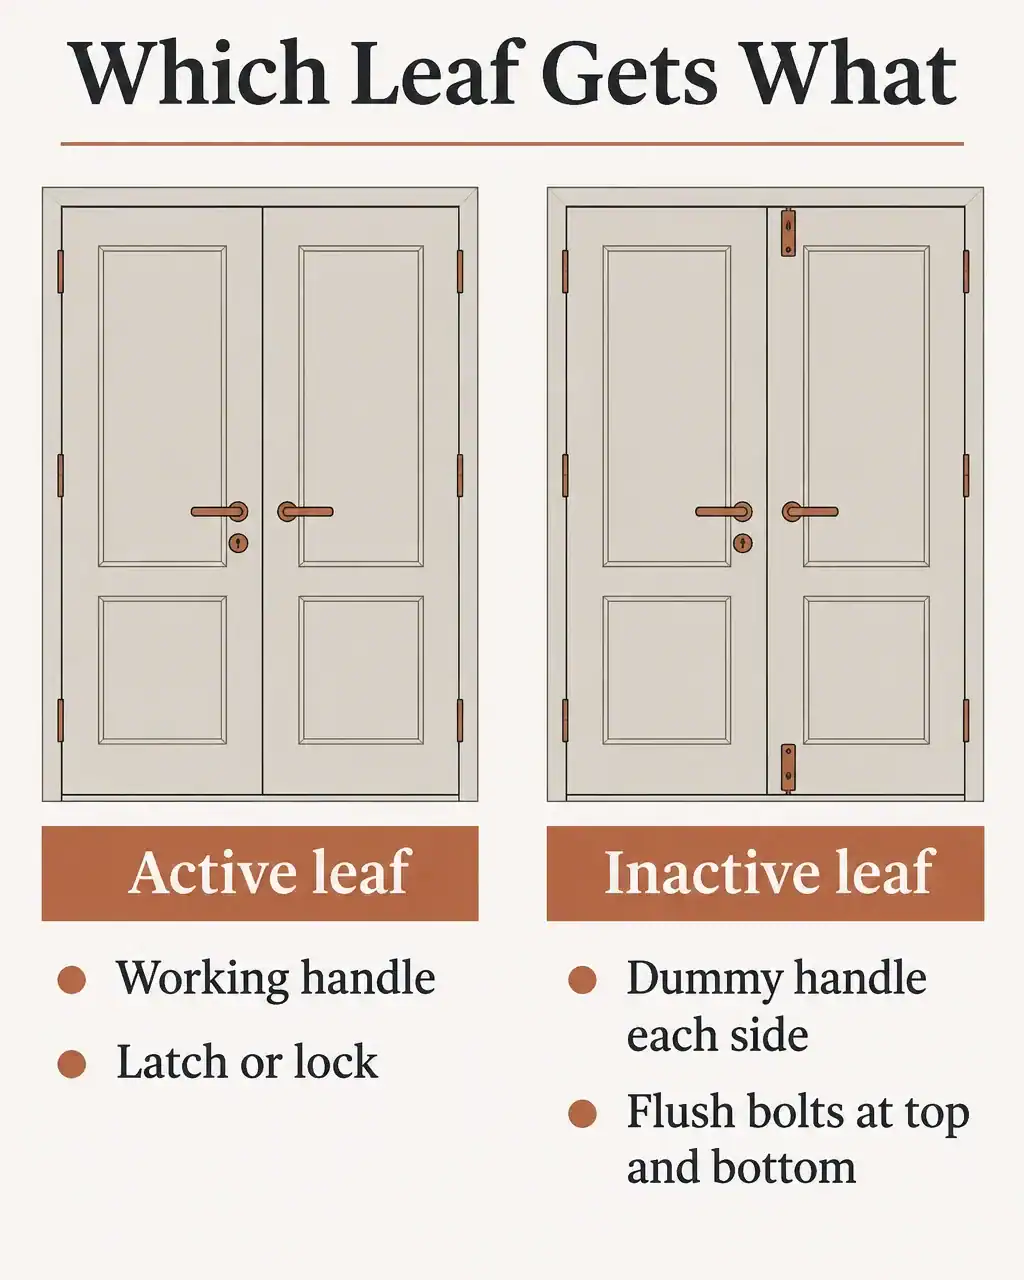
Restoration Online says the inactive door usually gets a fixed dummy handle on each side. A dummy looks like a normal handle but does not operate a latch or lock.
They are optional, since the doors work without them. Most people add them so the pair looks balanced.
If you buy levers, you need one left-hand and one right-hand dummy so each faces the right way. The common mistake is ordering two working handles instead of one working handle and one dummy.
What you need
- The dummy knob set, and its template if one is included.
- A tape measure and pencil.
- A drill with a small bit for pilot holes.
- A screwdriver.
- A spade bit or a 1 to 2 inch hole saw, only if the rosette sits in a shallow recess.
Fitting it step by step
- Mark the knob center about 36 inches from the finished floor, matching the existing handles.
- Mark the backset, 2-3/8 or 2-3/4 inches from the door edge to the center, depending on the design. Skip this if a template is supplied.
- Drill shallow pilot holes at the screw marks, slightly smaller than the screw thread and not through the door.
- Fit the first half, then the second, keeping the rosettes level.
- Tighten the screws firmly without overtightening.
- Pull the knob lightly and check for wobble or play.
This follows Engineer Fix, which says dummy knobs suit the inactive side of French door pairs, where only one door needs a working latch.
What goes wrong
Overtightening strips threads or crushes the door material, especially on hollow-core doors or particleboard. Deep pilot holes can break through the opposite face.
Crooked rosettes show most on doors with strong vertical grain or paneling. Check them against a level before the last turn.
Check the inactive leaf first
Restoration Online says the inactive door is held with flush bolts or surface bolts, usually one at the top and often one at the bottom. Flush bolts are recessed and look neater but need precise cutting. Surface bolts are easier to retrofit.
For an exterior pair that needs deadlocking, it recommends edge-mounted flush bolts or key-locking bolts on the face.
My order of work · James Davis
I would fit the flush bolts and get the working handle right first, then put the dummy on last. That way you can match the height to the real handle by eye.
Before you start
- Confirm which leaf is inactive, and that it is held by bolts.
- Buy one working set and one dummy set, not two working sets.
- Match the finish and the style to the working handle.
- Read the template or instructions for the backset your set uses.
- Test the door before you drill, so the knob height suits the pair.
To see why the handle sits where it does, read why French doors have the knob in the middle. For the working side, replacing French door handles and the different types of French door locks cover your options.
Related posts
 How Long Does It Take To Install Exterior French Doors?
 What Color Door Knobs Should I Use? A Guide to Choosing the Perfect Doorknobs for Your Home
 Can You Change the Opening Door on French Doors?
 Why Do French Doors Have the Knob in the Middle?
 Are French Doors Better Than Sliding Patio Doors?
 Are Sliding Doors or French Doors More Energy Efficient?
 Can You Get Screens for French Doors?
 How To Stop French Doors Blowing In The Wind