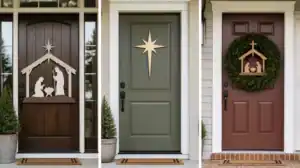
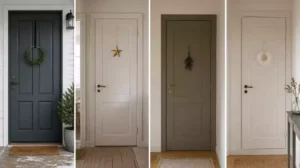
A disconnected front entrance leaves your home feeling unfinished and impacts your curb appeal. This guide narrows the process down to 8 practical steps worth your time to ensure a seamless flow between your architecture and landscape. Start with the foundation of your entry, the door material.
Start With the Doors Material

Your front door acts as the primary bridge between the home’s structure and the organic garden.
As an Amazon Associate I earn from qualifying purchases. Affiliate links may earn me a commission at no extra cost to you.
Your front door is more than a security feature; it is the physical threshold connecting your interior living space to the garden landscape. Choosing the right material dictates not only the aesthetic flow but also how much time you will spend on maintenance throughout the year.
If you prefer a traditional garden aesthetic, solid wood like oak or Accoya provides a warm, organic texture that blends beautifully with greenery. However, wood is prone to warping in humid garden micro-climates, so you must seal the top and bottom edges to prevent moisture-induced swelling.
For a modern or low-maintenance home, steel or fiberglass are superior choices because they offer clean lines that do not warp or rot. Regardless of the material, always ensure your door specifies Low-E glass to manage the thermal bridge effect.
Pro Tip: When choosing a wood door, ensure a minimum veneer thickness of 1/16″ (1.5mm) to maintain structural integrity.
This glass technology keeps your indoor temperature stable even when the garden creates a greenhouse effect on your porch. Once your door material is selected, you can focus on unifying the facade with your garden’s natural color palette.
.
🔢 The Right Sequence for Door Installation
Getting the order of operations right prevents moisture damage and ensures your door performs perfectly in a garden environment.
- Measure the opening: Confirm your rough opening and door thickness (1.25″–2.25″) before ordering.
- Seal all edges: Treat the top and bottom of wood doors before hanging to prevent rot.
- Install hardware last: Attach handles and strike plates only after the door is properly hung and leveled.
Pull Colors From the Garden

Harmonize your home’s exterior by echoing the permanent, unchanging tones found in your landscape.
Your front door color is a major visual statement, and linking it to the landscape prevents it from feeling like an island. Instead of chasing seasonal blooms that fade, look toward the permanent elements of your garden for your palette.
Focus on colors found in your stone pathways, natural bark mulch, or evergreen hedges. These elements provide a stable, year-round foundation that keeps your home looking intentional regardless of the current season.
The 60-30-10 Rule is your best tool for distributing color across your facade. Apply 60% of your color budget to the main house siding, 30% to the trim, and reserve 10% for the door as a deliberate accent.
When you head to the paint store, the chemistry of your paint matters as much as the hue. Use 100% Acrylic Latex for wood or masonry surfaces to handle the expansion and contraction common in exterior settings.
For metal surfaces, choose an Alkyd, or oil-based, paint to provide a harder, more durable finish. Regardless of the material, always verify the specific weather resistance ratings on the can before committing.
Testing Your Palette
Light levels shift drastically between the deep shade of a covered porch and the intensity of direct afternoon sun. Always test your samples in both areas before painting the entire door.
- Paint a 12-inch by 12-inch square on a piece of foam board rather than the door itself.
- Move the board between the shaded threshold and the sunny path to see how the color interacts with your greenery.
- Observe the sample during both morning and late afternoon light to ensure the undertones do not clash with your stone or foliage.
.
Designer Note: Creating Visual Flow
Selecting a color that bridges your home and garden is less about finding a perfect match and more about finding a shared “temperature.” By pulling the cool slate gray of a path or the warm, earthy brown of mulch into your door’s finish, you create a visual echo that makes the entrance feel like a deliberate extension of the landscape rather than a barrier.
Connect the Path to the Threshold

A wide, stable walkway turns a simple door into a welcoming garden entrance.
A narrow, disconnected path makes your garden feel like a separate property. By designing a wide, integrated transition, you turn the walkway into an extension of your home’s living space.
For your materials, prioritize stable surfaces like natural stone pavers or poured concrete near the door. Avoid loose gravel right at the threshold, as it inevitably tracks debris into your home and creates an uneven surface for guests.
Common DIY Pitfalls
Ignoring the crossfall of your path is a frequent mistake that leads to pooling water directly at your front door. This moisture accumulation often causes long-term rot at the base of the door frame.
Always ensure your finished threshold gap is less than 1/4″ (6mm) to prevent tripping and air leakage. If you are budget planning, expect basic paver paths to range from $12–$25 per square foot, while premium stone options can reach $25–$50+ per square foot.
When you align your path width to be roughly double the width of your door, you create a sense of grand arrival. This balance makes the transition from the garden to the interior feel intentional and effortless.
.
🔢 The Right Sequence
Planning your path requires a specific order to avoid costly drainage rework or damage to your existing door frame.
- Measure and Level: Verify the 1 in 40 crossfall to ensure water flows away from the door base.
- Set the Base: Compact your sub-base thoroughly before laying pavers to prevent shifting and uneven threshold gaps over time.
- Final Threshold Fit: Install the finish materials last, ensuring the gap remains under 1/4″ (6mm) for safety and interior insulation.
Frame the Door With Planting

Strategic plantings act as architectural curtains that guide the eye toward your home’s entrance.
Plants serve as the living architecture of your entrance, effectively softening the transition between your home’s hard edges and the soft landscape. When you approach this, treat your greenery as a permanent frame rather than a collection of individual specimens.
The 3-Layer Rule acts as your blueprint for professional-looking depth:
- Base: Low-growing groundcover that hugs the foundation.
- Mid: Substantial shrubs like Boxwood ($15–$40) to provide mass.
- Height: Vertical elements or small ornamental trees that draw the eye upward.
To keep the composition balanced, use even numbers for formal, symmetrical framing on either side of the door. If your garden style leans toward organic and flowing, stick with odd numbers to create a more natural, relaxed aesthetic.
Evergreen to Flowering Ratio: Aim for a 60/40 mix. The evergreens provide essential structural interest year-round, while flowering plants like Lavender ($10–$25) or Hydrangea ($20–$50) add seasonal personality.
The most common mistake is planting for the sapling you see at the nursery today. Always research the mature size of your shrub, ensuring it won’t crowd the path or obscure the door once it hits its five-year growth milestone.
You want your door to remain accessible, not hidden behind overgrown foliage. By prioritizing mature dimensions during your initial layout, you ensure the entrance remains the clear focal point of your property.
.
Designer Note: Mastering Visual Flow
To make your entrance feel like a seamless part of the garden, avoid planting in a straight line, which can look rigid or like a fence. Instead, stagger your heights in a soft, undulating pattern. By placing your taller verticals slightly behind the mid-level shrubs, you create depth that pulls the eye naturally toward the front door without feeling cluttered.
Designing a cohesive transition between indoors and out often feels like an all-or-nothing prospect, but most homes only require a few high-impact adjustments to feel finished. Focusing your budget on the points of greatest ROI creates a lasting result without the stress of overhauling every detail.
Prioritizing structural continuity over decorative trends ensures your investment remains timeless rather than becoming a source of future renovation fatigue.
Match the Hardware to Outdoor Finishes

Elevate your entrance with hardware that bridges indoor luxury and outdoor durability.
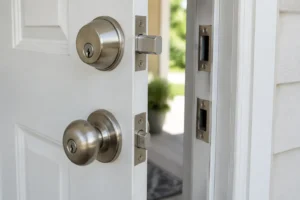
Hardware functions as the jewelry of your entrance, effectively bridging the gap between indoor luxury and outdoor resilience. To keep the look intentional, apply the 70/30 rule: 70% of your outdoor metal should feature the dominant finish, with the remaining 30% serving as a deliberate accent.
Modern vs. Traditional Styles
For modern garden ironwork, matte black is the preferred choice to maintain a clean aesthetic. If your design is wood-centric, opt for unlacquered brass to develop a natural, aged patina over time.
Durability is non-negotiable when your hardware is exposed to the elements. Always verify that your chosen pieces feature PVD-coating (Physical Vapor Deposition) to prevent early tarnishing and corrosion.
Avoid the common mistake of mixing finishes haphazardly, as it can make an entryway look disjointed rather than curated. Ensure your hinges and strike plates consistently match your handle finish to create a unified, professional appearance.
.
🧰 Questions for Your Installer
- PVD-coating verification: Can the manufacturer confirm this hardware set is PVD-coated to prevent tarnishing in wet garden climates?
- Hardware compatibility: Does the strike plate provided with this set match the existing door jamb’s specific cutout dimensions?
- Warranty terms: Does the finish warranty cover salt air or humidity exposure if the entrance faces a garden?
Layer in Entrance Lighting

Warm, layered lighting extends your home’s welcoming atmosphere well into the quiet evening hours.
Lighting is the primary tool for extending the entry experience beyond sunset. Without a deliberate plan, your front door can feel like a dark, uninviting void after dusk.
Think of your lighting in a three-tier hierarchy to create depth and safety. You need ambient light for the house structure, task light for the door and keyhole area, and accent light to highlight the garden textures.
Lighting Hierarchy Guide
- Ambient (House): Soft wall-mounted fixtures that define the porch architecture and general entry zone.
- Task (Door): Focused, glare-free light illuminating the handle, lock, and immediate landing to aid guests.
- Accent (Landscape): Low-voltage fixtures that draw the eye to unique garden features or path edges.
Color temperature is just as important as placement for the mood of your garden. Use 2700K–3000K for general light to maintain a clean, visible entry, and opt for 2400K in intimate garden zones to keep the vibe soft and relaxing.
When placing path lights, avoid the common mistake of creating a runway effect. Space your fixtures 6 to 8 feet apart to provide enough guidance without over-illuminating the ground.
Avoid Glare at Eye Level
Never let bulbs shine directly into the eyes of arriving guests or neighbors. Always use shielded fixtures to direct light downward onto the path surface, which keeps the light functional and the garden mood atmospheric.
Plan for a total project investment between $1,500 and $4,000, depending on the number of fixtures and the complexity of your wiring. High-quality, properly shielded fixtures protect your investment from early tarnishing and ensure years of reliable performance.
.
💡 Why This Lighting Strategy Works:
By separating your lighting into ambient, task, and accent layers, you mimic the complexity of interior design in your outdoor space. This approach stops the entry from feeling like a flat, over-lit “runway,” instead using shadow and highlights to create a sense of mystery and depth that makes your garden feel like an extension of your living room.
Pro-tip for balance: Always prioritize the keyhole visibility first; functional light is the best way to make a home feel truly welcoming after dark.
Repeat One Element Inside and Out

Blurring the boundary between your home and garden creates a sense of expansive, unified living.
The secret to a truly connected entrance is a visual echo – a deliberate repetition of material or pattern that tricks the eye into seeing the garden as an extension of your foyer. By carrying a single design element through the threshold, you eliminate the “separate zone” feeling that often plagues standard entryways.
Start by evaluating the flooring materials you are using for your exterior path and your indoor entry area. If you use the same bluestone pavers outside, try to carry that exact stone or a very close visual match into your interior foyer.
Material Echo Ideas
- Bluestone Pavers: Use these outdoors for walkways and bring them inside for a durable, high-end foyer floor.
- Cedar Accents: Carry natural cedar from outdoor decorative screens or porch ceilings into an interior slat-wall or bench design.
- Geometric Layouts: Mirror the pattern of your exterior brickwork in your internal entryway tile installation.
When you introduce these repeating elements, follow the rule of “Think in Threes.” Arrange your focal points – such as planters, lanterns, or architectural details – in odd clusters to ensure the space feels natural and organic rather than stiff or forced.
Keep your design strategy simple to avoid overwhelming the space with too many competing features. Repeating one strong element is significantly more effective than cluttering your transition with multiple shared features that compete for attention.
Pro Tip: Design for the Future
Always account for the mature size of your plants and materials when arranging them near your threshold. Planning for how a shrub or paver layout will look in five years prevents you from accidentally blocking your front door or creating a pinch point.
.
✨ Small Details That Matter
Focusing on the tactile and visual overlap of your materials turns a simple doorway into a cohesive, intentional transition that feels professionally designed.
- Grout Continuity: Ensure outdoor stone joints match interior floor spacing to maintain an unbroken visual line through the threshold.
- Finish Alignment: Carry your door’s specific wood grain direction or stain tone into foyer trim for a seamless, unified look.
Test the View From the Gate

Ensure your home’s first impression draws guests naturally from the garden to the door.
The gate serves as the first frame of your home’s portrait. You need to verify that your entrance remains the primary focal point from the moment someone steps onto your property.
A standard gate opening should measure between 36 and 42 inches (900–1100mm) to allow for comfortable movement. You should also ensure the gate itself swings inward, which is standard for both safety and flow as guests arrive.
Sightline Strategy: Use “pinch points” – such as strategic plantings or architectural structures – on either side of the gate to naturally funnel the eye toward your front door.
Use the following checklist to confirm your entrance feels both visible from the street and intimate from the garden path.
- 1
Clearance Check: Ensure the gate provides a head clearance of 78 to 80 inches (1980–2030mm).
- 2
Visibility Test: Walk from the street to the gate and confirm the front door is immediately identifiable.
- 3
Intimacy Check: From the garden side, ensure the path feels like a private corridor leading directly to your home.
When you align these sightlines, you turn a simple transition into an intentional experience. Your home should feel like a cohesive, welcoming destination rather than a house separated from its surroundings.
.
📋 What to Check First
- Door visibility: Stand at the street gate and confirm that large foliage or structural elements don’t hide the entrance.
- Gate height: Verify your gate opening allows for a standard head clearance of 78 to 80 inches for guests.
- Swing path: Check that the gate arc doesn’t drag on uneven pavers or strike low-lying garden borders during operation.
With all eight strategies now at your disposal, the path toward a unified front entrance becomes a matter of execution rather than volume. Identifying the one or two changes that anchor your home to your landscape is far more effective than attempting a total overhaul.
Focusing on high-impact areas like quality door styles or structural lighting will define the transition better than any single detail ever could. Once those deliberate choices are locked in, the rest of your garden flow will naturally follow.
Related posts
 12 Wooden Front Door Design Ideas for a Grand Entrance
 17 Sliding Door Living Rooms That Flow Right Into the Garden
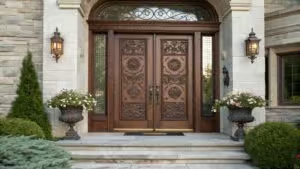 12 Epic Carved Front Door Design Ideas
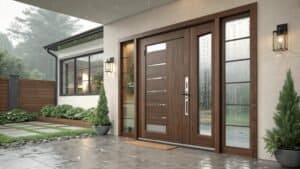 12 Climate-Proof Main Door Design Ideas That Always Work
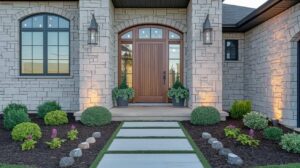 19 Wooden Entrance Door Inspirations That Instantly Elevate Curb Appeal
 Boost Your Home’s Appeal: An In-Depth Review of the Design House 181412 3.5″ Satin Nickel Hinge 3-Pack
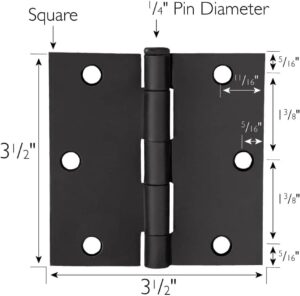 Design House 188938 Door Hinges Review
 11 Pinterest-Worthy Door Design Inspirations You’ll Love