A sliding patio door that requires physical force to open is more than an annoyance; it is a sign of mechanical failure that can lead to permanent damage. This guide covers 9 specific causes of resistance to help you diagnose the issue and restore smooth operation. Let’s start with the track.
Dirty Track
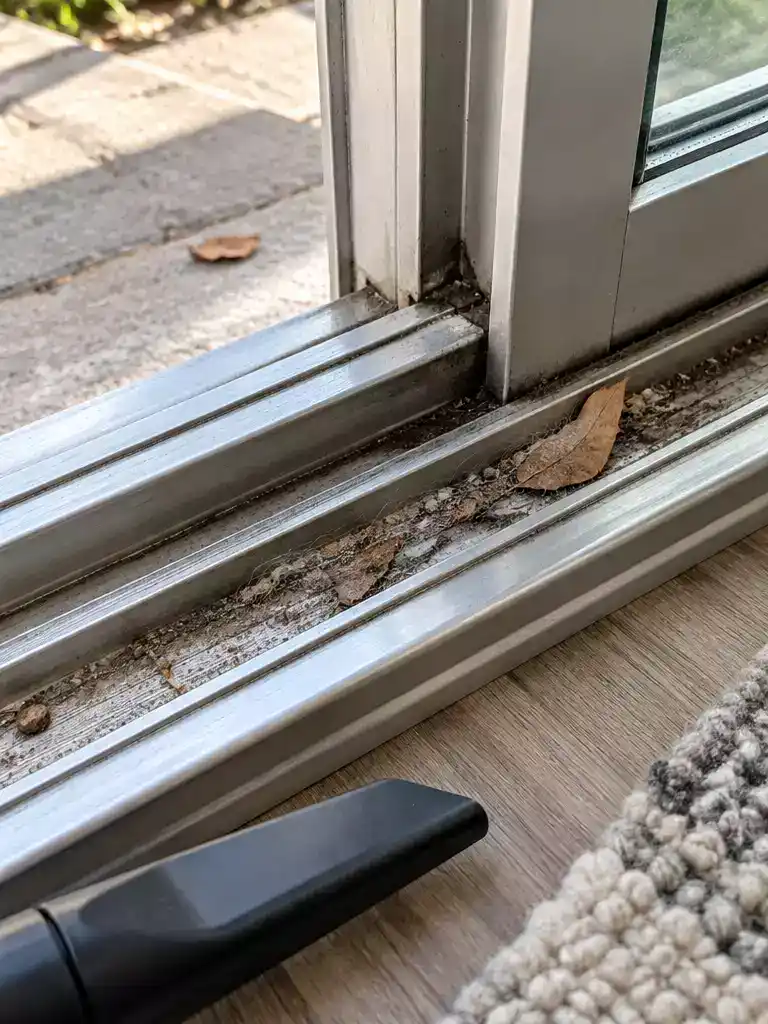
Restoring your door’s smooth glide starts with a clean, debris-free track.
As an Amazon Associate I earn from qualifying purchases. Affiliate links may earn me a commission at no extra cost to you.
When your door starts to resist, the first place to look is the track itself. Over months or years, grit, pet hair, and outdoor debris settle into the channel, where they act like fine-grit sandpaper under your door’s rollers.
This grinding friction doesn’t just make the door feel heavy; it slowly eats away at the roller wheels and can even score the metal track, creating permanent damage that is much harder to fix than a simple cleaning.
The Deep Clean Process
Follow these steps to safely clear the track without forcing the door or damaging the finish:
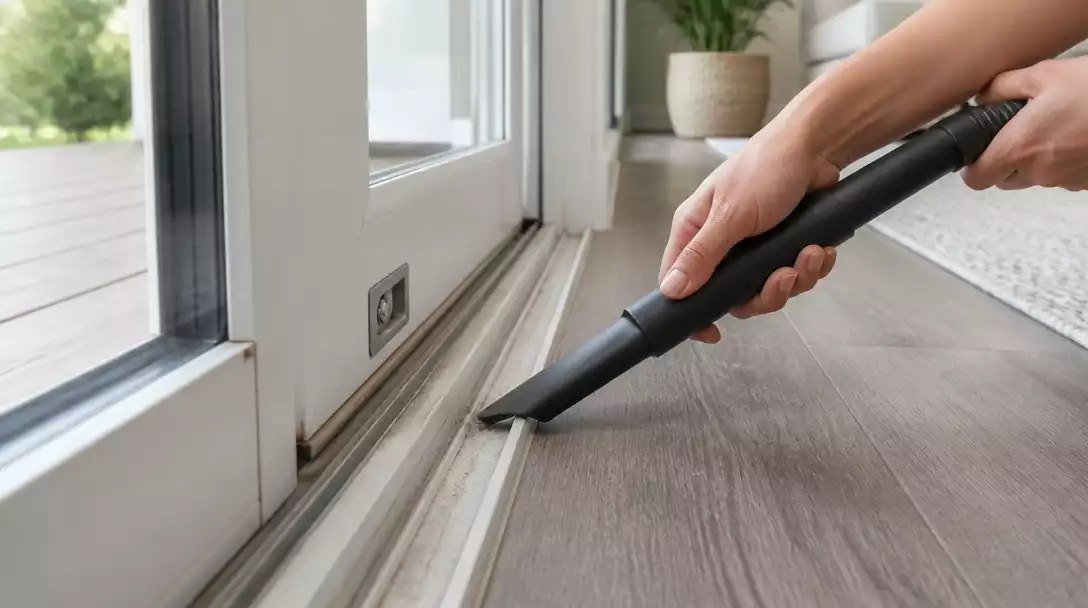
- Vacuum First: Use a shop vacuum with a narrow crevice tool to remove all loose dirt, hair, and grit. Do not skip this step or attempt to wipe the debris while it is loose, as you will only push the particles deeper into the track.
- The Scrub: Once the loose debris is gone, use a stiff-bristled brush or an old toothbrush dipped in warm, soapy water to dislodge caked-on grime.
- Wipe and Dry: Use a soft, clean cloth to wipe away the soapy residue and dirt. It is essential to leave the track completely dry to prevent future oxidation or rust.
The “No-Grease” Warning
Avoid the temptation to use heavy oils, WD-40, or household grease on your tracks. These products act like a magnet for dust and grit; they might make the door slide easily for a few days, but they quickly turn into a gummy, abrasive paste that accelerates roller wear and forces you into a more expensive repair later.
If you find that your door still feels like it’s dragging even after the track is spotless, the issue likely sits deeper within the roller assemblies themselves. Never force a door that is struggling to move; if it doesn’t glide with a gentle push, you risk bending your track and turning a quick, free maintenance task into a major repair.
⭐ Top Track Kits for Smooth Sliding
✨ Editor’s Pick
Stainless Steel Sliding Door Track Repair Cover
Heavy Duty Sliding Barn Door Track Kit
Sliding Barn Door Rail Wall Spacers Kit
The Right Sequence
Clearing the track is always your first move; performing other repairs before removing debris often leads to unnecessary damage or wasted effort.
- Vacuum all loose grit and pet hair using a crevice tool attachment.
- Scrub away stubborn, caked-on buildup with a stiff brush and soapy water.
- Dry the track thoroughly with a soft cloth before attempting any roller adjustments.
Worn Rollers
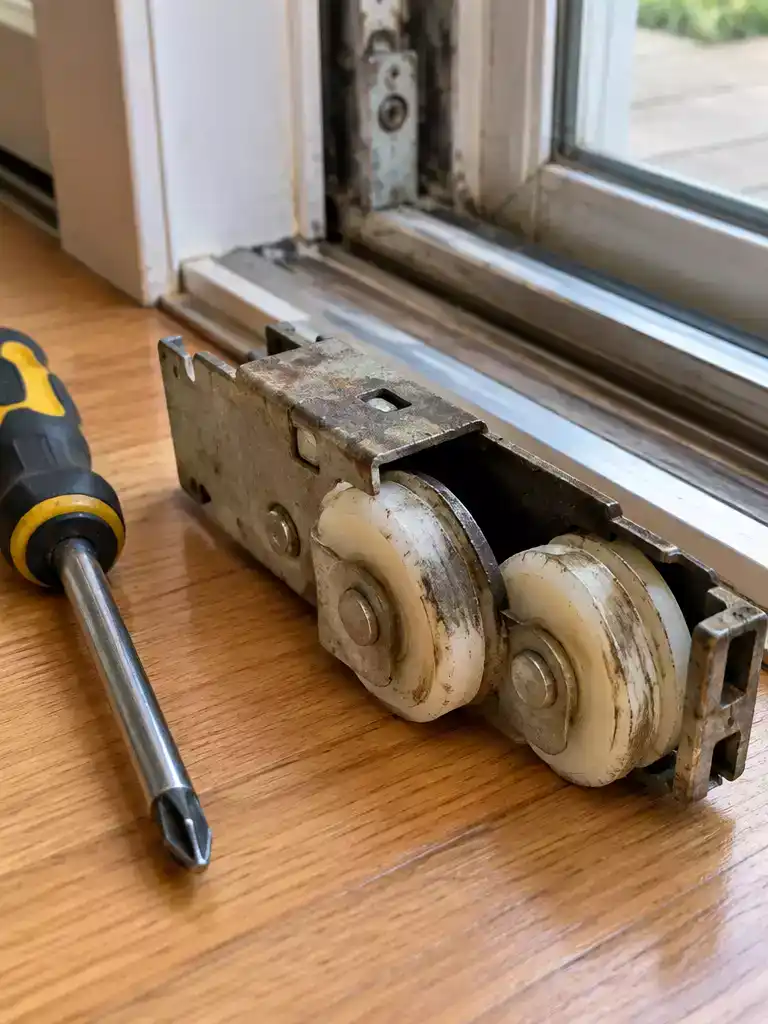
Restoring your door’s smooth glide starts with identifying and replacing fatigued roller assemblies.
When your sliding door starts to feel heavy or grinds against the track, the culprit is often mechanical fatigue within the roller assemblies. Over time, the weight of the glass panel causes the wheel surface to develop flat spots, or the internal bearings simply seize up, preventing the wheel from rotating at all.
If you suspect your rollers are the issue, do not wait until the door becomes immobile. Dragging a panel on a flat-spotted wheel will eventually gouge your track, turning a simple hardware replacement into a much more expensive repair.
The Golden Rule: Always replace your rollers in pairs. Replacing only the front or back roller creates an uneven weight distribution that causes the door to tilt, leading to rapid, uneven wear on the new parts and continued resistance.
Before you head to the store, you must remove the entire roller assembly from the door panel to ensure a perfect match. Generic replacements rarely fit perfectly, and the wrong size will leave your door sitting too high or too low in the frame.
- Measure the housing: Note the exact width and height of the metal carriage.
- Check the wheel diameter: Use calipers to get the precise size of the roller wheel.
- Identify the material: Note if the wheels are nylon, steel, or brass, and look for any manufacturer part numbers stamped on the side of the housing.
Avoid This Mistake: Never leave the old roller housing in the frame while attempting to swap out just the wheels. If the housing itself is corroded or bent, new wheels won’t solve the underlying alignment issues. Always swap the entire assembly to ensure the door tracks correctly.
⭐ Best Roller Replacements for Patio Doors
Spring Tension Sliding Screen Door Roller Set
✨ Editor’s Pick
Heavy Duty Sliding Glass Door Tandem Rollers
Heavy Duty Steel Sliding Screen Door Rollers
💰 What This Really Costs
- Replacement parts: DIY rollers typically range from $20 to $35, though specialty assemblies can reach $168.88.
- Hidden labor costs: Forgetting to clear the track before testing new rollers often leads to immediate, unnecessary damage.
- Investment value: Spending on high-quality stainless steel rollers pays back by preventing future track corrosion and binding.
3. Misadjusted rollers
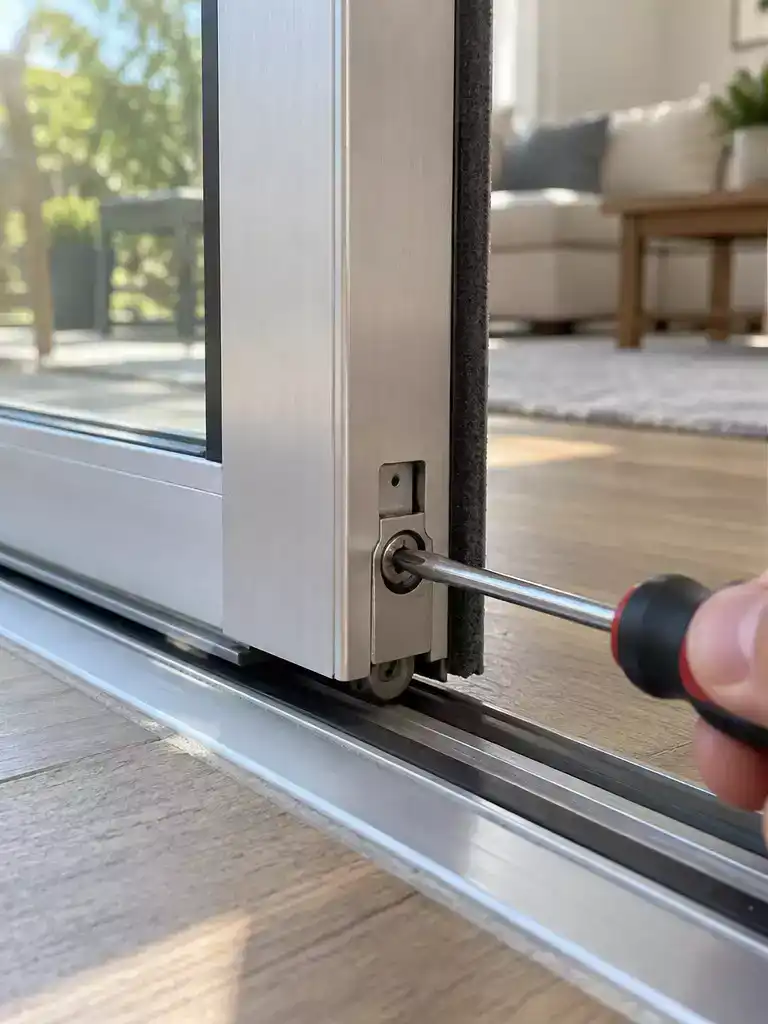
Fine-tuning your door’s alignment ensures a smooth, effortless glide across your patio threshold.
Most sliding patio doors are designed with adjustable rollers to compensate for minor floor settling or frame shifts over time. If the lock has stopped catching as well, see a sliding patio door that will not lock. If your door is dragging or doesn’t meet the jamb flush, the panel is likely no longer perfectly parallel to the frame.
Before you reach for the tools, check the top of the door panel with a spirit level. If the bubble isn’t centered, you have a clear indication that one side of the door needs to be raised or lowered to restore its square position.
The Adjustment Technique: Locate the adjustment screws, which are usually hidden behind small plastic caps on the bottom or side edges of the door panel. Using a standard Phillips screwdriver or a hex key, turn the screw in tiny quarter-turn increments to avoid over-adjusting.
- Clockwise: Rotates to raise the door panel.
- Counter-clockwise: Rotates to lower the door panel.
Pro Tip: After each adjustment, slide the door back and forth several times to allow the rollers to settle into their new position. Keep testing until the door is flush with the side jamb when closed and slides without erratic resistance.
If you find that the door still binds after several adjustments, you may be dealing with more than just a simple alignment issue. If the panel remains stubborn even when perfectly level, it is time to inspect the tracks for debris or check for internal roller damage.
⭐ Roller Kits That Fix Misalignment
Lower Screen Door Roller Assembly Replacement Pair
Bifold Closet Door Hardware Repair Kit Set
✨ Editor’s Pick
Patio Glass Door Tandem Roller Replacement Kit
🔢 The Right Sequence to Prevent Rework:
Adjusting rollers before addressing other issues often leads to frustration; follow this order to ensure your door stays square and slides without binding.
- Vacuum all debris from the track to prevent grit from affecting roller height.
- Verify the frame is square by measuring diagonals before making any roller changes.
- Perform micro-adjustments on the rollers only after confirming the panel is level.
Mechanical resistance often stems from daily habits rather than a failing door system. Addressing these patterns early prevents the need for a costly door replacement while keeping your home entrance functioning exactly as intended.
Fixing the few root mechanical causes is significantly more effective and affordable than attempting a complete door overhaul.
4. Bent track
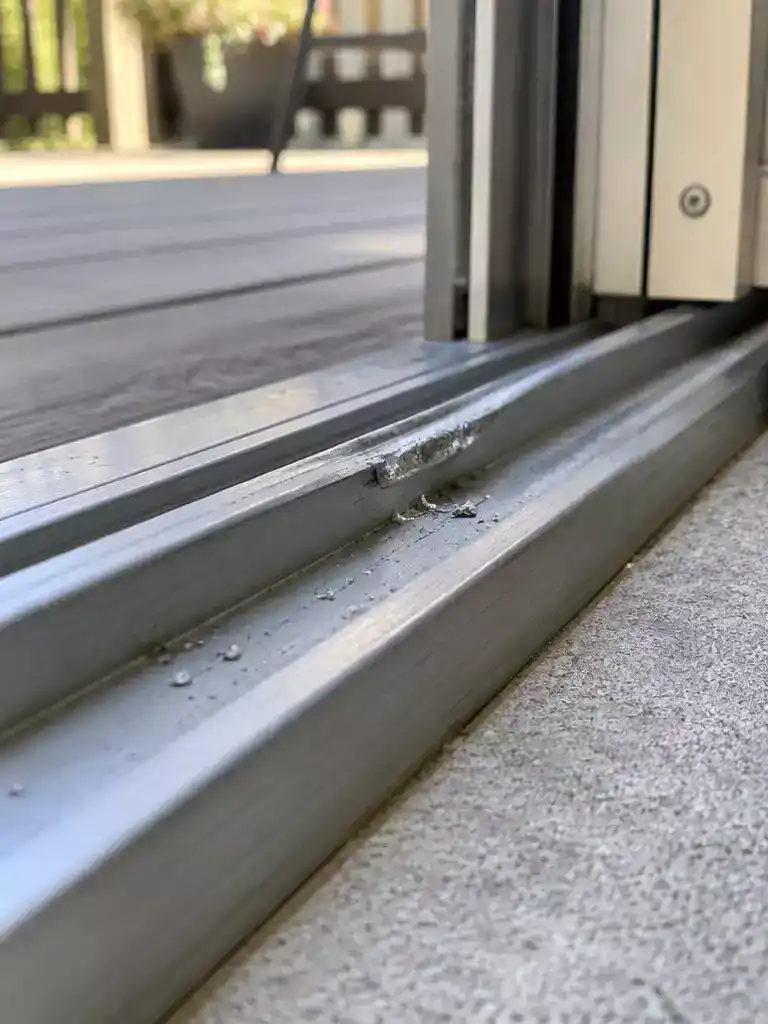
Restoring your track’s profile ensures smooth movement and prevents further structural damage.
When your sliding door feels like it’s hitting a speed bump every time you open it, take a close look at the metal track itself. Physical deformation is a common culprit, often manifesting as visible dents, raised metal lips, or fine metal shavings scattered near the rail.
If you spot these signs, it usually means the track has lost its structural integrity. You might notice the door makes a distinct grinding sound or physically “jumps” as it passes over the damaged area.
Never attempt to push through the resistance when you feel the door snag. Forcing a sliding panel over a bent track can permanently kink the metal, turning a simple, localized repair into a major structural failure.
For minor imperfections, you can often perform a targeted DIY repair. Use a fine-tooth metal file or a block of sandpaper to carefully smooth out high spots or jagged edges that are catching the roller wheels.
However, there is a clear limit to what you should handle yourself. If the track is severely kinked or the metal is fatigued to the point of cracking, DIY straightening attempts often cause the metal to weaken further or snap entirely.
If the damage is extensive, remember that a professional track replacement or capping is a significant investment. While the upfront cost is higher, it is far more economical than ignoring the issue until you reach the point of needing a full-door replacement, which can easily climb into the thousands.
⭐ Standout Track Repair Solutions
✨ Editor’s Pick
Stainless Steel Sliding Door Track Repair Cover
Precision Silicone Oil Lubricant for Tracks
Commercial Grade Pocket Door Track Set
💰 Where the Budget Goes
- The real range: DIY materials for smoothing tracks typically cost between $20 and $100 for basic tools.
- Hidden cost: Don’t forget to budget for professional labor, which often ranges from $75 to $150 per hour.
- Worth it: Track capping is a smart investment if damage is severe, saving you from a $4,000+ full replacement.
5. Frame Settlement
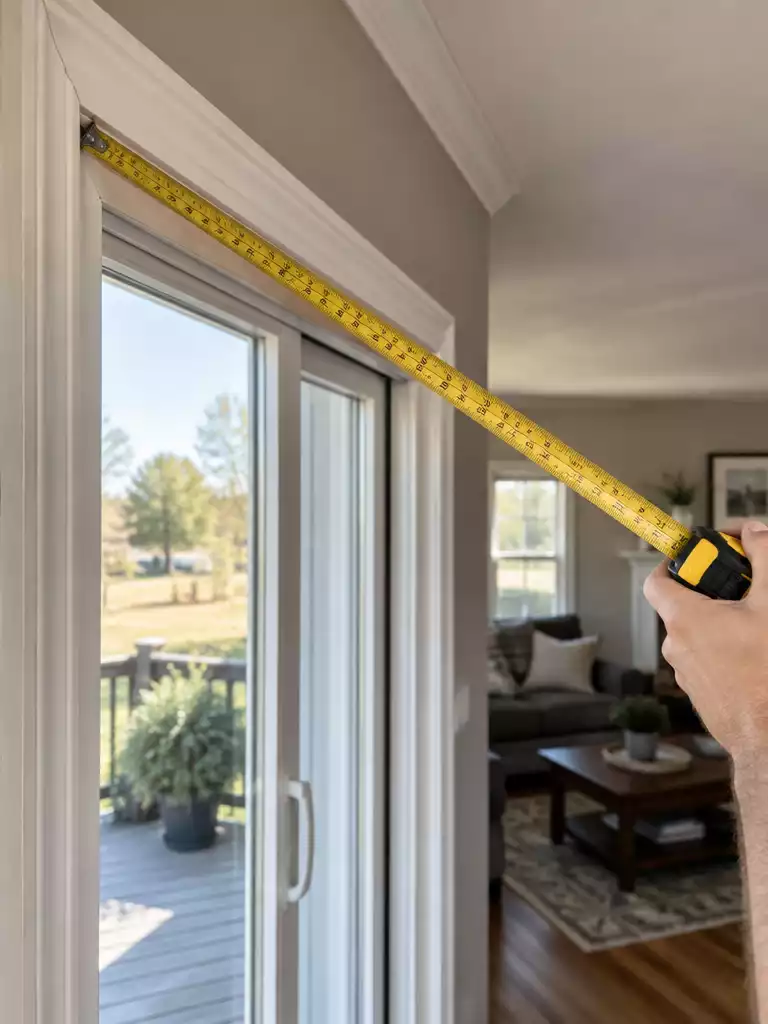
Identifying structural shifts early protects your door from permanent mechanical binding and damage.
Sometimes, the trouble with your sliding door isn’t the door at all – it’s the house itself. Over time, foundations settle and wooden framing members shift, which can pull your door frame out of square. When this happens, the track is no longer a perfectly level path, and the door panel will consistently bind in the exact same spot, no matter how many times you clean or lubricate the track.
To determine if your issue is structural, you need to perform a simple diagonal measurement test. Take a tape measure and measure the distance from the top-left corner of the frame to the bottom-right corner, then repeat the process for the top-right to the bottom-left.
What to look for: If those two diagonal measurements do not match, your frame is what contractors call “racked” or out of square. A difference of even a quarter-inch can be enough to compromise the smooth sliding operation of your door panel.
If you confirm that your frame is out of plumb, it is important to be realistic about your next steps. While you might be tempted to force the door or perform aggressive roller adjustments to compensate, these are only temporary band-aids. If the frame is significantly out of alignment, the door will continue to struggle because the physical opening it travels through has effectively changed shape.
Persistent binding in the same location, visible tilting of the frame, or new cracks in the drywall surrounding the door are all indicators that the issue is structural. In these cases, minor DIY adjustments will likely fail to provide a long-term fix, and you may need to consult with a professional to address the underlying settlement issues.
⭐ Frame Kits for Settlement Issues
Adhesive Foam Insulation Tape for Frames
✨ Editor’s Pick
Soft Close Pocket Door Frame Kit Set
Paintable Curved Archway Door Frame Kit
🔢 The Right Sequence for Structural Checks:
Before assuming your frame has settled, you must rule out easier fixes to avoid unnecessary structural repairs.
- Vacuum the tracks thoroughly to eliminate grit interference first.
- Adjust the roller height to account for minor floor unevenness.
- Perform the diagonal frame measurement once the path is clean and leveled.
6. Weatherstrip drag
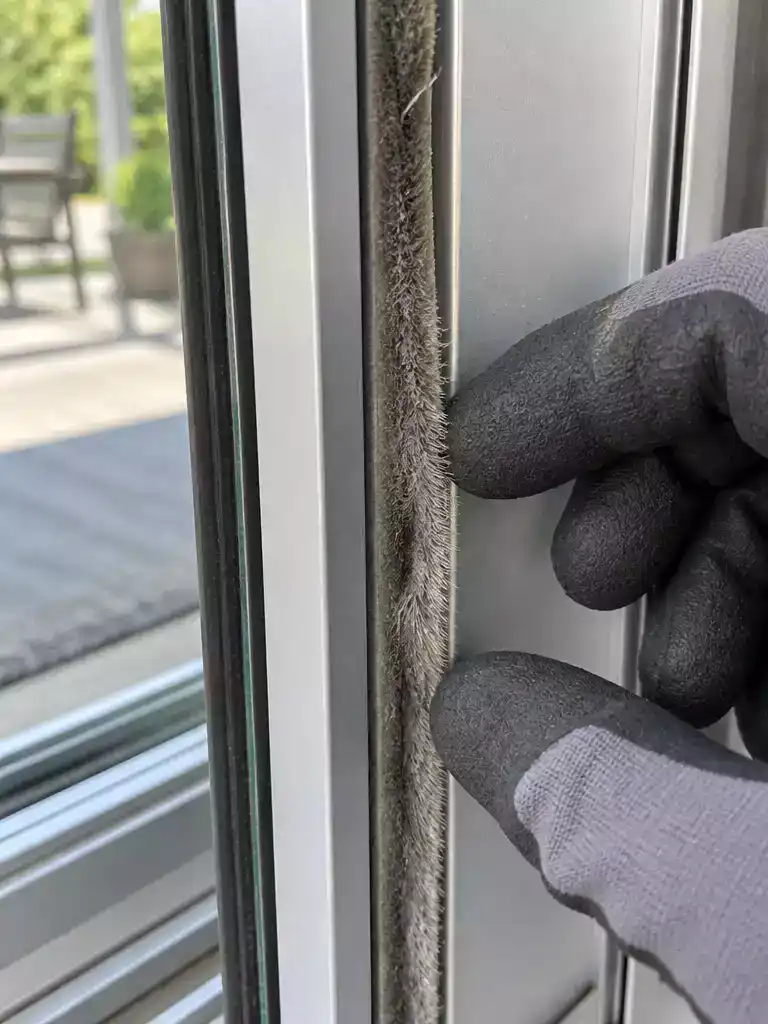
Restore your door’s smooth glide by identifying and replacing worn, high-friction weatherstripping.
Weatherstripping is the unsung hero of your patio door, designed to keep the elements out. However, when these seals become compressed, frayed, or misaligned, they transition from a protective barrier into a significant source of friction that makes the door feel heavy and sluggish.
Identifying the right type is the first step in solving the drag. Most sliding doors utilize one of three common profiles:
- Pile (Brush) Seals: Common on aluminum-framed doors; these consist of fine fibers that can mat down or fray over time.
- Vinyl Channel Seals: Rigid plastic or vinyl strips that snap into the frame; these often harden or crack with age.
- Bulb or Fin Seals: Flexible rubber or foam gaskets designed to compress against the door panel for a tight seal.
If you notice the door moves freely for most of its travel but binds up near the closed position, the weatherstrip is likely catching or over-compressed. Inspect the material for signs of deformation. If it is frayed or no longer springs back when pressed, it needs to be replaced with an exact profile match.
When you head to the hardware store, bring a small sample of your old weatherstrip with you. Because profiles vary significantly between manufacturers, matching the exact width and thickness is the only way to ensure the new seal provides protection without dragging against the door panel.
⭐ Weatherstrip Seals That Stop Drag
Transparent Silicone Weather Stripping Seal Set
Expanding Foam Seal for Door Gaps
✨ Editor’s Pick
Low Profile Aluminum Door Sweep Seal
🔢 The Right Sequence for Seal Replacement
Getting the order right prevents the frustration of having to pull out new adhesive strips or misaligned brush piles halfway through the job.
- Measure first: Cut a small piece of old seal to match the exact profile before shopping.
- Clean the channel: Remove all adhesive residue or grit so the new seal sits perfectly flush.
- Install carefully: Press the seal firmly into place without pulling or stretching the material during application.
7. Door Panel Warping
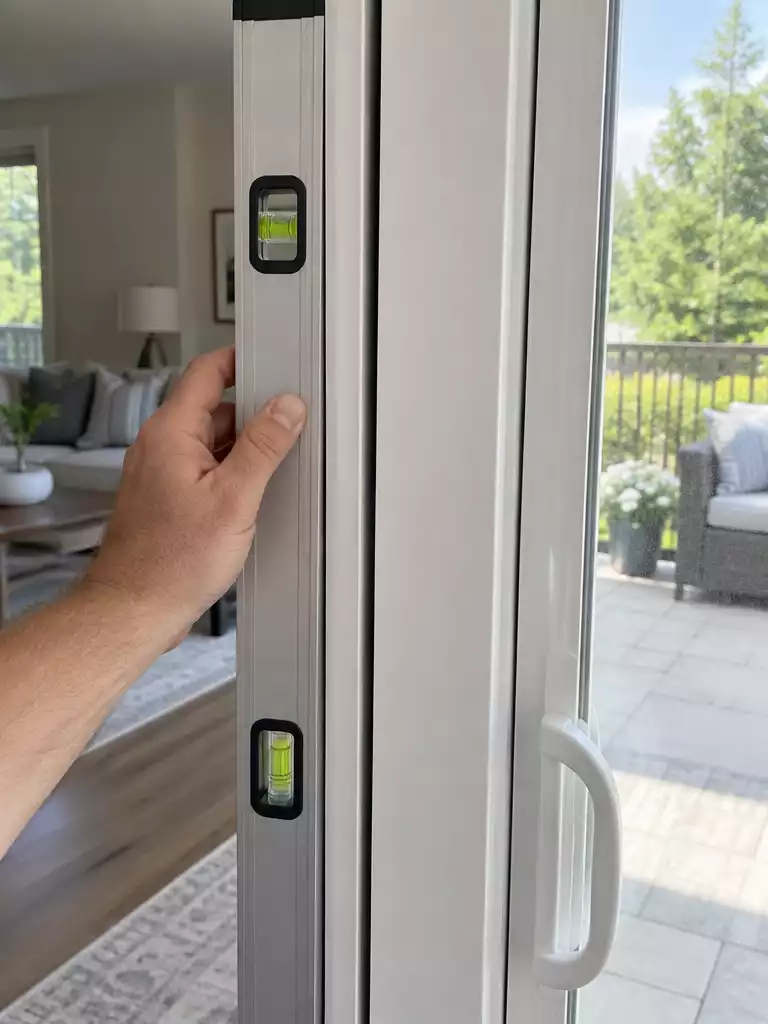
A quick straightedge check can reveal if your panel is structurally compromised beyond simple adjustments.
When your sliding door becomes difficult to move, it is easy to assume the problem is limited to the track or the rollers. However, the structural integrity of the door panel itself can be the hidden culprit, especially if the door has been exposed to extreme temperature fluctuations or moisture over many years.
To determine if your door panel is warped, take a long, rigid straightedge – a professional level or a perfectly flat piece of lumber works well – and hold it vertically against the face of the door panel. If you notice a visible gap or “bow” between the straightedge and the door frame, your panel has likely lost its original shape.
The Threshold for Repair
Minor bowing can sometimes be mitigated by adjusting the roller height to compensate for the slope, but this is often a temporary fix. If the panel is significantly warped, no amount of adjustment will restore smooth operation, and replacing the panel or the entire door unit is usually the only permanent solution.
Warping is frequently caused by moisture infiltration, which is common in older wood-framed sliders, or by the expansion and contraction cycles of lower-quality vinyl frames in harsh climates. If the panel is visibly bowed, it will never slide smoothly because it creates constant, uneven friction against the frame and the weatherstripping.
Before you spend money on new roller assemblies or professional track repairs, perform this straightedge test first. If the panel is indeed warped, you can save yourself the cost of unnecessary parts and move directly to planning for a more reliable door system.
⭐ Panel Kits for Warped Doors
✨ Editor’s Pick
Magnetic Blackout Closet Door Curtain Panel
Primed White Sliding Barn Door Slab
Plastic Sliding Door Track Panel Kit
📋 What to Check First
- Diagonal measurements: Use a tape measure to compare frame diagonals; if they don’t match, your frame is racked.
- Hardware clearance: Inspect the gap between the panel and the jamb to see if it narrows significantly mid-slide.
- Structural moisture: Check for soft or discolored wood near the bottom rail, which often indicates internal panel rot.
Corroded Roller Assemblies
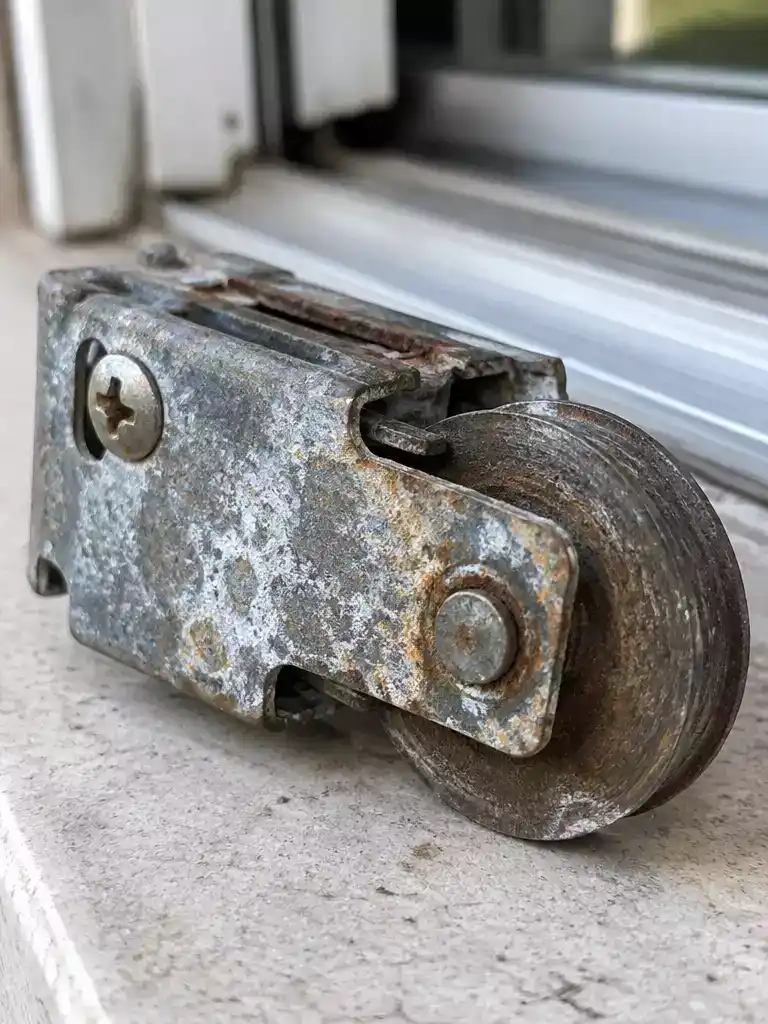
Protect your investment by choosing hardware that handles the elements without seizing up.
If your home is located in a coastal or high-humidity environment, the air itself might be the primary reason your door is struggling. Salt air and persistent moisture are the fastest ways to turn a functional roller assembly into a seized, immovable brick.
When rollers corrode, the metal housing often expands or flakes, creating friction that no amount of cleaning can fix. You will typically notice this as a “crunching” sensation or a complete inability for the wheels to rotate, causing the door to drag across the track rather than roll over it.
The Coastal Upgrade: If you are replacing rollers in a humid zone, prioritize stainless steel roller assemblies. Standard plated steel components will eventually succumb to the same oxidation, while stainless steel provides the necessary resistance to keep your door moving smoothly for years.
Preventative maintenance is your best line of defense against these environmental factors. If you live near the ocean or in a region with heavy seasonal rains, make it a habit to perform a post-storm inspection.
- ✓ Wipe down the tracks immediately after heavy storms to remove salt spray and moisture buildup.
- ✓ Inspect your roller housings for early signs of white powder or rust-colored oxidation.
- ✓ If you catch oxidation early, a quick cleaning can prevent the assembly from freezing solid inside the door panel.
Waiting until the assembly is completely locked up often results in the roller damaging the track itself. If you see visible signs of heavy corrosion, it is more cost-effective to replace the entire assembly with a high-grade stainless version than to attempt a temporary fix.
⭐ Corrosion Resistant Roller Assemblies
Spring Loaded Sliding Screen Door Rollers
✨ Editor’s Pick
Steel Framed Mirror Closet Door Rollers
Patio Screen Door Roller Replacement Kit
🏡 Real-Home Application:
- Check the housing: Inspect for white, chalky mineral deposits on the roller housing, which signal early-stage salt oxidation.
- Daily maintenance: Simply rinse your track with fresh water after a storm to neutralize salt before it settles.
- Natural finish: Choose high-grade stainless steel hardware to ensure the door remains easy for everyone in the family.
9. Damaged Track Guides
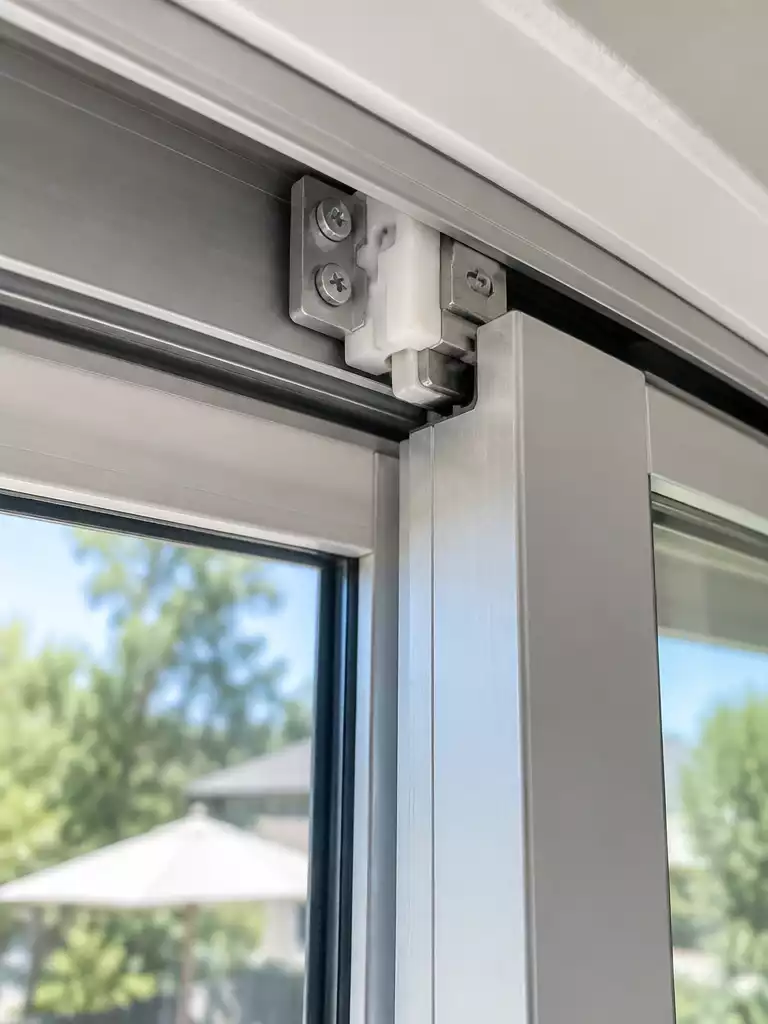
Restoring your door’s alignment ensures a smooth, silent glide every single time.
Your sliding door relies on more than just the rollers at the bottom to operate smoothly. The track guides – located at the top or bottom of the frame – act as the silent stabilizers that keep the door panel from wobbling or leaning as it moves.
When these guides become loose, broken, or misaligned, the door panel loses its vertical integrity. This causes the door to tilt slightly, forcing the frame of the door to rub against the track or the wall, creating significant friction that makes the door feel heavy and difficult to slide.
Wait to inspect: Only examine your track guides after you have already confirmed that your tracks are free of debris and your rollers are properly adjusted. Often, what feels like a guide issue is actually just a symptom of a dirty, obstructed track.
If you have confirmed your tracks are clean and your rollers are level, yet the door still binds, it is time to inspect the guides. Look for visible gaps between the guide and the door frame, or listen for a clicking sound as the panel moves past the guide point.
If you find that your guides are loose, you can often correct the issue with a simple adjustment:
- Locate the adjustment screws on the guide assembly, which are typically found at the top or bottom edge of the door panel.
- Using a screwdriver or hex key, make adjustments in tiny quarter-turn increments.
- Test the slide movement after each turn to ensure you are pulling the panel back into a perfectly centered position.
Avoid the temptation to over-tighten these screws, as this can strip the housing or create too much pressure, which will only increase the drag you are trying to eliminate. If a guide is physically cracked or broken, it cannot be adjusted and must be replaced with the exact manufacturer-specified part to ensure the door remains secure and centered.
⭐ Guides That Prevent Track Damage
Universal Sliding Closet Door Floor Guide
Graphite Lubricant Powder for Door Guides
✨ Editor’s Pick
Nylon Shower Door Bottom Track Guide
💡 Why This Matters for Long-Term Function:
Track guides are the unsung heroes of your patio door. When they function correctly, they prevent the panel from leaning, which protects the track from uneven stress and keeps the rollers from grinding against the frame. Staying on top of this simple alignment prevents small wobbles from becoming costly hardware failures.
Prevention Strategy: A quick visual check after every seasonal cleaning session keeps the door centered and stress-free.
With all nine potential causes for a sticking door now on the table, the path to a smooth-gliding entrance is far more manageable than it first appeared. Focusing on the one or two issues that match your door’s symptoms is the most strategic way to protect your investment and avoid unnecessary repairs.
You do not need to overhaul every component to restore function. Start by clearing the track and testing the frame for square, as these simple, diagnostic steps often resolve the friction without requiring a professional service call. Once the door is sliding freely, you will find that a little maintenance goes a long way toward preserving the long-term value of your home’s entryways.
Related posts
 Why Sliding Doors That Open in the Middle Beat a Standard Slider
 4-Panel Sliding Patio Doors for Wide Openings That Actually Look Custom
 Are French Doors Better Than Sliding Patio Doors?
 Why Are My French Doors Leaking? Causes and Fixes
 Why Do French Doors Have the Knob in the Middle?
 Why Choose French Doors
 Why Deep Green and Navy Front Doors Are Easier to Live With Than Black
 Why Barn Doors Solve the Swing-Space Problem So Well