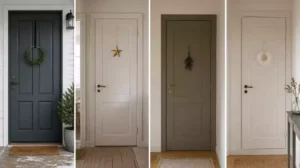
Creating a unified door design across your home is the most effective way to improve visual flow and protect your resale value. This guide filters the process down to 8 ideas worth your attention so you can decide with confidence. Let’s start with the foundational choice.
Pick One Door Style First

Establishing a unified architectural anchor creates instant flow and increases your home’s long-term value.
As an Amazon Associate I earn from qualifying purchases. Affiliate links may earn me a commission at no extra cost to you.
Your home essentially tells you which door to choose. Installing a modern, wide-plank slab in a traditional Colonial home feels jarring and creates a disjointed look that signals unfinished work to future buyers.
The Architecture-First Rule: Never select a door from a showroom photo alone. Look at your existing window trim and baseboard profiles to ensure the door’s design language speaks the same dialect as the rest of your house.
If your home leans traditional or features Tudor elements, look for symmetrical paneling that mirrors the era of the construction. For Craftsman-style homes, prioritize vertical lines and simple shaker-style flat panels that emphasize clean, honest construction.
Beyond style, you need to align your material choice with your home’s specific environment. Use the following guide to balance durability with your aesthetic goals:
- Wood: The gold standard for traditional homes, offering a rich, stainable finish that ages beautifully.
- Fiberglass: The most practical choice for humid climates, as it resists warping and maintains its integrity over decades.
- Steel: Best for areas requiring high security, providing a rigid, durable barrier that stands up to heavy daily use.
Security Warning: Avoid choosing door models with large glass panels near the lockset. These designs compromise your home’s security and often act as a focal point for break-in attempts.
Once you settle on a style that honors the house’s bones, your foundation is set. The structural “guts” of the door – specifically the panel profile – are what actually unify the look throughout every room.
.
⚖️ Quick Decision Guide: Choosing Your Material
- Choose wood if: You want a classic, stainable finish that adds warmth and character to a traditional home interior.
- Skip wood if: You live in a high-humidity environment where seasonal swelling or warping causes constant door-sticking frustration.
- Pair it with: Fiberglass or steel cores for exterior-facing rooms to ensure long-term durability without sacrificing your chosen architectural look.
Match the Panel Profile Throughout

Precise shadow lines create a custom, high-end feel that ties every room together.
The secret to high-end, custom-looking doors isn’t just the style of the door – it’s the shadow line. This is the precise depth and shape of the groove where the recessed or raised panel meets the vertical stile and horizontal rail.
Most DIYers fail here by mixing different profile depths, which makes the house look like it was renovated in stages rather than as a single, intentional project. You want to standardize the “sticking” – the profile of that groove – so every door casts the exact same shadow across your home.
The Master Profile Concept
Keep a small physical cutout of your door trim or profile in your wallet or phone case. When you are shopping for hardware or additional trim, hold your “Master Profile” against the new piece to ensure the shadow geometry matches perfectly.
To get this right, you need to understand the two main categories of panel construction. Flat panels typically feature a 3/8″ RC profile, while raised panels often use an Ogee or Roman Ogee shape.
If you are mixing doors, check the groove width. A 46mm groover creates a 12mm deep shadow, whereas a 41mm groover results in a 9.5mm depth.
Do not be tempted to trim your budget by opting for cheaper, mismatched profiles in guest rooms or pantries. Solid flat panels often cost the same as raised panels, meaning you can achieve a high-end look without a premium price tag.
Finally, keep an eye on your stile and rail widths. Maintaining a consistent width, such as 4-11/16″ for your bottom rail, ensures that even as you move from bedroom to hallway, the visual weight of the doors remains balanced.
.
Designer Note: Mastering the Shadow
Think of your door’s profile as the home’s “connective tissue.” When you standardize that 9.5mm or 12mm shadow line, you visually link every room, making the transition between spaces feel seamless. Even if your architectural hardware or paint color changes, maintaining this identical geometry keeps the house feeling like a singular, cohesive design project rather than a collection of mismatched rooms.
Keep the Same Paint Color

Unified paint finishes create a professional, intentional rhythm throughout your entire home.
Homeowners often fall into the “Incompatibility Trap” by assuming wall paint and door paint are interchangeable. Applying leftover flat wall paint to a high-traffic door is a mistake that attracts dirt and ruins a clean aesthetic.
Instead, prioritize premium wood and metal resin-based paint for every door in the house. These formulas are specifically engineered to handle the wear and tear that occurs every time a door is opened or closed.
The Incompatibility Trap: Never use flat or eggshell wall paint on your doors. These finishes lack the durability to resist fingerprints and scuffs, meaning you will be scrubbing off surface grime within weeks.
When selecting your finish, avoid matte options entirely. Opt for semi-gloss or high-quality satin, as these provide a durable surface that is easy to wipe clean without losing the sophisticated look of your trim.
To ensure a perfect match, source your pigment in the appropriate bases for your specific surfaces. A metal closet door and a wooden bedroom door should appear identical to the naked eye, even if the material underneath differs.
Always apply a high-quality primer or undercoat before your final topcoat. Raw wood acts like a sponge, and skipping this step leads to patchy finishes that undermine the work you have already put into your door styling.
.
📈 The Long-Term Payoff:
Investing in a premium, consistent paint system is one of the most effective ways to signal high-end maintenance to potential buyers. When every door in your home shares an identical, durable finish, it creates a sense of intentionality that raw wood or mismatched colors simply cannot replicate, directly supporting higher marketability.
Resale Value Impact: Cohesive finishes eliminate the “renovation fatigue” that buyers feel when they see disjointed, poorly maintained interior doors.
Standardize the Hardware Finish

Elevate your home’s visual rhythm by securing a consistent, durable hardware finish across every room.
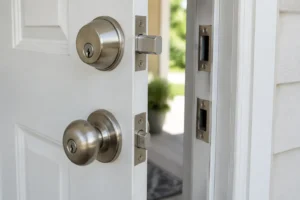
Hardware is the jewelry of your home, but treating finishes as generic categories is a common path to a disjointed look. You must look for BHMA codes rather than descriptive names like “Matte Black” or “Oil Rubbed Bronze” to ensure every handle, hinge, and bolt matches perfectly.
A “Matte Black” finish from one manufacturer rarely matches the same color from another. By specifying the BHMA code, you guarantee that your closet doors, bedroom entryways, and bathroom hardware share the exact same chemical composition and color profile.
Avoid the “Living Finish” Trap
Be wary of 613 (Oil Rubbed Bronze), as it is often a “living finish” designed to wear away over time. If you buy from different batches, these pieces will age inconsistently, leaving you with a mismatched look within a single year.
For homes near salt air or extreme humidity, skip standard plated finishes entirely. You should prioritize 316 Stainless Steel, which offers the necessary corrosion resistance to maintain its appearance over the long term.
Plan for a mid-range budget of $40 to $150 per set for quality hardware that won’t require immediate replacement. Consistent hardware acts as a visual anchor, pulling your entire home’s design system together even if individual room styles vary slightly.
.
Navigating door hardware can feel like a high-stakes investment because the finish you choose today dictates the visual flow of your home for the next decade. Rather than worrying about every minor detail, focus on standardizing your hardware finishes to create a cohesive environment that holds its value, much like the custom-look door designs that define a polished home.
Consistency in your finish choice acts as the primary anchor for resale value and long-term design confidence.
Coordinate the Handle Style

Bring professional-grade harmony to your home by unifying every handle and hinge with deliberate, consistent design.
You can successfully vary your handle styles to meet different functional needs without sacrificing the visual rhythm of your home. The rule is simple: maintain a consistent hardware finish across every room, but feel free to switch between levers and knobs based on accessibility or preference.
Levers are often the superior choice for high-traffic areas or homes with young children and aging residents, while traditional knobs offer a classic aesthetic for linen closets or pantries. By keeping the finish and the style of the rosettes and hinges identical, you create a cohesive thread that ties these different shapes together.
The 36-40 Inch Standard
For a truly custom, professional look, ensure every single door handle in your home is mounted between 36 and 40 inches from the finished floor. This alignment creates a subtle visual baseline that the human eye naturally perceives as intentional and orderly.
Beyond the handles themselves, the hinges and rosettes are the unsung heroes of a unified design system. If you choose a square-cornered rosette for your bedroom door, replicate that same shape on your bathroom and office doors.
Investing in higher-quality hardware is a decision that pays off in daily operation and long-term durability. While budget-friendly options exist at the $25 range, spending closer to $150 per set typically yields superior internal mechanics that won’t sag or stick over time.
Critical Check: Confirming “Handing”
Before you place your final hardware order, verify the handing of every door. Determine if your doors are left-hand or right-hand swinging to avoid the frustration and expense of return shipping fees.
If you are unsure of your door’s handing, stand with your back against the hinge side of the door jamb. If the door swings to your left, it is a left-hand door; if it swings to your right, it is right-hand.
.
🧰 Questions for Your Installer
- Standardized positioning: Can you confirm all handle sets will be bored at an identical 36–40 inch height?
- Hardware installation: Will you use a professional jig to ensure all rosettes sit perfectly square and flush?
- Long-term performance: Do you recommend additional reinforcement for high-traffic door sets to prevent future sagging or latch misalignment?
Decide Where to Break the Rule

Strategic exceptions maintain home flow while accommodating unique spatial needs and high-ceiling architecture.
Sometimes, your floor plan simply won’t cooperate with a one-size-fits-all door approach. It is perfectly acceptable to deviate for utility, provided you anchor the design with consistent details.
Think of your hardware as the design anchor that holds the room together. If you must use a pocket door or a sliding barn-style door for a laundry room, keep the finish identical to your standard swing doors to prevent a disjointed look.
The Hardware Anchor Strategy
When you change a door type for functionality, ensure the hardware finish remains constant. Consistency in the metal finish or paint color acts as the primary visual thread, even when the door’s mechanical operation differs.
Ceiling height is another common reason to break from standard 80-inch doors. You can install 84-inch or 96-inch doors in rooms with higher ceilings to create a more proportional look.
Always prioritize accessibility when making these decisions, especially for bathrooms or guest spaces. Using lever handles on these doors provides a functional upgrade without clashing with the knob-style hardware used in the rest of your home.
Avoid the “Frankenstein” Effect
Resist the urge to vary the panel profile just because a door is a different size or type. Keep the same panel geometry and sticking profile across every door in the house to ensure the home feels like a singular, unified design.
.
💡 Why This Works
Breaking your design rule for a utility space or high-ceiling room doesn’t create chaos; it creates visual interest. By keeping the hardware finish and panel profile consistent, you ensure that even when an installation method changes, the house maintains a rhythmic, intentional flow that feels curated rather than piecemeal.
The Anchor Effect: Uniform hardware finishes allow your home to handle functional design shifts without losing its polished, professional character.
Handle Transitions Between Floors

Precise floor gaps are the final professional touch for a quiet, unified home.
The gap between your door and the floor – or the threshold underneath – is the detail that separates a amateur project from a finished, professional install. If this gap is too wide, you lose sound privacy; if it is too tight, you risk scratching your new floors every time the door swings.
Always measure your clearance requirements after the final flooring is installed, never by relying on subfloor measurements. This ensures you account for the exact thickness of your planks or tile.
You can achieve a cleaner look by undercutting your door jambs so the flooring slips underneath them. This eliminates the need for unsightly shoe molding around the base of the door frame.
Remember that the transition point should always sit directly under the closed door. This hides the seam from view when you are standing in either room, maintaining that seamless visual flow you are aiming for.
.
✨ Finishing Touches:
Achieving a seamless look requires more than just the right gap measurement; it demands attention to how the flooring interacts with your door frame.
- Jamb Undercutting: Use a multi-tool to notch the bottom of your door casing so flooring slides cleanly underneath for a flush, gap-free appearance.
- Transition Centering: Always align your threshold or transition strip directly beneath the door leaf to keep the connection hidden when the room is closed.
Test Two Doors Side by Side

Verifying your installation precision ensures every door operates smoothly and looks perfectly consistent.
Before your installer packs up, perform a rigorous three-point visual inspection. You need to check the top, middle, and bottom of the door against the frame to confirm the gaps are uniform.
The Pro Inspection Checklist
- Check the “handing” to ensure the hinge side matches your original plan.
- Verify the swing direction – in-swing versus out-swing – is consistent for the room’s function.
- Use a flashlight at a 45-degree angle to cast shadows; this reveals uneven paint coverage or gaps in the sticking profile.
If you suspect a tight fit, use feeler gauges to verify the actual gap tolerances. A professional installation should feel precise without requiring any “bump” or extra force to catch the latch smoothly.
Warning: If a door requires force to close, it is likely misaligned or the hinges are not set correctly. Addressing this immediately prevents long-term warping and structural stress on your frame.
For your records, keep a copy of your measurements to ensure you can track performance over the coming seasons. You can use a Measurement & Gap Tolerance Tracker to log these specs for each door in your home.
Download the Whole-Home Door Consistency Checklist
Track your style, finish, and gap measurements to ensure a perfect, unified installation across every room.
.
🔢 The Right Sequence for Final Inspection:
Testing your doors in this specific order ensures you catch structural alignment issues before the installer finishes and leaves your home.
- Check swing clearance: Verify the door avoids the floor or baseboards throughout the entire arc of motion.
- Test latch engagement: Confirm the bolt clicks firmly into the strike plate without needing a nudge or bump.
- Verify gap uniformity: Inspect the reveal around the frame to ensure shadows remain consistent at the top, sides, and bottom.
With all eight strategies now at your disposal, you have the full picture of what creates genuine visual flow. Focus your budget on the two adjustments that dictate the most impact, such as standardizing your hardware or aligning the panel profiles, rather than attempting an exhaustive overhaul.
Consistency is the hallmark of a custom-designed home, and it stems from a few deliberate, high-quality decisions. By nailing your interior door designs first, the rest of your home styling will naturally fall into place with confidence.
Related posts
 Design House 181594 Door Hinges Review
 Design House 181479 Door Hinge Review
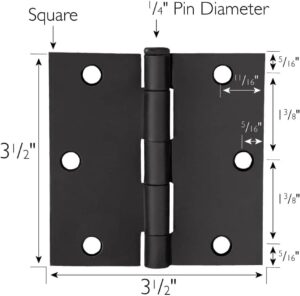 Design House 188938 Door Hinges Review
 Design House 181420 Door Hinge Review
 Boost Your Home’s Appeal: An In-Depth Review of the Design House 181412 3.5″ Satin Nickel Hinge 3-Pack
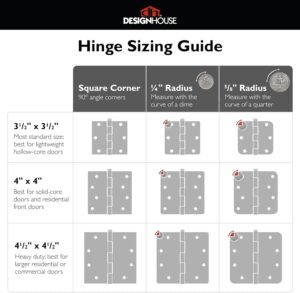 Design House 181370 Hinge Review
 10 Double Door Design Ideas
 12 Neutral Door Design Ideas With Light Ash Wood