
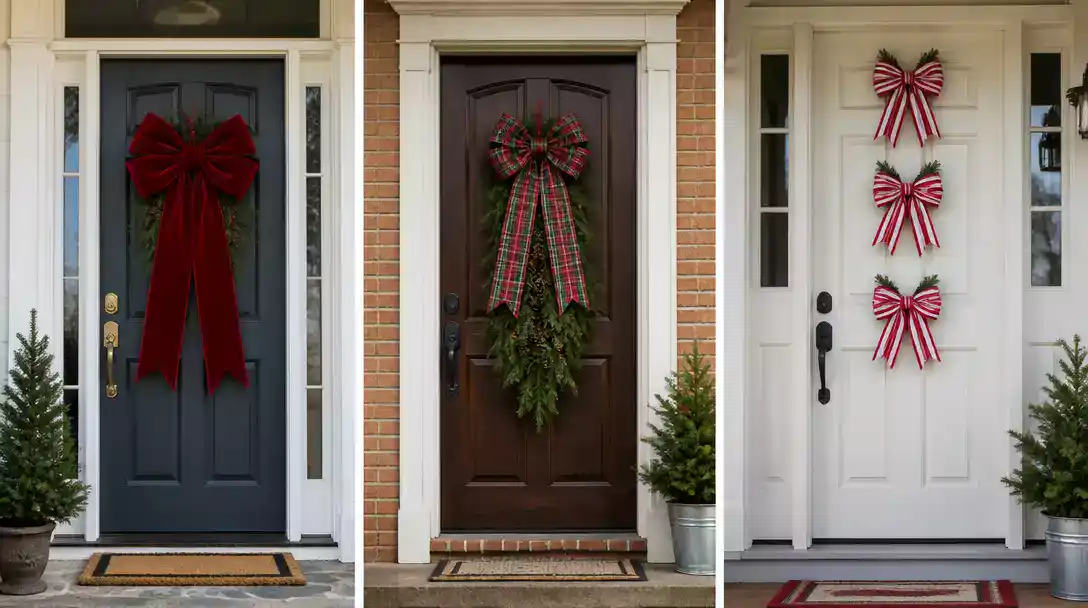
Christmas door decor ideas with bows can be tricky to scale: a bow may disappear on a wide door or crowd its hardware if placed poorly. These 10 bow-centered looks are worth saving, with greenery, bells, snowflakes, and candy-cane details kept in a supporting role. Use the guidance on size, placement, and texture to find a fit for your entry, starting with one velvet statement bow.
Oversized Velvet Bow
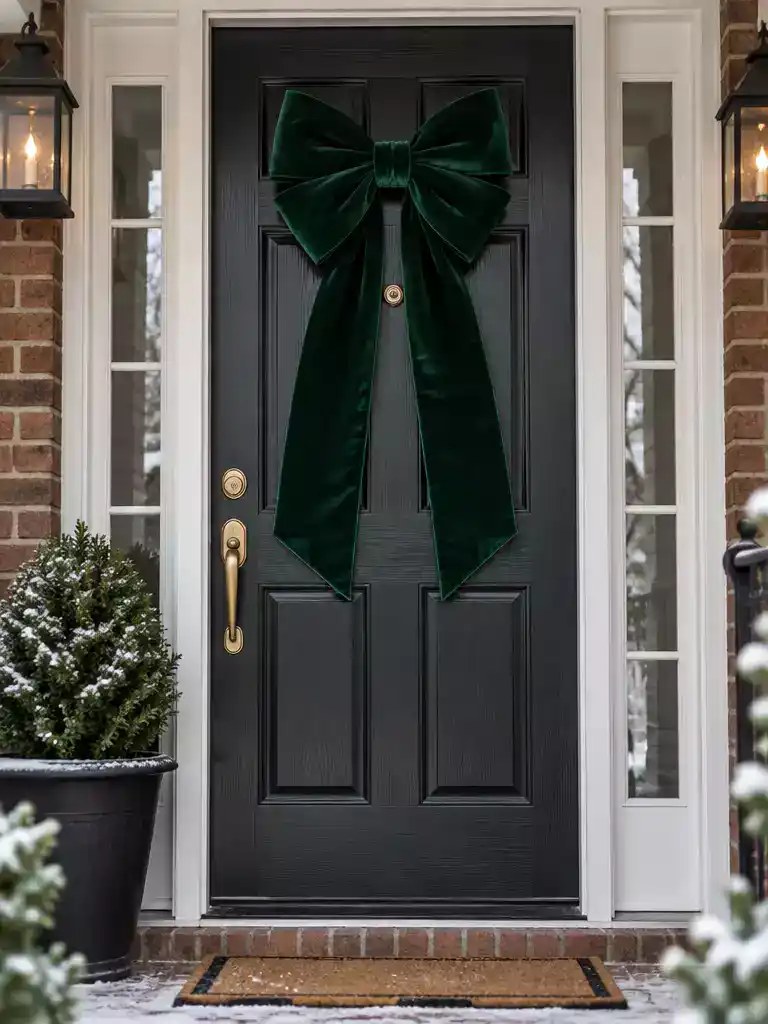
One bold velvet bow can turn a plain front door into a formal holiday welcome.
As an Amazon Associate I earn from qualifying purchases. Affiliate links may earn me a commission at no extra cost to you.
This is the simplest way to dress a door for Christmas: one big velvet bow, long tails, and nothing else. It suits anyone who wants a formal focal point without greenery or extra ornaments, especially on a sheltered entry.
Velvet gives you a deep, plush texture that catches light in a way ribbon never does. The tradeoff is weather. Moisture and direct exposure can flatten the pile, so this is a front-porch-under-an-overhang bow, not one for an open stoop.
For a standard 36-inch door, a bow about 22 to 26 inches wide lands around 60 to 70 percent of the door width. Treat that as a starting reference, not a rule. One giant-bow pattern finishes at about 22 by 27.5 inches, which fits that range well.
- Placement: Upper third, or just above center.
- Clearance check: Confirm the bow clears the handle, peephole, and the door’s full swing before you pick a final spot.
- Loop projection: On a 36-inch door, keep loops within roughly 5 inches off the door to limit wind catch and hardware conflicts.
Wired shaping is what keeps the loops standing up. It won’t make velvet weatherproof, but it helps the bow hold its look between gusts.
Mounting depends on your door. A steel door takes a magnetic hook. Fiberglass or wood can take an outdoor-rated removable hook. If neither works, pass a ribbon around the door and tie it inside.
Prices vary widely. Large velvet bows I came across ran from the high teens to the mid-$40s, with examples at $31.99 and $44.99. Those are loose market snapshots, not a standard price, so compare the bow size against your door before you buy.
⭐ Standout Oversized Velvet Bows
✨ Editor’s Pick
Large Red And Green Velvet Bow
Buffalo Plaid Door Bow Accent
Giant Satin Bow Door Accent
💡 Let the Color Do the Work:
Color does more of the work than size here. Deep burgundy or forest green velvet looks rich against cream, sage, or charcoal paint, but it can vanish on a dark red or navy door. In that case, a metallic gold or cream wire edge gives the loops a visible outline. Let the tails end above the threshold so the bow reads as a deliberate accent.
Gift-Wrapped Door
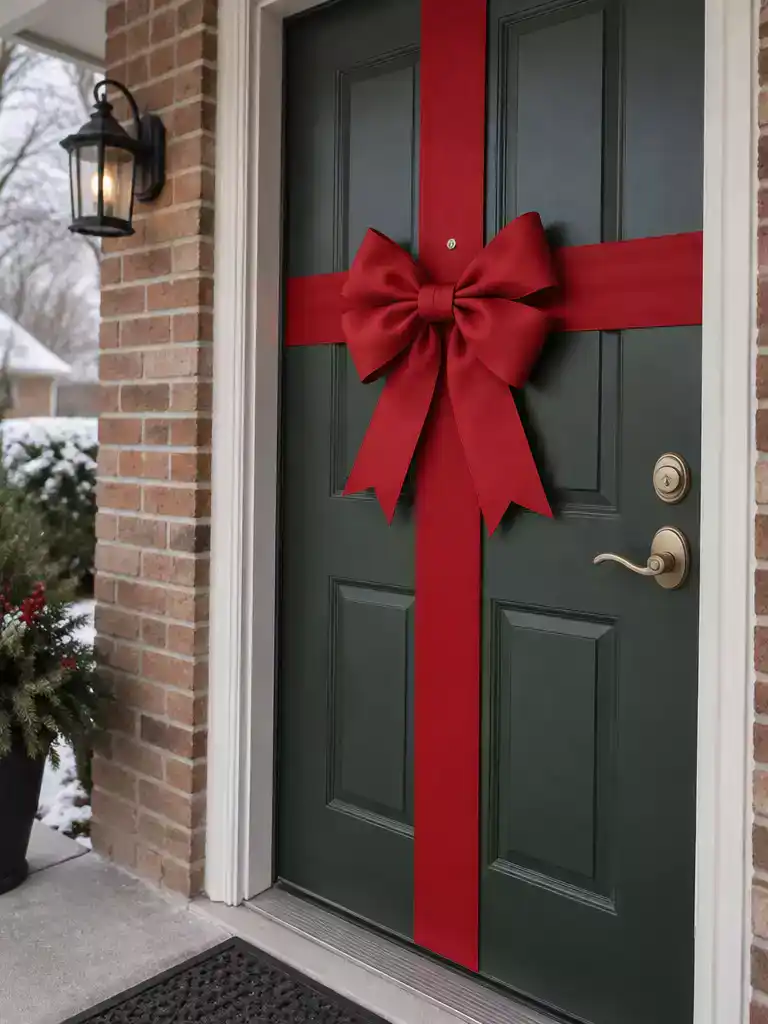
Wrap your entry in ribbon and it reads as a gift from the sidewalk.
Picture a painted front door with two wide ribbon bands running straight up and straight across, meeting beneath one oversized bow. From the walkway, the whole entry reads as a wrapped present. This is the only idea on the list where the ribbon is the entire design, so nothing else on the door competes with it.
The bands have to be wide enough to register from the sidewalk. Thin ribbon just looks like a stray tie, and a bow that’s too small makes the gift effect disappear. The crossing point is the design, so the bands must stay clear of the handle, lockset, and peephole.
This suits a door that sits under a porch roof and gets little direct weather. It’s a good weekend project if you can tie the ribbon off on the inside or use a removable hook that holds the crossing points.
Skip this one if your door is:
- A storm door, where the frame and extra glass can shift or catch the ribbon.
- Unusually trimmed, with raised molding or a sidelight that bands can snag on.
- Opened and closed all day, which loosens bands and frays the edges.
Attachment is where most wraps go wrong. Use a method that matches your door surface, and skip makeshift tape or cheap adhesives, especially outdoors, since they can leave residue or pull paint off the finish.
Test before you finish
Open and close the door through its full swing with the ribbon in place. Watch for bands catching on the frame, tails dragging on the threshold, or the crossing point hitting the handle.
⭐ Gift-Wrapped Door Ribbon Picks
✨ Editor’s Pick
Wired Dupioni Ribbon For Gift Wrapping
Pink Embossed Ribbon For Gift Wrapping
⚠️ Wrap Mistakes That Show Up After the First Week:
- Soft ribbon: Unwired bands sag over time, so the crisp gift lines droop and lose their shape.
- Fade-prone colors: Sun wears down bright reds and golds fast on a sunny facade, so check for UV-resistant labeling.
- Hinge-side ends: Loose tails near the hinge edge get pinched as the door swings, so anchor ends away from that side.
Gift-wrap ribbon can look striking, but it needs to fit your door’s width, hardware, and swing before you commit; Christmas door ideas can help you picture the overall effect. On a 36-inch door, a 22–26-inch focal bow is a useful reference, while crossed bands should meet clear of the handle and peephole. Testing the full opening first can prevent a polished plan from becoming a daily snag.
One well-scaled bow and clear ribbon placement can make the entry feel finished without perfecting every detail.
Plaid Bow Wreath
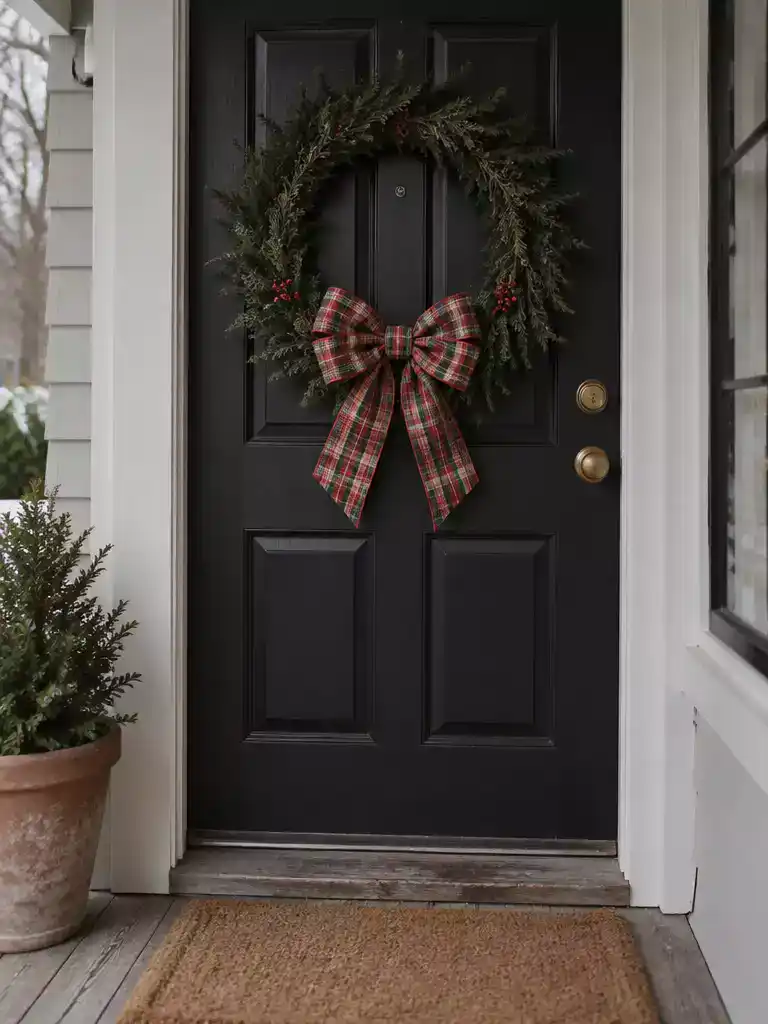
A cozy plaid bow that carries the holiday look with almost no extra decor.
This one is for the reader who wants the bow to do all the talking. Plaid ribbon is the star here, and the greenery is just a thin frame around it. Think of a wreath where you can actually see the pattern from the sidewalk.
Plaid brings a bold repeating check and a woven-looking texture that reads as Christmas without a pile of extra ornaments. Those two things do most of the work, so you can keep the rest of the wreath quiet.
Buy wired plaid ribbon. Soft, unwired ribbon slumps within a few days outside, and the loops lose their shape. Wired edges let you reshape the bow after wind or handling.
If you already own a wreath base, this is one of the cheapest ways into the look. Reuse the base and buy only the ribbon. If you don’t have a base, a pre-made wreath may cost less than sourcing every component separately.
Before you hang it
- Keep the bow proportionate to the base so the foliage never overwhelms it.
- Confirm the wreath clears the peephole and door handle.
- Choose a base and ribbon rated for your door’s actual sun and rain exposure.
⭐ Plaid Wreath Bows We Love
Sunflower Wreath With Plaid Bow
Harvest Plaid Bow For Wreaths
✨ Editor’s Pick
Large Red Buffalo Plaid Wreath Bow
💡 Designer Note: Let the Plaid Set the Color Story
Plaid reads boldest when the wreath stays quiet, so choose a colorway that either echoes your door or contrasts with it. A deep green or red door can let a busy check blur into the background, while a neutral door helps the pattern stand out. Keep any greenery in soft, uniform tones so the eye lands on the loops first, not the foliage.
Bow-Tied Evergreen Swag
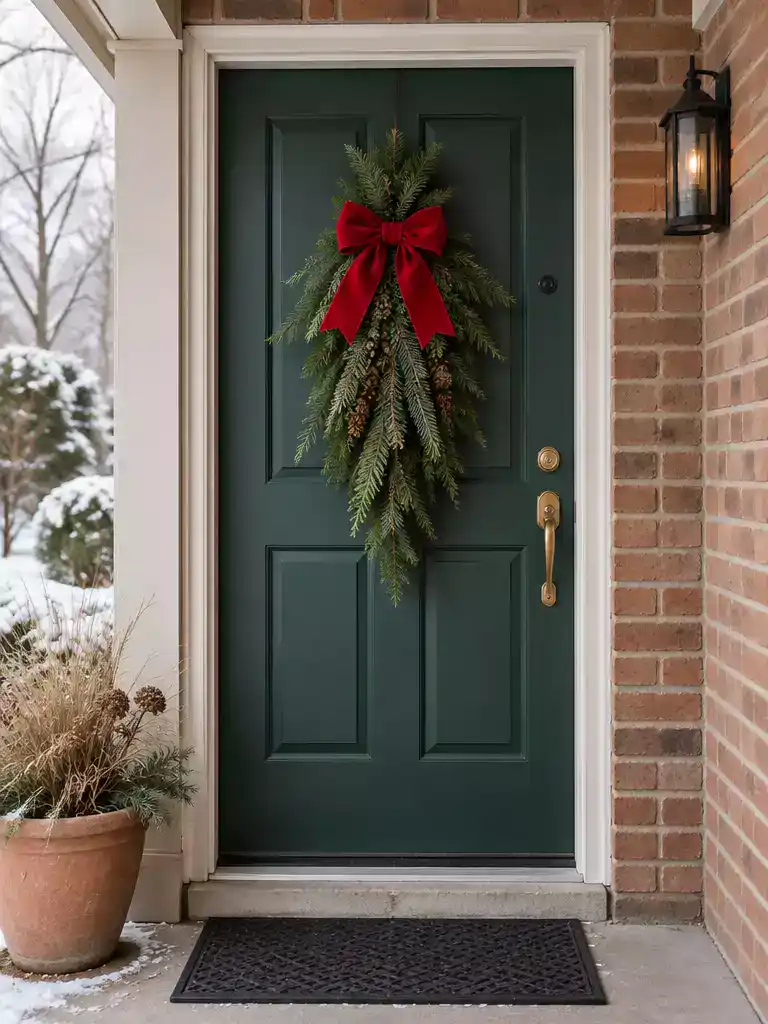
A long green line down your door that looks full, finished, and planned from the curb.
This is the one to pick if your door is tall and narrow and a wide wreath keeps looking squashed. A swag runs vertically or diagonally, so the greenery draws the eye up the door, and one big bow does the cinching. The bow is the focal point; the greenery just supplies the fullness.
Choosing where the bow sits changes the whole mood. A top bow caps the swag like a finial, a middle bow visibly gathers the branches, and a bottom bow anchors the trailing end. For most doors, the top position gives the cleanest read, so start there unless your door has a tall top panel that the bow would crowd.
Greenery matters more than it looks on a door. Exposed entries need weather-resistant or properly preserved evergreen, because soft fresh cuttings dry out and brown in a few weeks in wind and sun. Keep any extra accents, like a pinecone or two, very restrained, or the bow loses its job.
For the bow itself, use wired ribbon. When a gust hits the door and flattens the loops, wire lets you reshape them with your fingers instead of pulling the whole thing apart.
Here is a simple way to build it:
- Lay the swag base on a table and fold the wired bow in place at your chosen height.
- Secure the bow to the swag with floral wire or a firm tie, wrapping at least twice so it does not slide.
- Mount the finished swag with a hook or hanger that is rated to hold it steady, not a loose decorative loop.
- Hang it, close the door fully, and check that the greenery clears the handle, peephole, and swing path.
Watch the wind. A long swag acts like a sail, and wind can twist it sideways while a lightweight tie slowly loosens. Fasten to a stable mounting point and check the fit after the first windy day.
This one suits a covered or sheltered entry with a sturdy mounting spot. If your door takes full sun and driving rain all day, skip the fresh greenery and go with preserved material, or choose a bow-only design instead.
⭐ Evergreen Swags With Bow Details
Prelit Pine Swags With Red Bows
Poinsettia Swag With Christmas Bow
🏡 How This Works in a Real Home:
- Hand-height clearance: Check whether coats, bags, and hands brush the lower swag each time someone comes through.
- Daily slam test: Notice whether the swag rattles after a hard slam on a windy day, then retighten the tie.
- Lived-in finish: Let one trailing end hang slightly off-center so it reads as hand-tied, not store-staged.
Bow-Topped Door Basket
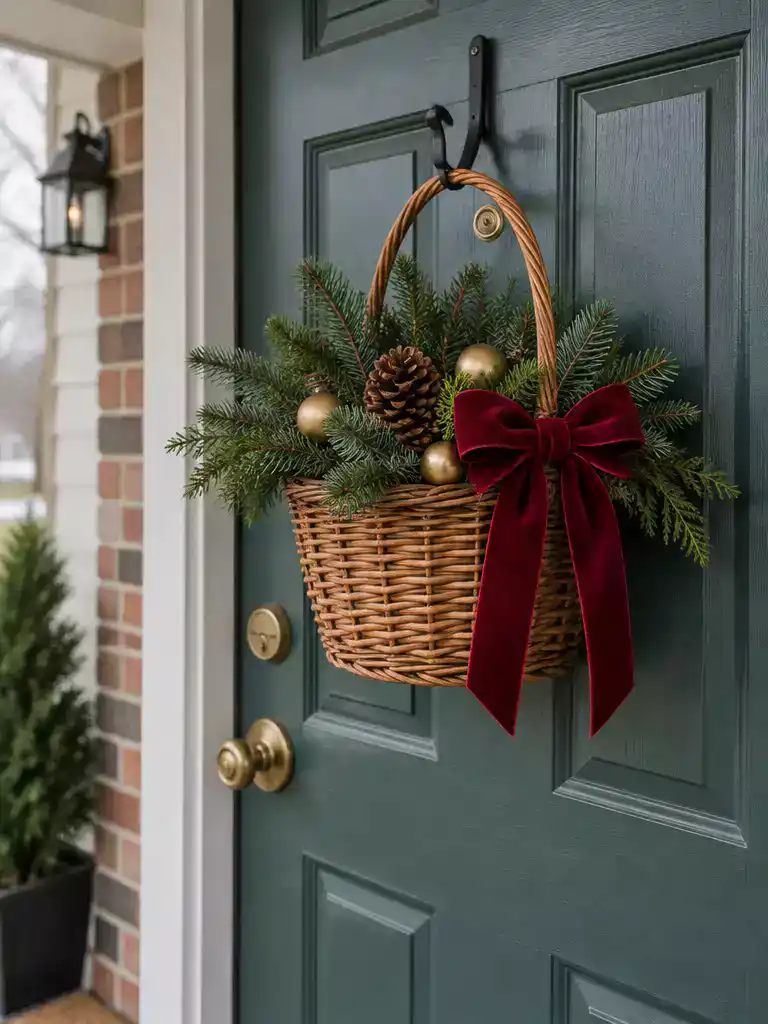
A hanging basket that greets guests with greenery and a bow sized just right for its opening.
This one is for the reader who wants a bow that looks like it belongs to a container, not a door. A woven basket hung at eye level, stuffed with evergreen sprigs and pinecones, with a bow tucked at the rim, reads as a finished entry piece. The bow stays small on purpose.
The rule is simple: size the bow to the basket opening, not the door. A bow that overwhelms the basket turns into a separate oversized door bow sitting on top of a container, and the whole thing looks off balance.
Before you style a single sprig, secure the basket itself. A filled basket swings in wind and pulls on its hook, wire, or strap, so the mounting point does more work than any decorative detail.
Check before you hang it
- Open and close the door fully and watch whether the basket clears the handle and frame.
- Confirm the mounting surface can hold a filled basket, not just an empty one.
- Keep fillers lightweight and limited so the load stays manageable.
Keep the contents light. Greenery, a few pinecones, and a couple of ornaments work well, while heavy fillers add leverage you don’t want on a door.
Heavy basket warning: If the arrangement is heavy, hire a professional installer or use a very secure setup. A falling basket can crack glass, damage trim, or hurt someone standing below.
This is a good DIY if the basket is light and the hook is rated for the load. It’s a poor fit for a heavy basket on a surface that won’t hold a hook well.
Pricing depends on the basket, filler, ribbon, and fastener you choose, so total up those components rather than chasing a single number. Keep the bow sized to the rim, the contents restrained, and the mount solid, and the basket will look intentional all season.
⭐ Baskets And Bow Accents
Rustic Burlap Bow For Basket Topping
✨ Editor’s Pick
Woven Hanging Basket For Door Decor
Plaid Gift Bows For Basket Displays
🧰 Ask Before You Hire Someone to Hang It:
- Mount Compatibility: Can you confirm the hook or bracket suits my door’s material and will hold a fully filled basket?
- Swing Clearance: Will the basket clear the handle and frame through the door’s full swing, and where would you place it?
- Quote Scope: Does your price include the hardware, anchors, and a repair if the mount pulls loose later?
Cascading Bow Garland
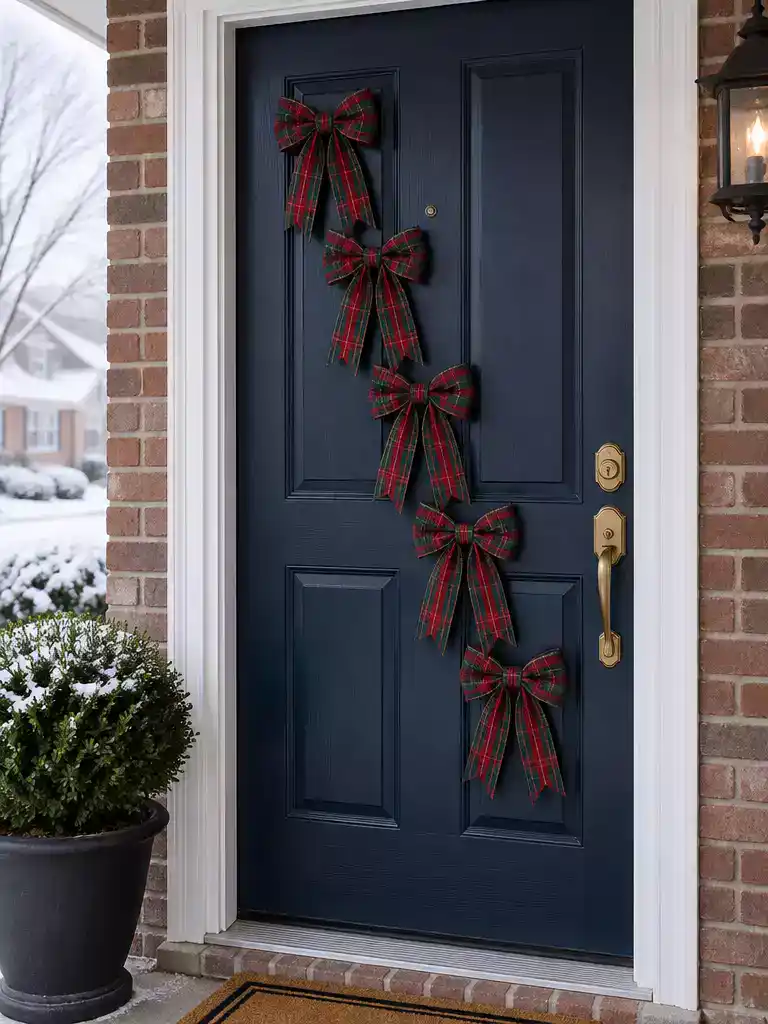
A row of distinct bows that tumbles down your door like ribbon falling from a shelf.
This is the idea for anyone who wants bows as the whole show without a single heavy piece hanging off the door. Instead of one big bow, you run a line of separate bows vertically or diagonally, so the door reads as a waterfall of ribbon. It works best on a covered entry or an interior-facing door where the bows are not fighting the weather.
Spacing does most of the work here. Each bow needs room to read as its own shape, and once they start crowding each other, the whole run blurs into a busy strip.
Use wired ribbon so every loop and tail keeps its shape. Soft, unwired ribbon slumps within a few days of hanging, and a slumped bow loses the crisp outline that makes the cascade look intentional.
Plan the spacing first
- Lay the run out on the floor or a flat surface before you attach anything.
- Keep loop projection modest, around 5 inches or less, so wind has less to catch.
- Check the full door swing and keep the run clear of the handle and peephole.
Here is the tradeoff. Building the run from ribbon and a simple support line is cost-effective, but making and positioning several bows takes far more time than hanging one. Plan an afternoon, not ten minutes.
Skip this one if your door takes a lot of wind exposure. Several light bows will shift and reveal weak attachment points faster than a single bow ever would, so secure the support line properly and watch the first storm.
⭐ Cascading Bow Garlands Worth Buying
Black Satin Bow Garland Banner
Pink Satin Bow Garland Banner
✨ Editor’s Pick
Blue Satin Bow Garland Strands
🔢 Build the Run in This Order:
Order matters because every bow hangs off the support line, so a loose line means re-spacing every bow.
- Anchor the support line firmly at both ends and let it hang before adding any bows.
- Mark bow positions along the line with ribbon tags, leaving clear gaps between each one.
- Attach bows top down, then open and close the door once before final tie-off.
Bell-and-Bow Cluster
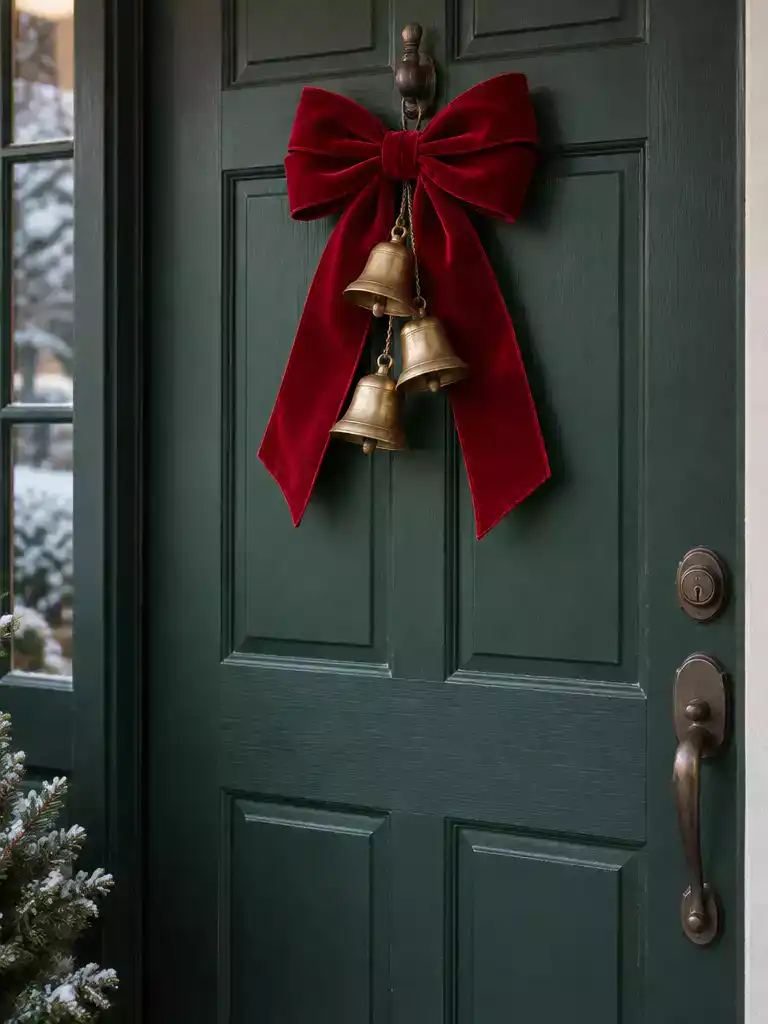
A soft red bow with brass bells that greets guests with a gentle chime.
This one suits a front door that already has a bow in mind and needs a little more character. The bell-and-bow cluster pairs a soft, colored bow with the hard, metallic shine of bells, so the eye catches the contrast before it reads the details.
The cluster works best when it stays compact. Center it high on the door, or attach it to the top of a swag, so the bells look planned rather than like hardware that wandered up there.
Match the bell size to the bow. Bells that are too large make a small bow look like an afterthought. A pile of tiny bells does the opposite and turns the arrangement into clutter.
Bells are the sound element. When the door moves, they can chime, while the bow supplies the main color and softness. How loud they get depends on the bells and how the door swings, so don’t count on any particular volume.
Watch the weight. Bells add load, and they swing. That stress lands on your hook or tie, so a fastener that holds a bow alone may not hold the cluster.
Before you hang it, open and close the door through its full swing. Make sure the bells won’t strike the glass, the trim, or the handle as the door moves.
If you already have the bells and a bow, this is a sensible DIY. Pick the fastener for the combined weight of the cluster, not the bow alone. Heavier bells or a high, awkward placement are good reasons to call in help.
⭐ A Christmas Bell And Bow
✨ Editor’s Pick
Pine Swags With Vintage Brass Bells
✨ Finishing Touches That Make the Cluster Look Planned:
Small choices in metal and ribbon finish decide whether the cluster looks planned or pieced together, especially next to the hardware already on your door.
- Matching metal: Pick bells in a finish close to your handle or lockset, so the cluster reads as one set.
- Tidy ribbon ends: Trim ribbon tails at a slant so the ends stay crisp rather than fraying into a ragged fringe.
Bow-Framed Welcome Sign
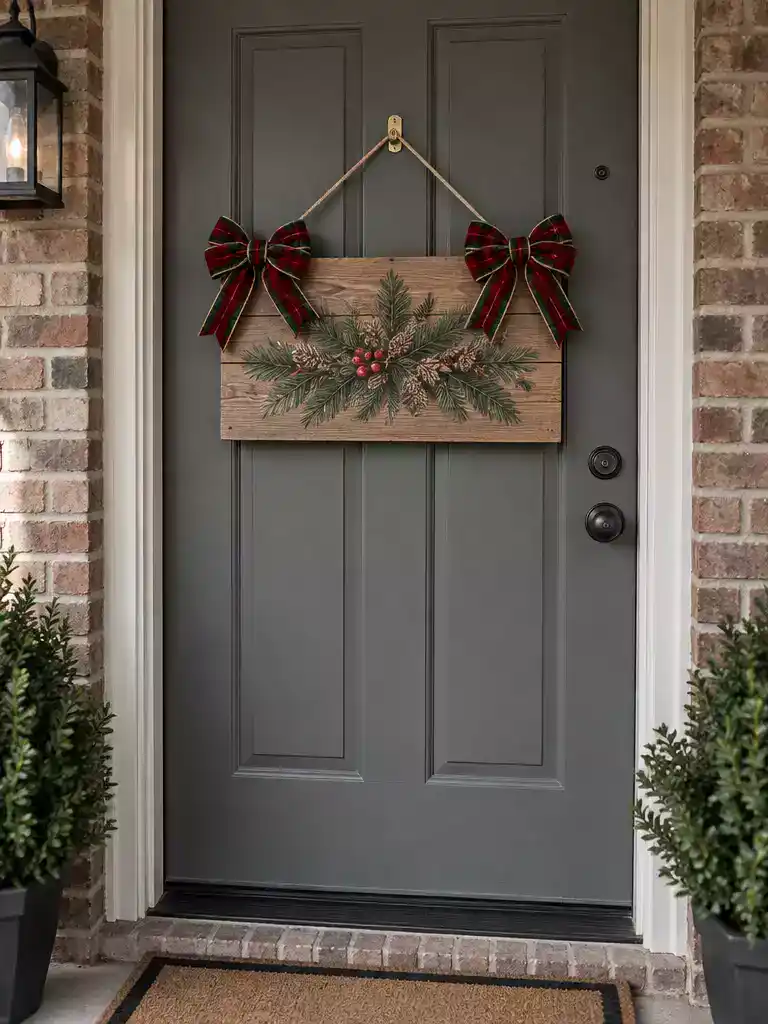
Your greeting stays easy to read while the bows bring the whole door into the season.
This one suits anyone who already has a welcome sign they love and wants the door to look like the holidays arrived. One or two bows sit at the top edge or the top corners of the sign, and the greeting underneath stays in charge. Think of the bows as a frame, not a headline.
The test is readability. Stand at the bottom of the steps and see whether you can still read the sign from there. If the loops or tails cover a letter, the bow is too big.
Size the bow to the sign, not the door. A bow that looks right on a 36-inch door can swallow a sign that is only a foot or two across. Start small, then step back and check.
Velvet and plaid both work well here because they add seasonal texture in a small footprint. Keep the bow material supporting the sign, though. A glossy red velvet bow next to a plain painted board can look like the bow is doing all the talking.
- Keep bow loops and tails clear of the greeting text.
- Choose a bow width that leaves the sign’s words as the first thing you read.
- Check that neither the sign nor the bows touch the handle, peephole, or door when it swings.
- Use one bow for a narrow sign and two for a wide one.
Check the weight before you hang it. A lightweight sign on a standard hook is a reasonable weekend project. If the sign is oversized, heavy, or going onto brick or a surface that does not take ordinary hooks well, get a more secure installation or professional help.
Keep the sign on a sheltered spot if you can. Wind and rain shorten the life of velvet quickly, and a plaid bow on an exposed sign will fade and loosen sooner than one tucked under a porch roof. No reliable price applies to this exact combination, so budget from the sign, bows, and hanging hardware separately.
⭐ Welcome Signs With Festive Detail
Wooden Welcome Sign With Greenery
✨ Editor’s Pick
Buffalo Plaid Christmas Tree Sign
Interchangeable Seasonal Welcome Sign
🛠️ Simple Steps That Keep the Greeting Front and Center:
- Tie before you hang: Twist floral wire through each bow’s center knot, then fasten it to the sign’s back, not its front.
- Test the layout flat: Lay the sign on a table, set the bows in place, then photograph it from standing height.
- Shorten the tails: Trim ribbon tails so they stop short of the sign’s edge and never drape across the lettering.
Snowflake Bow Hanger
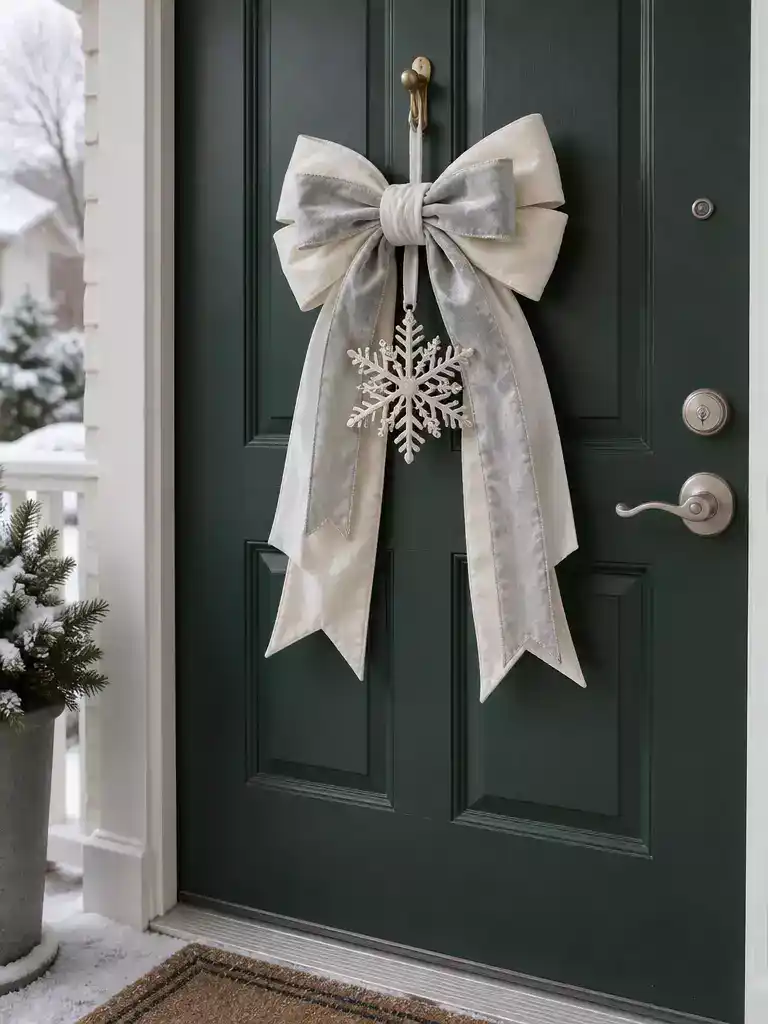
A crisp winter accent that greets guests from the first step up the porch.
This one pairs a bow with a single snowflake, and the snowflake is the detail that says winter. The bow stays the anchor. The snowflake sits at the knot as a medallion, hangs beneath the loops, or forms a cutout on the ribbon. It suits a covered or sheltered exterior door, and it is a poor pick for a door that takes direct rain and sun all day.
The material of the snowflake decides how long it lasts. Delicate cut metal can bend under a bump or a gust, and brittle plastic can crack after a cold snap. Choose a lightweight, weather-tolerant snowflake, and don’t assume an indoor ornament will hold up outside.
Measure before you buy. The snowflake should look proportionate to the finished bow width. Check both measurements against each other, since the research gives no standard hanger or snowflake dimension to work from.
- Medallion at the knot: the snowflake is centered where the loops gather, so it reads as part of the bow.
- Hanging beneath: a short ribbon or wire drop lets the snowflake move a little in the breeze.
- Cutout on the ribbon: the snowflake is built into the bow face, which keeps the look flat and tidy.
Pro tip: Attach the snowflake with wire, ribbon, or an adhesive made for that specific material. Pick the method based on your door surface and how much weather it gets.
Keep the hanger well clear of the lock, handle, and peephole. Also watch the snowflake’s edges as the door swings, because a sharp point can catch on the doorframe or strike it. If you open the door and feel a snag, move the hanger before you hang anything else.
💡 Why One Snowflake Beats a Crowd:
A single snowflake gives the eye a clear order to follow. The bow catches attention first through its color and softness, and the snowflake then registers as a small seasonal signal instead of competing for space. That hierarchy is what makes the arrangement look planned. Add more metallic shapes to the same ribbon, and the bow stops leading, so the door reads busy from the walkway.
Takeaway: One well-chosen snowflake speaks louder than a cluster of them.
Candy Cane Bow Pair
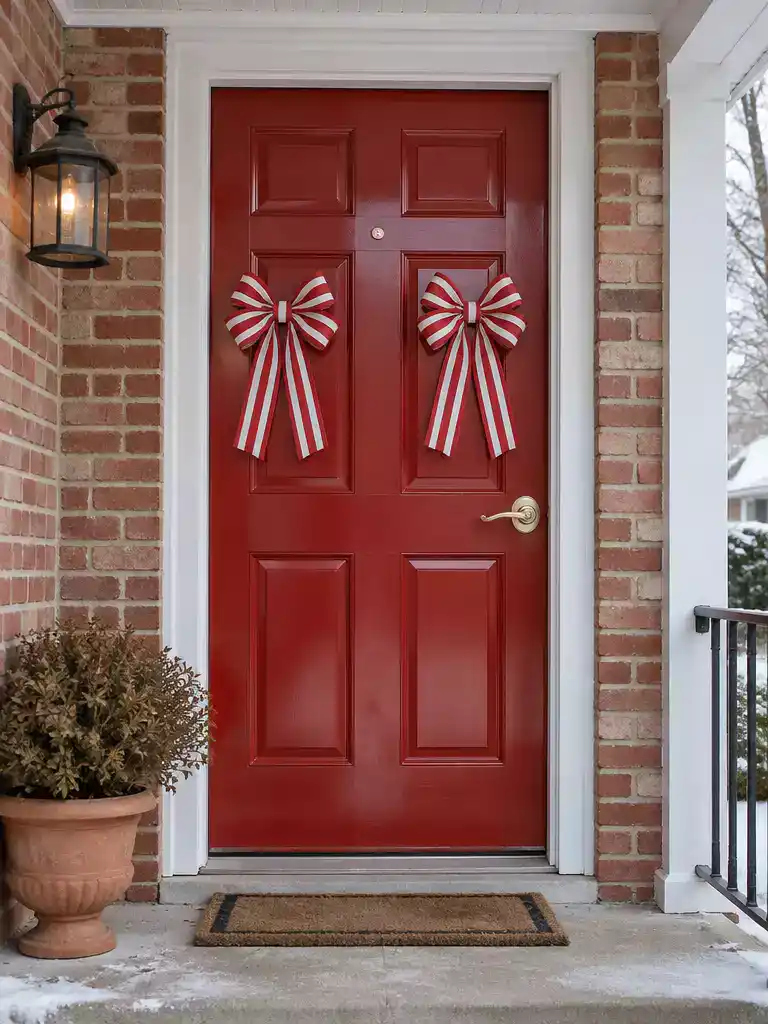
Two matching candy cane bows can turn a plain door into a planned, balanced holiday welcome.
Picture a red door with two loops of red and white stripe ribbon sitting side by side, one on each side of the knob. That’s the whole look, and it works because the pair does the decorating. No greenery, no bells, no extra ornaments needed.
The trick is balance. Two bows that land at the same height and spacing read as a planned set. Two bows tossed wherever space was left read as duplicates.
Before you hang anything
- Mark the handle, lockset, and any glass pane on the door first.
- Center each bow an equal distance from the door’s midline, measured with a tape.
- Check the swing path so neither bow gets clipped by the frame when the door opens.
- Skip the glass: a bow sitting over a pane can block the view and catch the light in a distracting way.
Stripe ribbon with wired edges is the material to buy. Wire keeps the loops crisp, and the stripes stay legible instead of sagging into a blur of pink.
Pro tip: Buy a little more ribbon than you think you need, then tie both bows before mounting. Matching them side by side on the door is much easier than trying to make two separate bows look identical after they’re up.
This is one of the easier bow projects on the list. The look depends on ribbon choice and placement, not on complicated construction. For an exposed entry, pick weather-appropriate ribbon and use a mounting method rated for outdoor use, since sun and wind can fade stripes and loosen ties over time.
⭐ Candy Cane Bows For Christmas
✨ Editor’s Pick
Candy Cane Garland With Peppermint Bows
✓ Practical Tips That Work for Candy Cane Bows:
- Hook choice by surface: Steel doors suit magnets, while fiberglass or wood can take outdoor-rated removable adhesive hooks.
- Loop projection: Keep each loop projecting about 5 inches or less so wind has less to catch.
- Storage between seasons: Store them flat in a dry spot between seasons so the wired loops keep their shape.
With all ten Christmas door decor ideas with bows in view, you can see how scale and placement shape the entry: a single bow makes a clear focal point, while ribbon, greenery, and accents add structure or a more distinctive seasonal note. The bow should lead; supporting details only need to reinforce it. You don’t need to combine every look – one or two well-chosen elements can give the door a finished, intentional appearance.
Start with the idea that suits your door’s dimensions and exposure, then measure the planned bow and check its position against the handle, peephole, and full door swing. That practical check helps confirm both the look and the mounting approach before you gather materials. Choose the bow-led design that fits your entry best; the result will feel considered without needing all ten.
Related posts
 12 Rustic Christmas Door Decor Ideas
 12 Apartment Front Door Christmas Decor Ideas
 11 Front Door Christmas Decor Ideas
 10 Christmas Door Decor Ideas with Lights
 17 Christmas Door Ideas for Classroom That Turn the Door Into the Display
 11 Snowman Christmas Door Ideas
 10 Toddler Christmas Door Ideas
 15 Christmas Door Ideas