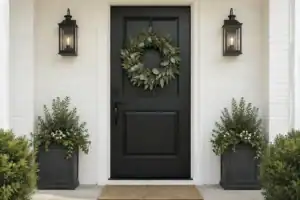
Customizing your classroom Christmas door can be a major challenge when you want to balance visual impact with student participation. This guide rounds up 17 door ideas worth saving that turn your entrance into an immersive display, so you can find the design that fits your space.
Wrapped Like a Gift

Turn your classroom door into a giant holiday present that invites students inside every morning.
As an Amazon Associate I earn from qualifying purchases. Affiliate links may earn me a commission at no extra cost to you.
This design creates an immediate, high-impact visual that makes your doorway feel like the focal point of the hallway. It is an ideal choice for teachers who want a cohesive look that masks the standard institutional door finish entirely.
To get that crisp, professional look, stick with wide, metallic-finish wrapping paper or sturdy butcher paper. Avoid standard gift wrap, as it tends to tear under the high-traffic conditions of an active school hallway.
Creating the Gift Effect:
- Ribbon Placement: Measure your door first and use contrasting paper strips. Tape them vertically and horizontally to mimic a real gift wrap cross-pattern.
- Personalized Tags: Use oversized gift tags crafted from cardstock. Write each student’s name on a tag to foster a sense of classroom community.
- 3D Bow Construction: Construct an oversized bow using tissue paper or sturdy cardstock. Mount it firmly at the center where your “ribbons” intersect for a focal point that pops off the surface.
Pro Tip: If you are worried about door hardware, cut thin slits in your wrapping paper to accommodate the door handle and lock. This ensures your display stays secure without interfering with safety or classroom access.
⭐ Top Gift Wrapping Essentials to Buy
✨ Editor’s Pick
Giant Red Christmas Door Ribbon Bow
Hanging Double Sided Wrapping Paper Organizer
Spring Eucalyptus Teardrop Wreath Set
✨ Small Details That Matter
Elevating your gift-wrapped door from a flat surface to a festive focal point relies on how you handle the transition between the paper and the hardware.
- Seamless Corners: Fold your paper edges inward at the corners like a professional gift to hide any raw, jagged cuts along the door frame.
- Hardware Integration: Use gold or silver metallic tape to frame your door knob, effectively turning functional hardware into a decorative “centerpiece” of your bow.
Gingerbread House Front

Turn your classroom into a cozy, candy-coated cottage that makes every student feel right at home.
Transforming your door into a giant gingerbread house is all about layering textures to get that classic, oven-baked look. Start with brown kraft paper as your base material; it holds up much better than construction paper and provides the most authentic gingerbread color right out of the roll.
For that signature icing trim, cut long strips of white felt or heavy cardstock into scalloped edges. Secure these along the door frame and across the top to create the “roof” line of your cottage.
Pro-Tip for Windows: Instead of drawing simple squares, print out photos of your students and frame them in paper squares. It turns the door into a house full of friendly faces, making the display feel personal and welcoming.
The real magic happens when you let students build the candy decorations themselves. Set up a station where they can design their own gumdrops or peppermint swirls using brightly colored cardstock.
- Gumdrops: Use circular or teardrop shapes with white glitter glue to mimic a sugary coating.
- Peppermints: Cut red and white paper into circles, then layer them to create the iconic swirl effect.
- Personalized Cookies: Have students decorate paper cookie cutouts with their names and hang them near the bottom of the door.
This theme is perfect for teachers who want a balanced, symmetrical look that doesn’t feel too cluttered. If your classroom door has a window, prioritize that as your “main” house window to give the display a clear, central focal point.
⭐ Best Gingerbread House Decor for Doors
Spooky Halloween Caution Tape Decor Set
✨ Editor’s Pick
Gingerbread House Front Door Cover Banner
Frosted Glass Privacy Window Film Kit
🏡 Real-Home Application
- Door hardware safety: Cut small notches in your brown paper so the handle and lock remain fully accessible and visible.
- Daily wear: Apply blue painter’s tape to the back of your paper pieces to prevent damaging the classroom door’s finish.
- Natural texture: Avoid over-gluing; use small adhesive dots on the corners of candy cutouts so they look slightly raised and 3D.
Reindeer Faces

Give your classroom entrance instant personality with a friendly, interactive character display.
The secret to a successful reindeer door is using the existing architecture to anchor the character. By positioning the door handle as the nose, you turn a functional piece of hardware into the focal point of the entire face.
Cover the door in brown butcher paper for a seamless look, then layer your features on top. If your door has a window, incorporate it into the design by placing the eyes just above it for a natural, alert expression.
Pro-Tip for Antlers
Use thick, corrugated cardboard for the antlers instead of thin construction paper. It provides the necessary structural integrity to keep them upright over the door frame without drooping.
Design Elements to Include
- Antlers: Cut these from heavy brown cardstock or wrap pipe cleaners in brown yarn for a fuzzy, realistic texture.
- The Collar: Drape a string of real, lightweight sleigh bells across the lower third of the door to create a tactile, festive detail.
- Eyes: Use oversized white circles with large black pupils to give the reindeer a wide-eyed, welcoming appearance.
This theme is perfect for lower elementary classrooms where a friendly character feels more inviting than abstract decor. If you prefer a highly sophisticated or minimalist hallway aesthetic, you might find this character-focused approach a bit too whimsical.
Safety Warning
Ensure the nose (the door handle) remains fully accessible and that no paper overlays interfere with the latch or emergency exit requirements. Always test the door’s operation before finalizing your glue or tape.
⭐ Reindeer Face Decor We Love
Christmas Picture Frame Ornament Set
Reusable Magnetic Wreath Hooks for Doors
✨ Editor’s Pick
Magnetic Wreath Hanger for Metal Doors
📋 Quick Reality Check: Before You Commit
- Hardware Clearance: Test the door’s latch and hinges to confirm your reindeer’s “nose” won’t jam the mechanism.
- Sightline Alignment: Check if your door’s window sits at head or chest height to determine eye placement.
- Traffic Durability: Inspect for sharp edges or loose bells that might snag backpacks in high-traffic school hallways.
Snowman Buildup

Create a winter wonderland at your entrance with this scalable, student-focused vertical snowman design.
This design uses the full vertical height of your classroom door to create a stacked snowman that feels like it’s standing guard. It works best for teachers who want a cohesive look while ensuring every student has a tangible spot to contribute to the final display.
Pro-Tip: Use white butcher paper as your base for the three stacked circles. It’s thicker than standard construction paper and handles high-traffic hallway bumps much better throughout the winter months.
Student involvement is the heartbeat of this project. Rather than doing the decorating yourself, assign specific roles to keep everyone engaged:
- Buttons: Have each student design a unique “coal” button using black cardstock and glitter.
- Snowflakes: Let students cut out individual paper snowflakes to fill the negative space around the snowman.
- Accessories: Task small groups with creating mittens or earmuffs to attach to the sides of the middle circle.
The 3D Finish:
To ground the design, glue cotton balls or white pom-poms around the base of the door frame. This creates a snow pile effect that anchors the snowman to the floor and adds depth that flat paper designs lack.
If you have a door with a window or handle in the middle, don’t try to hide them. Incorporate the handle into the scarf design or place the snowman’s “nose” slightly above it so the door remains fully functional for daily use.
⭐ Snowman Buildup Ideas for Classrooms
✨ Editor’s Pick
Heavy Duty Brick Clips for Hanging
Artificial Fall Harvest Hanging Basket Set
Artificial Boxwood Wreath for Front Doors
🔢 The Right Sequence
Building from the bottom up prevents structural sagging and ensures the snowman’s weight is evenly distributed against the door surface.
- Anchor the base circle first to establish your height and floor-level alignment.
- Layer the middle and top circles, overlapping slightly to create a seamless body.
- Attach accessories like scarves and buttons only after the main paper structure is secure.
Transforming a classroom entrance doesn’t require an exhaustive overhaul of every single detail. Focusing on a handful of high-impact elements is often enough to create a cohesive display, much like choosing the right classroom door decorations to set a positive tone for the year.
Your holiday door potential thrives when you commit to two or three bold design choices rather than attempting to execute every single festive concept perfectly.
Fireplace and Stockings

Create a hearth-side classroom atmosphere that makes every student feel right at home.
This fireplace display works best for teachers who want to soften the clinical feel of a school hallway. It turns a standard entrance into a homey focal point that invites students and visitors into a warmer space.
The secret to the hearth effect is the foundation. Use red kraft paper with white paint marker lines to simulate authentic brickwork, ensuring you cover the entire door surface for a seamless look.
Pro Tip: Keep your tissue paper “fire” low to the ground. This prevents the display from interfering with the door handle or locking mechanism during the school day.
The mantle serves as the primary structural element. Use a sturdy strip of brown cardstock or a lightweight cardboard box to create a shelf that sits horizontally across the middle of the door.
Use this checklist to organize your assembly:
- Brick Base: Apply red paper first, then add white grout lines with a thick paint marker.
- Fire Insert: Layer yellow, orange, and red tissue paper in the bottom center for a glowing, translucent effect.
- Stocking Station: Have each student personalize their own paper stocking with their name and custom drawings.
- Mantle Trim: Attach the cardstock shelf using heavy-duty painter’s tape to ensure it stays flush against the door.
This design is ideal if you have a class that thrives on personalized storytelling. It is a bit more time-intensive than flat designs, so skip this if you have a very short deadline for your door decorating.
⭐ Fireplace and Stocking Decor Picks
Adjustable Metal Stocking Holder for Mantle
✨ Editor’s Pick
Antique Brass Brick Wall Hanger Clips
Magnetic Wreath Hanger for Metal Doors
🏡 Real-Home Application:
- Traffic flow: Keep the mantle shelf slightly narrower than the door width to prevent snagging clothes or backpacks.
- Daily durability: Reinforce the back of paper stockings with extra cardstock so they don’t curl or tear during morning arrivals.
- Natural texture: Use torn edges on your “brick” paper rather than perfectly straight cuts to give the hearth a rustic, handmade appearance.
Christmas Tree Cutout

Turn your classroom entrance into a focal point with a life-sized, collaborative holiday tree.
The Christmas Tree Cutout is ideal for teachers who want to showcase every student’s individual effort in a unified, structural display. By using a giant, layered green triangle as your base, you immediately anchor the design to the full height of the door.
To build your tree, start by cutting large green construction paper triangles that stack vertically to create the silhouette of a pine. Secure these directly to the door, ensuring the bottom layer is wide enough to cover the base.
Pro Tip: Use student-made paper chains to spiral around the tree instead of traditional garland. This adds essential 3D depth and physically connects the student-made ornaments to the overall structure.
Balance is the key to making this display look intentional rather than cluttered. Assign each student a specific “ornament spot” on the branches to ensure an even distribution of their work.
Assembly Checklist
- Silhouette: Layered green cardstock or butcher paper cut into pointed triangular segments.
- Ornaments: Student-decorated paper circles, stars, or shapes mounted on foam squares to stand off the door surface.
- Topper: A large, double-sided yellow glitter paper star attached to the top door frame.
- Garland: Interlocking paper chains created by students to create a sense of scale and movement.
This design is perfect for classrooms that prioritize student-led decor over store-bought items. If you are crunched for time, skip the individual paper chains and use simple ribbon or tinsel to get that same wrapped effect.
⭐ Christmas Tree Cutout Decor Ideas
Pre Lit Artificial Cedar Christmas Garland
Metallic White Glitter Tinsel Garland Roll
✨ Editor’s Pick
Artificial Cedar Pine Topiary Tree Set
💡 Why This Works:
By using a vertical, layered silhouette, you transform the door from a flat surface into an immersive focal point. This design naturally guides the eye upward, creating a sense of scale that makes the classroom entrance feel larger and more welcoming during the busy holiday season.
Visual Benefit: Stacking student contributions creates a unified, vibrant mosaic that celebrates the entire class’s creativity.
Elf Door

Transform your classroom entrance into a mischievous workshop that captures the magic of Santa’s helpers.
The Elf Door theme is perfect for classrooms that want a high-energy, character-driven look without needing complex structural builds. By using the door itself as the elf’s body, you create an immersive scene that students recognize instantly.
Design Strategy
Use a vibrant green paper base for the tunic and a sharp black strip for the belt buckle. This provides the classic “Santa’s Helper” aesthetic that makes the character immediately identifiable.
Student involvement is easy to scale, making this a great project for younger elementary grades. You can assign different tasks based on the students’ fine motor skills.
- Elf Hats: Have students create individual paper hats with their names to display around the door frame.
- Candy Tools: Let students cut out and color oversized paper hammers, saws, or candy canes to “hold” in the elf’s hands.
- Name Badges: Create custom helper ID tags for each student to stick onto the door’s lower section.
Pro-Tip
If your classroom door has a built-in window, use that as the elf’s face. You can cut a simple eye-and-smile template from black paper and stick it directly onto the glass for an instant character reveal.
This theme works best if you keep the accessories light and flat against the surface. Avoid bulky cardboard props that might get bumped or torn in a busy school hallway.
⭐ Elf Door Decor We Love
✨ Editor’s Pick
Precision Door Hinge Lubricant Oil Bottle
Window and Door Track Cleaning Brush
Anti Scratch Cat Training Tape Roll
✨ Finishing Touches That Bring Your Elf to Life
Small, intentional details turn a flat paper cutout into a personality-filled character that truly anchors your hallway display.
- Dimension layers: Use small foam mounting squares behind the collar or hat to create a subtle 3D pop off the door surface.
- Texture contrast: Incorporate felt for the hat or fabric scraps for the scarf to add a tactile, cozy quality that paper alone lacks.
Polar Express Theme

Transform your classroom entrance into an inviting, high-energy locomotive ready for a winter holiday journey.
The Polar Express theme works best for classrooms that want an immersive, narrative-driven entrance. By framing the door as a train car or engine, you turn a simple transition into an “all aboard” experience for students.
To build the train car base, use black and grey butcher paper to cover the door surface. You can use silver cardstock to cut out circular wheels or rectangular window frames to add depth.
Pro Tip: Use white cotton batting or pulled-apart tissue paper along the top door frame to create a 3D “billowing steam” effect. This structural element provides the necessary height to make the display feel like a real train engine.
Student involvement is easiest to manage through the “Golden Ticket” concept. Have each student decorate a yellow cardstock rectangle shaped like a vintage train ticket with their name.
These tickets can be arranged in a neat row or scattered across the lower half of the door. Adding a destination sign at the very top, such as “North Pole Express,” gives your display a clear, unified narrative focal point.
Avoid this mistake: Keep the “steam” and signage away from the door handle and hinges. You will want to ensure the door remains fully functional for high-traffic hallway entry and exit.
⭐ Polar Express Theme Ideas
Halloween LED Glowing Skeleton Eyes Set
✨ Editor’s Pick
All in One Forest Green Refinishing Paint
Wood Drawer Wax Lubricant Paste Tube
⚖️ Quick Decision Guide: Choosing Your Train Aesthetic
Selecting the right scale for your train helps ensure the project fits your hallway’s traffic flow and your students’ ability to contribute effectively.
- Choose this if: You want an immersive atmosphere; go with a full-door wrap to create a bold, life-sized train engine exterior.
- Skip this if: Your door is frequently used for equipment carts; keep the train decoration flat to avoid snagging or structural damage.
- Pair it with: Metallic silver or gold paper for wheels and window frames to add a crisp, high-contrast finish that pops.
Grinch Scene

Transform your classroom entrance into a mischievous holiday focal point that students will love.
The Grinch Scene works best for teachers who want to inject a bit of humor into the hallway without relying on traditional red-and-green motifs. By turning the door into the iconic character himself, you create an instant conversation starter that appeals to students of all ages.
To pull off the look, start by covering the entire door in vibrant green butcher paper. This serves as the Grinch’s “skin” and sets a bold, high-contrast palette for the rest of your features.
Pro-Tip for Character Recognition
Skip the text or lengthy signage. A single, well-placed red Santa hat on the top corner of the door is all you need to make the character instantly recognizable to everyone walking by.
Facial details are where the personality really comes through. Use black felt or heavy cardstock to cut out his signature smirk and large, yellow-rimmed eyes.
If you want to lean into the story’s plot, consider these student-involvement ideas:
- The Heart Detail: Add a small, bright red heart to the center of the door to represent the character’s heart growing three sizes.
- Who-ville Elements: Have students design miniature “Who-ville” houses to tape around the door frame, creating a neighborhood scene.
- Name Tags: Use heart-shaped cutouts for student names to keep the theme consistent and personal.
This theme is ideal for classrooms that enjoy a playful, slightly rebellious holiday spirit. If you prefer a strictly traditional or calm atmosphere, you might want to consider a different, more subdued design.
⭐ Grinch Scene Decor Picks
Flexible Rubber Edge Trim Guard Strip
Magnetic Name Badge Holders for Uniforms
✨ Editor’s Pick
Clear Door Scratch Protector Guard Sheet
💰 What This Really Costs
- Budget baseline: Using butcher paper and felt scraps is highly affordable, typically costing under $10 for materials.
- Hidden expense: Don’t overlook the cost of high-quality removable adhesive, which is essential for protecting classroom paint.
- Value investment: Spend your limited budget on sturdy neon-green paper rather than paint, as it provides a cleaner finish.
Nutcracker Guards

Create a regal classroom entrance that stands tall and commands attention from every student.
Turn your classroom entrance into an authoritative focal point by styling the entire door as a classic toy soldier. This theme relies on symmetrical design to mimic the rigid, upright posture of a Nutcracker guard.
You will need a base of red wrapping paper or butcher paper to serve as the soldier’s jacket. Layer gold foil paper or metallic cardstock over the top to create the epaulets, buttons, and belt trim.
To finalize the look, place the character’s eyes and nose near the top of the door. Ensure your signage, such as “Classroom 102 Guards,” is printed in a bold, military-style font to maintain the theme’s authority.
Pro Tip: Use gold foil paper for the buttons and trim to catch hallway light. This adds a premium, high-contrast feel that makes the door pop from a distance.
This design works best for teachers who want a clean, organized aesthetic without too much clutter. If your classroom door has a window, incorporate it into the face of the Nutcracker for an instant, high-impact result.
⭐ Nutcracker Guard Decor Ideas
✨ Editor’s Pick
Christmas Picture Frame Ornament Set
Clear Adhesive Bumper Pads for Furniture
Painters Tape Applicator for Door Frames
Class Photo Ornaments

Transform your classroom entrance into an immersive gallery that celebrates every student in the room.
This idea turns your door into a giant, festive showcase where every student’s face becomes a literal part of the holiday decor. It is the perfect choice for teachers who want to foster a strong sense of classroom community while keeping the design clean and organized.
You can create these ornaments using simple materials, but the finish makes them look like high-end retail decor. Follow these steps to get that polished, professional result:
- Start with cardstock circles or clear plastic plates as your base to give the ornament a sturdy, 3D structure.
- Mount individual student photographs in the center of each circle using double-sided adhesive.
- Use glitter glue or metallic markers to create unique, hand-drawn borders around each photo, letting students add their own flair.
- Apply a layer of clear plastic wrap or a thin acetate sheet over the top to mimic a glass snow globe finish.
Pro Tip: For the most visually striking display, arrange your photo ornaments in a strict grid pattern across the entire door. If you prefer a more organic shape, cluster them together to form a large tree silhouette or a giant wreath shape.
If you have a very large class, skip the complex trim and focus on consistent color-coding for the borders to keep the door from looking chaotic. This setup is ideal for primary grades where students take immense pride in spotting their own face and the faces of their friends every time they walk into the room.
⭐ Class Photo Ornament Ideas
Durable Aluminum Window and Door Awning
✨ Editor’s Pick
Encouraging Rolled Bulletin Board Border Trim
Thermal Insulated Window and Door Curtain
⚖️ Quick Decision Guide: Organizing Your Display
Choosing between a structured layout and an organic cluster changes the overall feel of your classroom entrance.
- Choose a grid if: You want a clean, organized look that helps visitors easily find specific student photos.
- Skip the grid if: You prefer a playful, whimsical vibe; cluster the ornaments into a tree or wreath shape instead.
- Pair it with: A solid-colored background paper in soft navy or white to make the colorful photo borders pop.
Hot Cocoa Stand

Transform your classroom entrance into a cozy holiday cafe that welcomes every student inside.
Creating a Hot Cocoa Stand on your classroom door turns a standard entrance into a warm, inviting destination. This theme thrives on a layered, counter-style visual that makes the door feel like a functional service window.
Pro-Tip: Use cotton balls glued to the rims of your paper mugs to create realistic marshmallow toppings that add instant 3D texture.
To pull this look together, start by defining the space with a horizontal paper strip that acts as your service counter. This shelf-like visual anchors the paper mugs and provides a clear separation between your “menu” area and the bottom of the door.
Here is how to organize your student involvement for maximum impact:
- • Personalized Mugs: Let each student decorate their own paper mug with their name and favorite cocoa toppings.
- • Menu Signage: Create a header sign using cardstock that features a title like “Holiday Warm-Up” or “Classroom Cocoa.”
- • Counter Accents: Add cutouts of peppermint sticks or whipped cream swirls to fill empty spaces on the counter.
This design is perfect for teachers who want to avoid cluttered hallways, as it keeps the visual interest focused on the middle and upper third of the door. If your door has a window or a handle that needs to remain accessible, simply position your “hot cocoa” items to frame those areas without blocking them.
⭐ Hot Cocoa Stand Decor Picks
Magnetic Thermal Insulated Winter Door Curtain
Wall Mount Pantry Door Spice Rack
✨ Editor’s Pick
Vintage Christmas Santa Penguin Door Topper
💸 Budget-Friendly Version
- Reuse materials: Swap store-bought decorations for construction paper scraps or leftover gift wrap from previous holiday projects.
- Group projects: Instead of individual mugs, create one large “community pot” of cocoa to simplify assembly and reduce paper usage.
- Focus on impact: Prioritize the counter-top strip and a central sign, as these define the theme more than individual mug details.
Penguin Igloo

Create a cool, immersive winter escape that stands out from standard holiday red and green.
The Penguin Igloo theme is perfect for classrooms aiming for a crisp, icy aesthetic that lasts well beyond the December break. By using white butcher paper as your primary canvas, you establish a clean, neutral base that makes the blue and black accents pop.
To build the igloo structure, draw curved horizontal and vertical lines across your white paper surface to mimic interlocking ice blocks. A foam-core arch secured around the doorway adds necessary structural depth, making the entrance feel like a true portal into an arctic home.
Pro-Tip: Create the Chill
Add blue tinsel or strips of metallic blue paper along the door frame to catch the hallway light. This simple addition creates a shimmering ice effect that makes the igloo feel much more realistic than flat paper alone.
Student involvement is easiest here by having each child craft their own unique penguin character. You can provide basic black-and-white templates, but encourage students to personalize their penguins with felt scarves, googly eyes, or glittery fish accessories.
These characters can then be arranged around the base of the door, creating a busy, collaborative scene. If you have extra space, add a few paper icebergs or “frozen” fish cutouts to complete the winter environment.
⭐ Penguin Igloo Decor Ideas
✨ Editor’s Pick
Shatterproof LED Outdoor String Patio Lights
Clear Incandescent Mini Christmas String Lights
Solar Powered Outdoor Firefly Garden Lights
💡 Why This Works
Using a cool-toned palette offers a refreshing visual break from the high-energy red and green displays filling the rest of the hallway. By establishing a bright, snowy foundation, you create an immersive “arctic oasis” that feels calm and inviting for students, effectively reducing visual clutter while keeping the holiday excitement high.
Visual Impact: The high contrast between white igloo blocks and dark penguin figures draws the eye instantly.
String Light Frame

Frame your students’ names in a glowing display that brings warmth to the hallway.
This idea turns your classroom entrance into an inviting focal point by outlining the door frame with oversized, colorful light bulbs. It is perfect for teachers who want a highly personalized display that clearly highlights every student’s name in the class.
Pro-Tip: If your school’s fire safety policy permits, intersperse real battery-operated LED fairy lights between your paper bulbs. This adds a genuine, soft glow that makes the door pop against standard hallway lighting.
To assemble the frame, cut large “bulb” shapes from multi-colored cardstock and write one student’s name on each piece. Use a thick piece of black yarn or a rolled paper strip to connect the bulbs, wrapping them around the door frame in a classic holiday string pattern.
This design is ideal for classrooms where you need a fast assembly that still feels cohesive and festive. Avoid this theme if you have a door with frequent, heavy traffic, as the yarn cord can occasionally snag or pull away from the frame.
⭐ String Light Frame Decor Ideas
Artificial Boxwood Greenery Hanging Wreath
✨ Editor’s Pick
Spring Eucalyptus Teardrop Swag Wreath Set
Weatherproof Lavender Purple Wired Edge Ribbon
💡 Designer Note: Achieving Visual Balance
To make this display feel intentional rather than cluttered, vary the size of your paper bulbs. Group larger bulbs at the corners where the frame meets, and use smaller ones along the straight edges to create a sense of movement. This keeps the door from feeling weighed down by uniform shapes while ensuring the frame looks full and energized.
Handprint Wreath

Transform your entrance with a collaborative wreath that celebrates every student in your class.
This project is perfect for teachers who want a highly personalized display that requires minimal store-bought supplies. By turning each student’s handprint into a piece of the wreath, you create a visual representation of your classroom community.
Start by providing each student with construction paper in varying shades of green. Have them trace and cut out their own handprints, which helps build fine motor skills while contributing to the final design.
Pro Tip: Create a sturdy base by cutting a large ring out of heavy-duty cardboard or poster board. This provides the structural integrity needed to support the layers of paper without drooping throughout the month.
When it comes time to assemble the wreath, follow these steps to ensure a full, lush appearance:
- Layering: Glue the handprints in an overlapping circular pattern, alternating the shades of green to add depth.
- Texture: Use different paper weights or textures, such as cardstock and matte construction paper, to make the wreath look more dynamic.
- Accents: Complete the display by adding red paper circles as berries and a large, structured bow at the bottom of the ring.
This theme is ideal for primary classrooms where student involvement is the main priority. If you prefer a highly polished, symmetrical look, you may find the organic nature of hand-cut shapes to be a bit too rustic for your taste.
⭐ Handprint Wreath Decor Picks
Interchangeable Rustic Wood Welcome Door Wreath
Farmhouse 3D Welcome Sign Door Wreath
✨ Editor’s Pick
Large Artificial Forsythia Spring Door Wreath
⚠️ Common Mistakes to Avoid
- Weak structural base: Using flimsy construction paper alone for the ring will cause the wreath to droop and lose shape immediately.
- Overcrowding space: Placing handprints too close together hides the individual details and makes the final display look like a cluttered blob.
- Ignoring door hardware: Failing to account for the door handle or hinges often leads to snagged paper and ruined wreath segments during daily use.
Book Character Christmas

Bring your favorite holiday stories to life by turning your classroom entrance into an open book.
This design is perfect for educators who want to merge literacy goals with festive decorating. By turning the door into a giant, open book, you create a narrative-driven focal point that naturally peaks student interest in holiday reading.
Pro Tip: Use small foam mounting squares behind your character cutouts. This creates a 3D “pop-up” effect that makes the scene stand off the page rather than lying flat against the door.
To pull this off effectively, start by covering the door with white butcher paper to serve as your two main pages. Use a thick black marker to draw horizontal lines that mimic the text of a storybook.
Here is what you need to focus on to get the proportions right:
- The Pages: Use a darker beige or cream paper if you want a “vintage” storybook feel rather than a stark white look.
- Character Cutouts: Keep your characters recognizable; think of the Polar Express conductor or iconic storybook animals dressed for winter.
- The Title: Place the book title at the very top of the door frame so it remains visible even when students are standing near the entrance.
This idea is ideal for elementary classrooms where specific characters are already part of the daily curriculum. If you prefer a minimalist look, you might want to choose a different theme, as the “open book” style thrives on layering text and illustrative details.
⭐ Book Character Christmas Decor Ideas
✨ Editor’s Pick
Heavy Duty Hidden Bookcase Pivot Hinge
Stainless Steel Hidden Door Pivot Hinge
Classroom Story Begins Door Decor Kit
💡 Designer Note: Achieving the “Pop-Up” Effect
To make your book characters truly leap off the door, avoid gluing them flush to the surface. By mounting cutouts on small, doubled-up foam squares or folded cardstock tabs, you gain essential depth. This simple shadow-casting technique prevents the door from looking like a flat poster and gives your literary scene a professional, museum-quality display feel that captures students’ attention immediately.
Santa’s Workshop

Transform your classroom entrance into a bustling hub of holiday activity and creative student collaboration.
Turning your door into Santa’s Workshop is the ideal project for a classroom that thrives on high energy and visible student participation. This theme works best when you want to highlight the process of learning and creating rather than just a static holiday scene.
To pull this off effectively, focus on the industrial, industrious side of the North Pole. Use these key elements to build your display:
- Tool cutouts: Create oversized hammers, saws, and paintbrushes from sturdy cardstock to scatter across the door.
- Conveyor belt: Run a horizontal paper strip across the bottom third of the door to simulate a toy-making assembly line.
- Toy boxes: Use small folded paper squares, labeled with each student’s name, to represent the “gifts” being prepared inside.
- Clear signage: Hang a prominent sign like “Santa’s Workshop: Busy Elves Inside” to anchor the entire narrative.
Pro Tip: Mount your character cutouts or tool shapes using small foam squares instead of flat tape. This adds a slight 3D pop that makes the workshop look like a real, layered scene rather than a flat bulletin board.
This design is perfect for teachers who want to keep students engaged throughout the entire month of December. By assigning each student a specific “job” – like crafting a toy box or decorating a tool – you foster a deep sense of ownership over the final result.
⭐ Santa Workshop Decor We Love
Magic Wooden Miniature Fairy Door Kit
✨ Editor’s Pick
Vintage Christmas Street Sign Decor Set
Durable Magnetic Garage Screen Door Mesh
🔢 The Right Sequence for Workshop Success:
To avoid a cluttered look, assemble your workshop components in layers, starting with the base background before adding individual student contributions.
- Anchor the background and main signage first to establish the door’s focal point.
- Install the conveyor belt path across the bottom to create a natural visual baseline.
- Add student-created tools and boxes last to build depth without overcrowding the door’s hardware.
You have now navigated seventeen ways to transform your classroom entrance into an immersive holiday display. Select the one or two themes that best suit your classroom flow and start there, as the most effective designs rely on a single, clear concept rather than an accumulation of every available idea.
Building a space that invites students into the season happens when you commit to one direction and execute it with consistency. When you prioritize festive door decorations that feel authentic to your group, the impact is immediate. Choose your favorite concept today and let the finished door serve as the focal point of the hallway.
Related posts
 12 Christmas Classroom Door Ideas
 Can You Turn a French Door Into a Barn Door?
 14 Classroom Door Decorations for Back to School Week
 11 Snowman Christmas Door Ideas
 12 Apartment Front Door Christmas Decor Ideas
 10 Toddler Christmas Door Ideas
 15 Christmas Door Ideas
 11 Front Door Christmas Decor Ideas