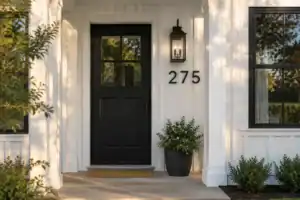
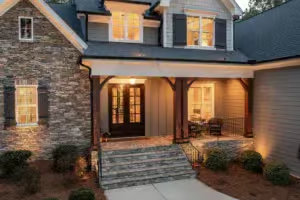
Mismatched doors make a home feel fragmented, but creating coordinated interior doors is the fastest way to add polish to your floor plan. This guide rounds up 12 door ideas worth saving to help you find the precise design thread that ties your rooms together.
Matching Panel Style

Create a seamless visual flow by repeating the exact same door panel geometry throughout.
As an Amazon Associate I earn from qualifying purchases. Affiliate links may earn me a commission at no extra cost to you.
The “patchwork effect” is a common eyesore that happens when a six-panel door in the hallway abruptly meets a two-panel door in the bedroom. This visual inconsistency breaks the rhythm of your home and makes sightlines feel fragmented.
The secret to true coordination lies in the shadow line—the depth of the recess where the panel meets the frame. You should aim for identical depth (1/4″ versus 1/2″) across every door in the house to maintain a consistent look.
Pro-Tip: Check Your Stile and Rail Width
Even if your doors share the same panel count, different frame widths will look misaligned to the eye. Verify that the width of the vertical stiles and horizontal rails matches perfectly before finalizing your purchase.
Sticking to a single panel choice across the entire home transforms a series of isolated boxes into one cohesive, flowing space. It simplifies your design language and reduces the visual noise in tight hallways.
This strategy is best for homeowners looking to build a long-term architectural foundation. If you currently have a mix of styles, you will need to replace them simultaneously to achieve this level of uniformity.
⭐ Matching Panel Style Doors to Consider
✨ Editor’s Pick
Prehung Louver Panel Interior Door Set
Solid Core Two Panel Shaker Door
Frosted Glass Pine Wood Door Slab
Why This Looks Better
Repeating panel geometry creates a rhythmic visual thread that guides the eye naturally through your floor plan. When the stile and rail widths are consistent, the doors function as architectural frames rather than competing elements, effectively “calming” a busy hallway and making even modest rooms feel intentionally designed and architecturally significant.
Consistent Paint Color

A single bucket of paint can instantly turn a fragmented floor plan into a cohesive home.
Painting every door in your home the same color does more than just update the look; it acts as a visual thread that connects disparate rooms. Whether you choose a crisp gallery white, a deep charcoal, or a soft greige, this simple change forces the eye to track the movement through your home rather than stopping at every mismatched slab.
The Sheen Rule: Stick with one sheen for every single door in the house. While matte finishes hide imperfections well, semi-gloss remains the gold standard for durability and ease of cleaning in high-traffic hallways.
Before you open the paint can, remember that the finish is only as good as your prep work. If you are painting over a factory-finished door, you must sand the existing surface to remove the high-gloss sheen so the new paint has something to grip.
Thorough sanding and a coat of high-quality bonding primer are the only things standing between a professional look and paint that peels in two years. With proper application, you can expect an intentional, unified look that lasts for a decade or more before needing a touch-up.
⭐ Consistent Paint Colors for Interior Doors
Flat Interior Paint and Primer White
✨ Editor’s Pick
Semi Gloss Interior Paint and Primer
Black Magic Semi Gloss Interior Paint
💰 What This Really Costs:
- The price spread: Materials for DIY painting run $50–$150 per door, while professional services range from $200–$400 per door.
- Hidden prep costs: Don’t forget to budget for high-quality sandpaper, bonding primer, and painters’ tape, which are essential for lasting adhesion.
- Value of pro finish: Hiring a pro is often worth the extra spend if you want a factory-smooth, brush-free finish without the learning curve.
Uniform Hardware Finish

Create a seamless visual thread through your floor plan with perfectly matched door hardware.
The hardware jumble—where one room features tarnished brass and the next displays mismatched nickel—is a common culprit behind a fragmented home aesthetic. Using a consistent hardware finish across every door is the most effective way to unify different styles, acting as a visual anchor that ties your interior design together.
Before you commit to a full-home swap, you must verify the backset. This is the measurement from the edge of the door to the center of the borehole, and it is the non-negotiable step that determines if your new handles will actually fit your existing doors.
Pro Tip: Buy in Bulk
Purchase your handles and hinges in multi-packs for the entire house. This ensures you maintain dye-lot consistency and often reduces the total cost by 15-20% compared to buying individual sets.
Don’t fall into the trap of only upgrading the handles while forgetting the hinges. A cohesive look requires matching your hinges to the finish of your door handles, as these small details are the first thing the eye notices when walking through a doorway.
Hardware typically has a 10–20 year replacement cycle due to daily wear and tear. Choosing a high-quality finish now ensures your home stays coordinated through years of use without needing constant touch-ups.
⭐ Uniform Hardware Finishes for Your Home
Matte Black Passage Door Handle Set
Matte Black Privacy Door Lever Set
✨ Editor’s Pick
Brushed Gold Privacy Door Lever Set
📋 Quick Reality Check Before You Buy
- Measure the backset: Use a tape measure to confirm the exact distance from the door edge to the center of the existing borehole.
- Audit your hinges: Check if your current hinges have rounded or square corners, as the new hardware must match this specific profile.
- Verify borehole size: Ensure your door’s current hole diameter comfortably accommodates the new latch mechanism without requiring wood filler or additional drilling.
Shaker Panel Doors

Create a cohesive visual language with the clean, geometric lines of classic Shaker doors.
The Shaker panel door has become the gold standard for modern, coordinated homes because of its uncomplicated, flat-panel geometry. It bypasses the fussy, decorative molding found on traditional Victorian styles, allowing your home to feel open and intentionally curated.
The coordination in this design comes from the consistent 90-degree angles of the rails and stiles. Whether you choose MDF or solid wood, this repetition creates a clean visual line that anchors every room in your floor plan.
Pro Tip: Install MDF doors in high-humidity areas like bathrooms. Unlike solid wood, MDF won’t expand or contract in steamy environments, keeping your panel lines crisp for decades.
If you are looking for a reliable way to unify both traditional and modern decor, the Shaker style is your best bet. It provides the necessary structure to make a home feel finished without competing with your furniture or wall art.
⭐ Shaker Panel Doors We Love
✨ Editor’s Pick
Two Panel White Primed Shaker Slab
Solid Core White Primed Shaker Slab
Three Panel Finished White Shaker Slab
Stepping back to look at your home as a whole often reveals that the pressure to overhaul every single entry is mostly internal. Achieving a custom, unified feel rarely requires changing everything at once; instead, it comes down to choosing consistent design threads that sustain your home’s aesthetic for the long haul.
Focusing on two or three high-impact design choices provides the architectural cohesion that makes a house feel intentionally finished rather than just renovated.
Flush Modern Slabs

Minimize visual distraction and create a seamless, sophisticated flow between your living spaces.
Flush modern slabs are the go-to choice for homeowners who want their walls to feel continuous rather than interrupted. Because these doors lack the recessed lines or ornamental profiles of traditional designs, they effectively disappear when painted the same color as your wall.
If you are trying to make a cramped hallway feel larger, this is the most effective design strategy available. Choosing solid-core slabs provides the heavy, premium feel of a quality door while significantly dampening sound between rooms compared to their hollow-core counterparts.
To really lean into the minimalist aesthetic, pair these slabs with low-profile or frameless casing. This removes the bulky trim that usually frames a door, allowing the surface of the door to sit nearly flush with the wall plane.
This style is perfect for modern or mid-century homes where clean geometry is the priority. If your home leans toward traditional or ornate decor, you might find that these doors feel too stark and out of place.
⭐ Flush Modern Slabs for Minimalist Homes
Peel and Stick Door Molding Kit
✨ Editor’s Pick
Solid Core White Primed Slab Door
One Panel Oak Finish Slab Door
💡 Why This Works:
Flush slabs act as a visual “reset” button for busy hallways. By removing the play of light and shadow found on panelled doors, these surfaces allow the eye to glide across the wall plane, making narrow corridors feel significantly more open and architecturally intentional.
Design Benefit: A seamless transition that turns necessary doors into a clean, unified architectural feature.
Glass Panel Inserts

Bring light deep into windowless hallways by repeating the same glass style throughout your home.
Glass panel inserts are the most effective way to share light between rooms, especially in tight corridors that feel like dark tunnels. To keep your home feeling unified, the rule of consistent opacity is your golden ticket.
If you choose to use frosted glass for privacy in a bathroom, carry that exact same frosted texture to every other glass door in the house. Mixing clear, reeded, and frosted glass creates a visual disconnect that makes your home feel like a collection of salvaged parts rather than a planned living space.
Safety First: Never install standard plate glass in an interior door where it can be bumped or slammed. Always ensure you are using tempered safety glass for every insert to prevent dangerous shattering.
The grid pattern—the number of panes visible—is just as important as the glass itself. If you install a 6-over-6 pane style in your office, don’t switch to a single large pane in the guest bedroom.
Consistency here provides the visual rhythm that ties your rooms together. Use this quick checklist to ensure your glass choices remain professional and cohesive:
- ✔ Match the grid: Keep the number of panes identical on every door.
- ✔ Uniform opacity: Do not mix clear glass with obscured glass.
- ✔ Professional install: Avoid DIY inserts; the factory-sealed gasket is vital to prevent rattling and drafts.
⭐ Glass Panel Inserts to Brighten Rooms
Five Lite Frosted Glass Door Slab
Solid Core Clear Glass French Door
✨ Editor’s Pick
White Mirror Door Slab with Panel
🧰 Questions for Your Installer:
- Sealing methods: How will the glass be gasketed to ensure the door remains quiet and draft-free?
- Tempered verification: Can you confirm that all inserts meet safety standards and bear the required manufacturer stamp?
- Maintenance access: If a pane cracks in the future, is the frame designed for easy glass replacement?
Repeated Trim Profile

Anchor your entire home’s aesthetic by using one consistent trim profile on every doorframe.
A door is only as impactful as the frame surrounding it. If your home has a mixture of thick crown-style molding in one room and flat-edge boards in another, the space will immediately feel disjointed.
The secret to a unified look is selecting one specific trim profile—like a clean 45-degree bevel or a simple square-edge—and repeating it on every single door throughout the house. This consistent frame acts as the “connective tissue” that ties your interior doors together, even if the doors themselves vary slightly in style.
For high-traffic hallways or areas near bathrooms, prioritize polyurethane or PVC trim over traditional pine. These materials are moisture-resistant and significantly less prone to cracking, ensuring your frames stay crisp for decades.
Pro Tip: Ensure all door casings share the exact same thickness as your baseboards. This small detail creates a cohesive, built-in appearance that makes the entire transition feel intentional.
This strategy is ideal for homeowners who want a professional, custom-built result without the price tag of a full remodel. If you are currently renovating, stick to a single profile and thickness across all openings to lock in that cohesive flow.
⭐ Repeated Trim Profiles for Coordinated Homes
✨ Editor’s Pick
Paintable PVC Door Frame Casing Trim
Invisible Finishing Nails for Door Trim
Scalloped Decorative Wood Molding Trim
⚠️ Common Mistakes to Avoid:
- Ignoring wall gaps: Failing to use high-quality caulk between the casing and wall makes even expensive trim look amateurish.
- Mixing profiles: Using different edge designs in adjacent rooms destroys the visual flow, making the home feel cluttered.
- Skipping moisture checks: Installing pine in damp bathroom areas leads to warping; always opt for moisture-resistant polyurethane in these zones.
Two-Tone Doors

Create rhythmic visual interest by customizing the color of your doors room by room.
A two-tone approach challenges the assumption that a door must look identical from both sides. By painting the hallway-facing side one color and the room-facing side another, you create a distinct design rule that ties your home together through rhythmic consistency.
This strategy works best when you apply the same color logic to every door in the house. For example, you might paint every door black on the hallway side to ground the pass-through spaces, while keeping the bedroom side white to maintain a soft, neutral bedroom palette.
Pro-Tip: When painting the edges of the door, always match the color to the side that swings outward into the main living space. This ensures that when the door is closed, the color visible from the hallway remains uniform and intentional.
Achieving this look requires a steady hand and high-quality painter’s tape to ensure the separation line is razor-sharp. You do not need to make structural changes to the door itself, making this a high-impact, low-cost project.
This design choice is ideal for those who want a custom, designer-curated home feel without the expense of replacing hardware or frames. If you prefer a completely monochromatic, “hidden” look, however, you may want to skip this and stick to a single paint color throughout.
⭐ Two Tone Doors That Make Statements
Modern Double Barn Door Track Set
✨ Editor’s Pick
Matte Black Interior Door Hinge Set
Double Barn Door Clear Glass Set
✨ Finishing Touches for Crisp Color Transitions
Achieving a professional two-tone finish relies on the quality of your edge work, as the transition point between colors is the most visible detail when the door is partially open.
- Clean Lines: Apply high-quality painter’s tape and burnish the edges firmly to prevent paint bleed into your secondary color.
- Edge Prep: Sand the door edge lightly before painting to ensure the new color grips uniformly, preventing premature peeling at the corner.
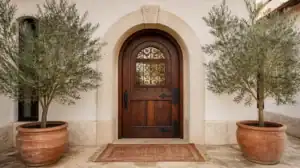
Arched Top Doors

Soften your home’s geometry with custom arched entries that create a cohesive architectural flow.
Arched top doors introduce a sense of movement and architectural interest that square-cut frames simply cannot replicate. This design choice is best for homeowners looking to add a custom, high-end feel to their floor plan without leaning into trendy or temporary styles.
The secret to keeping these looking intentional rather than haphazard is radius consistency. Every arched opening in your home must share the exact same height-to-width proportion to maintain a sense of order.
Installation Warning
Arched units require expert framing and installation because the curved top is prone to warping if the wood is not factory-sealed correctly. Avoid DIY installation for these units, as getting the frame perfectly plumb while maintaining the integrity of the arch is a job for a professional.
While standard square doors are easy to swap, arched doors often necessitate custom wall modifications to accommodate the curve. If you are renovating, commit to the arched look early in the process to ensure the wall framing supports the arch radius you have selected.
This style is a significant investment, but it provides a 30 to 50-year lifespan when cared for properly. Use this look if you want to ground your home’s transition points in a form that feels permanent and deliberate.
⭐ Arched Top Doors We Love
One Lite Frosted Glass Pantry Doors
Five Panel Solid Core French Doors
✨ Editor’s Pick
Raised Two Panel Arch Top Door
🧰 Questions to Ask Your Installer:
- Custom framing: Does the quote include the necessary structural modifications to ensure the wall opening matches the arch radius?
- Warp prevention: How will the vendor or installer guarantee that the arch remains plumb and sealed against seasonal moisture changes?
- Long-term warranty: What is the specific coverage for potential frame separation or finish cracking common in non-standard arched units?
Stained Wood Set

Bring organic warmth and character to your home with a unified wood grain finish.
A stained wood set offers a rich, organic texture that paint simply cannot replicate. This approach is ideal for homeowners who want to lean into the natural character of their home’s architecture rather than covering it up.
The secret to success here is the species and stain rule. Every single door in your home must be crafted from the exact same wood species, such as Walnut, Cherry, or Oak, and coated in the identical stain color to avoid a disjointed look.
Warning: Mixing different stain brands or wood species often leads to clashing tones that are difficult to correct later. If you cannot guarantee a perfect match across all doors, it is much safer to opt for paint instead.
One of the primary benefits of this choice is the 60-year refinishing cycle. Because you are working with real wood, you can sand down and re-stain your doors multiple times over the decades to update your home’s aesthetic without needing to replace the slabs themselves.
⭐ Stained Wood Sets to Consider
✨ Editor’s Pick
Wood Door Lock Installation Drilling Kit
Half Lite Frosted Glass Pine Door
Dark Walnut Water Based Wood Stain
📈 The Long-Term Payoff
Investing in a matching stained wood set is a significant upfront commitment, but it offers exceptional longevity compared to painted alternatives. With a 40–60 year lifespan and the ability to be refinished multiple times, these doors retain their character and value, eventually becoming an architectural asset rather than just a functional room barrier.
Refinishing Potential: Natural wood allows for a complete aesthetic reset every few decades without requiring a full door replacement.
Black Frame Doors

Create a bold visual anchor in your home with high-contrast, graphic door frames.
Black frame doors serve as a graphic anchor, pulling focus and defining the geometry of a room. They work best in homes designed with a neutral palette, where the dark finish can ground the space against light-colored walls.
Because black paint is notoriously unforgiving, it highlights every dings, scratch, and dust particle. Matte or satin finishes are significantly better at hiding scuffs than high-gloss alternatives in high-traffic areas.
The Monochromatic Rule: To keep this look from feeling disjointed, pair your black doors with matching matte black hardware. You should also consider painting your trim a dark gray or black to maintain a cohesive, intentional visual line.
If you have pets or active children, be prepared for more frequent touch-ups. Keep a small bottle of high-quality paint on hand specifically for quick fixes to keep the frames looking sharp.
⭐ Black Frame Doors That Stand Out
Semi Frameless Sliding Glass Shower Door
✨ Editor’s Pick
Matte Black Rounded Interior Door Hinges
Custom Aluminum Retractable Screen Door
⚠️ Common Mistakes to Avoid:
- Sheen Mismatch: Never mix high-gloss and matte black paints; stick to one consistent finish to ensure the door faces reflect light evenly.
- Neglecting Edges: Failing to paint the door edges creates a distracting white “halo” effect when the door is partially open.
- Skipping Primer: Painting directly over factory finishes without sanding and priming leads to premature peeling, especially on high-traffic, scratch-prone black surfaces.
Coordinated Casing

Create a seamless, intentional look by unifying your door frames and baseboards.
Your door is only as polished as the frame surrounding it. Coordinated casing acts as the anchor that ties your door to the wall, turning a standard opening into a intentional architectural feature.
The most effective strategy depends on whether you want your doors to stand out or blend in. Painting your casing to match the door creates a strong, defined frame, while painting it the same color as the wall produces a modern, “hidden” effect that helps small rooms feel larger.
Regardless of color, the profile of the casing must match your baseboards throughout the house. If you use a rounded edge on your door frames, swap out square-edged baseboards to match, or your home will feel like a collection of mismatched parts.
Pro Tip: Use a high-quality, paintable caulk to bridge the gap between the wall and your casing before you begin painting. This single step eliminates unsightly hairline cracks and creates a professional, built-in appearance that lasts for years.
If you are tackling the install yourself, precision is your best friend. Take the time to double-check your miter cuts, as gaps in the corners will break the visual unity you are trying to achieve.
⭐ Coordinated Casing for a Finished Look
Modern Double Pocket Closet Door Set
Solid French Door with Frosted Glass
✨ Editor’s Pick
Prefinished Solid Core White Door Casings
💰 What This Really Costs
- The material spend: Budget between $2 and $12 per linear foot for standard, polyurethane, or custom trim profiles.
- Hidden labor costs: Don’t forget to account for the time spent on wood filler, sanding, and caulk application.
- Where to invest: Prioritize high-quality, moisture-resistant polyurethane trim in high-traffic hallways to avoid future cracking and repairs.
You now have twelve distinct strategies to establish a cohesive look across your home. Choosing the one or two that align with your specific floor plan is far more effective than attempting all of them at once. A few deliberate, matching details often carry the design much further than a complete overhaul of every surface.
Decide on the door style that anchors your space first, and you will find that creating visual unity becomes a straightforward process. Focus on the refinement of your interior door flow rather than chasing every trend, and you will achieve an intentional look that feels complete.
Related posts
 17 Interior Door Designs That Make a Plain Room Look Custom
 17 Door Designs That Instantly Make a Room Look More Expensive
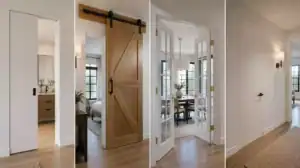 12 Interior Doors That Improve Room to Room Flow
 21 Mandir Door Designs For Sacred Home Temples
 21 Unique Wardrobe Door Designs You’ve Never Seen Before
 14 Cupboard Door Designs That Hide Clutter Beautifully
 17 Pooja Unit Door Designs For Compact Spaces
 10 Arched Door Designs Made For Mediterranean Entryways