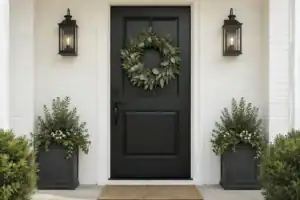
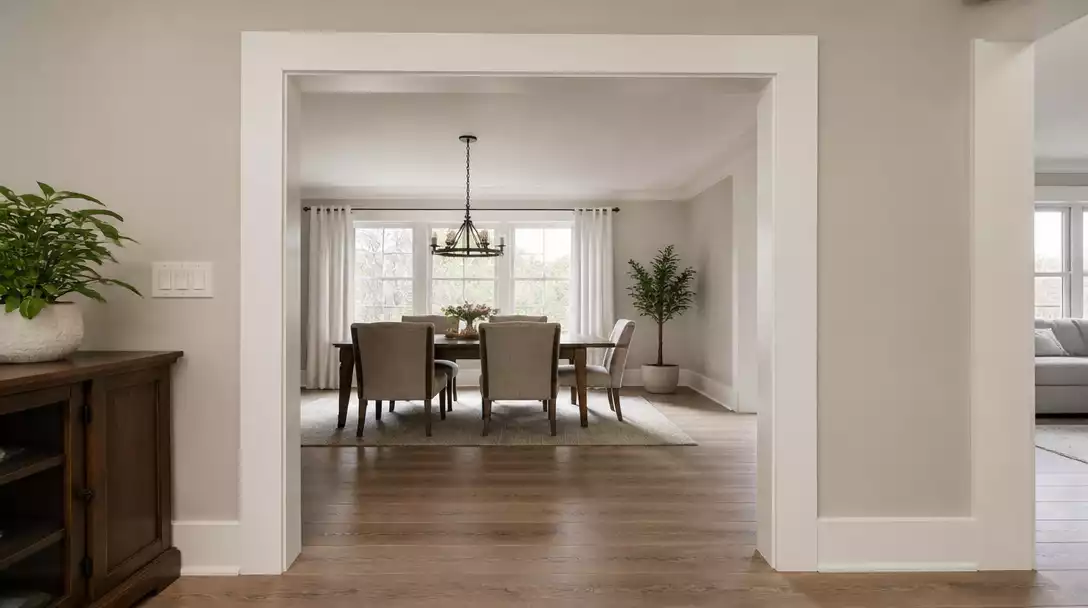
A raw, doorless passage often feels unfinished, but the right cased opening bridges the gap between open-concept flow and architectural definition. This guide rounds up 10 design ideas worth saving to help you choose the profile that fits your home. Let’s look at the most fundamental style first.
Simple square casing
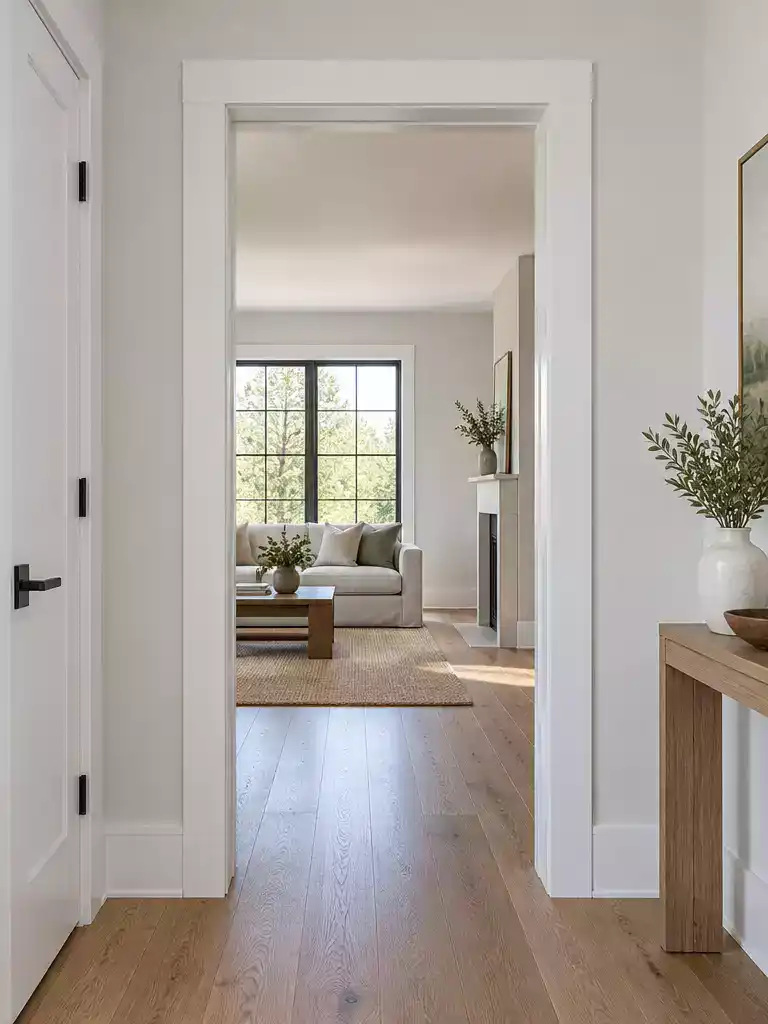
Achieve a clean, professional finish with these sharp, minimalist lines for a modern home.
As an Amazon Associate I earn from qualifying purchases. Affiliate links may earn me a commission at no extra cost to you.
Simple square casing is the most straightforward way to frame a doorless passage, relying on flat stock with crisp, 90-degree edges. It is a go-to choice for homeowners who prefer a clean, uncluttered aesthetic over decorative profiles.
To achieve a professional result, aim for a consistent 3/16-inch reveal between the edge of the casing and the jamb. This small offset is the industry standard that prevents the trim from looking like a flat, stuck-on board.
The Head-First Installation Method:
- Install the horizontal head piece first, ensuring it is perfectly level.
- Measure and cut your side legs to land precisely against the bottom of that head piece.
- This sequence ensures your corner joints stay tight and avoids awkward gaps at the top of the opening.
Because this style is so minimal, it is also the most revealing. Any out-of-square wall or poor alignment with your existing baseboards will be instantly visible to anyone walking through the room.
Warning: If your walls are significantly out-of-plumb, the flat, unforgiving nature of this casing will highlight the error. You may need to use extra shims or caulk to bridge the gaps, which can detract from the clean look you are chasing.
⭐ Simple Square Casing Options
✨ Editor’s Pick
Precut Peel and Stick Door Trim
Flexible Paintable Arched Doorway Trim
Premium Interior and Exterior Latex Caulk
💡 Essential Tips for Professional Results:
- Check wall variance: Use a digital caliper to measure jamb depth at three points to account for drywall inconsistencies.
- Verify blocking: Ensure there is solid framing behind the drywall; if you hit hollow space, the casing will eventually pull away.
- Prioritize plumb: Since this style is unforgiving, focus on keeping side legs perfectly vertical, even if the floor requires a slight custom scribe.
Wide Flat Casing

Give your pass-throughs architectural weight by matching trim width to your existing baseboard profile.
Wide flat casing uses the same crisp, 90-degree geometry as standard square trim but scales up the stock to 4 or 6 inches. This extra width turns a simple hole in the wall into a deliberate structural element that grounds the room.
Pro Integration Tip: Measure the height of your existing baseboards before purchasing your casing stock. Matching these two dimensions creates a cohesive, high-end trim system that flows seamlessly from the floor up and around your doorways.
Because the stock is wider, this style is significantly less forgiving than thinner trim. It tends to magnify any gaps caused by wall surfaces that aren’t perfectly plumb, making careful prep work essential.
This style is a perfect fit if you want your doorways to feel like custom-built features rather than afterthoughts. If your walls are notably wavy or out-of-square, you may want to skip this width in favor of a narrower, more flexible profile.
⭐ Wide Flat Casing Picks
Decorative Door and Window Casing Bit
✨ Editor’s Pick
Customizable Aluminum Door Casing Trim
Flexible Casing Molding for Curved Walls
📋 Quick Reality Check: Wide Trim Prep
- Check wall variance: Use a digital caliper to measure jamb thickness at the top, middle, and bottom to account for drywall inconsistencies.
- Verify solid backing: Ensure you are hitting structural framing behind the drywall; if you hit hollow space, the heavy casing will eventually pull away.
- Assess plumbness: Wider stock magnifies even slight wall tilts; if the opening is significantly out-of-square, hire a finish carpenter to scribe the trim properly.
Balancing the weight of structural trim against your preferred aesthetic often feels like a high-stakes trade-off. However, achieving a professional result is less about mastering every style and more about ensuring your custom casing installation aligns with the home’s existing architecture.
Focusing on authentic material proportion ensures your chosen opening feels like an intentional design feature rather than a decorative afterthought.
3. Craftsman Casing
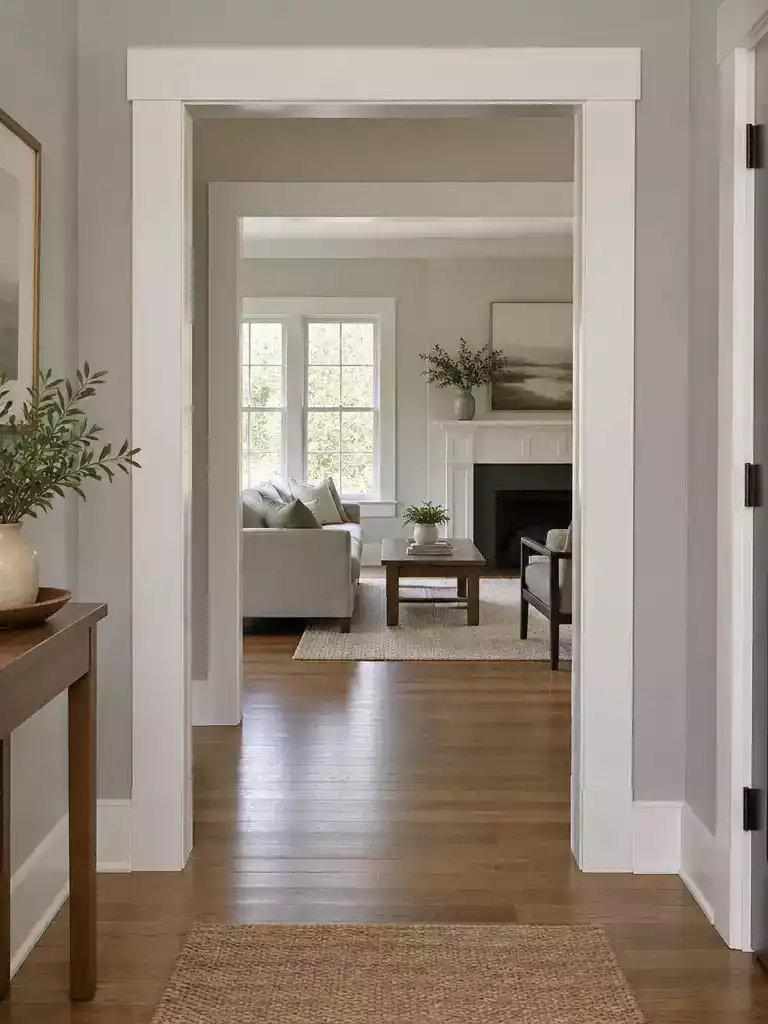
Define your home’s character with the structured, architectural weight of classic Craftsman trim details.
Craftsman casing relies on an articulated composition that separates the header from the side legs. Instead of mitered corners, this style uses a butt joint where the side casings land directly beneath a horizontal head piece.
This approach is perfect for homes already featuring Craftsman-style baseboards or interior doors. It creates a heavy, intentional look that anchors the room, making a simple pass-through feel like a purposeful structural element.
Proportion Warning: Avoid the temptation to install an overly thick head casing.
If the header is too deep, it will quickly overpower the scale of your doorways and shrink the perceived height of your ceilings.
For a professional result, ensure your head casing is perfectly level and your side casings are dead plumb. The visual success of this style rests entirely on the precision of these junctions.
If your home lacks existing Craftsman trim, be prepared to upgrade your floor baseboards as well. The casing looks most natural when its width and thickness relate directly to the baseboard profile in the surrounding room.
⭐ Craftsman Casing We Love
Unfinished Decorative Wood Arch Trim
Paintable Siliconized Acrylic Latex Caulk
✨ Editor’s Pick
Customizable Curved Arch Door Trim Kit
🏡 How to Make It Feel Authentic:
- Consistent grain: If using stain-grade wood, pick boards with similar grain patterns to keep the header and legs feeling like one cohesive unit.
- Plumb check: Because this style relies on crisp butt joints, use a level to confirm your wall is actually plumb before committing to the header height.
- Integrated transitions: Use small blocks or rosettes if your existing baseboards have complex profiles that don’t meet the flat casing smoothly.
Traditional Backband
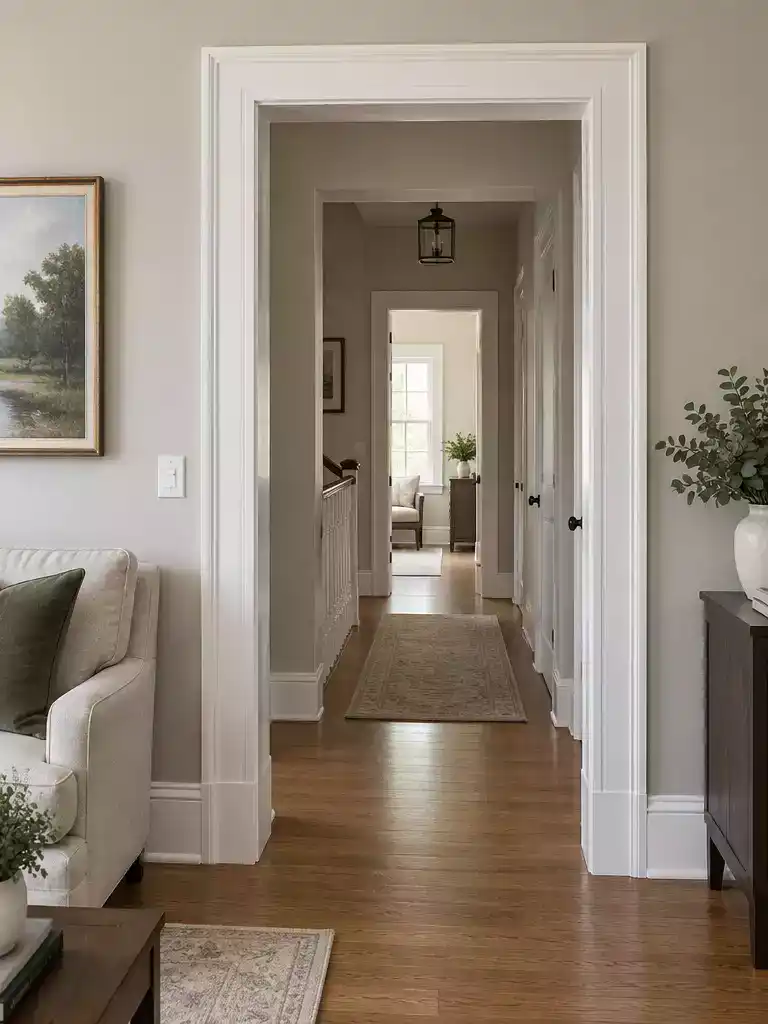
Add historical depth and architectural shadow lines to your doorless transitions with layered trim.
A traditional backband adds a secondary, decorative trim piece to the outer edge of your primary casing. This layering technique breaks up the flat surface of standard trim, creating depth and a sense of historical character that simple square stock often lacks.
This style is ideal for period-style homes or any space where you want the doorway to feel like a structural feature rather than a thin veneer. Because the added profile introduces more complexity, it is best suited for those who appreciate detailed woodwork and have the patience for high-precision installs.
Warning: Precision Required.
Layered profiles make corner miters much harder to hide if they aren’t perfect. Always dry-fit every piece before committing to nails or glue, as any gap in the backband will be immediately visible.
If you choose to tackle this, keep your layout consistent across all openings in the room. The transition where the backband meets the baseboard requires a clean “return” or a mitered end to look finished rather than like an afterthought.
⭐ Traditional Backband Trim Ideas
✨ Editor’s Pick
Paintable Rounded Corner Door Trim
Professional Blue Painter Masking Tape
Peel and Stick Door Molding Kit
Designer Note: Mastering the Shadow Line
The visual power of a backband lies in its ability to cast deeper, more dramatic shadows than standard flat stock. To keep this look sophisticated, ensure your primary casing is thick enough to support the backband’s profile without it appearing “tacked on.” This layering provides an intentional, furniture-grade quality that anchors a room’s architecture.
Fluted Side Casings
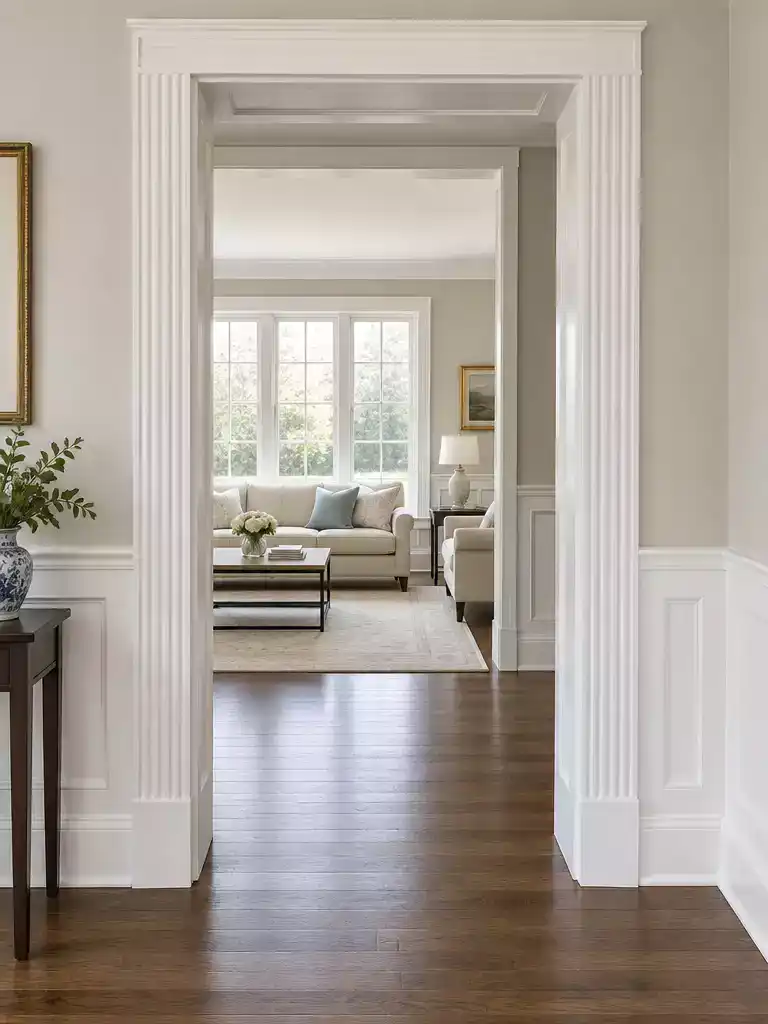
Add formal, classical rhythm to your passage with precise vertical grooved trim details.
Fluted side casings feature vertical grooves machined into the face of the trim, turning a simple pass-through into a formal, classical architectural element. This style immediately draws the eye upward, creating a sense of height and structured rhythm in any hallway or living space.
Warning: Precision is mandatory. Because fluting creates a strong vertical line, any tilt or lack of plumb will be immediately obvious to the viewer.
To achieve a professional finish, layout is your most critical step. You must match the fluting orientation on both sides of the opening to ensure the pattern looks mirrored and intentional.
The installation follows a specific order to keep the reveals tight:
- Install the head piece first to establish your level reference point.
- Cut your side legs to land precisely beneath the header with a consistent 3/16-inch reveal.
- Double-check your plumb lines before fastening, as even a slight deviation will be magnified by the vertical grooves.
This style is best suited for homes with classical, colonial, or formal interior aesthetics. If your walls are significantly out-of-square, you should consider a different profile, as hide-the-gap techniques are much harder to execute on fluted trim without ruining the pattern.
⭐ Fluted Side Casings to Consider
Decorative Fluted Wood Casing Set
✨ Editor’s Pick
White PVC Outdoor Door Trim Kit
Primed Fluted Casing Sample Piece
🏡 Real-Home Application:
- Visual orientation: Align flutes vertically so they mirror each other across the opening to create balanced symmetry.
- Maintenance check: Dust settles easily in deep grooves; use a soft-bristled brush to keep them clean.
- Seamless transition: Match the fluted profile to your existing baseboard height to keep the look grounded.
Plinth Block Casing
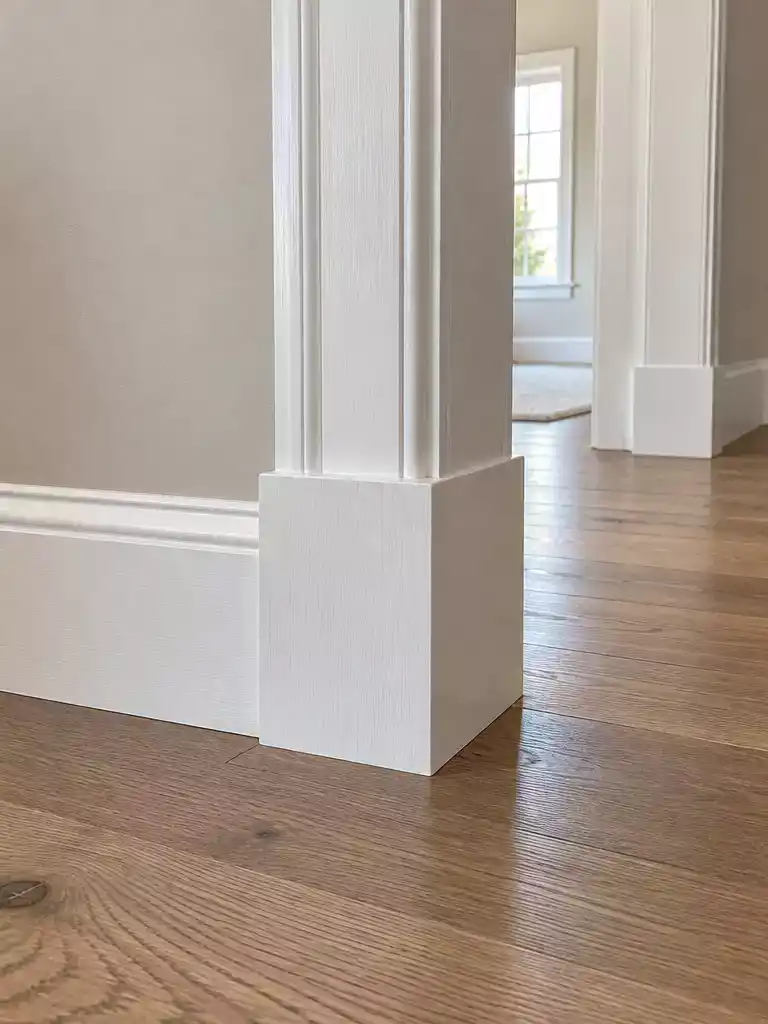
Ground your doorless passage with a sturdy, architectural base that resolves awkward trim transitions.
Plinth blocks are substantial, square blocks positioned at the very bottom of your door casing where it meets the floor. They serve as a dedicated transition point between your vertical casing and your horizontal baseboards.
This style is ideal for homes where the baseboard thickness varies from your door trim, preventing that messy look where one piece of wood awkwardly sticks out past the other. If you are working in an older house with existing trim that doesn’t quite line up, these blocks act as a visual anchor that makes the mismatch look intentional.
The Golden Rules of Sizing:
- Height: The block must be at least 1/2-inch taller than your highest baseboard to look properly grounded.
- Width: It must be wider than your casing to create a distinct visual “stop” for the eye.
- Thickness: Always select a block that is at least as thick as your thickest trim piece to ensure a flush, high-end finish.
Skip the DIY headache if you are dealing with severely uneven floors. Because these blocks are rigid and square, they require a perfectly level floor to avoid leaving a visible gap at the bottom that no amount of caulk can hide.
If your floor is sloped, you will need to scribe the bottom of the block to match the contour of the floorboards or tile. This is a task that often separates the amateur finish from the professional result.
⭐ Plinth Block Casing Picks
✨ Editor’s Pick
Permanent Door Hinge Screw Repair Kit
Extendable Cobweb Duster and Pole
⚖️ Quick Decision Guide: Choosing Your Block
- Choose this if: Your baseboards are thicker or more ornate than your door trim, requiring a visual buffer.
- Skip this if: You are aiming for a strictly modern, minimalist look, as blocks add a traditional, weighted aesthetic.
- Pair it with: Match the block material to your casing; if painting, use a high-density MDF to prevent future joint cracks.
Paneled Jambs
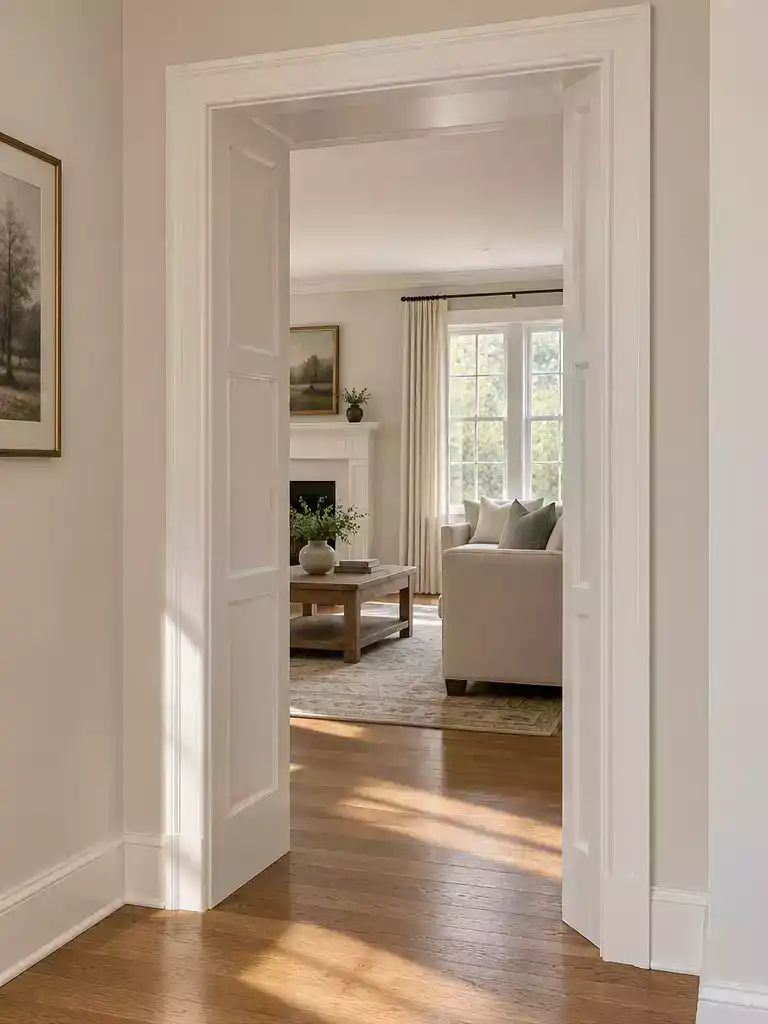
Create a custom built-in feel by adding architectural depth to your interior pass-throughs.
Paneled jambs shift the focus from the wall thickness to the opening itself by replacing plain drywall with finished woodwork. This strategy gives the passage a fine furniture aesthetic, making it look like an intentional design choice rather than a simple hole in the wall.
Installation Warning: You must measure your wall thickness at the top, middle, and bottom of the opening after the drywall is fully finished. Because walls are rarely perfectly plumb, your jamb stock will need to be custom-fit to accommodate these variances.
This approach is ideal for homeowners who want to bridge the gap between open-concept living and structured traditional character. It works particularly well in homes that already feature wainscoting or detailed trim work, as it allows the passage to mimic the style of your existing cabinetry.
Key execution steps for your project:
- Confirm your total wall depth, including both layers of drywall and any necessary shims.
- Rip your jamb material to the exact width to ensure a flush transition with the surrounding drywall edges.
- Install the top header piece first, followed by the side panels, ensuring all joints are tight and finished with high-quality wood filler.
- Set your casing with a consistent 3/16-inch reveal to emphasize the depth of the new paneled interior.
If your walls are significantly out of square, this style can be difficult to pull off without professional help. If you aren’t comfortable with high-precision carpentry, consider hiring a finish carpenter to handle the complex scribing required for a seamless panel fit.
⭐ Paneled Jambs We Love
✨ Editor’s Pick
Primed Fluted Casing Sample Piece
Large Primed Fluted Casing Sample
Small Primed Fluted Casing Sample
✨ Small Details That Matter
Focusing on these subtle finishing elements will bridge the gap between a standard doorway and a truly professional architectural feature.
- Caulk consistency: Use high-quality paintable caulk at all joints to hide tiny gaps where panels meet the jambs.
- Sanding technique: Prioritize a smooth, grain-free finish on all wood edges to ensure the panels pop against the wall.
Natural Oak Casing
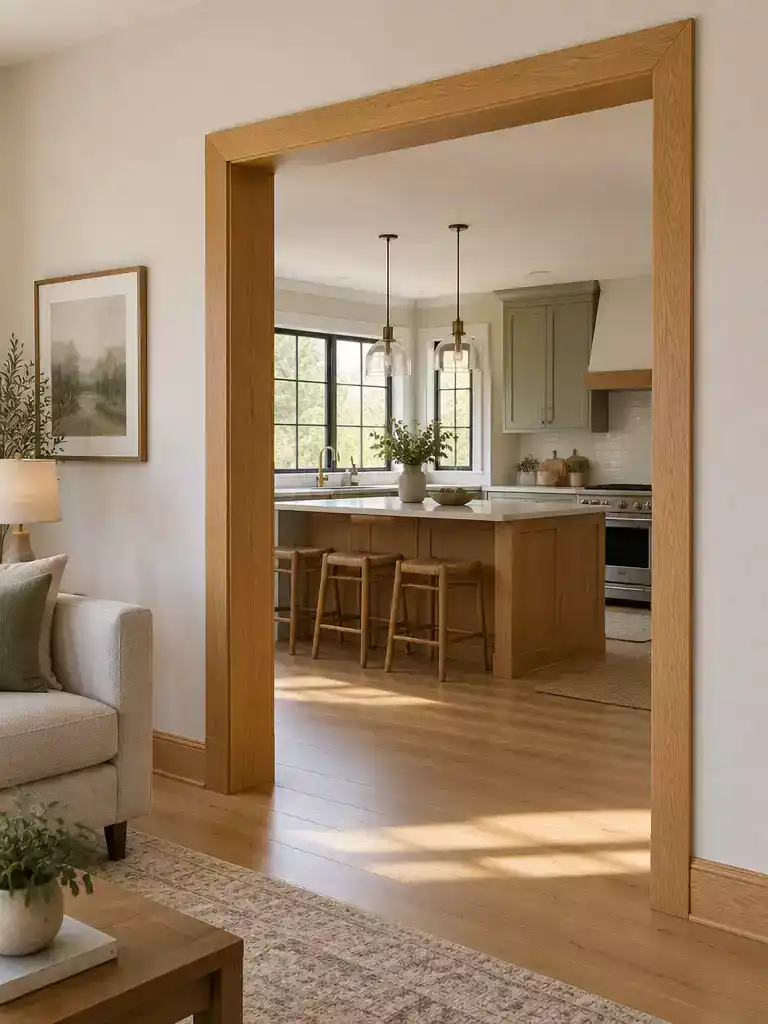
Bring warmth and organic texture to your interior transitions with high-quality, stain-grade oak trim.
Natural oak casing provides a rich, tactile alternative to standard painted MDF. It is an ideal choice for homes that feature existing wood elements, such as hardwood flooring or stained cabinetry, allowing you to create a cohesive design language throughout your space.
Budget Note: Expect to pay between $3 and $6 per linear foot for high-quality oak or maple stock. Factor in additional costs for professional-grade stains and clear-coat finishes to ensure long-term durability.
Achieving a professional result requires careful attention to the wood’s natural character. Because this trim is stain-grade, you must prioritize grain continuity during the installation process to prevent a disjointed or patchwork appearance.
- ✓ Wall Preparation: Measure your wall thickness at the top, middle, and bottom before ordering stock to ensure your jambs fit snugly.
- ✓ Finishing: Test your stain on a scrap piece of the same board to ensure the color tone reads correctly against your existing flooring.
- ✕ Avoid: Do not attempt to hide poor miters with wood filler, as it will rarely take the stain exactly like the surrounding natural oak.
This style is best suited for those comfortable with woodworking basics or willing to hire a finish carpenter. If your home lacks other wood tones, this casing might feel isolated; ensure you have enough wood elements in the room to make the choice feel intentional.
⭐ Natural Oak Casing Ideas
Decorative Half Circle Arch Trim Strip
✨ Editor’s Pick
Adjustable Curved Arch Door Trim Kit
📈 The Long-Term Payoff:
Natural oak is a classic material choice that generally holds its aesthetic value better than painted MDF, which can show wear at the corners over time. While it requires a slightly higher initial investment, the durability of solid hardwood means it won’t need frequent repainting, ultimately saving on maintenance and preserving a high-end, timeless look for future buyers.
Resale Appeal: Buyers consistently view natural wood finishes as a premium, low-maintenance upgrade that signifies quality craftsmanship.
Painted Contrast Casing
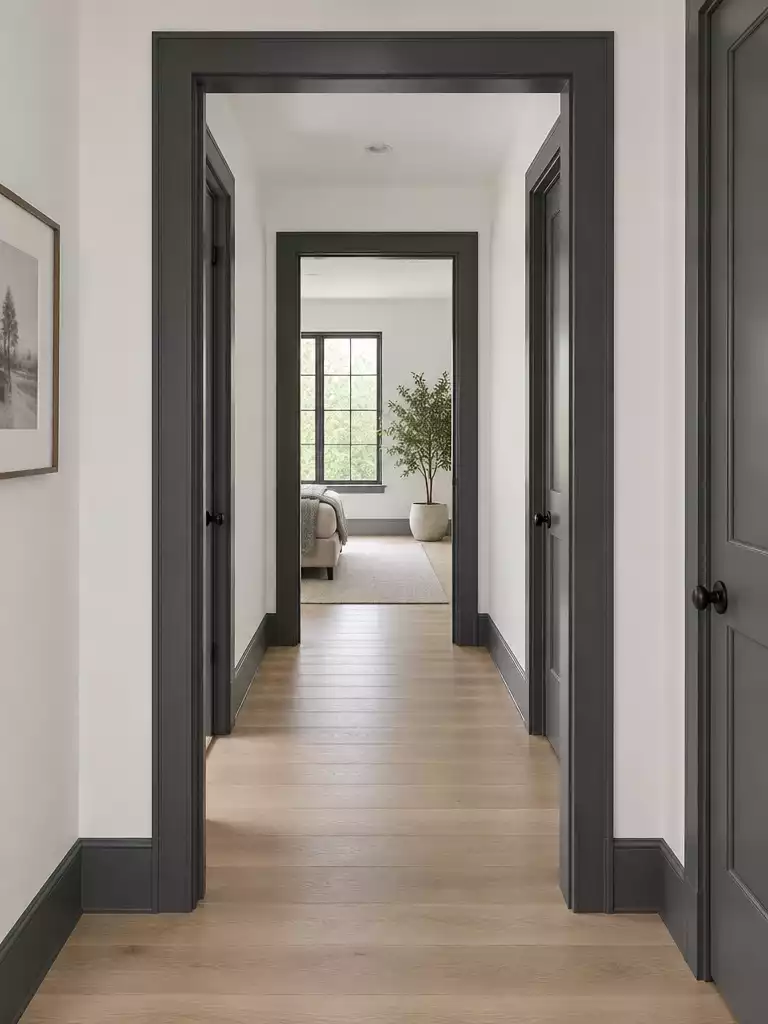
Use bold color to turn a simple pass-through into a striking architectural frame.
Painted contrast casing treats your doorless opening as a deliberate frame for the room beyond, rather than just a void in the wall. By painting the trim in a bold, saturated color like charcoal, navy, or matte black, you command the eye to focus on the transition itself.
Surface Prep Warning: High-contrast paint is unforgiving and will call attention to every tiny defect. You must use a high-quality wood filler and sand the trim thoroughly before applying your first coat to ensure the seams remain invisible.
This approach works best when you treat the opening as a cohesive element within the room’s total design. Align the casing thickness with your existing baseboards and nearby window trim so the color choice feels purposeful rather than accidental.
Consider this option if your home features neutral walls and you want to define spaces without adding doors. Skip this if your trim work has uneven joints or poorly filled nail holes, as the bold color will highlight these flaws rather than hide them.
⭐ Painted Contrast Casing Picks
✨ Editor’s Pick
Waterproof Rubberized Paste for Casings
💡 The Visual Benefit of Color Framing:
By introducing a sharp color contrast at a transition point, you essentially treat the passage like an art gallery frame. This trick draws the eye toward the opening, making the threshold feel like a deliberate structural choice rather than an accidental void left behind during open-concept renovations.
Design Takeaway: Use bold trim to anchor the space and create a sophisticated, intentional transition between distinct rooms.
Floor-to-Ceiling Casing
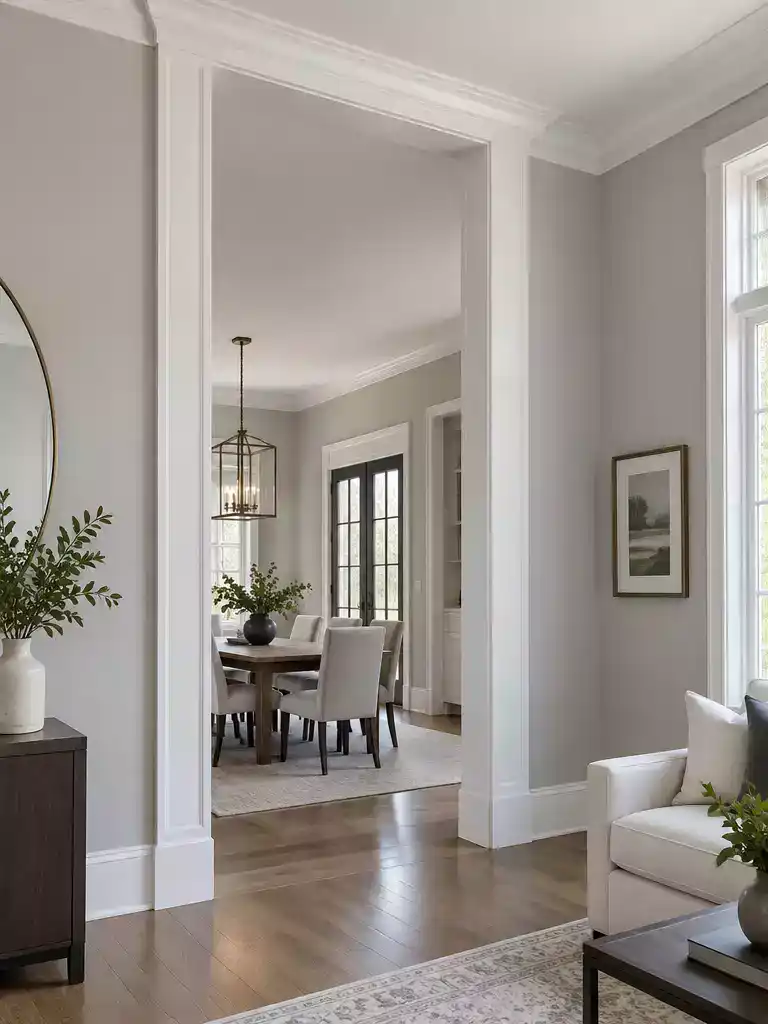
Maximize your room height and create a dramatic, seamless architectural transition between living spaces.
This approach moves beyond standard door-height trim by running vertical casing from the floor straight to the ceiling. It effectively draws the eye upward, making the room feel significantly taller and more intentional.
Pro Integration Tip: For the most polished outcome, ensure your vertical casing profile matches the profile of your crown molding. This allows the two elements to meet in a clean, sophisticated junction that looks like a custom built-in feature.
Because this style relies on long, continuous lines, the installation requires high precision to avoid highlighting wall imperfections. You must fasten the trim directly into the structural framing behind the drywall using brads spaced every 12 to 16 inches.
Warning: Any lack of plumb in your wall framing will be immediately obvious over a span of eight or nine feet. If your walls are significantly out of square, this style will magnify the error rather than hiding it.
This option is best suited for homeowners looking to elevate a pass-through into a signature design element. If you prefer a subtle, understated look, you should opt for standard head-height casing instead.
⭐ Floor to Ceiling Casing Ideas
✨ Editor’s Pick
Flexible Self Adhesive Wall Molding Trim
🔢 The Right Sequence
Executing a floor-to-ceiling installation requires a strict order of operations to ensure the vertical lines remain perfectly plumb and the transitions look intentional.
- Plumb the jambs: Establish a dead-plumb vertical line on both sides of the opening before fastening any trim.
- Secure the header: Install the top horizontal piece level, ensuring it perfectly squares your vertical side elements.
- Fasten side legs: Attach the long vertical casing to the framing, working from the header down to the floor.
With all ten cased opening ideas in front of you, the path toward a finished transition is much clearer. You do not need to implement every strategy here; simply identifying the one or two profiles that align with your home’s existing architecture is enough to create a cohesive result.
A well-proportioned casing does more for your room flow than a complex design ever could, so focus on the openings that see the most daily traffic. If you are ready to refine the details, you might explore how to make every door in your house feel like one design as you finalize your trim choices. Take your time with the measurements, select the style that naturally complements your space, and trust that a single, intentional transition will elevate the entire home.
Related posts
 Can You Change the Opening Door on French Doors?
 10 Closet Door Types for Beds Close to the Opening
 10 Double Door Design Ideas
 9 Balcony Sliding Door Ideas
 10 Inspiring Interior Door Styles Ideas
 14 Pocket Door Ideas Built Around Tiny Bathrooms
 14 Closet Door Ideas for Tight and Awkward Spaces
 14 Latest Door Design for Home Ideas That Feel More Expensive