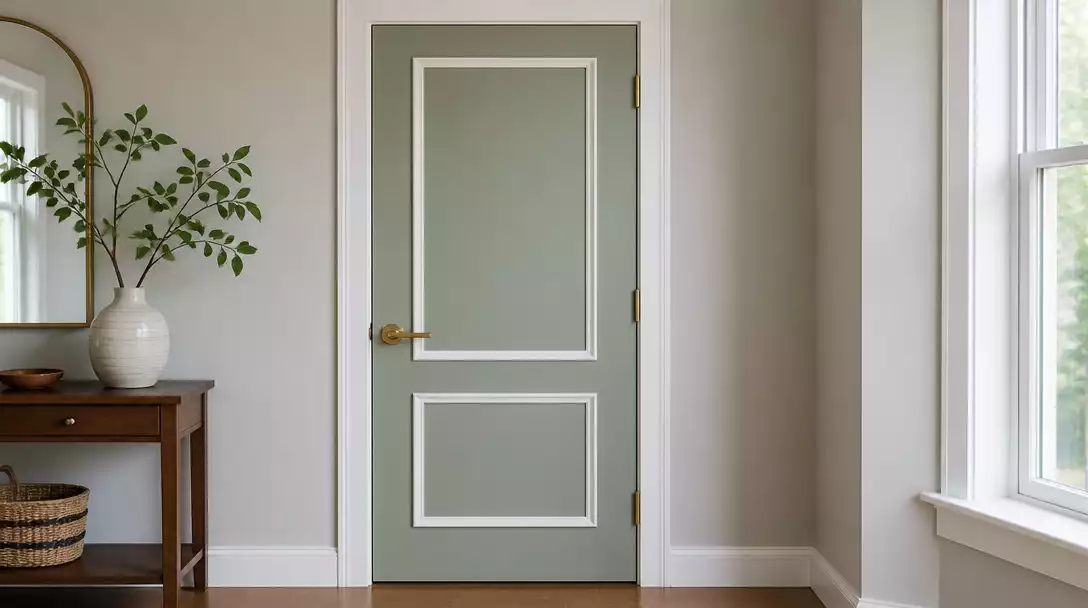
Flat, builder-grade slabs often feel like a design afterthought, but hollow core door makeovers provide a simple way to add permanent architectural detail. This guide covers 11 molding and paint ideas worth saving to help you find the perfect layout that fits your home.
Single-Panel Shaker
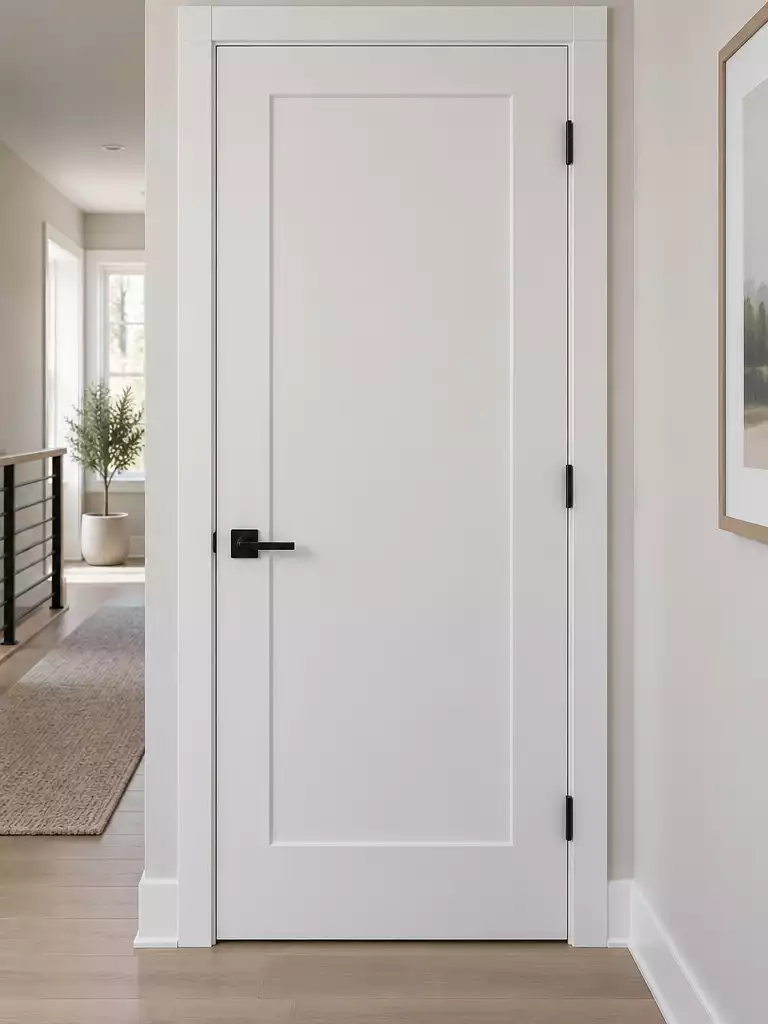
Give your flat builder-grade doors a clean, architectural update with this simple shaker-style frame.
As an Amazon Associate I earn from qualifying purchases. Affiliate links may earn me a commission at no extra cost to you.
The single-panel Shaker look relies on creating one large, centered rectangular field on your existing slab. By leaving a uniform border of four to six inches around the entire perimeter, you mimic the heavy look of authentic wood stiles and rails.
For the best results, use narrow, flat-profile paint-grade wood molding rather than thick, ornate trim. Keep your trim profile thin to ensure the final result looks integrated into the door rather than just stuck onto the surface.
Critical Geometry Warning
You must center your field with absolute precision. Even a 1/4-inch deviation in your border width will be glaringly obvious against the door’s original edges.
This style is the ideal starting point for anyone new to trim work because it limits the number of miters you need to cut. It is a perfect fit for minimalist or transitional homes that need a touch of character without adding busy patterns.
⭐ Top Shaker Door Slabs to Buy
✨ Editor’s Pick
Solid Knotty Pine Shaker Door Slab
Frosted Glass Five Lite Door Slab
Two Panel Solid Core Door Slab
💡 Why This Works
By creating a single, clean rectangular field, you break up the visual monotony of a flat door without cluttering the room’s overall aesthetic. This design relies on the shadow line created by the molding, which adds a sense of depth and architectural weight that builder-grade slabs naturally lack, grounding the door in a more formal, intentional way.
Design Takeaway: Keep your trim profile shallow to maintain the illusion of a solid, professional-grade panel door.
Double Rectangle Panels
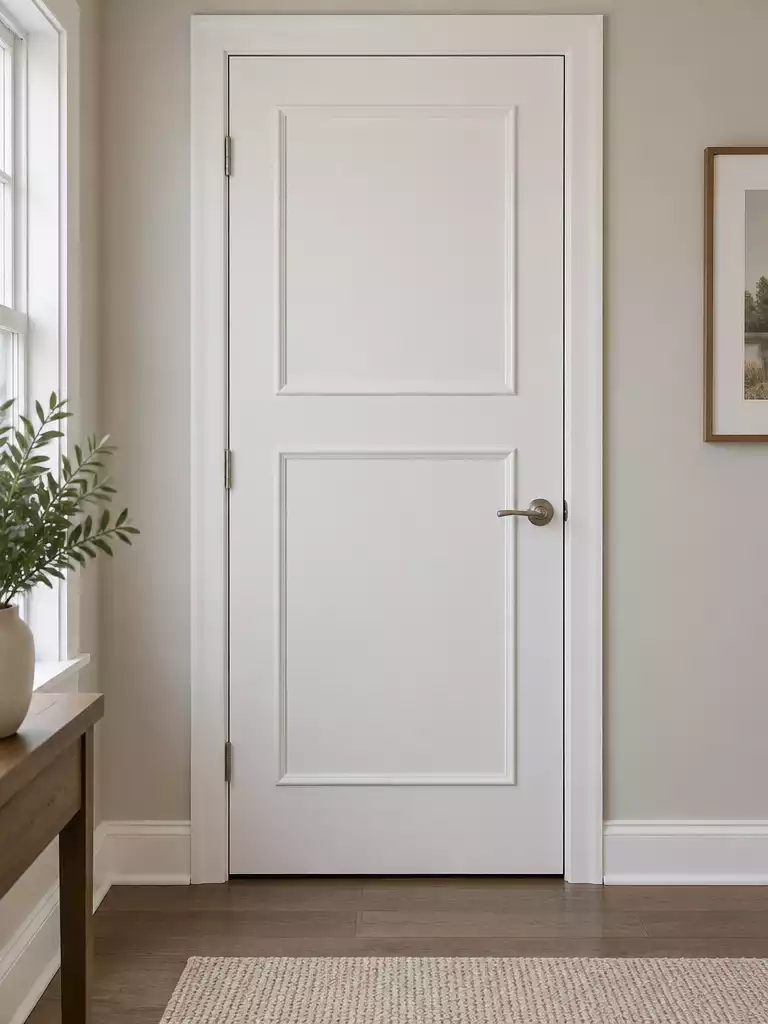
Create a traditional raised-panel aesthetic by stacking two distinct rectangular fields on your flat slab.
This layout uses two vertically stacked rectangles to mimic the look of classic solid-wood architecture. You should use a larger rectangle for the bottom panel and a smaller one for the top to achieve the most balanced, authentic proportions.
Precision is your best friend when working with these miters. Even a tiny gap in the 45-degree corner joints will immediately break the illusion of a solid door.
You can ensure a professional result by using a simple spacer block during installation. This helps maintain a perfectly consistent distance between the two panels and the outer edges of the door from top to bottom.
This style is ideal for homeowners who want a traditional, heritage look on a budget. If your home has a minimalist or ultra-modern design, you might prefer a single-panel layout instead.
⭐ Best Double Rectangle Panel Doors
Five Panel Prehung Interior Door Kit
✨ Editor’s Pick
Frosted Glass Five Panel Slab Door
Bifold Sliding Barn Door With Hardware
⚖️ Quick Decision Guide: Choosing Your Layout
- Choose this if: You want a classic, timeless architecture that feels substantial without the cost of replacing the actual slab.
- Skip this if: Your space is strictly ultra-modern or minimalist, where simple shaker lines often provide a cleaner visual harmony.
- Pair it with: A medium-sheen eggshell paint to highlight the depth of the panels without creating distracting, high-gloss glare.
Three-Panel Layout
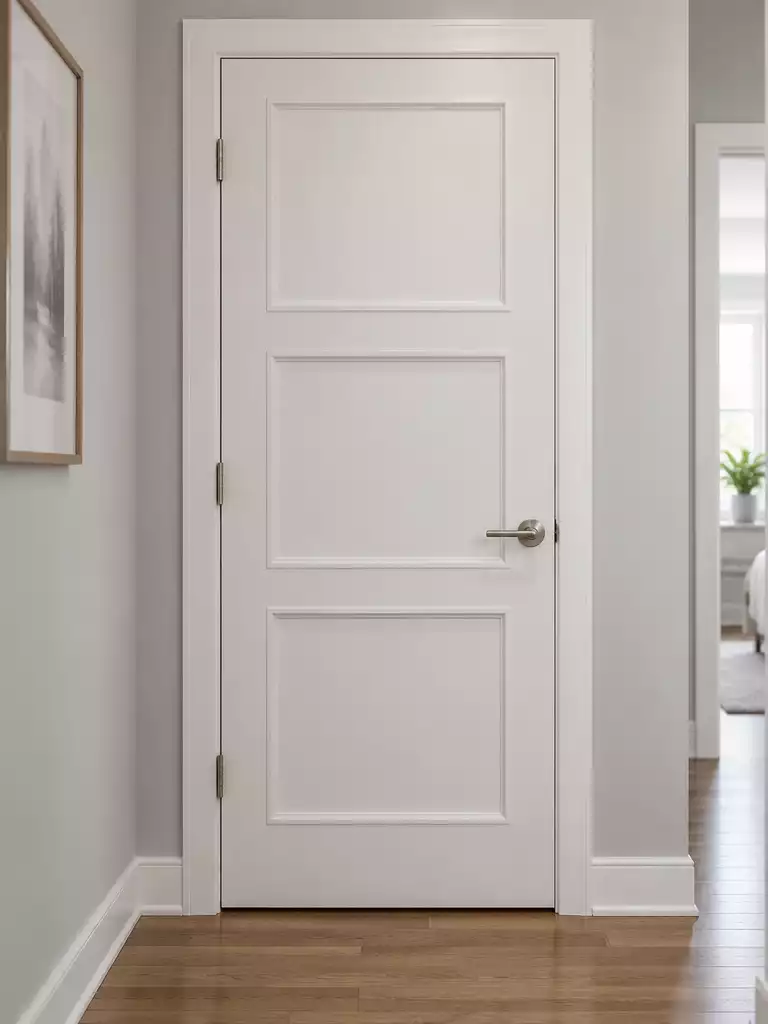
Create vertical rhythm and architectural height with this balanced, classic three-panel door configuration.
The three-panel layout relies on a strict vertical rhythm to break up the monotony of a flat builder-grade slab. By stacking three equal rectangles, you draw the eye upward and make standard-height doors feel slightly more intentional.
Pro-Tip for Proportion: Your panels should occupy at least 60-70% of the door’s surface area to maintain a high-end look. If the panels are too small, the door will appear busy and cluttered rather than architectural.
Before you commit to your measurements, hold your trim pieces against the door to check the clearance for your hardware. You must ensure the horizontal rails of your molding do not interfere with the door handle or the latch mechanism.
This layout is ideal for homeowners who want a traditional aesthetic without the cost of solid wood doors. Use the following checklist to keep your spacing consistent:
- • Measure the Hinge-Side: Maintain a consistent border distance from the edge of the door to the outside of your trim.
- • Check the Latch-Side: Align your latch-side border with the hinge-side to keep the door square.
- • Hardware Clearance: Dry-fit your middle panel to ensure it sits safely above the door handle assembly.
Skip this style if your door has a very narrow width, as the vertical panels can quickly create a “caged” appearance. For standard 30-inch to 32-inch doors, however, this layout provides an effective upgrade that mimics the look of period-appropriate millwork.
⭐ Three Panel Layouts We Love
Solid Spruce Sliding Barn Door Slab
Decorative Cast Iron Door Stop Ornament
✨ Editor’s Pick
Extra Large Interior Pet Door Pass
💡 Why This Works:
The three-panel layout introduces a rhythmic, vertical structure that tricks the eye into perceiving more height, effectively drawing attention away from the door’s hollow core and toward its new architectural depth. By segmenting the surface, you create a sophisticated shadow play that makes standard builder-grade doors feel like custom millwork.
Visual Benefit: Stacking three panels creates a balanced, elongated silhouette that anchors the door within any room’s vertical plane.
Your existing home trim often dictates which panel patterns feel natural rather than forced. Identifying these subtle architectural cues can simplify your selection and ensure the final upgrades look like they were always meant to be part of the house.
Focusing on just two or three consistent door styles throughout your home matters significantly more than perfecting every single room.
Picture frame molding

Create a high-end gallery aesthetic by adding substantial, decorative framing to flat slab doors.
Picture frame molding is the go-to choice for formal hallways where you want your doors to mimic high-end wall paneling. By using casing-style trim rather than thin, flat strips, you add a level of architectural weight that completely masks the hollow core underneath.
Execution Tip: Because this style uses thicker, more substantial profile trim, your miter joints are front and center. Take the extra time to test your angles on scrap wood before cutting your final pieces, as any misalignment here will be immediately visible.
This layout typically involves a single, large border that follows the perimeter of the door, though you can also create nested borders for extra visual complexity. It is an ideal project for those who want a dramatic, custom-built look without the cost of full-scale carpentry.
This style is best reserved for formal areas, as the heavy trim profile can make a small or casual room feel a bit crowded. If you are working on a bedroom or closet door, consider using a slightly thinner trim profile to maintain balance.
⭐ Picture Frame Molding Kits
✨ Editor’s Pick
Peel and Stick Wall Molding Kit
Heavyweight Picture Hanging Adhesive Strips
Flexible Arch Trim Molding Kit
Designer Note: The Art of Proportion
Picture frame molding relies entirely on the negative space between your trim and the door edge. To keep it feeling custom rather than cluttered, aim for a border width of 4 to 6 inches. Maintaining this consistent spacing creates a visual “frame” that mimics high-end architectural millwork without overwhelming the room’s scale.
Square Grid Molding
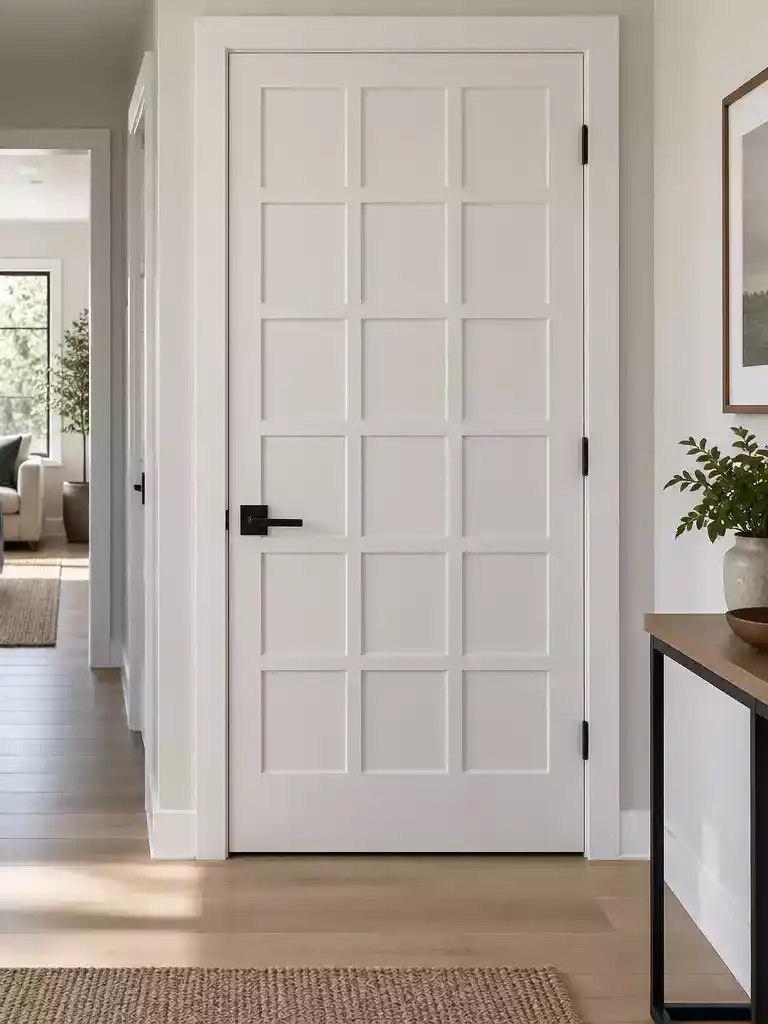
Create a custom modern focal point by dividing your flat door into a geometric grid.
This layout gives a builder-grade slab the character of a high-end, custom-milled door. It works best for homeowners aiming for a modern, architectural aesthetic rather than a traditional raised-panel style.
Planning is the most critical step here. Before you cut a single piece of wood, use a laser level to map out your grid lines directly onto the door surface.
Avoid the “wandering line” trap by cutting your vertical strips to the full length of the door first. Fit your shorter horizontal pieces snugly between those vertical members for a seamless, professional finish.
When selecting your materials, stick to very thin, lightweight trim profiles. If the molding is too thick, the door becomes visually heavy and starts to look cluttered rather than intentional.
This project is perfect for you if you have a steady hand and access to a miter saw. If you struggle with repetitive measurements or have a large number of doors to finish, this layout is significantly more time-consuming than a simple shaker-style single panel.
Grid Planning Checklist:
- Mark your center point first to ensure symmetry.
- Use a scrap wood spacer to keep gaps uniform.
- Double-check all horizontal pieces with a level.
- Apply wood glue to the back of every strip before nailing.
⭐ Square Grid Molding Ideas
European Style Wrought Iron Fireplace Screen
✨ Editor’s Pick
Composite Front Entry Door With Ironwork
Premium Vinyl Sliding Door Bottom Track
🛠️ Technical Steps for Precision Alignment:
- Vertical-first method: Install all full-length vertical strips across the entire door width before measuring and cutting your horizontal grid segments.
- Consistent spacing: Cut a simple wooden spacer block to your desired square width; use it to verify the gap between every strip before you nail.
- Flush finishing: Since you are creating many intersection points, lightly sand the seams where horizontal pieces meet vertical strips to ensure a seamless, professional appearance before priming.
Vertical Slat Detail
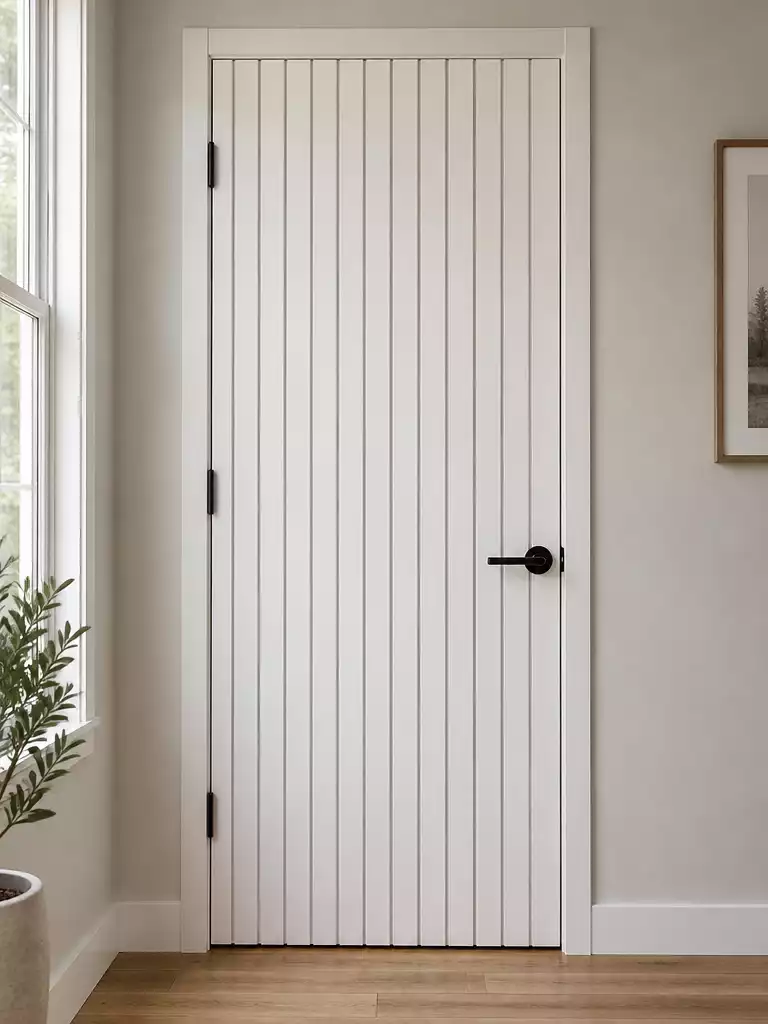
Add significant visual height to your room with a crisp, linear slat pattern.
The vertical slat detail uses narrow, evenly spaced strips running the full length of the door to create a modern, textured silhouette. This style is an ideal choice for rooms with low ceilings, as the continuous vertical lines naturally draw the eye upward and create the illusion of extra height.
The Plumb Rule: Your first slat acts as the anchor for the entire project.
If the first strip is even slightly off-plumb, every subsequent slat will look crooked and ruin the linear effect. Use a long level to ensure your starting position is perfectly vertical before you attach a single piece of trim.
Consistency is the biggest hurdle for this pattern, as small gaps build up into noticeable errors across the width of the door. Use a scrap piece of wood as a custom spacer block to ensure the gap between each slat remains identical from top to bottom.
- ✖ Skipping the spacer: Measuring each gap individually usually leads to “drift” where the slats become progressively crooked.
- ✖ Choosing bulky trim: Thick slats can make the door feel heavy and may interfere with the door frame or surrounding trim.
- ✔ Dry-fitting first: Lay all your slats out on the door slab before applying any glue to verify the spacing works with the width of your specific door.
⭐ Vertical Slat Detail Products
Floor to Ceiling Swivel Partition Posts
Smooth Gliding Tambour Slat Cabinet Door
✨ Editor’s Pick
Adjustable Wood Slat Room Divider Posts
🏡 How This Works in a Real Home:
- Hardware clearance: Verify your existing door handle won’t catch on the new slats, especially if your lockset has a large decorative backplate.
- Daily maintenance: Densely spaced slats create small crevices that collect dust; choose a satin or semi-gloss finish to make occasional wiping much easier.
- Visual flow: In small hallways, align the slats with the door’s orientation to prevent the room from feeling choppy or overly cluttered.
Crossbuck Molding
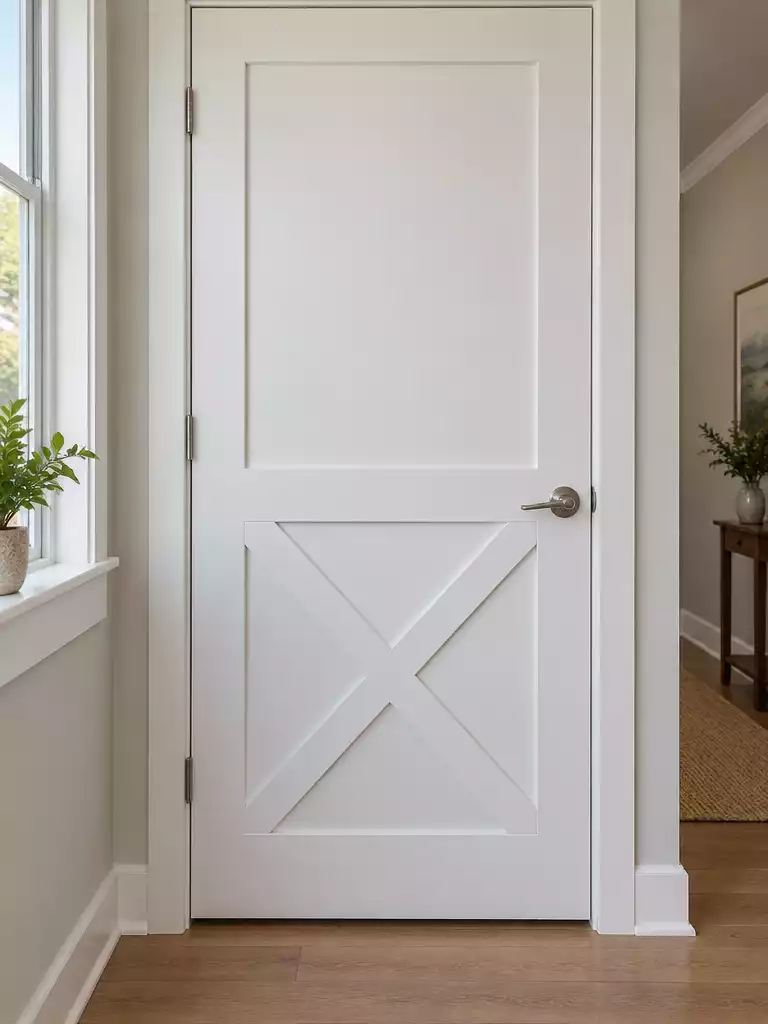
Add rustic character to any flat door with a classic X-pattern geometric design.
The crossbuck pattern, often associated with farmhouse interiors, introduces a structural, diagonal aesthetic to otherwise plain doors. It works best on doors in mudrooms, pantries, or bedrooms where you want to break up the vertical lines of a standard slab.
Critical Planning Tip: Always dry-fit your diagonal pieces before applying glue or nails. Because the geometry relies on perfect symmetry, even a slight miscalculation at the miter saw will make the intersection look off-center and sloppy.
To pull off this look, you will need lightweight, paint-grade molding. Measure your door’s lower section carefully to ensure the intersection point of the X sits exactly in the center of the space.
- • Use a miter saw to cut the ends of your diagonals at the exact angle required to sit flush against your outer frame or vertical trim.
- • Check that your first diagonal is perfectly aligned before locking it in, as it dictates the angle of the crossing piece.
- • Use high-quality wood glue and 18-gauge brad nails to secure the trim to the hollow core, ensuring the nails hit the solid internal door framing where possible.
This layout is a bold choice that acts as a primary focal point. If your home has a minimalist or ultra-modern style, you might find this detail too busy, but for cottage or transitional spaces, it provides that missing architectural weight.
⭐ Crossbuck Molding Hardware
✨ Editor’s Pick
Zinc Alloy Sliding Barn Door Pulls
Rustic Antique Metal Barn Door Handles
Double Sided Matte Black Door Handles
🏡 Real-Home Application
- Hardware clearance: Double-check that your diagonal trim doesn’t overlap your existing door knob escutcheon or lock plate.
- Daily maintenance: Use a high-quality, paintable wood filler on the miter joints so they don’t catch dust easily.
- Visual integration: Match your trim’s paint sheen to the door’s finish to make the crossbuck look like a factory-molded design.
Diamond Trim Pattern
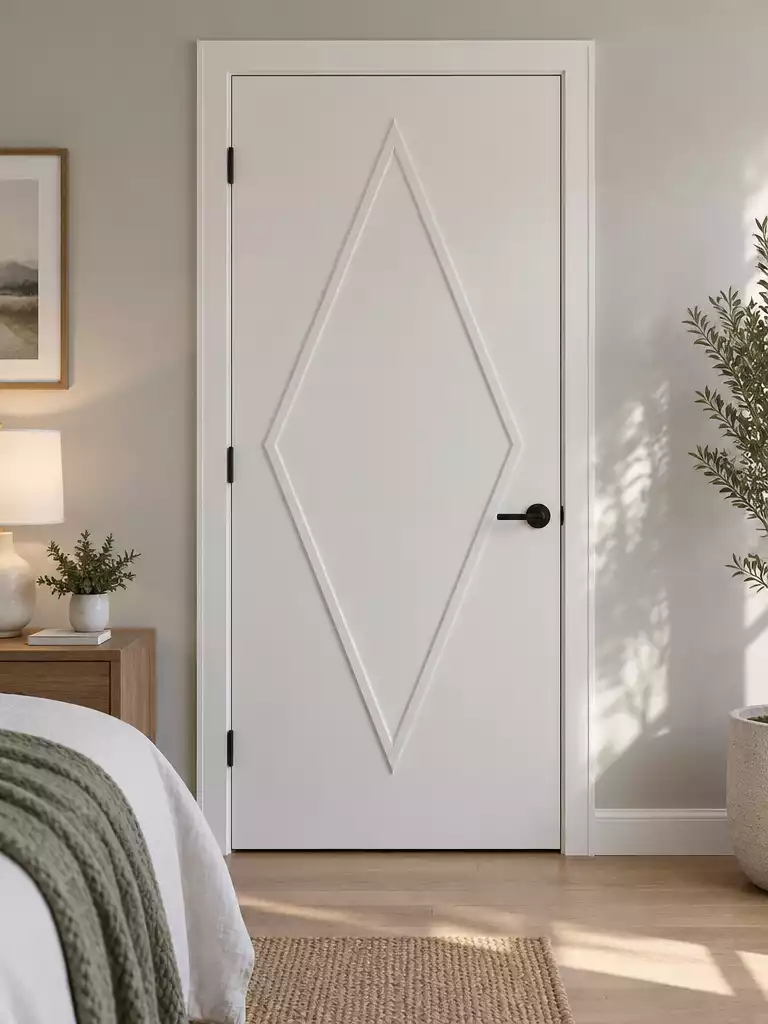
Create a bold geometric focal point that instantly elevates simple bedroom or closet doors.
A diamond pattern functions as a high-impact geometric focal point for any room that feels a bit too plain. This layout is best suited for closet doors or bedroom entrances where you want the door to serve as an architectural statement rather than fading into the background.
Critical Precision Warning: Because this pattern relies on angles, even a slight misalignment will be immediately noticeable to the eye. Take the time to dry-fit every piece of trim before applying any adhesive to ensure the diamond points are perfectly equidistant from the door edges.
To execute this look, find the exact vertical and horizontal center of your door slab and mark the intersection. Work outward from this center point to calculate the lengths of your four trim pieces, ensuring all sides of the diamond are identical in length.
This style requires a specific approach to cutting and installation:
- Use a miter saw to cut your trim ends at consistent angles to ensure the corner joints close tight.
- Start by marking the four outer points of the diamond on the door surface using a laser level.
- Apply wood glue and use 18-gauge brad nails to secure each segment, working in a clockwise or counter-clockwise sequence.
- Fill the nail holes with sandable wood filler and sand flush before you begin your painting process.
This design is a bold choice for those who are comfortable with more complex miter cuts. If you prefer a simpler aesthetic, consider sticking to a single large diamond rather than a series of nested shapes, which can quickly make a standard-sized door look cluttered.
⭐ Diamond Trim Pattern Ideas
Bevel Raised Panel Cabinet Router Bits
✨ Editor’s Pick
Solid Core Wood Panel Slab Door
Embossed Welcome Design Rubber Door Mat
💡 Why This Works
Geometric patterns like the diamond shape break up the monotony of flat builder-grade doors by introducing diagonals that draw the eye toward the center. This creates an immediate architectural focal point, effectively “anchoring” the room and adding a sense of intentional, custom-designed weight to an otherwise hollow and unremarkable surface.
Visual Anchor: Use this pattern to turn closet or bedroom doors into deliberate design statements rather than background elements.
Raised Center Panel
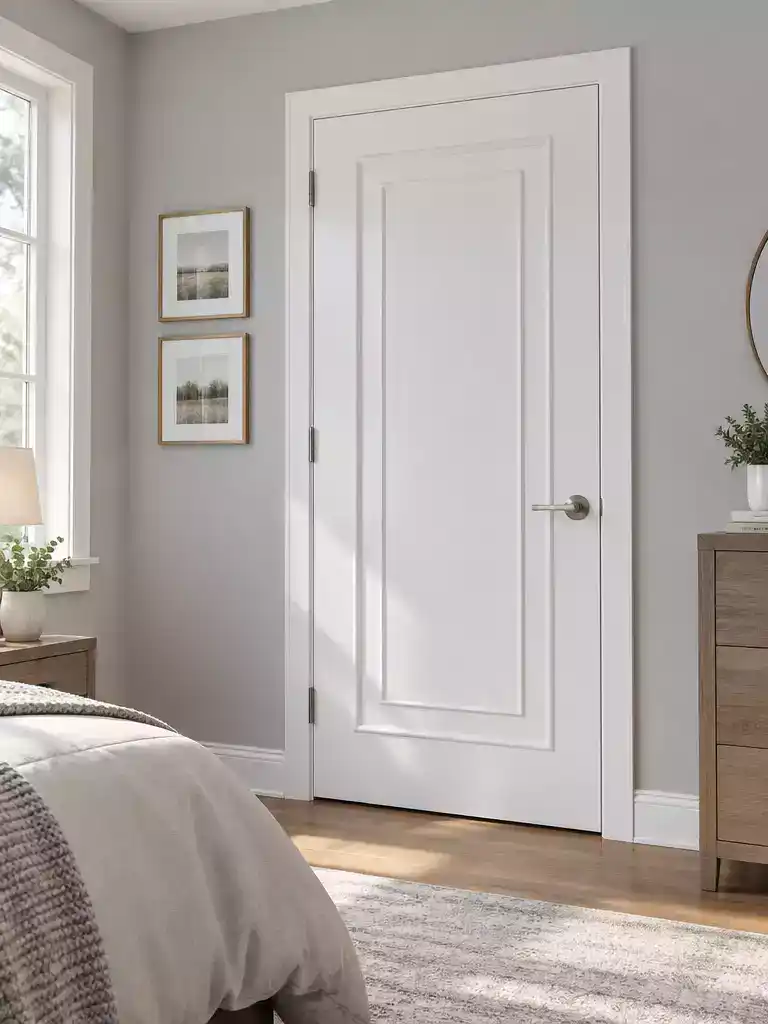
Create the illusion of a heavy, solid wood door using clever trim layering and paint.
The raised center panel look effectively mimics the profile of high-end, millwork-heavy doors by using two nested frames. This technique relies on depth rather than bulk, making it a great choice for homeowners who want to add weight to a flat slab without making the door feel like it is protruding too far into the hallway.
Warning: Avoid using thick, heavy crown or chair rail molding for this project. If the trim profile is too deep, the door will look like an amateur DIY project rather than a custom architectural feature.
To execute this look, start by installing a primary rectangular frame around the perimeter of the door. Once that is set, apply a second, smaller rectangular frame inside the first, leaving an even reveal between the two.
The secret to selling the illusion is in the final finish. Use a high-quality, self-leveling paint to coat both the trim and the door surface; this hides the transition line where the molding meets the door, making the entire assembly look like one single, structural piece.
Best for:
- Formal bedroom or office doors.
- Adding character to plain builder-grade slabs.
- Rooms where you want a classic, traditional feel.
⭐ Raised Center Panel Doors
Solid Pine Dutch Exterior Entry Door
Tempered Glass Split Single Dutch Door
✨ Editor’s Pick
Mahogany Wood Double Entry Doors
💡 Why This Works:
This layered approach leverages the power of shadows to trick the eye into seeing depth where none exists. By creating a recessed “floating” center, you break up the monotonous, flat surface of a hollow-core door, providing the architectural weight and structural character typically found in expensive, solid wood millwork.
Design takeaway: Keep trim profiles shallow to maintain consistent visual balance without appearing like a heavy, tacked-on afterthought.
Tone-on-Tone Panels
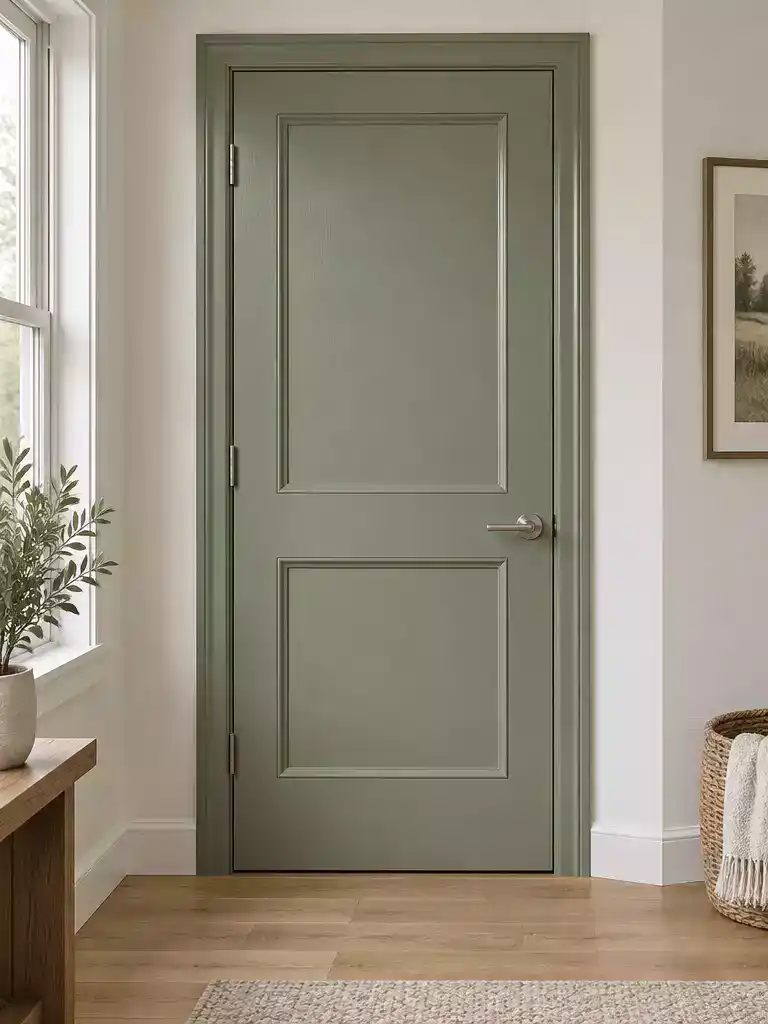
Create depth and visual interest by playing with light reflection instead of contrasting paint colors.
Tone-on-tone paneling is the masterclass in subtle sophistication. You achieve this look by using the exact same paint color for both the door slab and the applied trim, relying entirely on sheen variation to define the geometry.
The most effective combination is a matte or eggshell finish for the door’s base surface, paired with a semi-gloss finish for the molding. This contrast ensures that the trim catches the light differently than the field, making the architectural details pop without the visual noise of a multi-colored design.
Pro-Tip for Precision: Start by priming the entire door and the new trim pieces with the same high-quality primer. Even a slight difference in the base coat can cause the paint to cure differently, which is immediately obvious when you are working with the same color family.
This approach works best for homeowners who want to add architectural weight to a room without overwhelming the existing wall color or decor. If your space already has a lot of bold patterns or bright accents, this tone-on-tone method keeps the door feeling integrated rather than like an “add-on” project.
Skip this style if you are looking for a high-contrast focal point or if your door surface is highly damaged. Because this method uses light to highlight the trim, it can inadvertently draw the eye to any unevenness in the underlying door slab or poor caulking lines.
⭐ Tone on Tone Panel Ideas
✨ Editor’s Pick
Staple On Wood Door Bottom Sweep
Stainless Steel Pivot Hinge System
Extra Large Interior Cat Door Portal
The Detail That Pulls It Together
To make the tone-on-tone effect truly intentional, prioritize the quality of your caulk job over the trim profile. In a monochromatic scheme, any messy gaps between the molding and the door surface stand out sharply. Use a paintable, high-quality acrylic caulk to create a seamless transition that makes the trim appear as if it were carved into the door itself.
Two-Tone Paneling
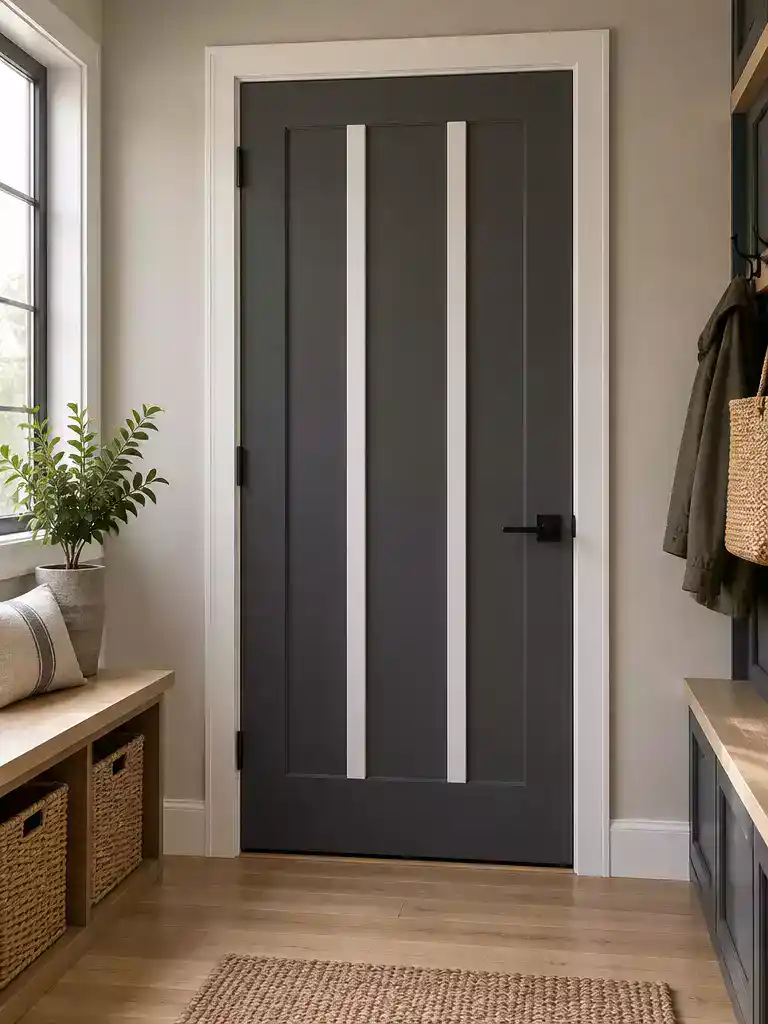
Define your door’s geometry with high-contrast color to turn a simple slab into a graphic statement.
Two-tone paneling relies on bold color contrast to make the added molding stand out rather than blending into the door slab. This style is an ideal choice for rooms that need a punch of personality, such as a laundry room, kid’s bedroom, or a hallway closet door.
Pro-Tip for Sharp Lines: Clean, crisp edges are non-negotiable for this look. Use high-quality painter’s tape and press the edges firmly with a plastic putty knife before applying your secondary color to prevent paint bleed.
When selecting your palette, consider the impact of your placement. Painting the trim a darker shade than the door field creates a recessed, shadowed effect, while a lighter trim on a moody, dark door makes the paneling pop aggressively.
- Edge Detail: Don’t forget to paint the narrow side edges of the door to match the primary (field) color for a professional, finished look.
- Contrast Check: If you are unsure about the color pairing, test two sample pots on a piece of scrap wood first to ensure the tones don’t clash under your room’s specific lighting.
- Hardware Pairing: Coordinate your door handle finish with the darker of your two colors to ground the overall aesthetic.
Avoid this common mistake: Skipping the primer on the raw wood trim will cause the two colors to look uneven in sheen. Always prime the entire assembly before applying your final topcoats to ensure the color match is consistent across both the door and the molding.
⭐ Two Tone Paneling Solutions
Wood Look Paint Kit For Doors
✨ Editor’s Pick
Plastic Door Vent Air Ventilation Grille
Clear Rubber Glass Retainer Strips
🏡 How This Looks in a Real Home:
- Visual Weight: Use a darker trim color in high-traffic hallways to hide scuffs while creating a sophisticated, high-end gallery feel.
- Light Reflection: Pair a matte-finish door field with semi-gloss trim in the same color family to create subtle, professional-looking depth.
- Lived-In Balance: Keep the door handle finish consistent with your secondary trim color to ensure the two-tone aesthetic feels intentional and grounded.
You have now navigated eleven different ways to build depth into a flat slab. Bringing character to a plain door doesn’t require adopting every technique mentioned; instead, pinpointing the one or two styles that naturally complement your home’s architecture will deliver the most cohesive result.
A successful hollow core door makeover relies on consistency and clean execution rather than complexity. When you upgrade your interior doors with a layout that matches your existing trim, the transformation feels intentional and permanent. Select the pattern that aligns with your space, measure your dimensions, and move forward with the confidence that a single, well-executed detail is enough to elevate the entire room.
Related posts
 Hollow Core Door Makeover DIY With Real Depth and Character
 Hollow Core Bedroom Doors Built Up to Feel More Like Solid Wood
 Hollow Core Doors
 Unlock the Secrets to the Perfect Cut: Find the Ultimate Blade for Hollow Core Doors
 Unlock the Secrets to Perfectly Cutting Hollow Core Doors
 Flat Door Makeovers That Look Custom-Built Not Builder-Grade
 Front Door Makeovers That Transformed the Entire Entrance
 12 Mirrored Wardrobe Door Makeovers for Dated Bedrooms