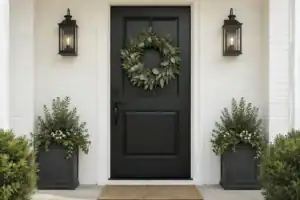

Creating scary Halloween door decorations requires a sharp eye for detail and the right level of aggression. This guide rounds up 15 door ideas worth saving to help you achieve a high-impact, unsettling look that commands attention. Here is how to start your disturbing display.
Bloody Handprints

Create a cinematic, high-stakes horror scene that makes your entryway look like a crime scene.
As an Amazon Associate I earn from qualifying purchases. Affiliate links may earn me a commission at no extra cost to you.
Most DIY blood decor looks flat and artificial, but you can achieve a realistic, translucent finish by using a simple mixing technique. Instead of applying paint directly from the tube, combine red acrylic paint with a clear gel medium.
This mixture allows the light to pass through the paint layers, mimicking the depth and viscosity of real fluid. It prevents that chalky, opaque look that happens when you paint directly onto a dark or stained door surface.
The Frantic Struggle Technique
To make the display look genuinely unsettling, avoid perfect, full-palm impressions. Focus on these three visual strategies:
- Asymmetry: Place hands at varying heights to suggest someone was losing their balance.
- Dragging Streaks: Use a damp sponge to pull the paint downward, simulating a body being dragged away.
- Overlapping: Layer multiple prints over each other to create a sense of density and confusion.
Mandatory Maintenance Warning
Always perform a test patch on a hidden corner of your door frame before applying paint to the main surface. Ensure you do not use permanent adhesives, as you want to preserve the finish once the season ends.
⭐ Bloody Handprint Decals for Your Windows
✨ Editor’s Pick
Giant Bloody Window Posters for Halloween
Large Zombie Door Cover for Halloween
Spooky Flameless Candles with Halloween Decals
🛠️ Practical Tips for Horror Realism:
- Stencil masks: Use cardboard cutouts to gain consistent, recognizable hand shapes before you begin your translucent layering.
- Lighting check: Position your prints where porch lights cast shadows, which deepens the appearance of the gel-based texture.
- Reversible removal: Keep a bottle of gentle, non-acetone cleaner nearby to quickly remove accidental spills from your door hardware.
Zombie hands

Create a chilling illusion of entrapment that makes guests second-guess their arrival.
The most effective way to feature zombie hands is through the emergence effect, where props appear to be actively clawing their way out of your entryway. You want these limbs positioned in tight, transitional spaces like the mail slot, the bottom door frame, or the gap between the door and the wall.
This placement suggests that something is trapped inside, actively trying to escape into the porch area. It creates a sense of immediate, physical tension that simple hanging decorations cannot replicate.
DIY vs. Professional Installation
For static hands that stay in one fixed position, a DIY approach is perfectly fine and requires minimal tools. However, if you want hands that actually retract, twitch, or move, you must hire a professional to handle the installation.
Professional installation ensures your door’s structural integrity remains sound while integrating motors or mechanical linkages. Improper DIY drilling into a door assembly can easily compromise weatherstripping or the lock mechanism, leading to expensive repairs after the season ends.
If you are sticking with a DIY project, focus on materials that won’t scratch the door finish. You can secure static hands using heavy-duty, removable mounting tape or tension-based brackets that don’t require permanent hardware modifications.
⭐ Zombie Hands to Scare Your Guests
Scary Zombie Hand Window Door Covers
✨ Editor’s Pick
Animated Crawling Zombie Horror Prop
Six Foot Fake Halloween Plastic Chain
📋 Quick Reality Check: Before You Install
- Mail slot clearance: Ensure the prop doesn’t block the internal flap, preventing your daily mail from dropping properly.
- Weatherstripping integrity: Verify that clamping hands between the door and jamb won’t create gaps that invite drafts or rain.
- Egress path: Confirm that no protruding limbs catch on clothing or create a trip hazard for visitors approaching your door.
Possessed doll wreath

Transform your entrance into a scene of unsettling discovery with this eerie, handcrafted centerpiece.
This project uses a standard wreath base to create a disturbing, hostile focal point for your entryway. Instead of traditional seasonal decor, you are building a display that feels like a relic from a found-footage horror film.
To assemble this, focus on layering textures that imply decay and abandonment. Incorporate synthetic hair, off-white gauze, and dark staining to make the doll parts appear as though they have been unearthed from a long-forgotten attic.
Safety Warning: Under no circumstances should you use actual ceramic or glass doll components for an exterior door.
These materials are prone to shattering if the door is slammed or caught by a strong gust, creating a significant injury risk for visitors.
You can customize the intensity of the look depending on your comfort level with gore. Consider these stylistic directions to guide your build:
- The Vacant Observer: Use a single, intact doll head with a distressed, blank stare fixed in the center of a dark vine wreath.
- The Fractured Relic: Arrange multiple broken doll torsos and limbs intertwined with rotted netting and dark, moody florals.
If you want your wreath to include lights, sound effects, or motion, hire a professional maker to handle the wiring. Integrating electronics into an exterior wreath requires moisture-sealed components that are difficult to execute safely as a weekend DIY project.
⭐ Possessed Doll Wreaths for Spooky Doors
Pre Lit Halloween Floral Teardrop Swags
Cute Ghost Welcome Sign Door Wreath
✨ Editor’s Pick
Lighted Black Spider Halloween Door Wreath
⚠️ Where This Can Go Wrong:
- Weight distribution: A heavy, off-center doll torso can cause the wreath to tilt, making the entire display look lopsided.
- Weather degradation: Using non-waterproof glue or standard paper products will lead to rapid molding or structural collapse during autumn rains.
- Snagging hazards: Loose synthetic hair or protruding limbs can catch on guest clothing or delivery packages if the wreath isn’t mounted securely.
Creepy Clown Face

Transform your entrance into a source of genuine dread with distorted, decaying clown features.
This decor concept relies on exaggerated facial geometry to trigger an immediate, unsettling reaction. Instead of bright, cheerful circus colors, you should focus your palette on decay tones like grays, sickly yellows, and bruised purples to lean into the horror aesthetic.
The mask should look like it is physically distorting the door surface rather than just sitting on top of it. Aim for deep, hollowed-out eye sockets and an asymmetrical grin that creates a sense of unease for anyone approaching your threshold.
Pro Tip: If you are planning to use complex facial prosthetics that integrate with your door’s mechanics, professional installation is the safest route. You want to ensure the decor never blocks the door’s function or creates an obstacle during an emergency.
The execution depends on your comfort level with installation. Use the following guide to decide how to approach your setup:
⭐ Creepy Clown Faces for Your Decor
✨ Editor’s Pick
Animated Face Ripping Clown Horror Prop
Large Creepy Clown Carnival Door Cover
Four Pack LED Glowing Skull Eyes
💡 Designer Note: Why Exaggerated Geometry Matters
To make a clown face truly terrifying, you must break the symmetry usually associated with friendly mascots. Gentler ideas are in cute Halloween door decorations without scare. By pulling the mouth wider on one side or dropping a brow lower than the other, you create an “uncanny valley” effect. This subtle distortion forces the human brain to linger on the image, instinctively searching for a logic that isn’t there.
Navigating high-impact entryway decor often feels like a balancing act between achieving a specific aesthetic and ensuring your home remains accessible. You do not need to implement every concept here to make a statement, as choosing just a few targeted projects often yields the most cohesive result for your front door display.
Focus your efforts on one or two high-impact elements that define your entryway’s personality without compromising the structural integrity or daily function of your front door.
Spider Cocoon

Transform your doorway into a scene of terror with this unsettling, immobilized victim display.
The spider cocoon relies on the psychological dread of immobilization and parasitism. By wrapping a human-shaped foam form in layers of cheesecloth and faux webbing, you create a chilling silhouette that implies something – or someone – has been dragged into a web.
Building this prop is a straightforward DIY project, but the visual impact depends entirely on your technique. Focus on creating uneven, chaotic layers of webbing that look like they have aged over time.
Construction Tip: You need a lightweight human-shaped form to maintain the shape without dragging the door down. Use a foam mannequin or even a spare set of clothes stuffed with plastic bags to keep the weight minimal.
Because this is a large prop, it acts as a massive sail during autumn wind storms. You must anchor the cocoon securely to your door or surrounding frame using non-damaging clips or heavy-duty outdoor tape to prevent it from blowing away.
Stick to the DIY version if you want a static, unsettling focal point that is easy to store after October. If you find yourself craving a prop that actually moves or twitches, that is the moment to hire a professional to ensure the motor is safely integrated without damaging your door’s finish.
⭐ Spider Cocoons and Webbing for Haunts
Two Pack Giant Hairy Black Spiders
✨ Editor’s Pick
Large Halloween Spider Webbing with Spiders
White Fake Spider Web Hanging Decor
🧰 Questions for Your Installer
- Load-bearing capacity: Can the mounting surface handle the weight of a water-logged, wind-exposed cocoon prop?
- Structural anchoring: How will you secure the cocoon to avoid drilling into the door’s structural frame?
- Mechanical integration: If adding motorized twitching effects, how will you route internal wiring without compromising weather seals?
Grim Reaper

Cast a long, chilling shadow over your entryway with this towering, hooded figure of death.
Creating a looming presence requires a solid structural armature made from PVC pipe or wood. Draping this frame in layers of tattered, black fabric creates the necessary volume and movement to catch the wind.
The most unsettling versions focus on the hood’s negative space rather than a bright, prominent face. Position the skull so it is partially obscured, leaving just enough detail to suggest a void where a soul should be.
Safety Reminder: When building your armature on-site, keep your workspace clear of sharp shop tools and rogue electrical cords.
These figures can be trip hazards if cables are loose, so ensure all wiring is tucked neatly along the porch edge.
Choosing Your Setup
If you are aiming for a DIY project, stick to a static hanging figure to avoid complex mechanical failures. Only hire a professional if you need a self-supporting, life-size Reaper that incorporates motors or complex rigging.
⭐ Grim Reaper Props for Your Yard
Speaking Skeleton with Glowing Red Eyes
Giant Skeleton Garage Door Banner Decor
✨ Editor’s Pick
Life Size Animated Grim Reaper Prop
💡 Why This Works
The Grim Reaper relies on psychological tension rather than overt gore. By manipulating the “negative space” of the hood, you force the observer to project their own fears into the shadow, making the figure feel far more present and menacing than a static, brightly lit decoration ever could.
Psychological impact: Obscuring the face creates a void that triggers a primal, uneasy sense of being watched.
Demon Eyes

Create an unsettling psychological presence that makes guests feel watched from behind your closed door.
This project is perfect for those who want a psychological scare rather than a gore-heavy display. By positioning glowing optics at human eye level, you trigger an instinctive, primal reaction in anyone approaching your entrance.
The setup relies on simplicity rather than complex mechanics. Focus your budget on high-quality LED backlighting that can be hidden behind dark framing or door gap moldings so the light source remains invisible.
Placement Pro-Tip: The illusion only works if the eyes are set exactly at or slightly above adult eye level. Ensure they are framed by dark, non-reflective material to keep the focus purely on the glowing gaze.
When installing, always stick to battery-operated lighting rather than hard-wired solutions. Avoid open flames or candles near your door frame, as these are significant fire hazards when placed near decorative materials.
You should skip this project if you are unable to easily conceal the wiring or battery packs without drilling into your door structure. If you require synced motion or sound effects, consult a professional to ensure your door’s weatherstripping and latching mechanisms remain functional.
⭐ Demon Eyes to Watch Your Guests
✨ Editor’s Pick
Four Pack Waterproof LED Glowing Eyes
Two Pack Light Up Skeleton Eyes
Color Changing LED Eyes with Remote
🔢 The Right Sequence for Installation:
Getting the order right ensures your setup looks seamless and stays secure throughout the spooky season. Porch lighting ideas are in spooky decorations for a dim porch.
- Map out your eye positions while standing outside to ensure they align with human height.
- Secure your dark backing material firmly to the door before attaching the light housings.
- Test the battery-operated LEDs in low light to adjust the glow intensity for maximum impact.
Coffin door

Transform your entryway into a final resting place with this heavy-duty, high-impact structural modification.
The coffin door is a professional-only project that goes far beyond simple seasonal decor. It involves cladding your existing door in rigid foam board or plywood to mimic the distinct, tapered shape and heavy aesthetic of a traditional burial casket.
Safety Warning: Because this modification alters the physical profile of your entrance, it can severely interfere with emergency egress and proper door function. Never attempt this project yourself if you are not a skilled contractor, as improper installation creates significant fire and life-safety hazards.
If you hire a professional for this installation, prioritize materials that offer a heavy, aged appearance without adding excessive weight to your hinges. Request faux metal trim and a matte, weathered finish to ensure the door looks like it has been unearthed rather than freshly painted.
Avoid any modification that creates new trip hazards at your threshold or prevents the door from latching securely. Your safety and ability to exit the home quickly must always take priority over the aesthetic impact of your display.
⭐ Coffin Decor for a Haunted Entrance
Thirty Six Piece Disposable Coffin Trays
✨ Editor’s Pick
Two Piece Halloween Tombstone Coffin Signs
Mini Coffin Planter for Succulents
🧰 Questions for Your Installer:
- Weight distribution: Can the existing door hinges support the added mass of the foam and trim without sagging?
- Emergency egress: How will we ensure the latch remains fully functional and accessible for rapid exit during an emergency?
- Finish reversibility: What specific mounting system will you use so the door finish remains undamaged after the holiday season?
Skull wreath

Create a haunting, funerary entrance that anchors your porch with morbid, ritualistic detail.
A skull wreath moves your entryway away from traditional autumn decor and toward a more permanent, unsettling aesthetic. This project relies on a dense base of black mesh and aged resin skulls to create a deep, funerary look that feels both heavy and hostile.
If you are building your own, prioritize lightweight foam or hollow resin skulls to ensure the wreath remains secure on your door hook. Avoid heavy solid casts that can damage your door hardware or finish over time.
Installation Warning
Heavy, professional-grade wreaths designed for exterior environments require secure, non-damaging anchors. Always verify that your mounting hardware is rated for the weight of your specific wreath to prevent it from slamming against the door in high winds.
This style is perfect for those who want a high-impact focal point without the mess of gore or paint. If you prefer a display that lasts beyond a single October, investing in a professional-grade, weatherproof version will save you from annual repair tasks.
⭐ Skull Wreaths for a Spooky Welcome
Lighted Black Spider Halloween Door Wreath
Realistic Skeleton Groundbreaker Yard Stakes
✨ Editor’s Pick
Two Piece Posable Hanging Skeleton Props
💡 Why This Works
A skull wreath succeeds because it taps into the primal, funerary association of bone and shadow. By layering black mesh with aged resin, you create a sense of depth that feels legitimately ancient rather than crafted. Handmade versions are in DIY Halloween door decorations. This visual weight anchors the door, turning a standard entryway into a permanent, unsettling threshold.
Psychological Impact: The use of human-like forms at eye level commands immediate attention and establishes a somber, ritualistic atmosphere.
Chained Skeleton

Create an unsettling atmosphere of past captivity that stops trick-or-treaters dead in their tracks.
The chained skeleton is a high-impact display designed for those who want to imply that something truly malevolent happened on their porch. By using heavy-duty plastic chains wrapped tight against the frame, you create an immediate visual narrative of prior captivity that a simple hanging prop cannot achieve.
Safety Warning: Because this decoration involves rigid bone parts, ensure every limb is anchored securely to your porch or door frame.
Loose parts that swing in the wind can snag clothing or strike pedestrians, turning a fun scare into an actual liability.
You can choose between a static display or an active one depending on your comfort level with structural modifications. Here is how to decide which path fits your porch:
For the most realistic result, apply a rust-colored wash to your plastic chains to break up the uniform sheen of the material. This makes the metal look aged and heavy, anchoring the skeleton firmly into your horror scene.
⭐ Chained Skeleton Props for Your Haunt
✨ Editor’s Pick
Two Pack Three Foot Posable Skeletons
Five Pack Sixteen Inch Posable Skeletons
Metal Halloween Archway with Spider Web
⚠️ Watch Out for This:
- Snagging hazards: Ensure no chain links or bone fragments protrude into the walkway where they could catch on clothing.
- Excessive weight: Avoid bulky metal chains that stress your door hinges or cause the prop to lean unevenly over time.
- Pedestrian safety: Position the skeleton so its rigid limbs cannot swing into the path of people walking past your front door.
Cursed Portrait

Transform your entryway into a psychological trap where the artwork stares back at visitors.
A cursed portrait relies on the uncanny valley effect to unsettle guests before they even reach your doorbell. By using crackle medium on the frame and subtle distortion on the image, you create the unsettling feeling that the person in the portrait is aware of their surroundings.
Pro Tip: For the most disturbing impact, place the portrait at eye level. This ensures that anyone looking for a peephole or checking the name on the door is forced to make direct contact with the distorted subject.
While a static, printed panel is a fantastic DIY project, you can take the display further if you have the right technical support. Professional help is necessary if you want to integrate motion sensors, hidden speakers that trigger whispers, or fiber-optic lighting that makes the eyes glow when someone approaches.
Always ensure your frame is lightweight and securely anchored to the door surface. Heavy or fragile materials can turn into a safety hazard if the door is slammed or catches a strong autumn gust.
⭐ Cursed Portraits for Haunted Walls
Funny No Trespassing Metal Tin Sign
✨ Editor’s Pick
No Trespassing Hiding Bodies Metal Sign
Eight Piece Tombstone Yard Sign Set
🧰 Ask Before You Hire
- Concealed wiring: Ask if their motion-activated hardware can be routed through existing peephole or doorbell gaps.
- Weather sealing: Confirm how they protect integrated electronics from autumn moisture to prevent short-circuiting your equipment.
- Surface protection: Request that any mounting brackets use non-marring gaskets to keep your door finish pristine.
Bloody warning sign

Clearly mark your threshold as a restricted zone with a visceral, high-impact custom warning.
A bloody warning sign is an effective way to deliver a sharp, immediate shock without cluttering your entryway with elaborate props. It works best for homeowners who want a high-impact, low-cost project that signals a clear, unsettling boundary to visitors.
Safety Critical: Never allow your sign to cover the lock, the handle, or the peephole. These elements must remain accessible at all times in case of an emergency.
To build your own, start with a rigid foam board or a thin piece of scrap wood. Stencil your message – keep it short and punchy like “KEEP OUT” or “DO NOT ENTER” – using a dark, flat paint that stands out against the base.
The “bloody” effect requires a bit of control to look realistic rather than messy.
- Mix red acrylic paint with a glossy gel medium for a viscous, wet-look finish.
- Apply the mixture to the edges of the sign and let it streak naturally downward.
- Use a dry-brush technique with dark gray or black paint on the wood first to create an aged, rotted appearance before adding the red.
This project is perfectly suited for a DIY weekend. Because you are crafting the sign yourself, you can customize the size to fit perfectly alongside your hardware, ensuring the door remains completely functional.
⭐ Bloody Warning Signs for Your Yard
Wooden Ghost Welcome Sign Door Wreath
Happy Halloween Wooden Ghost Door Sign
✨ Editor’s Pick
Three Piece Scary Bloody Warning Signs
💰 What This Really Costs:
- Budget range: This project typically costs between $10 and $30, depending on your choice of foam board and paint supplies.
- Hidden expense: Don’t overlook the cost of high-quality stencil masks or specialized gel mediums needed for that crucial, non-flat finish.
- Budget strategy: Reuse scrap wood or leftover foam from past projects to keep costs near zero, focusing your investment on quality acrylics.
Rotting scarecrow

Create a truly unsettling threshold by leaning into the textures of total decay.
This project is for the homeowner who wants to abandon friendly fall themes for something deeply corpse-like and visceral. By focusing on damp, moldy coloration and torn fibers, you move the scarecrow from garden ornament to a genuine source of tension.
Fire Safety Alert
Never use dried straw, raffia, or loose burlap near exterior porch lights or any heat sources. These materials are highly combustible and pose a significant fire risk when placed near electrical fixtures.
For a realistic, rotting effect, use a base of weathered burlap and layer it with dark, damp-looking fabrics. Emphasize sunken features on the head by using layers of gauze underneath the top fabric layer to create deep, hollow eye sockets.
Deciding between DIY and pro installation depends on your porch environment:
- DIY: Suitable for a static figure that can be safely secured to a porch railing or wall.
- Professional: Recommended if your entryway is in a high-wind area or if the figure needs custom anchoring to stay upright without damaging the door finish.
If you are building your own armature, use rigid PVC or wood to ensure the structure holds its shape. Always anchor the base of the scarecrow securely so that sudden gusts of wind don’t turn your decor into a tripping hazard for visitors.
⭐ Rotting Scarecrows for Your Garden
✨ Editor’s Pick
Six Piece Halloween Standing Scarecrow Decor
Two Pack Large Sitting Scarecrow Decor
Metal Scarecrow Garden Stake with Sunflower
⚠️ Common Mistakes to Avoid:
- Ignoring wind load: Failing to anchor the armature securely means your scarecrow could easily topple into pedestrians or traffic.
- Combustible materials: Placing dried straw or raffia near porch lights or heat sources creates a dangerous fire hazard.
- Excessive gore: Over-applying faux blood can lead to messy drips that stain your door finish and look cluttered.
Vampire Bite Wreath

Transform your entryway into a scene of dark predation with this visceral, sharp-edged display.
This wreath relies on high-contrast textures to imply a sudden, violent encounter. By pairing deep-red silk florals with sharp, synthetic fangs, you create an unsettling focal point that signals predatory intent rather than simple seasonal cheer.
To achieve the most realistic gore, focus on the application of your drip effects. High-gloss red paint creates a wet, fresh appearance that stands out starkly against matte black ribbon or dark foliage.
Pro Tip for Depth: Avoid using bright, candy-apple red paints which can look like plastic. Mix your high-gloss red with a touch of dark brown or black to achieve a deeper, more realistic arterial hue.
Installation for this project is straightforward, making it an ideal weekend DIY for those wanting immediate impact. If you choose to integrate lighting or mechanical jaw elements to make the fangs shift, ensure you hire a professional to conceal wiring and avoid damaging your door surface.
⭐ Vampire Bite Wreaths for Your Door
Animated Flying Reaper Ghost Scarecrow Prop
✨ Editor’s Pick
Two Piece Wooden Scarecrow Table Decor
Scarecrow Goose Outfit for Lawn Statue
💡 Why This Works:
This wreath design leverages the biological instinct to identify sharp, jagged shapes as threatening. By focusing on concentrated “bite” points rather than spreading decorations evenly, you create a narrative of a specific, localized attack that feels far more unsettling to passersby than a generic seasonal display.
Design Takeaway: Group your faux fangs and blood-drip details in one crowded arc to mimic a singular, gruesome injury.
Haunted mirror

Transform your ordinary entry into a psychological trap with a reflection that lingers too long.
The haunted mirror effect relies on one-way film and strategic backlighting to make your door’s entrance feel like a threshold to another dimension. By placing a silhouette behind a semi-transparent surface, you create the unsettling sensation that someone is watching from inside the glass.
Safety Warning: Glass Hazards
This project uses real glass and electrical components in an outdoor setting, which carries significant risk. Always secure mounting with professional-grade hardware and consult an electrician to ensure all lighting is weatherproof and safe for exterior use.
This project is best for homeowners who want a high-end, cinematic horror aesthetic and have the budget for professional mounting. If you are a renter or looking for a weekend DIY project, you should skip this mirror installation in favor of smaller, non-structural props.
- ✔
One-way film: Apply this to the interior side of the glass to hide the silhouette until the backlighting is triggered. - ✔
Backlighting: Use cool-toned LEDs to give the ghost-like figure a sickly, pale appearance that cuts through the darkness. - ✔
Professional mounting: Because of the weight of mirror glass, a professional should handle the installation to ensure it stays flush against the door without vibrating or breaking.
⭐ Haunted Mirrors for Your Home
Arched Black Metal Frame Vanity Mirror
Twenty Four Inch Black Round Mirror
✨ Editor’s Pick
Twenty Inch Black Round Wall Mirror
🧰 Questions for Your Installer:
- Mounting security: How will you anchor the mirror frame to ensure it stays flush and vibration-free during door operation?
- Weather sealing: Can you ensure all lighting circuits are fully enclosed and rated for exterior moisture exposure?
- Surface protection: What buffer materials will be used between the mirror backing and the existing door finish?
You now have fifteen distinct horror-themed directions to consider for your entryway. While the range of options spans from subtle shifts in texture to high-impact structural changes, selecting the one or two that best suit your home’s architecture is the key to a cohesive look. You do not need to layer every technique to achieve a convincing result.
The most effective front door displays prioritize impact over volume, ensuring the final scene feels intentional rather than cluttered. If you are working with a dim porch, refer to these spooky door decorations to find the right balance of visibility and fear. Once you settle on a primary focal point, your entryway will command attention with absolute authority.
Related posts
 16 Cute Halloween Door Decorations Without the Scare
 17 Creative DIY Halloween Door Decorations
 15 Easy Halloween Door Decorations for One Evening
 14 Halloween Door Decorations for a Rental Entry
 12 Spooky Door Decorations for a Dim Porch Light
 14 Door Decorations for Summer Ideas That Feel Bright and Breezy
 16 Door Decorations for Home Ideas That Instantly Feel Welcoming
 16 Christmas Door Decorations Made for Snowy Porches