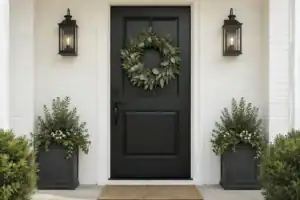

A dim porch often hides your spooky door decorations, making them invisible from the street. This guide rounds up 12 door ideas worth saving that use light-responsive materials to ensure your entryway stays visible through the night. Find the perfect project to brighten your setup below.
Glow tape runes

Transform your entryway into a glowing focal point using light-reactive geometric symbols.
As an Amazon Associate I earn from qualifying purchases. Affiliate links may earn me a commission at no extra cost to you.
Glow tape runes are perfect for homeowners who want a high-visibility effect without the hassle of electrical wiring. By using retroreflective tape, you create a design that actually “returns” light back to the source, making your door markers flash bright when hit by a porch bulb or car headlights.
For the best results, skip complex illustrations that turn into blurry smudges from the street. Instead, stick to geometric sigils or concentric circles that maintain clear, bold lines at a distance.
Installation Essentials
- Wipe your door surface thoroughly with rubbing alcohol to ensure it is grease-free before application.
- Only use outdoor-rated reflective tape; indoor-grade craft tape will peel and fail as soon as the humidity rises.
- Apply to a completely dry, cool door surface to ensure the adhesive sets properly.
Warning: Never use standard craft tape for this project. It will not withstand the moisture of an autumn night and will likely leave a sticky, damaging residue on your door finish.
⭐ Glow Tape Runes for Dim Porches
✨ Editor’s Pick
High Visibility Reflective Fabric Safety Tape
Black Reflective Fabric Warning Safety Tape
Extra Strength Green Rough Surface Tape
⚠️ Watch Out for These Installation Traps:
- Over-complex designs: Intricate, thin lines often blur together from the sidewalk, rendering your spooky runes unreadable at night.
- Humidity-prone adhesive: Using standard indoor craft tape leads to curling edges and sticky door residue when October moisture hits.
- Unprepared surfaces: Skipping the alcohol wipe leaves invisible grease, causing your runes to peel prematurely during windy autumn evenings.
Reflective Moon Wreath

Transform dim porch lighting into an atmospheric glow with this high-visibility moon silhouette.
A reflective moon wreath uses a pale metallic base to define its shape against a dark entryway, ensuring it remains visible even when your porch light is weak. By layering silver ribbon or white metallic foliage as your foundation, you create a bright silhouette that captures ambient light.
To make the wreath pop, attach small retroreflective discs or glossy faux leaves around the outer edge. These small additions act as beacons, flashing whenever a car headlight or porch flicker hits them.
Installation Tip: Skip the hot glue gun for this project, as moisture wicks into wreath backings and causes adhesive to fail. Instead, use mechanical fasteners like thin wire or zip ties to ensure your moon stays intact through October winds and damp air.
This project is perfect for homeowners who want a high-impact, spooky look without complex electrical wiring. If you prefer a minimalist aesthetic, keep the embellishments sparse; adding too many heavy decorations will obscure the moon’s clean crescent silhouette.
⭐ Best Reflective Moon Wreaths to Buy
Rustic Autumn Dahlia Front Door Wreath
✨ Editor’s Pick
Harvest Sunflower and Pumpkin Door Wreath
Large Eucalyptus Greenery Front Door Wreath
✨ Finishing Touches: Defining the Silhouette
Refining the edges of your moon wreath helps it hold its shape against the dark backdrop of your door, ensuring the design remains legible even from the sidewalk.
- High-Contrast Edging: Use a thin, metallic silver paint pen to highlight the outer crescent edge, creating a sharp, glowing border that catches low-angle light.
- Asymmetrical Placement: Cluster your reflective accents toward the tips of the crescent to mimic the natural way light hits a moon, adding depth and a realistic, organic feel to the display.
White Gauze Draping

Transform a dark entryway into a haunting silhouette using strategically layered, weather-resistant fabric.
The secret to making gauze visible in low light is relying on negative space rather than full coverage. By hanging fabric in loose, overlapping layers, you create natural folds that catch the limited ambient light, while the gaps between layers provide the depth necessary to define the door’s shape.
You should prioritize synthetic materials for this project. Unlike natural cheesecloth or burlap, which soak up moisture from the October air and sag quickly, synthetic versions hold their shape and resist mildew throughout the season.
Safety Warning: Always secure your fabric so it clears the door handle, latch, and walkway.
Loose gauze can easily catch on door hinges or become a tripping hazard for trick-or-treaters in the dark.
This look is ideal for anyone wanting an atmospheric, non-gory aesthetic that works even when your porch bulb is dim. If you prefer high-contrast, sharp-edged decor, you might find the soft, chaotic nature of draping less effective than metallic or reflective accents.
⭐ Spooky Gauze Draping for Haunted Porches
Six Pack Stretchy Black Creepy Gauze
Extra Large White Scary Halloween Gauze
✨ Editor’s Pick
Large Black Creepy Halloween Gauze Cloth
💡 How This Works in a Real Home:
- Create natural movement: Secure top anchors firmly but leave the lower layers loose; wind will naturally create an eerie, swaying motion.
- Layering for depth: Use at least three distinct overlapping pieces to build shadows that catch porch light, preventing a flat, boring look.
- Avoid messy cleanup: Use removable command hooks or gentle painter’s tape to anchor your fabric, ensuring you don’t damage your door’s finish when taking it down.
Drowning in options often happens when you try to solve for every square inch of the porch at once. Instead of stressing over a total overhaul, focus on how your entryway architecture naturally guides light to create a cohesive, high-impact look.
Achieving a standout porch mostly relies on two or three intentional focal points rather than decorating every available surface.
Metallic Moth Swarm

Create an atmospheric, high-contrast focal point that catches even the faintest porch light.
A metallic moth swarm uses the cluster effect to transform a flat, dark door surface into a textured, light-catching display. By grouping forms in irregular, organic patterns, you ensure that at least some surfaces are always angled to reflect your porch light toward the street.
Design Tip: Avoid perfect, grid-like spacing which looks manufactured and stiff. Instead, mimic a natural swarm movement by varying the density of the cluster – keep it tight in the center and let individual moths “flutter” outward toward the edges of the door.
For longevity in damp October air, avoid thin paper that will curl within hours of exposure. Choose rigid plastic or treated cardstock to ensure your swarm keeps its shape through humidity and temperature shifts.
When installing, use UV-resistant, exterior-rated adhesive tabs to keep your swarm secure. This project is ideal for those who want a high-impact visual without the bulk of traditional wreaths or garland.
⭐ Metallic Moth Swarms We Love
✨ Editor’s Pick
Moth Butterfly Patterned Privacy Door Curtain
🏡 How This Works in a Real Home:
- Test light angles: Use a flashlight from your sidewalk to verify which moth angles catch the best shimmer.
- Entryway clearance: Ensure moths are placed well away from the door handle so they don’t snag sleeves.
- Lived-in look: Scatter a few moths near the floor or threshold for a more organic, naturalistic swarm feel.
LED Lantern Frame

Create a precise, controlled glow that highlights your entryway design without blinding trick-or-treaters.
This project uses a black metal frame to house a low-output LED light, creating a defined silhouette that stays visible even on the dimmest porches. Unlike standard bright floodlights, this controlled glow emphasizes the architecture of your door rather than flattening it with harsh direct light.
Mounting Tip: Skip the adhesive strips for this project. Because the frame has weight, use small exterior-rated screws or metal clips to secure it directly to the door casing or frame.
When selecting your gear, prioritize durability to handle the October dampness. Using indoor-grade components is the most common reason these projects fail early in the season.
- LED Choice: Use outdoor-rated LED strips or candles specifically labeled for weather resistance.
- Connections: Ensure all wiring junction points are moisture-resistant to prevent shorting during rain.
- Glare Control: Keep your LED output low; if the light is too bright, it will create an overwhelming glare that hides the shape of your frame.
⭐ LED Lantern Frames for Porch Decor
Vintage Rechargeable Hanging LED Lantern Set
✨ Editor’s Pick
Modern Farmhouse Black Metal Lanterns 2PCS with Flameless Candle
Large Outdoor Black Metal Floor Lanterns
🧰 Questions for Your Installer:
- Sealing methods: Which weatherproof sealants do you recommend to protect the electrical connections from October humidity?
- Wiring path: Can we secure the power cord along the door casing to avoid trip hazards and visible clutter?
- Long-term performance: How do you ensure the metal mounting clips won’t damage or rust the door’s finish over time?
Backlit Bare Branches

Create a dramatic, high-contrast silhouette that turns your front door into a spooky focal point.
The most effective way to use bare branches in dim lighting is by embracing the silhouette effect. Instead of trying to light the branches from the front, hide a low-output light source behind or below them to cast a defined shadow directly onto your door.
Mounting Tip: Use small, clear adhesive clips or discreet screw-in hooks to secure your branches tightly against the door surface. This prevents wind from causing the twigs to scrape your paint finish or creating an annoying tapping sound all night.
Natural branches look best, but they need a little preparation before they are ready for the porch. Seal your branches with a matte clear coat to keep them from shedding bark or rotting in the damp October air.
You should skip this project if your porch experiences high winds, as keeping the branches immobile is key to the silhouette looking crisp rather than messy. If you live in an apartment, use a faux twig bundle instead of natural wood to avoid bringing bugs or debris into your entryway.
Common Mistake: Avoid using bright, direct front-lighting. This flattens the branches, removes the depth, and ruins the spooky, high-contrast shadow effect you are trying to achieve.
⭐ Backlit Bare Branches for Entryways
✨ Editor’s Pick
White Macrame Boho String Door Curtain
💡 Why This Works
By lighting the branches from behind, you strip away busy details and reduce the display to a crisp, high-contrast outline. This technique turns the potentially chaotic shape of natural twigs into a sharp, recognizable silhouette that remains visible even when your porch light is too dim for traditional, color-heavy decorations.
Visual impact: The negative space between branches is just as important as the twigs themselves for creating depth.
Luminous Lace Panel

Create haunting depth by letting light filter through intricate, weather-resistant lace patterns.
A luminous lace panel is the perfect solution if you want a sophisticated, ghostly aesthetic that doesn’t rely on bulky props. By mounting synthetic lace or open-weave netting over a dark door, you create a high-contrast display that captures even the faintest shimmer of a porch bulb.
The secret to this look is the stand-off mounting technique. Instead of pinning the fabric flat against the door, use small spacers to hold it a half-inch away from the surface.
Mounting Tip: This slight separation allows the lace to cast actual shadows behind it, adding layers of depth that solid decorations simply cannot replicate in low light.
When selecting your material, stay away from natural fibers like cotton or traditional linens, as they will sag and rot under damp autumn conditions. Look specifically for synthetic weather-stable netting or polyester-based lace that holds its shape regardless of the humidity.
This project is best for homeowners who want a clean, minimalist spooky theme that works well on darker door colors. If your porch is extremely bright, you might find this panel too subtle, but for the typical dim porch light, it offers an ideal balance of atmosphere and visibility.
⭐ Luminous Lace Panels for Windows
✨ Editor’s Pick
Clear Frameless Glass Wall Mirror Tiles
Gold Metal Vintage Sunburst Mirror Set
Small Peel and Stick Mirror Tiles
✨ Finishing Touches
Small styling adjustments prevent your lace panel from looking like a flat, lifeless decal and ensure it feels like a deliberate, ghostly installation.
- Vary the tension: Let the lace drape slightly; perfect, drum-tight stretching makes the fabric look like stiff plastic rather than elegant, haunting mesh.
- Add shadow depth: Position an LED light at a sharp, low angle beside the door to catch the lace’s texture and cast dramatic, elongated shadows across your porch.
Mirror tile wreath

Transform your darkest entryway into a shimmering focal point that captures every flicker of light.
For porches that don’t get enough ambient light to support standard decor, a mirror tile wreath is the most reliable way to create visibility. By using dozens of small, angled surfaces, this project captures even the faintest light from a streetlamp or a weak porch bulb and scatters it back toward the sidewalk.
Safety First: Always use shatter-resistant mirrored acrylic rather than real glass tiles. This keeps the wreath lightweight and ensures that wind or door movement won’t result in glass shards on your porch.
The secret to the “scatter” effect is intentional variation in your tile placement. Instead of laying every piece flat against the wreath form, tilt individual tiles at slightly different angles to create a multi-faceted surface that catches light from multiple directions.
When installing, ensure the wreath is fastened securely so that it remains stationary when the door opens or closes. Avoid mounting it in a way that allows the back of the wreath to scrape or rub against the door finish during operation.
Common Mistake: Avoid using heavy glass tiles that can damage your door hardware or become hazardous if the wreath falls during a storm. Stick to lightweight, weather-rated acrylic versions for a long-lasting seasonal display.
⭐ Mirror Tile Wreaths We Love
Black Round Metal Frame Wall Mirror
✨ Editor’s Pick
Round Bathroom Mirror with Black Frame
Large Thirty Inch Black Round Mirror
⚖️ Quick Decision Guide:
- Choose this if: You have a deeply shaded entryway and need maximum light dispersal to create a spectral, high-contrast glow.
- Skip this if: Your porch is subject to high-speed wind gusts that could cause the rigid tiles to clatter or detach.
- Pair it with: A simple, dark-painted door to contrast the reflective shimmer and ensure the individual mirror shapes remain clearly defined.
Silver Skull Garland

Capture fragmented light and create high-contrast texture on your porch using metallic skull accents.
This garland relies on the fragmented light technique to remain visible where darker decorations simply disappear. By alternating matte and shiny skull surfaces, you ensure that even a weak porch light bounces off the metallic finish to catch the eye of visitors from the street.
Size Matters: Avoid using store-bought “mini” skulls that are smaller than 3 inches. At a distance, tiny details lose their definition and blur into a nondescript gray mass against your door.
Durability is the biggest challenge for outdoor garlands, especially when humidity spikes in late October. Use UV-stable fishing line or coated craft wire to string your forms, as standard twine will sag and eventually snap under the weight of moisture.
When installing, keep the garland high enough to avoid tangling in your door hardware or striking the door frame during use. If you have a busy entryway, use adhesive-backed hooks specifically designed for exterior surfaces to keep the garland taut and prevent it from scraping your door finish.
⭐ Silver Skull Garlands for Halloween
Fifty Foot Metallic Pumpkin Bat Garland
White Ghost Garland with Wood Beads
✨ Editor’s Pick
Plum Purple Seeded Halloween Leaf Garland
💡 Why This Works:
By mixing matte and metallic finishes, you create a dynamic surface that prevents the garland from looking like a flat, dark silhouette against your door. The reflective elements break up light in multiple directions, ensuring the garland remains readable even when your porch light isn’t perfectly positioned for direct illumination.
Visual Impact: The contrasting textures turn a simple garland into a high-visibility, light-capturing focal point.
Reflective Raven Swag

Capture the eerie silhouette of a raven while ensuring it stays visible in the dark.
The secret to a successful raven swag is controlled reflection. Instead of coating your decor in shiny paint, apply reflective accents only to specific focal points like the eyes and the outer edges of the wings.
This creates a mysterious, hovering effect where the creature’s shape emerges from the shadows only when a stray beam of light hits it. It keeps the overall mood dark and spooky without disappearing into a pitch-black porch.
Material Choice Matters: Use rigid plastic or painted hardboard for your raven shapes to ensure they hold their form against wind and moisture. Avoid standard craft foam, which will soften and deform in the damp October air.
When assembling your swag, stick to a weatherproof backing to keep the piece from warping. Use exterior-rated adhesive or mechanical fasteners to mount the birds directly to the door or a sturdy wreath frame.
If you make the entire raven silver or metallic, you lose the spooky, atmospheric mood you are aiming for. Keep the body matte and dark so it functions as a silhouette, letting the reflective details do the work of catching the light.
Avoid this common error: Do not use raw, unsealed craft foam. It will absorb rain, grow heavy, and likely peel off your door before Halloween night.
⭐ Reflective Raven Swags to Consider
✨ Editor’s Pick
Realistic Handmade Black Feathered Crow Set
Striking Black Teardrop Door Swag
Thirty Six Inch Black Teardrop Frame
💡 Why This Works:
By limiting the reflective material to just the eyes and wing tips, you preserve the raven’s natural silhouette against the door. This creates a high-contrast focal point that flashes when light hits it, while the dark, matte body remains an eerie, shifting shadow that feels much more haunting than a bright, shiny object.
The Visual Benefit: Strategic light placement keeps your decor mysterious rather than turning it into a flat, distracting glow.
Light-Up Grave Marker

Define your porch perimeter with a soft, eerie glow that stays visible all night long.
This project uses a shielded LED setup to turn a standard tombstone cutout into a high-visibility silhouette. By keeping the light source hidden behind the marker, you create a halo effect that defines the shape without the blinding glare of exposed bulbs.
Installation requires more than just tape to survive outdoor conditions. Use only outdoor-rated battery enclosures and ensure every wire connection is sealed with silicone or electrical tape to prevent moisture-induced corrosion.
Warning: Never use indoor-grade battery packs for this project. They will corrode and fail during the first heavy rain or high-humidity night of the season.
If you are planning to add this to your door, keep these assembly tips in mind to ensure the marker stays secure throughout the month:
- Mounting: Use heavy-duty, exterior-grade adhesive strips or small mounting clips to keep the marker flush against the door.
- Lighting: Position the light strip at least one inch inward from the marker’s edge to guarantee a smooth, diffused halo.
- Power: Opt for battery packs with a built-in timer to save life and avoid daily manual switching.
This project is ideal for renters or homeowners who want high-impact visibility without complex electrical wiring. If you prefer a setup that requires zero maintenance after the initial install, ensure your battery housing is completely waterproof and easily accessible for a mid-month cell swap.
⭐ Light-Up Grave Markers for Yards
✨ Editor’s Pick
Fifty Miniature Black Resin Crow Figurines
🔢 The Right Sequence for Success:
Follow this order to protect your door’s finish and ensure your wiring remains completely weather-tight throughout the Halloween season.
- Test placement: Use blue painter’s tape to confirm the marker’s position before applying permanent exterior adhesive.
- Seal connections: Apply silicone or electrical tape to all battery pack and LED wire junctions first.
- Mount securely: Press the marker firmly onto the clean door surface only after wiring is fully protected.
Phosphorescent drips

Create a haunting, viscous glow that transforms your entryway into a scene of spectral slime.
For those who want a custom, permanent-looking effect without bulky hardware, phosphorescent drips provide a high-impact solution. By applying thick trails of glow-in-the-dark paint, you create an eerie residue that clings to your door frame or panels.
This project is ideal for renters or homeowners who prefer a low-profile installation that won’t interfere with locks or hinges. However, it requires a brief “recharge” from a nearby lamp or ambient light source to remain visible throughout the night.
Pro Tip: Apply the paint in varying lengths and thicknesses to mimic the natural movement of liquid.
A thicker, more generous coat ensures the glow lasts longer after the porch lights are dimmed.
Before committing to your door, test a small, inconspicuous area to ensure the paint adheres correctly to your specific surface finish. This ensures a spookier result that stays put until it is time to clean up.
⭐ Phosphorescent Drips for Spooky Paint
Sage Green Metallic Automotive Touch Paint
Sage Green Metallic Kia Touch Paint
✨ Editor’s Pick
Sage Green Metallic Mini Touch Paint
⚖️ Quick Decision Guide
- Choose this if: You want a low-profile, weather-resistant finish that won’t interfere with your door’s mechanics or hardware.
- Skip this if: Your porch is completely shielded from light, as you need ambient rays to “charge” the glow effect.
- Pair it with: Matte black accents to enhance the contrast, making the phosphorescent drips appear even brighter at night.
You now have a full spread of twelve ways to bring light to a dim porch. The goal isn’t to layer every single concept onto your entryway, but to select the one or two approaches that naturally suit your door’s architecture and light levels. Focusing on just a pair of these projects will provide cleaner, more high-impact visibility than trying to crowd your space with too much competing decor.
A thoughtful setup often looks better than a crowded one, and these specific methods for finishing an entry allow you to make a clear, confident decision without over-complicating the project. Choose the materials that best catch your existing light, and you will have an entry that remains atmospheric and visible all season long.
Related posts
 Do Plantation Shutters Block Out Light? A Homeowner’s Guide to Elegant Light Control
 16 Cute Halloween Door Decorations Without the Scare
 14 Office Door Christmas Decorations Ideas
 14 Door Decorations for Summer Ideas That Feel Bright and Breezy
 16 Door Decorations for Home Ideas That Instantly Feel Welcoming
 16 Christmas Door Decorations Made for Snowy Porches
 14 Classroom Door Decorations for Back to School Week
 17 Christmas Door Decorations for School Kids Will Love