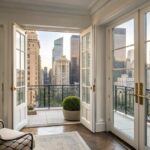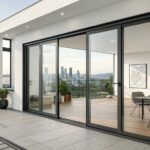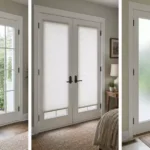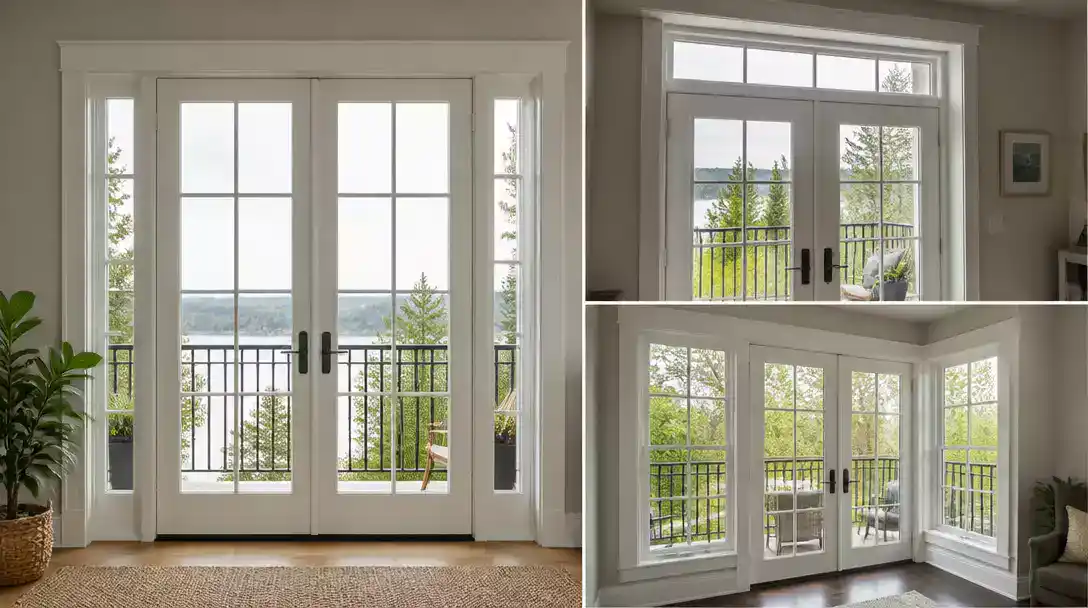
12 French door balcony window ideas focus on the glass around the doorway, adding daylight and giving the opening a more finished proportion. Save these 12 configurations as you compare options for your wall and light goals, starting with full-height sidelights.
Full-Height Sidelights
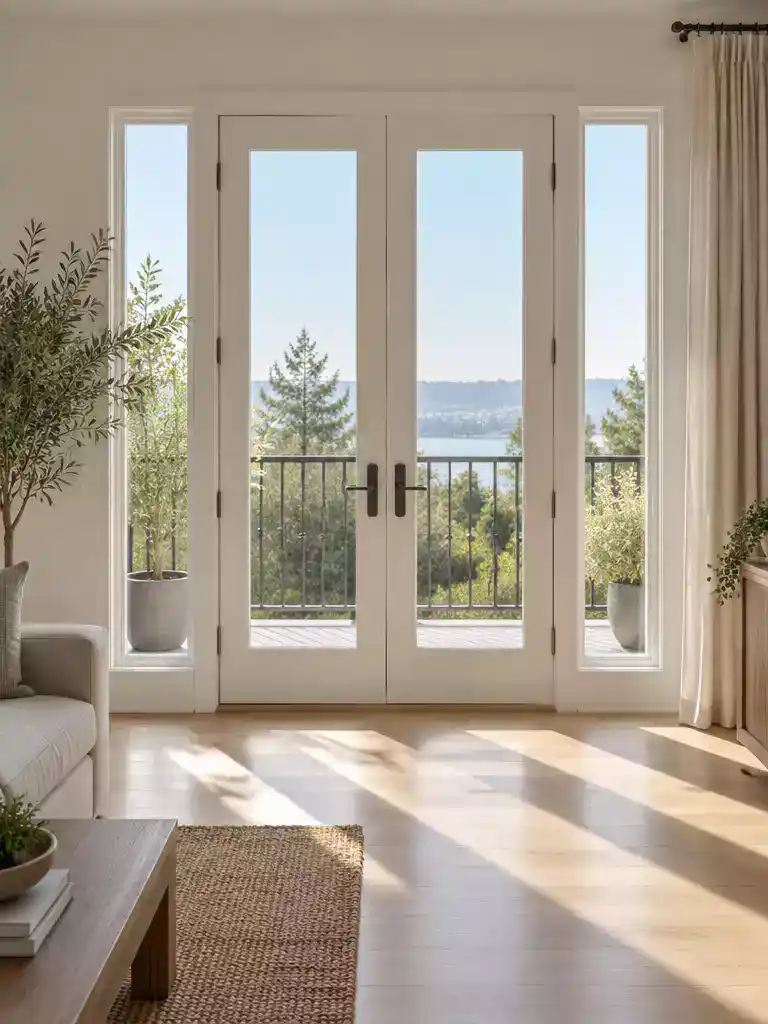
Tall narrow sidelights wrap the doorway in daylight from floor level upward.
As an Amazon Associate I earn from qualifying purchases. Affiliate links may earn me a commission at no extra cost to you.
A full-height sidelight is a narrow, tall glazed unit sitting beside the door edge, running from close to the floor up toward the head of the opening. Put one on each side and the doors get a continuous vertical frame instead of a strip of blank wall.
Notice the word narrow. These are tall, not wide – the broad, room-filling panels that turn the doorway into part of a glass wall are a separate idea covered later, so this one stays about a slender column of glass hugging each side of the door.
The payoff is daylight that starts low rather than high, which changes how the room reads at floor level and keeps the view out to the balcony running alongside the doors instead of stopping at the frame. The cost of that is straightforward: bigger panes mean more structure, more weatherproofing, and a glazing package chosen with more care.
Climate check before you commit: a larger glazed area can push heat loss up in colder climates and solar gain up in hotter ones.
Glazing selection, frame thermal breaks, and the wall’s orientation have to be considered together – there is no single specification that works everywhere.
Now the planning check that matters most: measure your proposed glass against the actual floor and the balcony walking surface. Safety-glazing requirements can kick in when all four of these are true for an exposed pane:
- The pane exceeds 9 square feet of exposed area.
- Its bottom edge sits under 18 inches above the floor.
- Its top edge sits over 36 inches above the floor.
- A walking surface is within 36 inches horizontally of the glazing.
Those four numbers are a screening check, not a verdict on your project. Confirm how your local building department applies them to your actual opening – near doors, stairs, or egress paths, some jurisdictions read them more strictly.
Before anything gets ordered, have the installer verify the sill elevation, anchorage, header capacity, flashing path, and the rough opening itself. Rough-opening sizes are not standardized across manufacturers, so a dimension taken off a competitor’s spec sheet tells you nothing about your unit.
Perfect for a balcony doorway where uninterrupted vertical light and a tall frame around the doors matter more than keeping the side glass small.
Skip it if the wall, the budget, or local safety-glazing requirements make large panes impractical for your opening.
⭐ Tall Sidelight Glass and Coverings
✨ Editor’s Pick
Thermal Blackout Curtain for Tall Sidelights
Made-To-Measure Clear Glass Sidelight Panel
💡 Why This Works:
Because the glass stays narrow, it can suit a doorway with limited uninterrupted wall space beside it: the opening gains a tall glazed edge without consuming the broader wall area a panoramic panel would need. That makes full-height sidelights a useful middle ground when you want a vertical glass accent but cannot dedicate the wall to a larger glass field.
Best fit: Consider this when the doorway has room for slim glass but not broad side panels.
Narrow Picture Sidelights
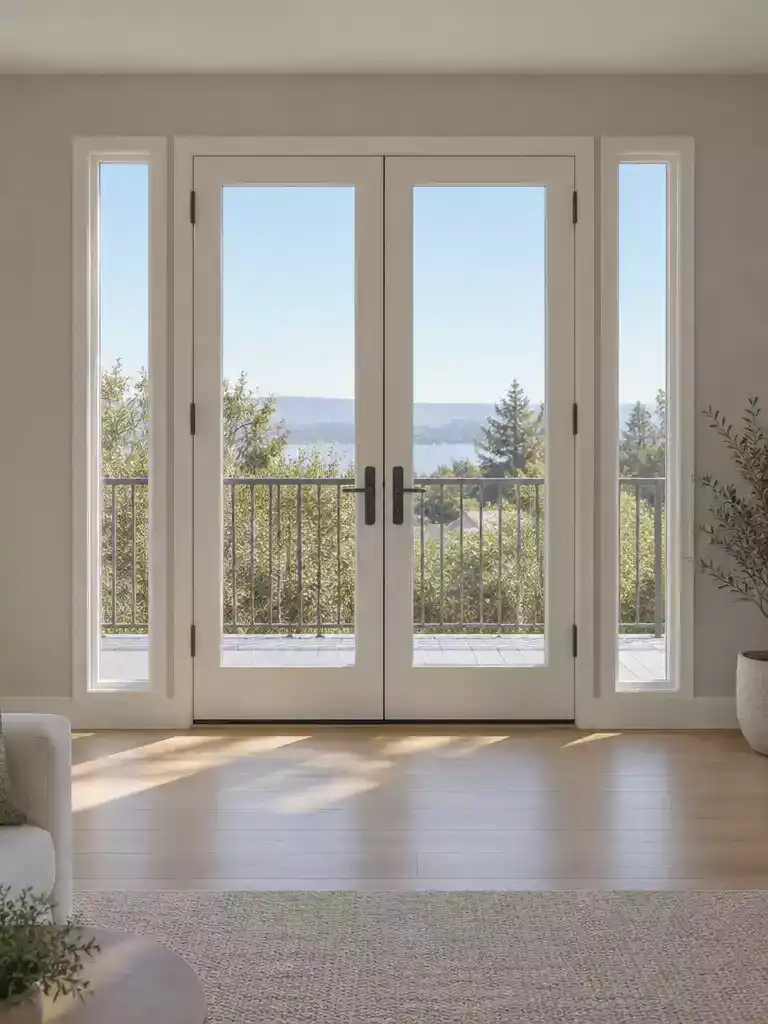
A slim border of borrowed daylight frames the doors without consuming the wall.
A narrow picture sidelight is a slim, fixed pane – no crank, no sash – set on one or both sides of the French doors. It gives you a quiet band of borrowed daylight and a clear visual edge around the doorway, not a panoramic view.
The whole point is restraint. Where a full-height sidelight runs a continuous column of glass beside each door, this leaves most of the flanking wall intact, so a modest opening reads as composed rather than converted into a glazing project.
Cost note – read the fine print.
The pricing report gives a broad baseline of roughly $30–$70 per square foot for French casement-style windows, with examples around $400–$900 for a 60-by-48-inch unit and about $400–$1,600 for a typical unit depending on specification.
Those are general window figures – not quotes and not prices for narrow picture sidelights. Never derive a sidelight price from them.
Ask for a product-specific estimate instead. Give the fabricator the actual width, height, frame material, glass package, and whether installation is included.
Narrow fixed units are generally simpler and cost less than expansive side glazing, precisely because the units are smaller and the work around them is lighter. That is where the “strong visual improvement per dollar” idea comes from.
Right for you if
You want a small daylight bump and a clean visual boundary around the doors without gutting the wall.
Skip it if
Your main goal is a broad balcony view or the maximum daylight you can get from the wall.
⭐ Narrow Sidelight Covering to Consider
✨ Editor’s Pick
Grey Thermal Curtain for Narrow Sidelights
💰 Keep the Sidelight Budget Clear:
- Installation scope: Separate the unit price from labor and finishing so you can see what the complete project includes.
- Opening condition: Ask how the estimate changes if the existing frame needs repair or the opening needs alteration.
- Uncertain repairs: Get potential extra work described before signing, rather than comparing a bare product figure with a completed installation.
Operable Casement Sidelights
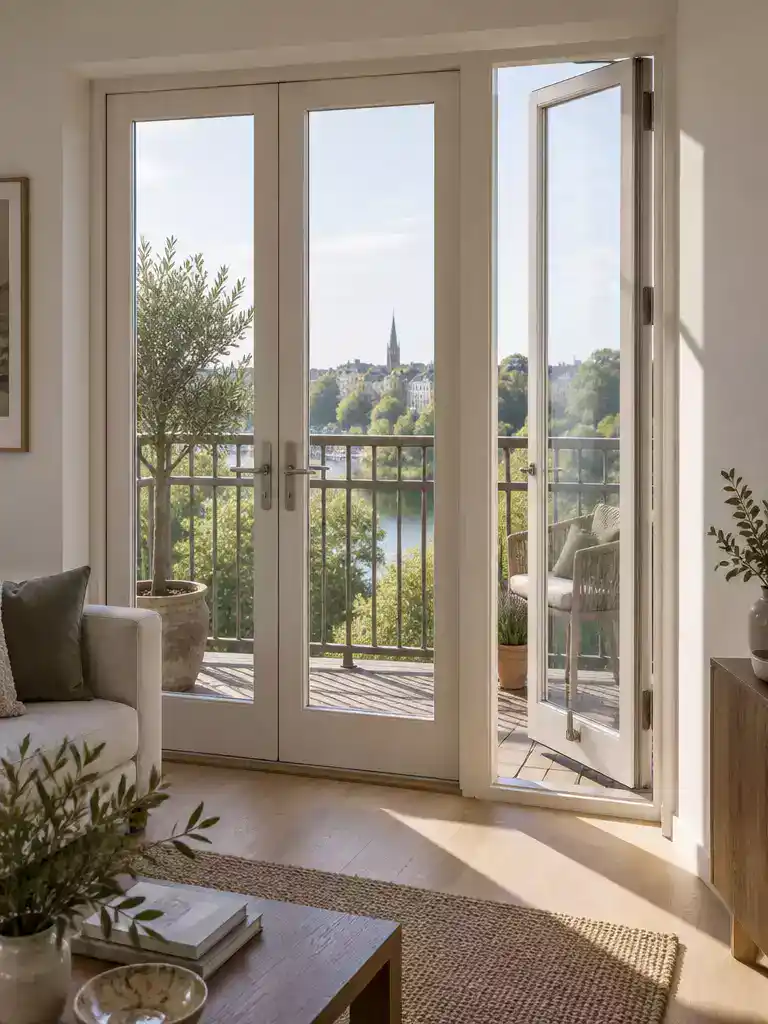
Side glass that opens outward and pulls balcony air into the room.
A casement sidelight is the side window that actually opens: a side-hinged sash that swings outward from the wall beside the French doors. Where the fixed picture sidelight in the previous idea only borrows light, this one puts fresh air within arm’s reach of the doorway.
That difference matters most in a balcony-facing room that feels stuffy in the evening. Two operable sidelights flanking the doors give you a way to draw air in from outside and push stale air out through a window on the far wall.
Don’t expect a performance number here – no ventilation rate applies to this configuration in fourth, and the claim is simply that an opening sash gives you air access a fixed pane never will.
The swing clearance check
Before you fall for the idea, walk out onto the balcony and trace where the sash would travel when it’s fully open. This is the decision that kills or confirms the project.
- Walking path: does the open sash cut across the route people use to step from the doors to the balcony edge?
- Furniture and planters: a chair |> pot |> laundry rack placed in that arc means the window stays shut most of the year.
- French door operation: confirm the two leaves can still open fully without meeting the sash, on either side.
- Railing and drop: check that the sash doesn’t press against the balusters or councillor a low parapet when swung out.
There’s no universal clearance dimension to lean on – the sash length, hinge position, and your balcony layout decide it. Mark the swing on the floor with tape and live with it for a day before ordering.
On cost: an operable unit generally runs more than a fixed sidelight of the same size, thanks to the sash, hardware, and weathersealing.
No specific price for operable sidelights is available here, so ask for a quote on your exact width, height, frame, and glass rather than estimating from a fixed-unit price.
Perfect for: a room where pulling in outside air is a real priority, and the balcony layout leaves the outward swing an unobstructed zone.
Skip it if: the sash would collide with how people sit, move, or store things on the balcony – a fixed sidelight gives you the same light without the conflict.
⭐ Operable Casement Glazing
✨ Editor’s Pick
Lockable Folding Casement Window Panel
💡 A Smaller Opening for Everyday Fresh Air
An operable sidelight gives you a smaller opening option when you want some fresh air but would rather keep the full doorway closed. That can be useful during a quiet morning or while the room is occupied, since the balcony door needn’t be the only route for outdoor air. It’s a convenience choice, not a substitute for checking conditions or airflow needs.
Best payoff: A modest opening for everyday moments when you want air without opening the full doorway.
A preferred sidelight becomes easier to price and review when your first notes describe how it needs to work – not every detail of the finished wall. You can build a useful brief without choosing perfectly among all twelve possibilities; the goal is clarity, not certainty.
🎯 Where to Focus:
- Note usable wall space, daylight or view priorities, and balcony context.
- For an operable sidelight, test its outward swing against balcony paths and furniture.
- Record floor, sill, balcony levels; photograph elevations; verify dimensions before ordering.
Divided-Light Sidelights
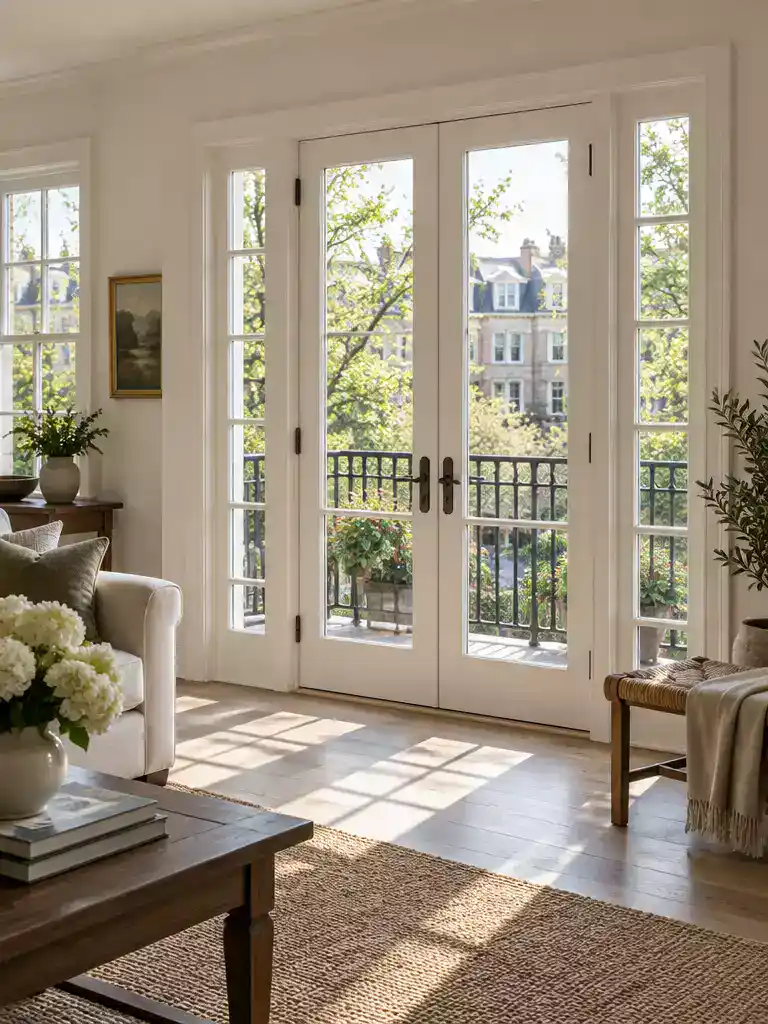
A narrow column of small panes that echoes the rest of the façade.
Instead of one uninterrupted sheet of glass beside the door, muntins cut the sidelight into a vertical stack of small rectangular panes. Think of a slim strip of glazing divided into half a dozen squares running floor to header next to each door leaf – a grid, not a blank field.
The point of the grid is compositional. A single broad sidelight can read as a bright, empty slab that pulls attention away from the doorway, while divided lights break that field into a rhythm the eye reads as part of the wall rather than a hole in it.
The pattern also gives the doorway a more traditional façade character, which matters when the house already speaks that language. That’s the whole reason to choose it: the surrounding windows use divided lights, and the balcony doorway needs to answer them.
The alignment test: walk to the curb and photograph the façade straight on.
Compare the sidelight grid against the muntin pattern, head heights, and spacing of the nearest window. If the lines don’t relate, the sidelights will look added-on no matter how well they’re built.
What you give up is a clear, uninterrupted view through the side glass – muntins sit right in the middle of it. They also add parts and complexity to the unit compared with a single-lite pane, though the research gives no specific price for divided-light sidelights, so a product-specific quote is the only real number here.
Right for you if: the windows beside or above the balcony doorway already carry a divided pattern and you want the door assembly to continue it.
Not the pick if: your main goal is the cleanest, least interrupted sightline out to the balcony through the side glass.
Keep the choice about the pane-dividing pattern itself. Whether the sidelight opens, how the French door is styled, and what covering goes inside are all separate decisions from the grid.
⭐ Window Grilles That Define Divided Lights
✨ Editor’s Pick
Flexible Peel-and-Stick Window Grille Trim
💡 Make the Grid Feel Intentional:
- Check indoors: Look at a pattern sample from the room, where the grid will frame the balcony view every day.
- Mind the scale: Keep the divisions legible in a narrow sidelight; an overly busy grid can crowd the small glass area.
- Coordinate the finish: Choose muntin and frame tones that sit comfortably with nearby trim, rather than introducing another strong contrast.
Rectangular Transom
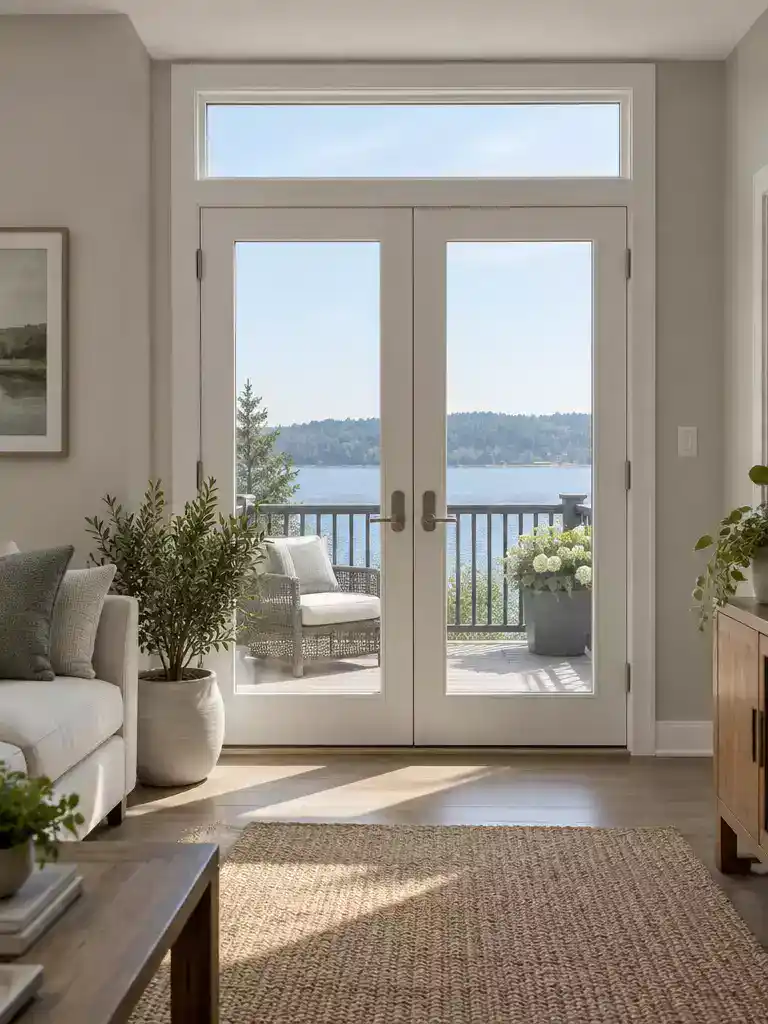
Overhead daylight that stretches a low doorway upward without touching the walls.
A rectangular transom is a single window sitting directly above the French door opening – glass overhead, no change to the side walls. It’s the right move when your doorway feels short and squat but the wall space beside it is already spoken for by a bookcase, a stair rail, or a window that can’t move.
The payoff is vertical proportion, not view. That borrowed band of daylight lands high in the room and reads as a taller doorway composition, which is exactly what a low-headroom balcony opening usually needs.
Why it beats a bigger project: a single transom is one of the more modest additions for improving light and proportion without major structural complexity.
It can be fixed or operable – an operable one is a bonus for airflow, not a requirement.
There’s a quiet code angle too. Upper glass can avoid enlarging the lowest panes – the ones most likely to raise impact- or fall-related concerns near a balcony walking surface. But don’t treat a transom as automatically exempt: exact treatment depends on the unit’s size, placement, and your local interpretation.
Before ordering, get these four confirmed:
- Structure – the header above the doors has to carry the load once the opening is extended upward.
- Flashing and air sealing – the seam where transom, door head, and wall meet is a common leak point.
- Safety-glazing requirements – checked for your actual pane size and location, not assumed.
- Rough opening – manufacturer dimensions vary, so verify the product submittal rather than assuming a standard size.
Go for it if: you have usable space above the doors but limited room on either side, and you want more daylight without widening the opening.
Skip it if: the ceiling, roofline, or existing structure leaves no practical headroom for overhead glass.
⭐ Antique Details for Rectangular Transoms
✨ Editor’s Pick
Antique Replica Transom Window Hardware
💡 A Horizontal Line That Ties the Wall Together:
The transom’s horizontal edge gives the eye a pause above the tall door leaves, making the opening feel deliberately composed. Aligning its frame with nearby window heads or other strong horizontal lines can help the new glass feel connected to the wider room and façade, rather than like an isolated addition.
Design cue: Check sightlines from inside and outside so the transom relates naturally to existing horizontal details.
Arched Transom
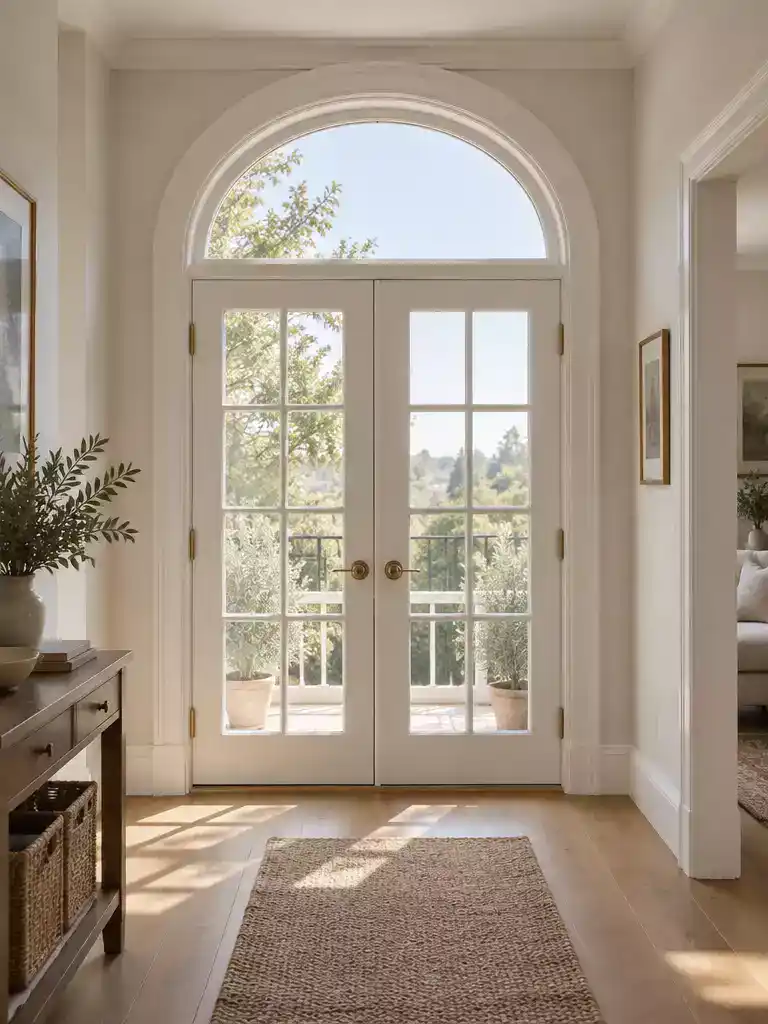
A curved head lifts a plain doorway into a composed, traditionally detailed opening.
A single band of curved glass sitting directly over the French door head, following a half-round or elliptical profile instead of a straight top. The arc is the whole point: it softens the upper edge of the doorway and pulls the composition upward, giving a flat wall a traditional, vertically emphasized silhouette.
This is the glass above the doors, never the arched units flanking their sides. Curved glass beside each door edge is a separate project, so keep the two apart when you brief a supplier.
No reliable price or standard dimensions exist for arched transoms, so per-square-foot estimates from rectangular work won’t tell you much. Ask for a design-specific quote covering the unit, curved trim, and installation together.
The arch changes more than the trim.
Structural changes to the header, a custom unit, waterproofing details, and any safety-glazing requirements all get resolved as part of the opening design – not after the glass arrives.
Treat a curved head as a job for a qualified professional, especially if the rough opening itself has to be altered.
Right for a home whose existing windows or façade already use curved profiles, where the balcony doorway needs to continue that geometry and custom fabrication is accepted as part of the scope.
Skip it if the job needs a standard-size unit that’s simple to flash, easy to source later, and installable without reshaping the opening. A rectangular transom delivers the same overhead daylight with far less custom work.
⭐ Arched Transom Trim Worth Considering
✨ Editor’s Pick
Flexible Trim for Arched Transom Windows
🧰 Plan the Custom Arch Before Work Begins:
- Opening plan: Can you show the proposed arch profile against the existing opening before any framing changes are approved?
- Quote scope: Does your quote include a site measure, custom fabrication, curved trim, flashing, and installation as one coordinated scope?
- Future records: What drawings or product records will we keep so a future replacement can match the curve accurately?
Clerestory Windows
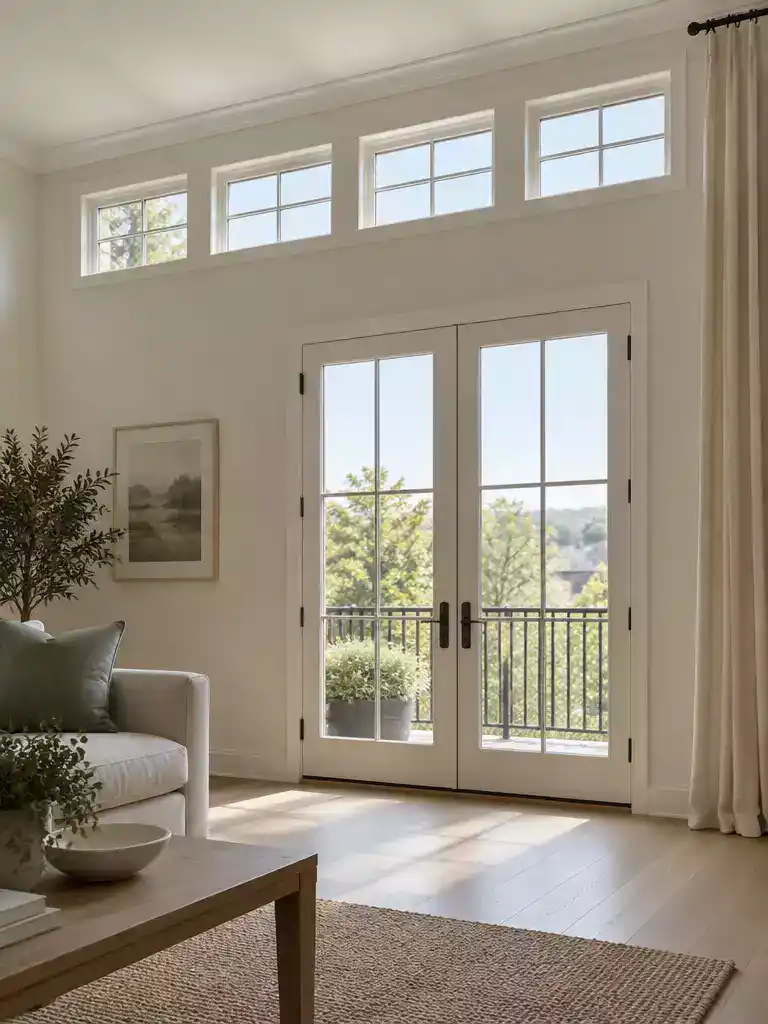
Light from above keeps the room bright without giving up privacy.
A clerestory is a band of windows set high in the wall above the doorway area, sitting apart from the French door frame rather than attached to it. The payoff is height – daylight enters near the ceiling and washes downward, instead of starting at floor level.
This configuration earns its place when the balcony itself is the constraint. A railing, a neighboring building, or a privacy concern can make low side glass close to useless, while a high band still pulls daylight in from above those sightlines.
Energy check before you commit.
More glass raises heat loss in colder climates and solar gain in hotter ones. Match the glazing package, frame thermal breaks, and orientation to your actual exposure rather than expecting one specification to suit every direction.
Upper placement helps with the lowest-pane concerns that come up near doors and walking surfaces, but it does not automatically settle safety-glazing requirements. Exact treatment depends on the pane’s size and location, and the local building department’s version of the code controls.
Verify before ordering:
- Whether the upper wall can carry the band – header capacity, structural support, and the anchorage path.
- Flashing continuity at the head and any change in wall plane, plus air sealing around the new rough opening.
- Applicable local code for the actual pane size and placement, including any stricter local amendments.
- Product-specific dimensions from the manufacturer – the report supplies no standard clerestory sizes or prices, so get a design-specific quote.
Perfect for
A balcony where low-level views are blocked or privacy matters, but the room still needs daylight from above.
Skip it if
There is no suitable upper wall area left, or the required structural work is beyond the project’s scope.
💡 A Better Fit When You Want Light, Not a View
Think of a clerestory as a daylight choice rather than a way to see more of the balcony. If the view is blocked or too exposed to enjoy, adding glass high in the wall can bring in light without making a low-level sightline the focus.
Decision cue: Choose it when brightness matters more than a direct view through the glazing.
Stacked Transoms
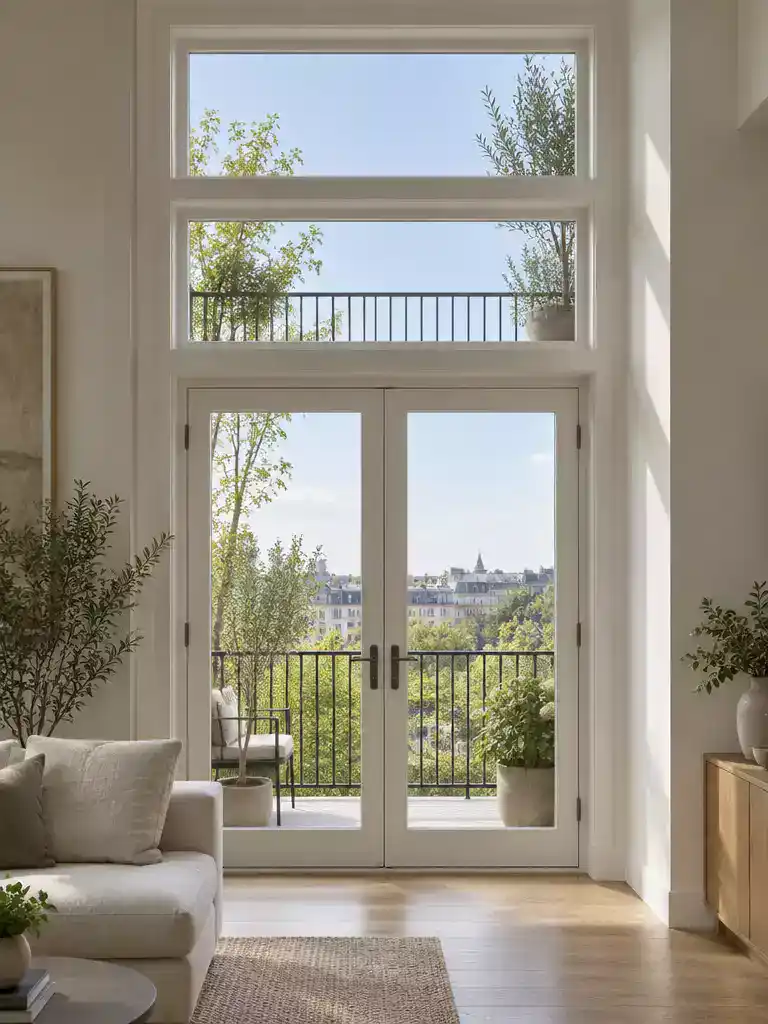
Two horizontal glass bands above French doors turn a tall wall into a layered light composition.
Stacked transoms are two or more horizontal glazing bands stacked above the French door head – think a lower transom, a muntin line, then a second transom of glass climbing toward the ceiling. This is not a single tall transom and not the separate, higher clerestory strip in the previous section; the whole idea is repetition, and the eye reads it as one layered composition rather than one big window.
The payoff is specific. Repeating horizontal lines carry the eye upward and divide a tall wall into deliberate layers, and daylight enters at more than one level instead of all pouring in from the same band. For a room where side glazing is squeezed by a neighbouring wall or a balcony railing, stacking glazing is often the only way to keep the wall above doing work.
Stacked vs. single transom at a glance
Be realistic about scope. As complexity climbs, fabrication and installation labor tend to dominate, which makes per-square-foot comparisons far less useful than on a single standard unit. Stacked glazing can also pull the project toward permit review and specialized installation, so this belongs in a design conversation, not a pickup-at-the-store one.
What a qualified professional should verify
- Structural support for each band and the wall area between them
- Flashing continuity between units, not just at the outer head
- Waterproofing and air sealing at every band junction
- Applicable safety-glazing requirements for the actual pane sizes and locations
- Whether permit review applies to the opening in your jurisdiction
Do not estimate this one from a single-transom price. No standard dimensions or reliable cost figures exist for stacked arrangements, so request a design-specific proposal rather than scaling up a simpler unit’s number.
Stacked transoms suit a tall wall where side glazing is constrained – a balcony railing blocking low-level glass, a neighbouring building close by, or a privacy concern that makes side windows impractical. Skip it if a low-complexity installation is the main priority; a single rectangular transom will deliver daylight and proportion without the layered build-out.
🔢 Plan the Installation in the Right Order:
With several connected glass bands, agreeing on the build sequence early helps keep design decisions from becoming expensive site changes.
- Set the band layout and unit relationships on the elevation before requesting final fabrication drawings.
- Have the installer map how each upper joint will shed water before trim or cladding details are fixed.
- Approve coordinated drawings and permit requirements before units are ordered, so field adjustments don’t drive costly rework.
Floor-to-Ceiling Side Glass
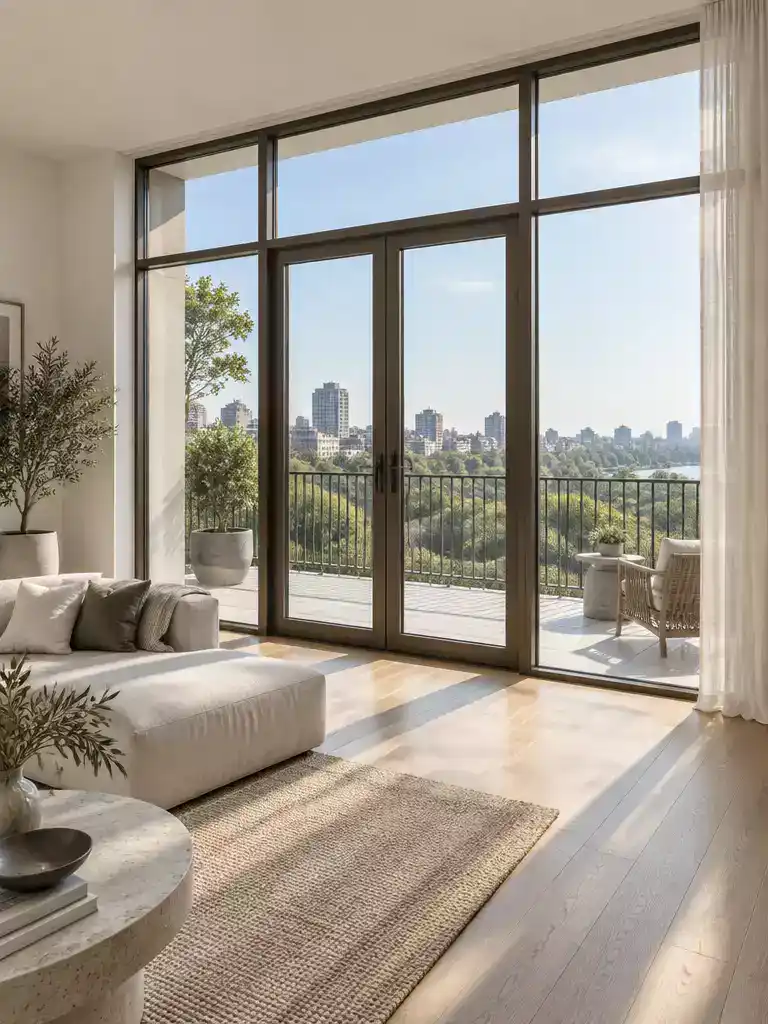
Broad side glass turns the doorway into a nearly continuous wall of daylight.
Broad glazed panels running from near floor level to the ceiling beside the French doors make the doorway read as one piece of a larger glass wall. This is the choice for a wall where the goal is a wide, mostly uninterrupted view toward the balcony rather than a tidy border of light.
It’s worth being clear about the difference: full-height sidelights (item 1) are narrow vertical units, while floor-to-ceiling side glass puts wide panes beside the doors. The wider the pane, the more daylight and view continuity you get – and the more the framing, anchorage, and weatherproofing have to work.
Safety-glazing screening check
A pane likely counts as a hazardous location when it exceeds 9 square feet, its bottom edge sits under 18 inches above the floor, its top edge sits over 36 inches above the floor, and a walking surface is within 36 inches horizontally of the glazing. Confirm how your local building department applies this to your actual pane and balcony – local amendments control.
Large glazed areas also change the room’s thermal exposure: more heat loss in colder climates, more solar gain in hotter ones. Glazing package, frame thermal break, and orientation need to be decided together rather than after the glass is ordered.
Before design is locked, run through the verification list:
- Rough opening and product submittals, checked unit by unit – sizes are not standardized
- Header capacity and anchorage for the wider, heavier panes
- Sill elevation and its relationship to the balcony walking surface
- Flashing path and air sealing across the enlarged opening
- Local safety-glazing and energy-code requirements for this specific condition
Who it fits
Perfect for: a wall where a broad, nearly continuous view beside the doors matters enough to take on engineering and code checks.
Skip it if: the goal is a small, low-disruption window addition – a narrow fixed sidelight or single transom suits that job better.
📈 Think Beyond the Initial Impact
There’s no reliable payback figure for this exact configuration. Its lasting appeal comes down to whether the wider view and daylight suit the home; comfort and durability depend on thoughtful glazing choices and careful installation, not glass area alone.
Value check: Choose it for the everyday view, not an assumed resale premium.
Symmetrical Side Windows
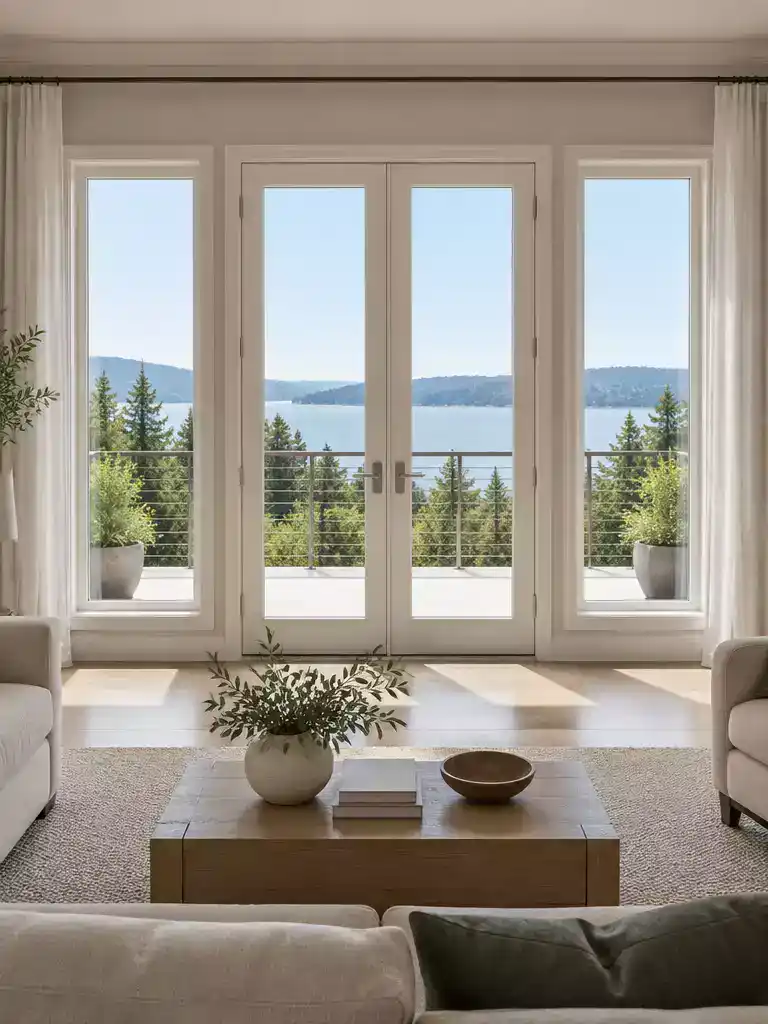
Matching side windows put the balcony doors at the center of the wall.
Two identical windows, one on each side of the French doors, set at equal distances from the door casing. The doors stop reading as a hole punched in a wall and start reading as the centered feature of a wider façade.
This is a composition idea, not a daylight idea. The payoff is balance – the doorway sits at the middle of a broader arrangement instead of drifting to one side of it.
It works best when the interior and exterior elevations agree. The pair should balance the room from inside and fall into the window rhythm of the outside wall at the same time.
The four-point symmetry check
Stand back and compare these across both side units before anything gets ordered:
- Widths – are the two panes the same size, or does one look wider from where you actually stand?
- Head heights – the top edges should land on one straight line across the whole assembly.
- Sill heights – matching bottoms matter as much as matching tops; a 2-inch difference is visible from across the room.
- Spacing – the gap between each window and the door casing should be equal on both sides.
Then ask the one question that settles it: does the door assembly look centered in the larger wall, or does it look like it’s sliding toward one end? Everything above serves that single test.
Honest scope: symmetry is a visual rationale. The research behind this list supports no claim that a balanced pair increases daylight, lowers cost, or improves performance.
Judge it the way you’d judge any composition – by how the wall reads, not by a number.
These are all above-board comparisons of proportion, not code dimensions. Nothing here needs to match a safety requirement; it only needs to match itself.
Right for: a formal façade where the balcony doorway should sit dead center of a broader wall arrangement, especially a wide room with a long, plain wall to compose.
Skip it if: the wall space is unequal on the two sides, or an existing feature – a fireplace breast, a stair, a corner – already breaks the balance and would make a matched pair look forced.
One last distinction: this is not the same as picking slim fixed panes. Narrow picture sidelights (List 2) are about keeping the glass small; symmetrical side windows are about matched placement across the whole wall, whatever width you land on.
⭐ Dress a Symmetrical Window Pair
✨ Editor’s Pick
Adjustable Double Curtain Rod for Paired Windows
Arched Side Windows
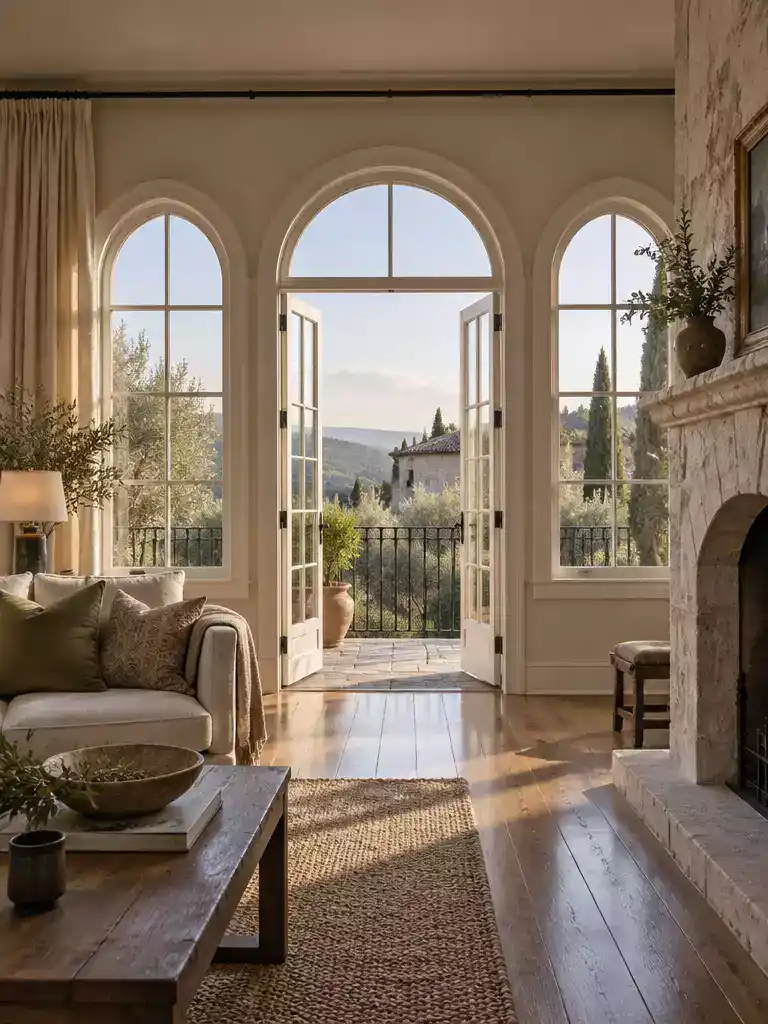
A soft curve at each side keeps a traditional façade moving upward.
Arched side windows flank the French doors with a curved top on the sides of the opening – not across its head, the way an arched transom does. This is the configuration where the curve itself is the idea, and it only earns its keep when that curve already exists elsewhere on the wall or façade.
Where the curve already appears: a stone or brick arch over the entry door, a curved-head window above the fireplace, a Palladian window in the stair hall, or a curved trim return on the exterior. If none of those exist on this elevation, a lone pair of arched side units usually reads as an outlier rather than a continuation of the architecture.
Look closely at where the shape repeats before committing – the arches should sit at the same visual weight and head height as the other curved openings, not compete with them. Sketch the elevation and mark the apex points; if the side-window arches don’t align with anything else in the composition, that’s the sign to stop.
Arched Side vs. Arched Transom: What Actually Differs
Both approaches are custom, but the side configuration doubles the fabrication: two curved units, each trimmed to match the wall on both sides, and each one a future replacement risk. Curved units are typically more expensive and more specialized to fabricate than standard rectangles, and their curves complicate trim, flashing, and matching components later on. No reliable price or dimensions exist for these assemblies, so get a design-specific proposal rather than estimating from a rectangular sidelight figure.
The mistake worth avoiding: ordering the arched units, then discovering the standard rectangular replacement won’t fit the curved opening a decade from now. Ask the fabricator now how future replacements would be sourced, and whether the trim profile can be recreated.
Also confirm structural changes and waterproofing before the design is final. Custom arches and any work touching structure or drainage are a professional’s job, not a same-day swap.
If your façade already carries curved-head windows or an arched masonry opening, arched side windows extend that geometry into the balcony doorway and keep the elevation reading as one composition. If the wall is plain and the priority is simple sourcing, standard sizing, or an easy future replacement, this configuration works against all three goals at once.
✨ Finish the Curve from Both Sides:
Once the custom profiles are settled, the surrounding finish helps the pair feel integrated from inside and outside, rather than like separate inserts.
- Interior transition: Carry the room’s trim finish toward the curved heads, keeping the change from straight casing to arch visually tidy.
- Exterior junction: Review how curved trim meets the wall cladding so the finish and water-shedding details are coordinated.
Corner Glazing
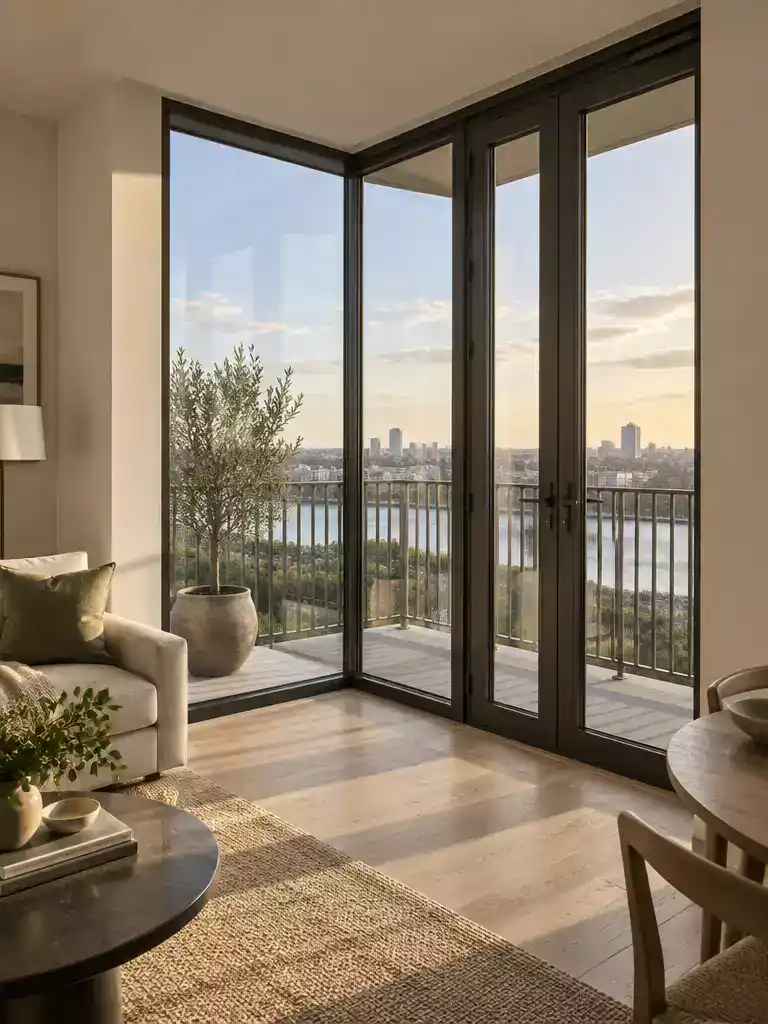
Wrap glass around the corner for daylight and angled views from two directions.
Corner glazing means the glass runs past the edge of the balcony doorway and continues around the wall corner, so light arrives from two directions and the view angles off instead of stopping flat. The payoff is specific: the corner stops reading as a solid mass of wall, which a plain sidelight beside the door never does.
This is the heaviest configuration on the list. Treat it as a design-and-engineering project, not a trim upgrade – structural support, waterproofing continuity, thermal-bridging control, anchorage, rough openings, and local safety-glazing rules all have to resolve together.
Corner conditions are unforgiving.
Large panes make support, shim placement, and the flashing sequence especially consequential, and an error at any of those points can turn into an expensive failure.
Custom fabrication, likely permit review, and specialized installation all raise the demand on this one. No reliable prices or standard dimensions exist for corner glazing, so a per-square-foot guess is meaningless – ask for a project-specific design and quote.
Before anything gets ordered, get one joined-up plan from a qualified professional rather than separate assumptions made after the glass arrives:
- Structural support – what carries the corner head, and whether the existing framing or header can take it.
- Drainage and flashing continuity – one water path across the corner, not two overlapping details that fight each other.
- Thermal detailing – where the frame thermal break sits and how the glazing package matches the exposure.
- Rough opening and anchorage – verified against the actual unit, since manufacturer sizes are not standardized.
- Code review – local safety-glazing rules and any permit conditions for the corner condition.
Safety-glazing screening check for the large corner panes
- Exposed pane exceeds 9 square feet
- Bottom edge under 18 inches above the floor
- Top edge over 36 inches above the floor
- A walking surface within 36 inches horizontally
Confirm how your local building department interprets these against your actual pane and balcony – the local version of the code controls.
Perfect for: a remodel where a corner view and daylight from two directions are central goals, and professional design coordination is available to carry it.
Skip it if: this is really a simple window replacement, or the corner cannot be altered safely within the existing structure.
💡 Why the Corner Matters:
Unlike adding more glass along the doorway wall, turning glazing onto the adjacent wall changes the view from different positions in the room. It’s most useful when that second orientation offers something worth seeing or brings useful daylight; otherwise, the extra design complexity may not earn its place.
Best design test: Consider what the corner reveals from the room, not only how much glass it adds.
With all twelve French Door Balcony Window Ideas in view, the choice comes down to what your wall needs: contained sidelights, light from above, or wider glazing for daylight and balcony views. Operable units add an airflow option; symmetry and arches shape the composition rather than promise better performance. You don’t need every approach; one or two well-matched choices can define the opening.
Start by naming your priority, then photograph both sides of the opening and note how the balcony walking surface meets proposed glass. A fixed sidelight or rectangular transom may be simpler if the opening stays unchanged; arches, stacked glazing, corner glass, or structural changes call for qualified professional input. Have a window professional assess the opening and local requirements before ordering: code varies, and your local building department’s rules control. Choose the configuration that fits your wall, light, privacy, and project scope, and you’ll have a clear direction for the balcony entry.