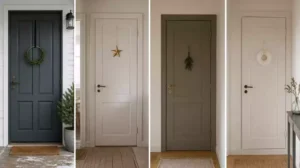

Achieving a sliding wardrobe that looks truly built-in requires careful structural planning rather than simple storage boxes. This guide narrows the process down to 8 ideas worth your attention so you can invest your time and budget wisely. Let’s start with the foundation of your installation.
Open Alcove to Enclosed Wardrobe

Transforming an awkward alcove into a high-end, structural wardrobe starts with a solid foundation.
As an Amazon Associate I earn from qualifying purchases. Affiliate links may earn me a commission at no extra cost to you.
The most common mistake homeowners make is mounting sliding tracks directly to drywall. This inevitably leads to bowing, track detachment, and those frustrating cracks that appear around the door frame within months.
Instead, you need a structural skeleton to support the weight of the doors and the movement of the runners. You should build this using 2×2 or 3×2-inch kiln-dried timber battens, which provide a rigid, stable backing that won’t warp over time.
Structural Enclosure Checklist
- ☑ Check the substrate: Before anchoring your base plate to the floorboards, use a stud finder or thermal scanner to identify any hidden pipes or electrical wires.
- ☑ Timber framing: Secure your 2×2 or 3×2 kiln-dried battens to the wall studs and floor to create a rock-solid perimeter.
- ☑ The 18mm rule: You must leave an 18mm door clearance gap to ensure the sliding mechanism operates without friction.
- ☑ Cladding: Once framed, finish the exterior with 18mm MDF or plywood for a smooth, paintable surface.
Precision is everything here, as even 2mm of non-plumb surface will cause your doors to jam or slide open on their own. You must keep a spirit level in your hand at every phase of the project, checking for plumb and level long before you start attaching the final cladding.
Warning: The Plumb Trap
Never assume your walls are square. If you don’t use a spirit level at every step of the framing process, you will struggle with door alignment that no amount of adjustment can fix later.
For a project of this scale, you can expect to spend between £150 and £300 on raw materials, whereas professional installation usually ranges from £600 to £1,200. This investment in the sub-frame is the difference between a temporary DIY fix and a permanent architectural upgrade.
.
Freestanding Unit to Wall-to-Wall Fit

Banish the V-shaped gap and achieve a custom, built-in aesthetic that elevates your entire bedroom.
Most homeowners quickly realize that their walls are rarely perfectly plumb or square. When you push a standard freestanding unit against an irregular wall, you are left with an unsightly V-shaped gap that immediately signals a non-fitted, store-bought piece.
The secret to a professional built-in look is using filler panels, typically 640mm in depth, to bridge the distance between your unit and the wall. By cutting these panels to match the exact topography of your wall, you create the illusion that the furniture was custom-made for the space.
The Scribing Technique: Use a contour gauge to trace the exact profile of your wall onto your filler panel. This allows you to cut the MDF with a jigsaw, ensuring a tight, gap-free seal that looks like it was born into the room.
To ensure your filler panels stay secure and flush, you need a strategic distribution of fixing blocks. Aim for at least two blocks at the top, two at the base, and four distributed along the vertical edge of the unit.
You should also consider the treatment of your existing skirting boards for that final high-end finish. You have two primary options:
- Scribing: Carefully cut the filler panel to wrap around the existing skirting board profile for a seamless transition.
- Chasing: Remove the section of the skirting board where the wardrobe will sit, allowing the panel to drop straight to the floor.
Avoid This Mistake: Never skip leveling your filler panel. If the panel is tilted, it will throw off the alignment of your sliding tracks, leading to permanent door jamming issues.
Once your panels are fixed, use color-matched caulk to seal the microscopic gaps between the panel and the wall. This small detail prevents dust from collecting and provides a crisp, architectural finish that completes the transformation.
.
Gap-Topped to Ceiling-Height Panels

Eliminate dust-collecting gaps for a clean, architectural finish that maximizes your room’s vertical space.
That annoying gap between the top of your wardrobe and the ceiling is the hallmark of a unit that wasn’t designed for your space. It acts as a permanent dust collector and immediately signals that your storage is a standalone piece rather than a permanent home feature.
To achieve a truly fitted appearance, you need to bridge that dead space with custom-measured panels. Using moisture-resistant MDF in thicknesses between 9mm and 18mm provides the best balance of stability and paintability.
The 3-Point Measurement Rule: Walls and ceilings are rarely perfectly level. Always measure the height of the gap at the left, center, and right points of the wardrobe, then use the largest figure to ensure your panel covers the lowest point of the ceiling.
You cannot simply glue these panels to the ceiling plaster. You must install a skeleton of 2×2 timber blocking secured firmly into the ceiling joists and the top of your existing wardrobe frame.
This creates a stable, long-term mount that won’t shift or crack over time. When selecting materials, keep in mind that MDF panels typically last 15–25 years, while solid wood components can endure for 25–40 years with proper care.
Critical Warning: When securing your top panels to the wardrobe, choose your screw length carefully. If your screws are too long, they will puncture the interior of the cabinet, leaving sharp, visible metal points inside your storage space.
For a professional look, use a 45-degree miter cut for any outside corners where the panels meet the side walls. If you are meeting an inside corner, simply overlap the panels and finish the seam with high-quality, paintable caulk to make the joint disappear.
- Use a stud finder to locate ceiling joists before attempting to anchor your support blocking.
- Always test your paint finish on a scrap piece of MDF to ensure the sheen matches your ceiling or wall color perfectly.
- Fill all screw heads with wood filler and sand smooth before applying your final coat of paint.
.
📈 The Long-Term Payoff:
Investing in floor-to-ceiling panels does more than just hide dust; it anchors the wardrobe as a permanent architectural feature. This seamless integration can increase your home’s appraised value by 1% to 3%. Choosing durable materials like solid wood over MDF extends the structural integrity of your storage from 15–25 years up to 40 years.
Resale Advantage: Unified cabinetry signals quality to potential buyers, distinguishing a professional install from a temporary DIY unit.
Visible Track to Hidden Runner

Whisper-quiet motion and a flush floor finish define the character of a truly integrated wardrobe.
There is a world of difference between the clunky, audible slide of an exposed metal track and the effortless glide of a recessed runner. Exposed tracks often act as dust traps, while a hidden runner system creates the illusion that your wardrobe is a permanent architectural feature of the room.
You generally have two paths for this upgrade: a top-hung system recessed into the ceiling or a bottom-running system embedded in the floor. Both methods require precision routing to achieve that flush, high-end appearance.
Routing Pro-Tip: Always cut your channel 1–2mm wider than the track itself. This minor tolerance prevents the mechanism from binding over time as your home settles.
Mechanically, you need to ensure the system is weight-rated for your door material. High-quality runners should comfortably support 200–300 lbs per door to maintain smooth operation for decades.
Do not underestimate the safety necessity of end-stops in your track assembly. Without these, even a slight nudge can cause a heavy door to derail, posing a significant risk to your flooring and your peace of mind.
Common Mistake: Failing to verify the depth of your recess. If the channel is too shallow, the track profile remains visible, immediately ruining the flush “built-in” aesthetic you are striving to achieve.
.
🧰 Ask Before You Hire
- Weight capacity: Does the runner system support at least 200–300 lbs per door for your specific material?
- Channel routing: Will you route the track channel exactly 1–2mm wider than the profile to allow for settling?
- End-stop hardware: Are secure, heavy-duty end-stops included in the quote to prevent the doors from ever derailing?
Mechanical reliability is the true foundation of a long-term investment, ensuring your doors glide smoothly for decades rather than just looking good for a season. Focusing on the engineering of the runner system is far more impactful than worrying over every minor aesthetic detail.
Prioritizing high-quality, recessed hardware ensures your sliding wardrobe functions flawlessly, securing your investment against the mechanical fatigue that causes most homeowners to regret their final choice.
Standard Doors to Reeded Glass

Textured glass filters light and softens the room’s visual weight for a sophisticated, high-end finish.
Swapping solid, flat panels for reeded or fluted glass is one of the most effective ways to break up a large expanse of wardrobe doors. This upgrade adds depth and movement to the room, turning a functional storage wall into a decorative feature that catches the light differently throughout the day.
While standard opaque doors can feel heavy or imposing in a smaller bedroom, reeded glass creates an airy, semi-transparent effect. It effectively obscures the contents of your wardrobe while maintaining a sense of openness that keeps the space from feeling cramped.
Design Note: Reeded glass is particularly forgiving in shared spaces. The vertical lines provide a consistent, organized look even if the clothing behind the glass has a variety of colors and textures.
When planning this transformation, consider the frame material carefully to ensure it complements your existing bedroom decor. Aluminum frames are a common, lightweight choice that provides a sharp, clean profile, while timber frames offer a warmer, more traditional aesthetic.
Keep in mind that you are moving from a solid surface to a material that requires more thoughtful interior management. Since the silhouette of your hangers and clothing will be softly visible, focus on using uniform hangers to maintain the clean, architectural look you are aiming for.
If you are retrofitting existing tracks, verify the weight capacity of your current runner system before ordering glass panels. Glass is significantly heavier than standard MDF or melamine, so you may need to upgrade your rollers to ensure the movement remains whisper-quiet and smooth.
Safety Warning: Always ensure your glass is tempered for safety, especially in homes with young children or high traffic areas. Tempered glass is designed to shatter into small, harmless fragments rather than large, dangerous shards if impacted.
.
💡 Why This Works:
Reeded glass acts as a sophisticated visual filter, softening the harsh, solid lines of traditional wardrobe doors. By diffusing light rather than reflecting it, the texture adds a layer of depth that makes a large storage wall feel like a intentional design feature rather than a bulky, monolithic box.
Visual Benefit: It successfully hides internal clutter while maintaining a sense of openness and airy architectural flow.
Bulky Handles to Recessed Grips

Streamline your wardrobe silhouette with flush-mounted hardware for a truly integrated, custom furniture finish.
Swapping out protruding hardware for recessed grips is the ultimate way to prevent your sliding doors from feeling like an afterthought. When you eliminate bulky handles, you remove the primary obstacle that causes doors to catch or snag during use.
Creating this look requires a clean, professional approach to routing the door panels. A standard cup pull typically ranges from 35mm to 50mm in diameter with a depth of 10mm to 15mm.
Professional Tip: Use a plunge router to create a perfectly sized pocket for your hardware. Always verify the remaining panel thickness before you begin to ensure you don’t route entirely through the door material.
Precision is mandatory here, as even a slight misalignment will prevent the doors from sliding past each other. You must ensure the grip is perfectly flush with the door face so it never makes contact with the adjacent track or panel.
Check the back of the panel carefully before finishing the installation to avoid screw protrusion. If your screws are too long, they will mar the interior finish or, worse, scratch the opposing door during operation.
Avoid the common mistake of routing either too shallow or too deep into the wood. A shallow route leaves the handle protruding, while an over-deep route causes the handle to wobble and lose its solid, integrated feel.
.
💡 Why This Works
Recessed grips transform your wardrobe from a piece of furniture into a seamless architectural feature. By removing visual noise and physical obstructions, you allow the clean lines of the sliding doors to take center stage, creating a sophisticated, high-end look that feels custom-built for your bedroom’s specific dimensions.
Visual Continuity: Eliminating hardware shadows creates a flatter, more intentional surface that makes smaller bedrooms feel significantly larger.
Plain Interior to Lit Shelving

Banish dark corners with precision lighting that turns your wardrobe into a boutique display.
Most sliding wardrobes suffer from a “black hole” effect where deep shelving hides your favorite items in shadow. Adding integrated lighting isn’t just about visibility; it’s the quickest way to make a basic unit feel like a custom artisan piece.
The secret to a professional look is mounting your LED strips on the front underside of each shelf rather than the back. This placement illuminates the contents directly while preventing the strips themselves from being visible when the doors are closed.
Pro Lighting Specs
For a clean, flicker-free glow, use high-density 14.4W to 18W/m LED strips. Choose 12V DC for shorter runs under 5 meters, or 24V DC if you need to cover larger, more complex wardrobe layouts.
Safety is the primary concern when retrofitting electronics into enclosed furniture. Never place power supplies inside the wardrobe enclosure, as the lack of airflow can lead to dangerous heat buildup.
Instead, mount your power supplies in a ventilated area outside the unit or in a dedicated technical cabinet. When cutting your LED strips, always be precise; cutting anywhere other than the designated copper pads will render the entire strip useless.
Common Pitfall
Avoid mounting lights on top of shelves. This positioning creates harsh shadows and makes it nearly impossible to see items on the shelf below.
.
✨ Small Details That Matter
The difference between a “lit shelf” and a custom-integrated display lies in how you manage the cable routing and the light diffusion during installation.
- Diffuse the Glow: Use aluminum channels with frosted covers to soften harsh LED diodes into a continuous, high-end light bar.
- Hide the Wiring: Run cables through small holes drilled in the back corners of shelves to keep the interior looking clutter-free.
Mismatched Finish to Wall-Matched Panels

Achieve a high-end, built-in aesthetic by perfectly synchronizing your wardrobe finish with your room’s wall color.
The biggest giveaway that a wardrobe is an aftermarket addition is a finish that sits apart from the rest of the room. When the wardrobe doors clash with the wall color or sheen, it immediately reads as a piece of furniture rather than a structural element.
To get that professional, fully fitted look, you need more than just a color match; you need a sheen match. Aiming for a 10–15% gloss level is the industry standard for creating that soft, integrated appearance which avoids the plastic shine of cheap off-the-shelf units.
Pro Tip: For walls with a noticeable texture, apply a thin layer of texture medium or joint compound to your wardrobe panels before painting. This ensures the light hits the wardrobe and the wall at the same angle, making the transition feel truly seamless.
When you are serious about this, rely on spectrophotometric analysis to get your color formula exact. Relying on a standard paint swatch under store lighting is a recipe for heartbreak once you get the doors home.
Before you commit to a full coat, always test your chosen finish in both natural daylight and your evening artificial light. You might be surprised how a color that looks identical at noon turns completely different under your bedroom lamps.
Mistake to Avoid: Never leave the edges of your panels unsealed or raw. A visible line of exposed MDF or unfinished edge-banding will ruin the illusion of an integrated wall, no matter how well you match the face color.
.
💡 The Visual Benefit of Continuity
Matching your wardrobe panels to the wall color isn’t just about hiding the unit; it’s about tricking the eye into seeing the wardrobe as a structural wall rather than a piece of furniture. By eliminating the contrast between the two, you reduce visual clutter and make even small bedrooms feel significantly more open and calm.
Seamless Strategy: When the wardrobe blends into the architecture, it increases home appraisal value by 1% to 3%.
You now have eight structural paths to transform a basic installation into a fully integrated piece of furniture. Focusing on the one or two upgrades that address your specific wall layout will give you the most impact, while saving you from unnecessary labor.
Selecting the right sliding door wardrobe designs is less about doing every step and more about choosing the ones that define the final, built-in silhouette. Pick your priority, secure the frame, and the result will look intentional.
Related posts
 21 Unique Wardrobe Door Designs You’ve Never Seen Before
 How Wide Do French Doors Open and How Do You Secure Them?
 11 Sliding Door Wardrobe Designs for Bedrooms
 What Homeowners Wish They Knew Before Buying Smart Door Locks
 Are Sliding Doors or French Doors More Energy Efficient?
 Unveiling the Troublemakers: Sliding Glass Door Leaks
 9 Balcony Sliding Door Ideas
 17 Sliding Door Living Rooms That Flow Right Into the Garden